Order Tag
What Is It?
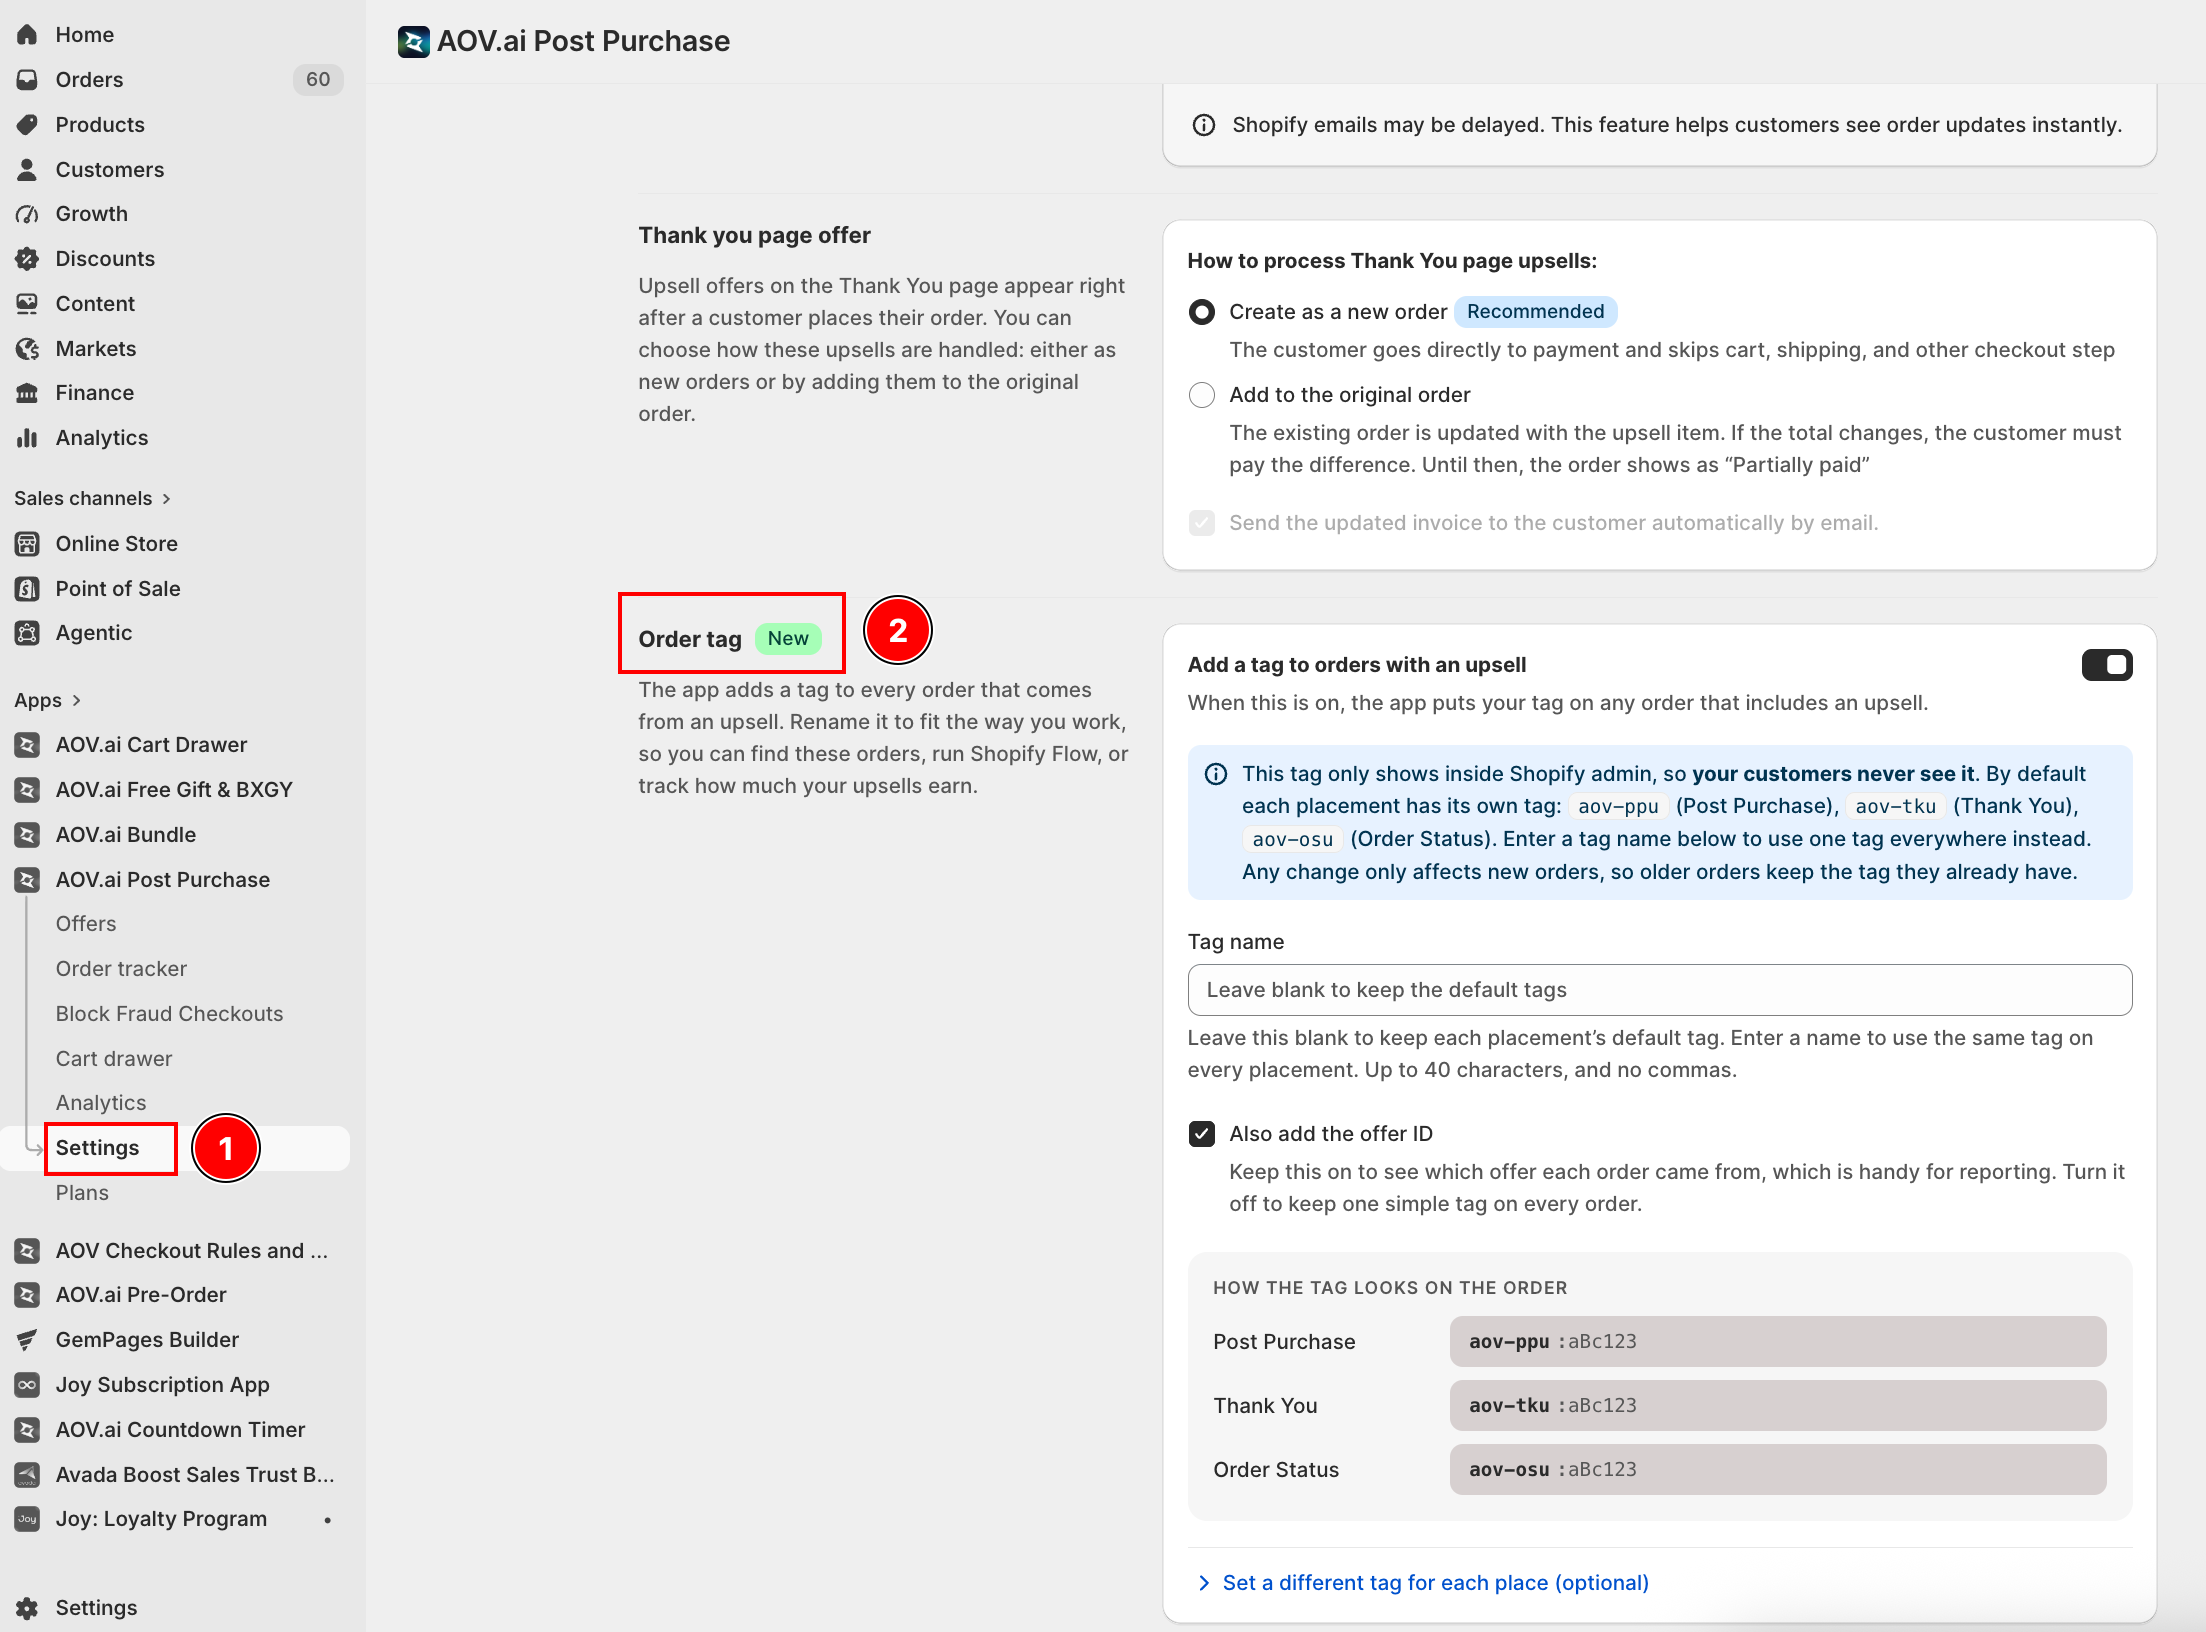
The app adds a tag to every order that comes from an upsell (Post Purchase, Thank You page, or Order Status page). You can now rename that tag to fit the way you work, so you can filter these orders in Shopify, run Shopify Flow, or track how much your upsells earn.
Previously the tag was fixed per placement: aov-ppu (Post Purchase), aov-tku (Thank You), aov-osu (Order Status).
When to Use It
- You want order tags that match your store's own naming or automation convention
- You want to filter or report on upsell orders in Shopify Admin
- You run Shopify Flow and need a predictable tag to trigger on
How to Customize the Order Tag
Step 1: Open Order Tag Settings
Go to Settings in the app menu, open the General tab, and scroll to the Order tag section.
Step 2: Customize the Tag
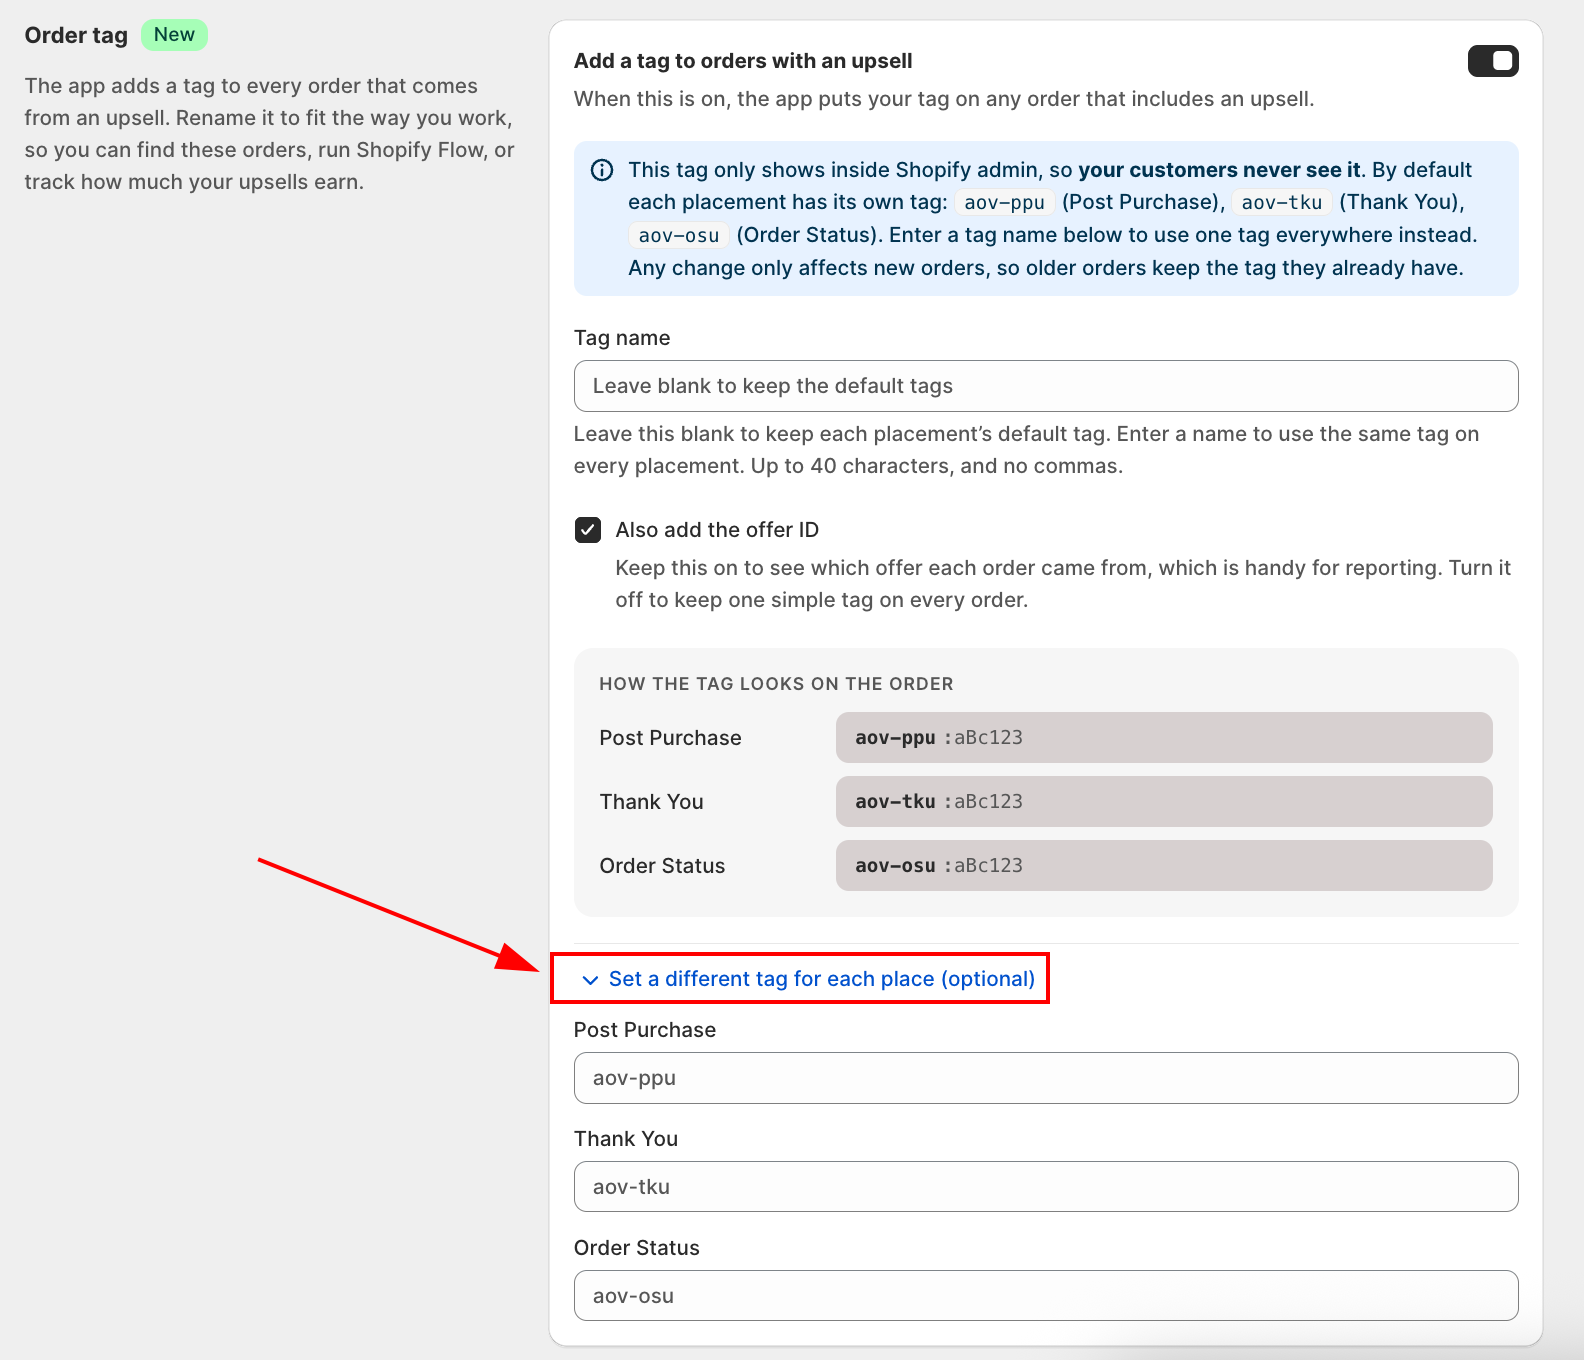
| Field | What it does |
|---|---|
| Enable toggle | Add a tag to orders with an upsell. When on, the app tags any order that includes an upsell. Turn it off to stop tagging new orders. |
| Tag name | Leave blank to keep each placement's default tag (aov-ppu, aov-tku, aov-osu). Enter a name to use that same tag on every placement instead. Up to 40 characters, no commas. |
| Also add the offer ID | On by default. Appends the offer ID to the tag (for example UPSELL:aBc123) so you can see which offer each order came from. Turn it off to keep one simple tag on every order. |
| Set a different tag for each place | Optional, collapsed by default. Expand it to set a separate tag for Post Purchase, Thank You, and Order Status, overriding the shared Tag name for just that placement. |
A preview box, How the tag looks on the order, updates live as you type, showing the exact tag for each placement (or a single All placements row when they share the same tag).
To set a different tag for each place, expand Set a different tag for each place (optional) and enter a value for Post Purchase, Thank You, and Order Status.
Step 3: Save and Check
Click Save. Orders placed from now on carry the tag you configured.
From the Offers list, click the order count on any offer to open Shopify Admin Orders, pre-filtered by that offer's tag.
Troubleshooting
Q1: My existing orders still show the old tag
That's expected. Changing the order tag only applies to new orders going forward. Existing orders are not retagged.
Q2: The Tag name field shows an error about commas
Shopify splits a tag into multiple tags at every comma. Remove the comma from your tag name; commas are not allowed.
Q3: I didn't change anything, will my tags change?
No. If you never open Order tag settings and save, your store keeps the original default tags (aov-ppu, aov-tku, aov-osu).
Q4: I want Post Purchase and Thank You to use different tags
Expand Set a different tag for each place and enter a separate value for each placement you want to override.