Milestone bar
Learn how to set up the Milestone bar for your Milestone rewards campaign to show customers how close they are to earning rewards.
Who can use this feature?
This feature is available for all AOV.ai Free Gift users on any plan. At least one active Milestone campaign must be created to use this widget.
What is the Milestone Bar?
The Milestone Bar is a real-time progress widget displayed on product pages and the cart drawer. It motivates shoppers to unlock tiered rewards such as discounts or free shipping by showing exactly how much more they need to add to their cart. It updates instantly as customers add items and supports multiple milestones per campaign.
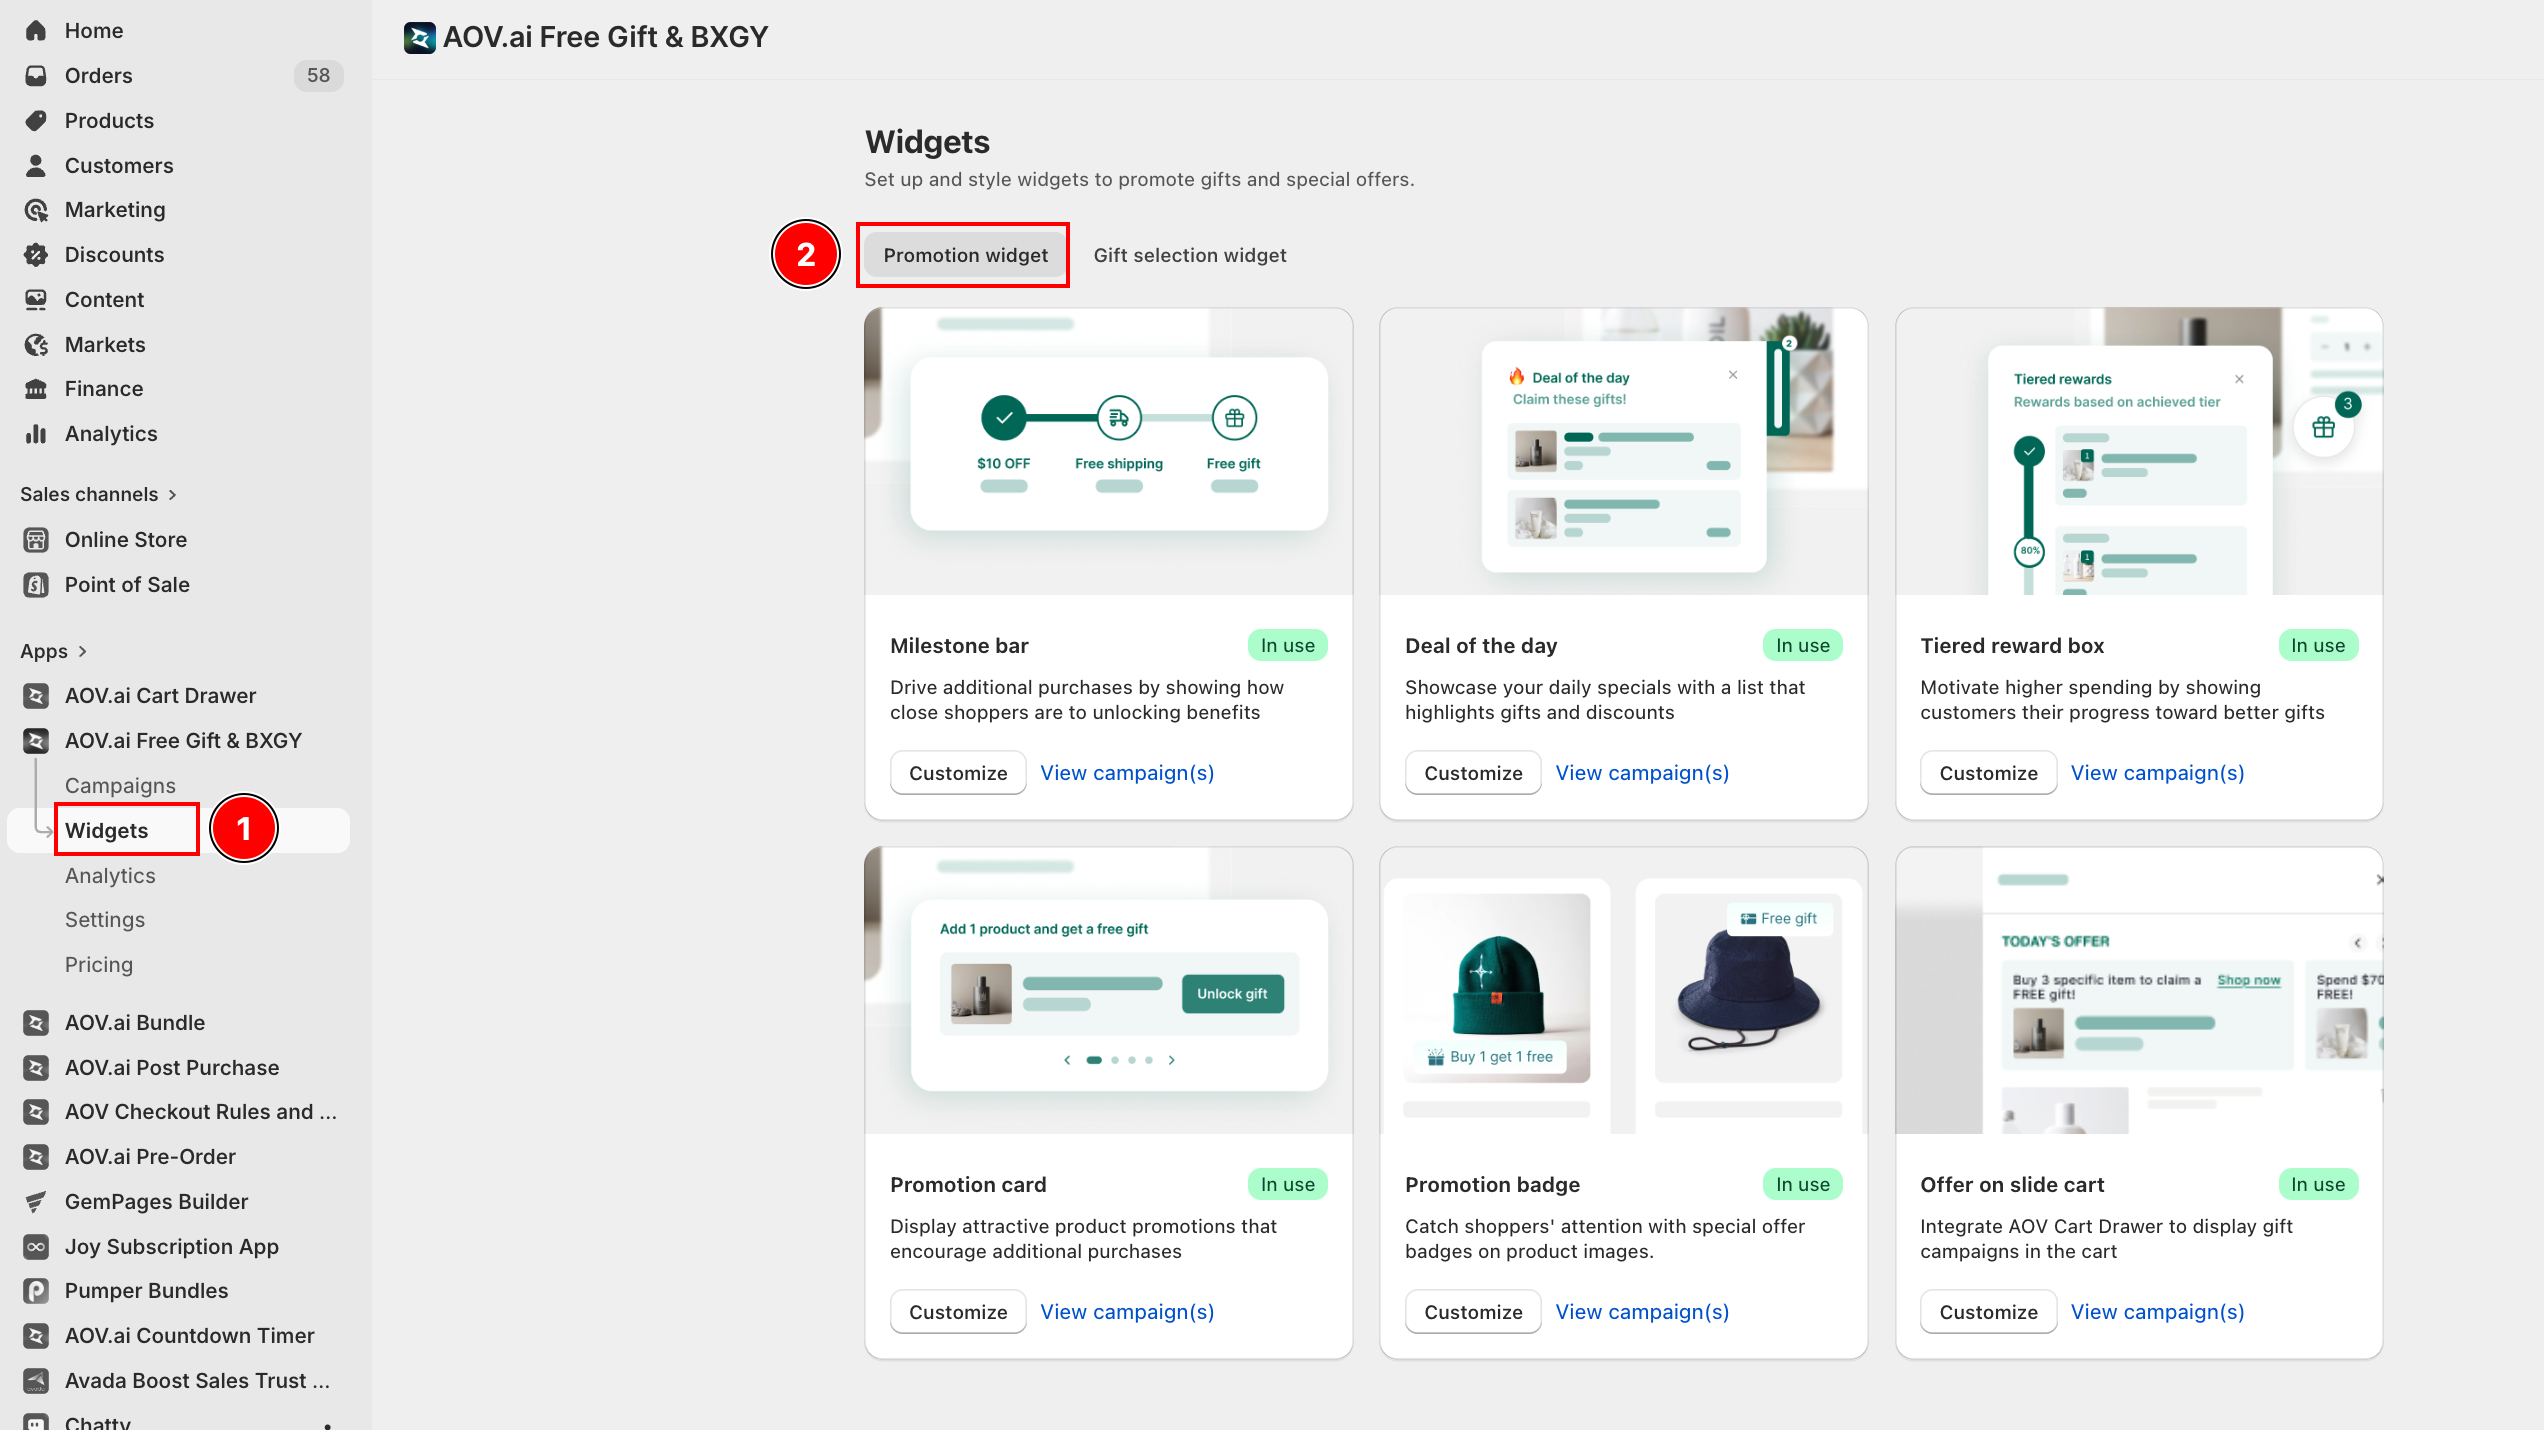
How to set up
The Milestone bar is configured in two distinct places:
- Campaign setting — defines the message content shown inside the bar for each campaign.
- Widget styling — controls how the bar looks visually across your storefront.
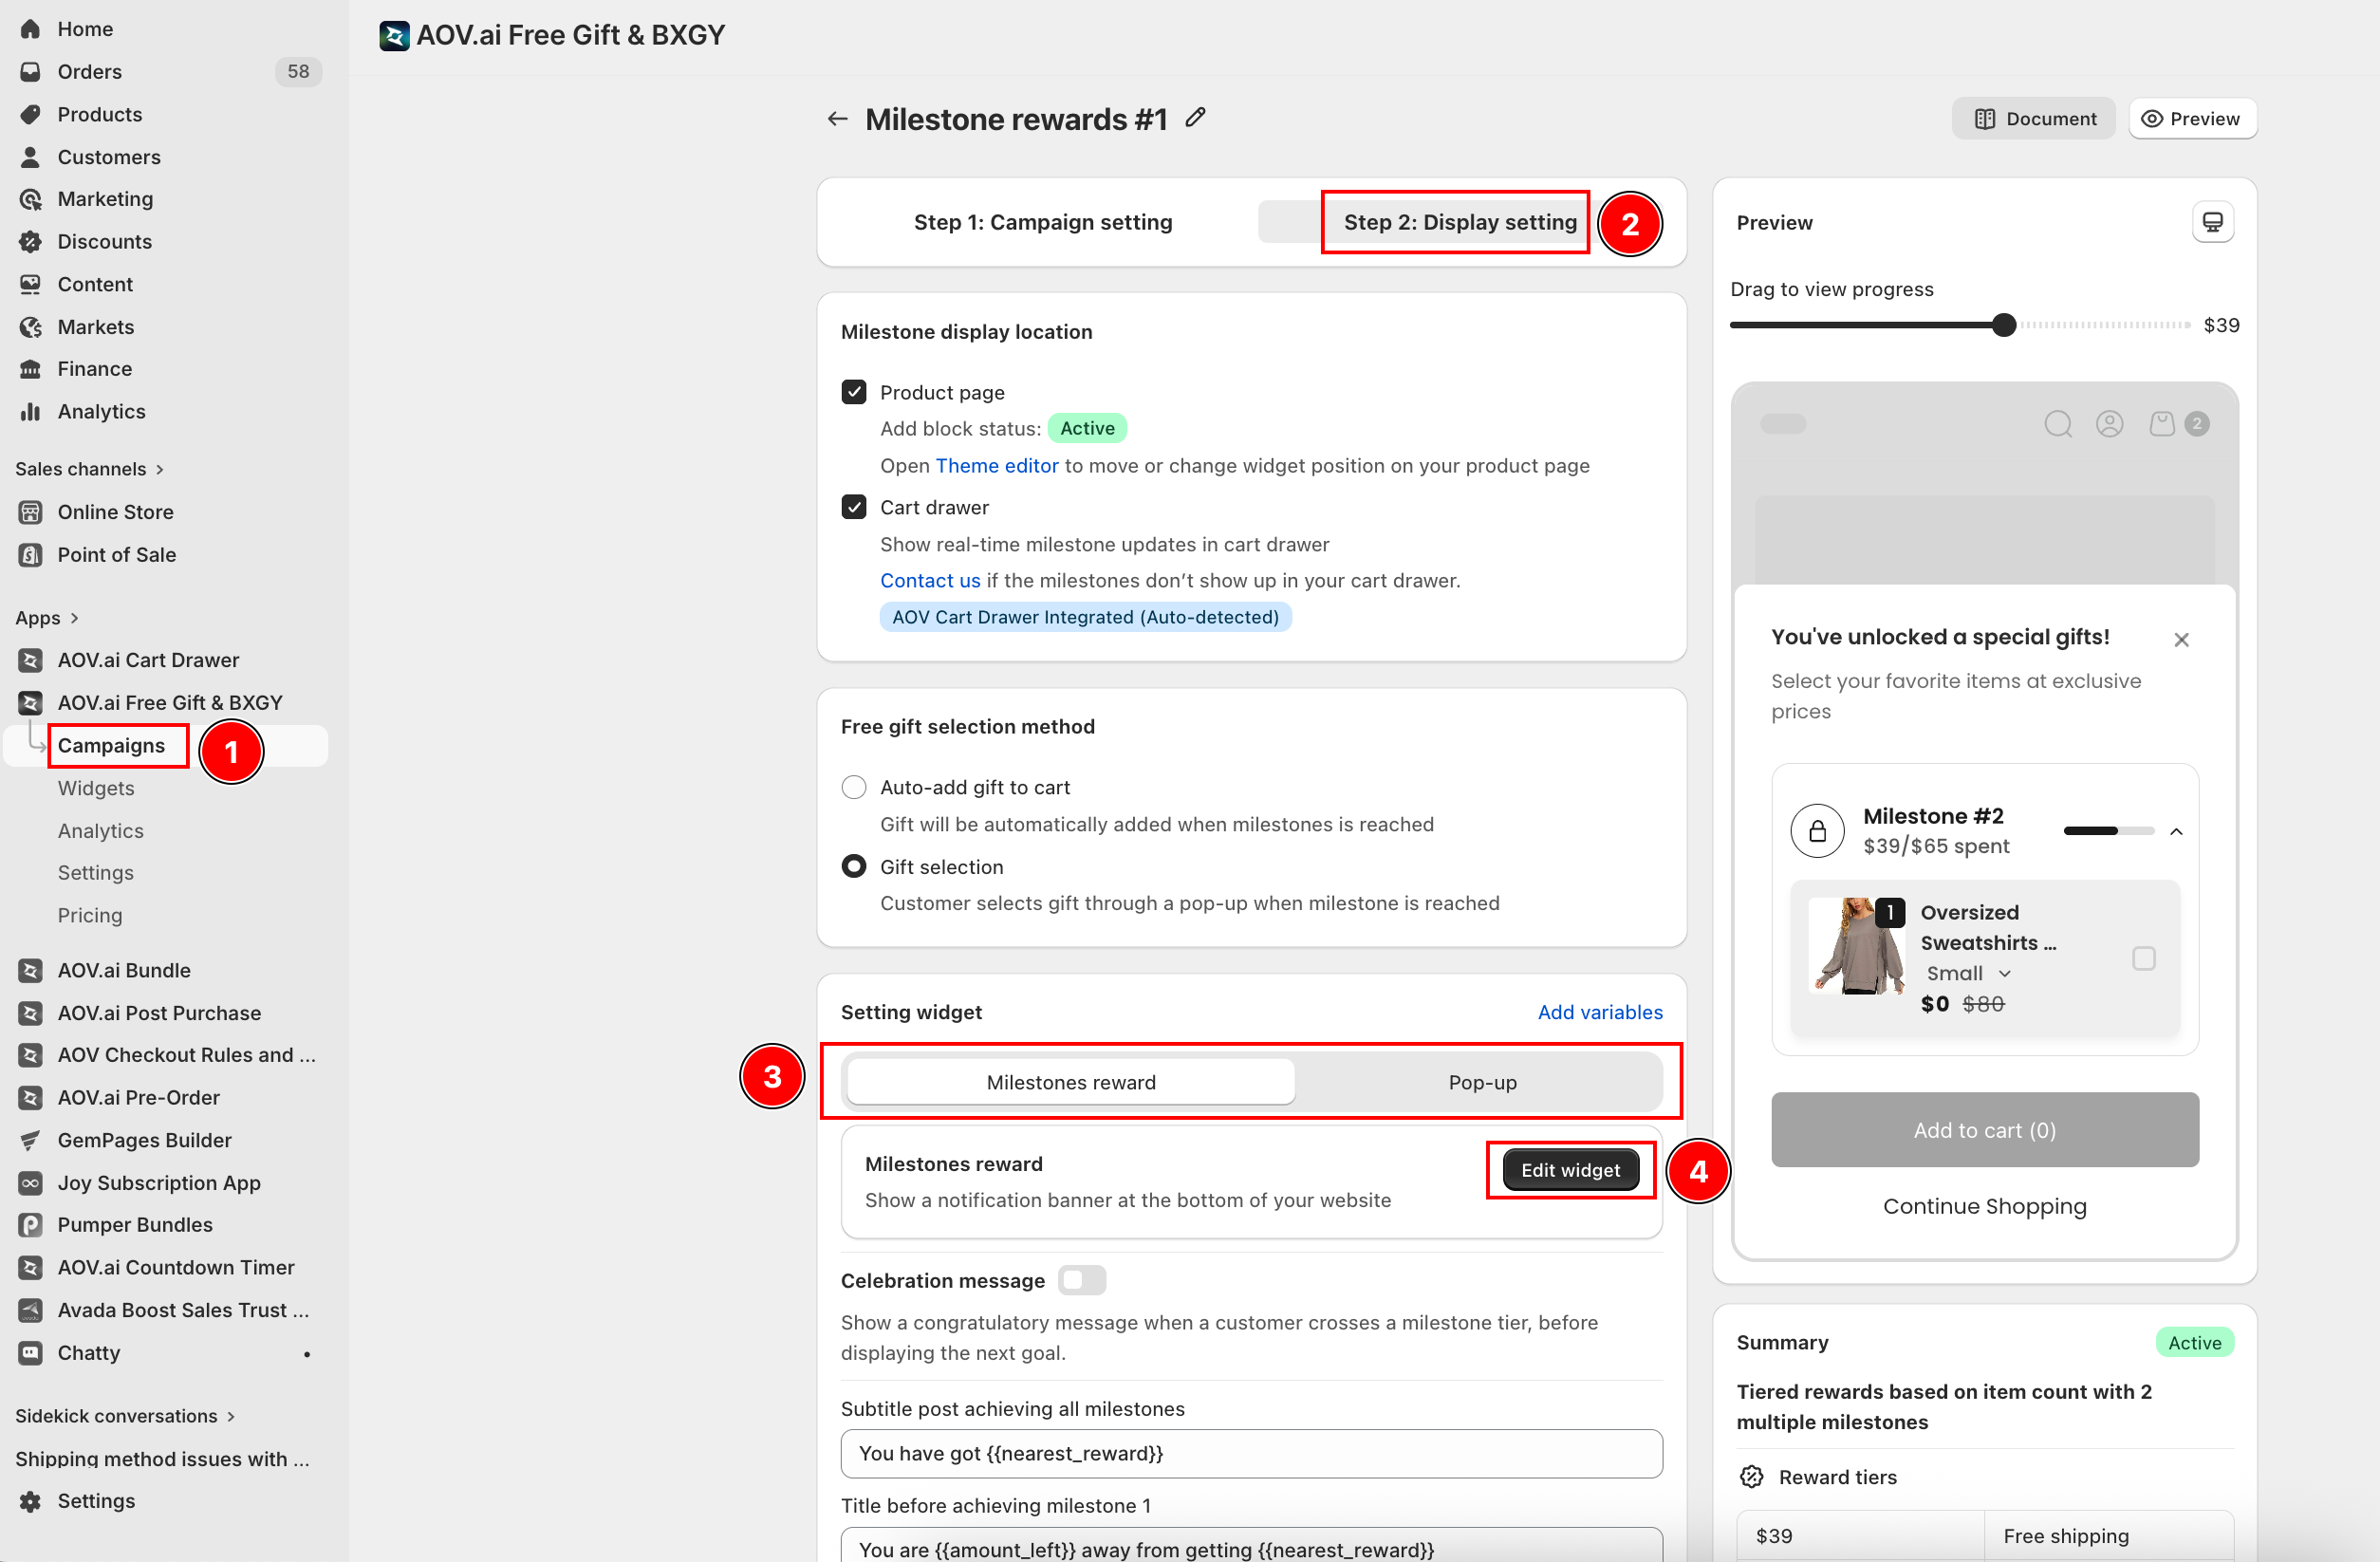
Step 1: Activate the Milestone bar in campaign settings
Open the Milestone rewards campaign you want to configure. Click Display setting, then find the Widget position setting. Click Go to theme and choose where the Milestone bar should appear on the storefront > click Save to activate.
Step 2: Customize the Milestone bar content
In the campaign setting, switch to the Content tab and edit the text shown inside the bar using smart variables:
2.1 Title after all milestones reached
Appears when a shopper has unlocked the final reward tier. Use it to celebrate and confirm the reward.
Recommended variable: {{nearest_reward}} — auto-fills the reward name from the highest milestone achieved.
2.2 Title before reaching each milestone
Displayed while a customer is still working toward the next reward. Updates dynamically as the customer gets closer to each tier.
Recommended variables:
{{item_left}}or{{amount_left}}— shows what's remaining{{nearest_reward}}— shows the reward name of the next milestone
2.3 Celebration message
A short message shown when a customer crosses a tier. Available on multi-milestone campaigns to maintain momentum toward the next milestone.
2.4 Reward labels
Short labels that appear below the progress bar, one per milestone (for example, "10% OFF", "Free Shipping", "$15 OFF"). Keep them short so shoppers recognize rewards instantly.
After setting all content, click Save to confirm.
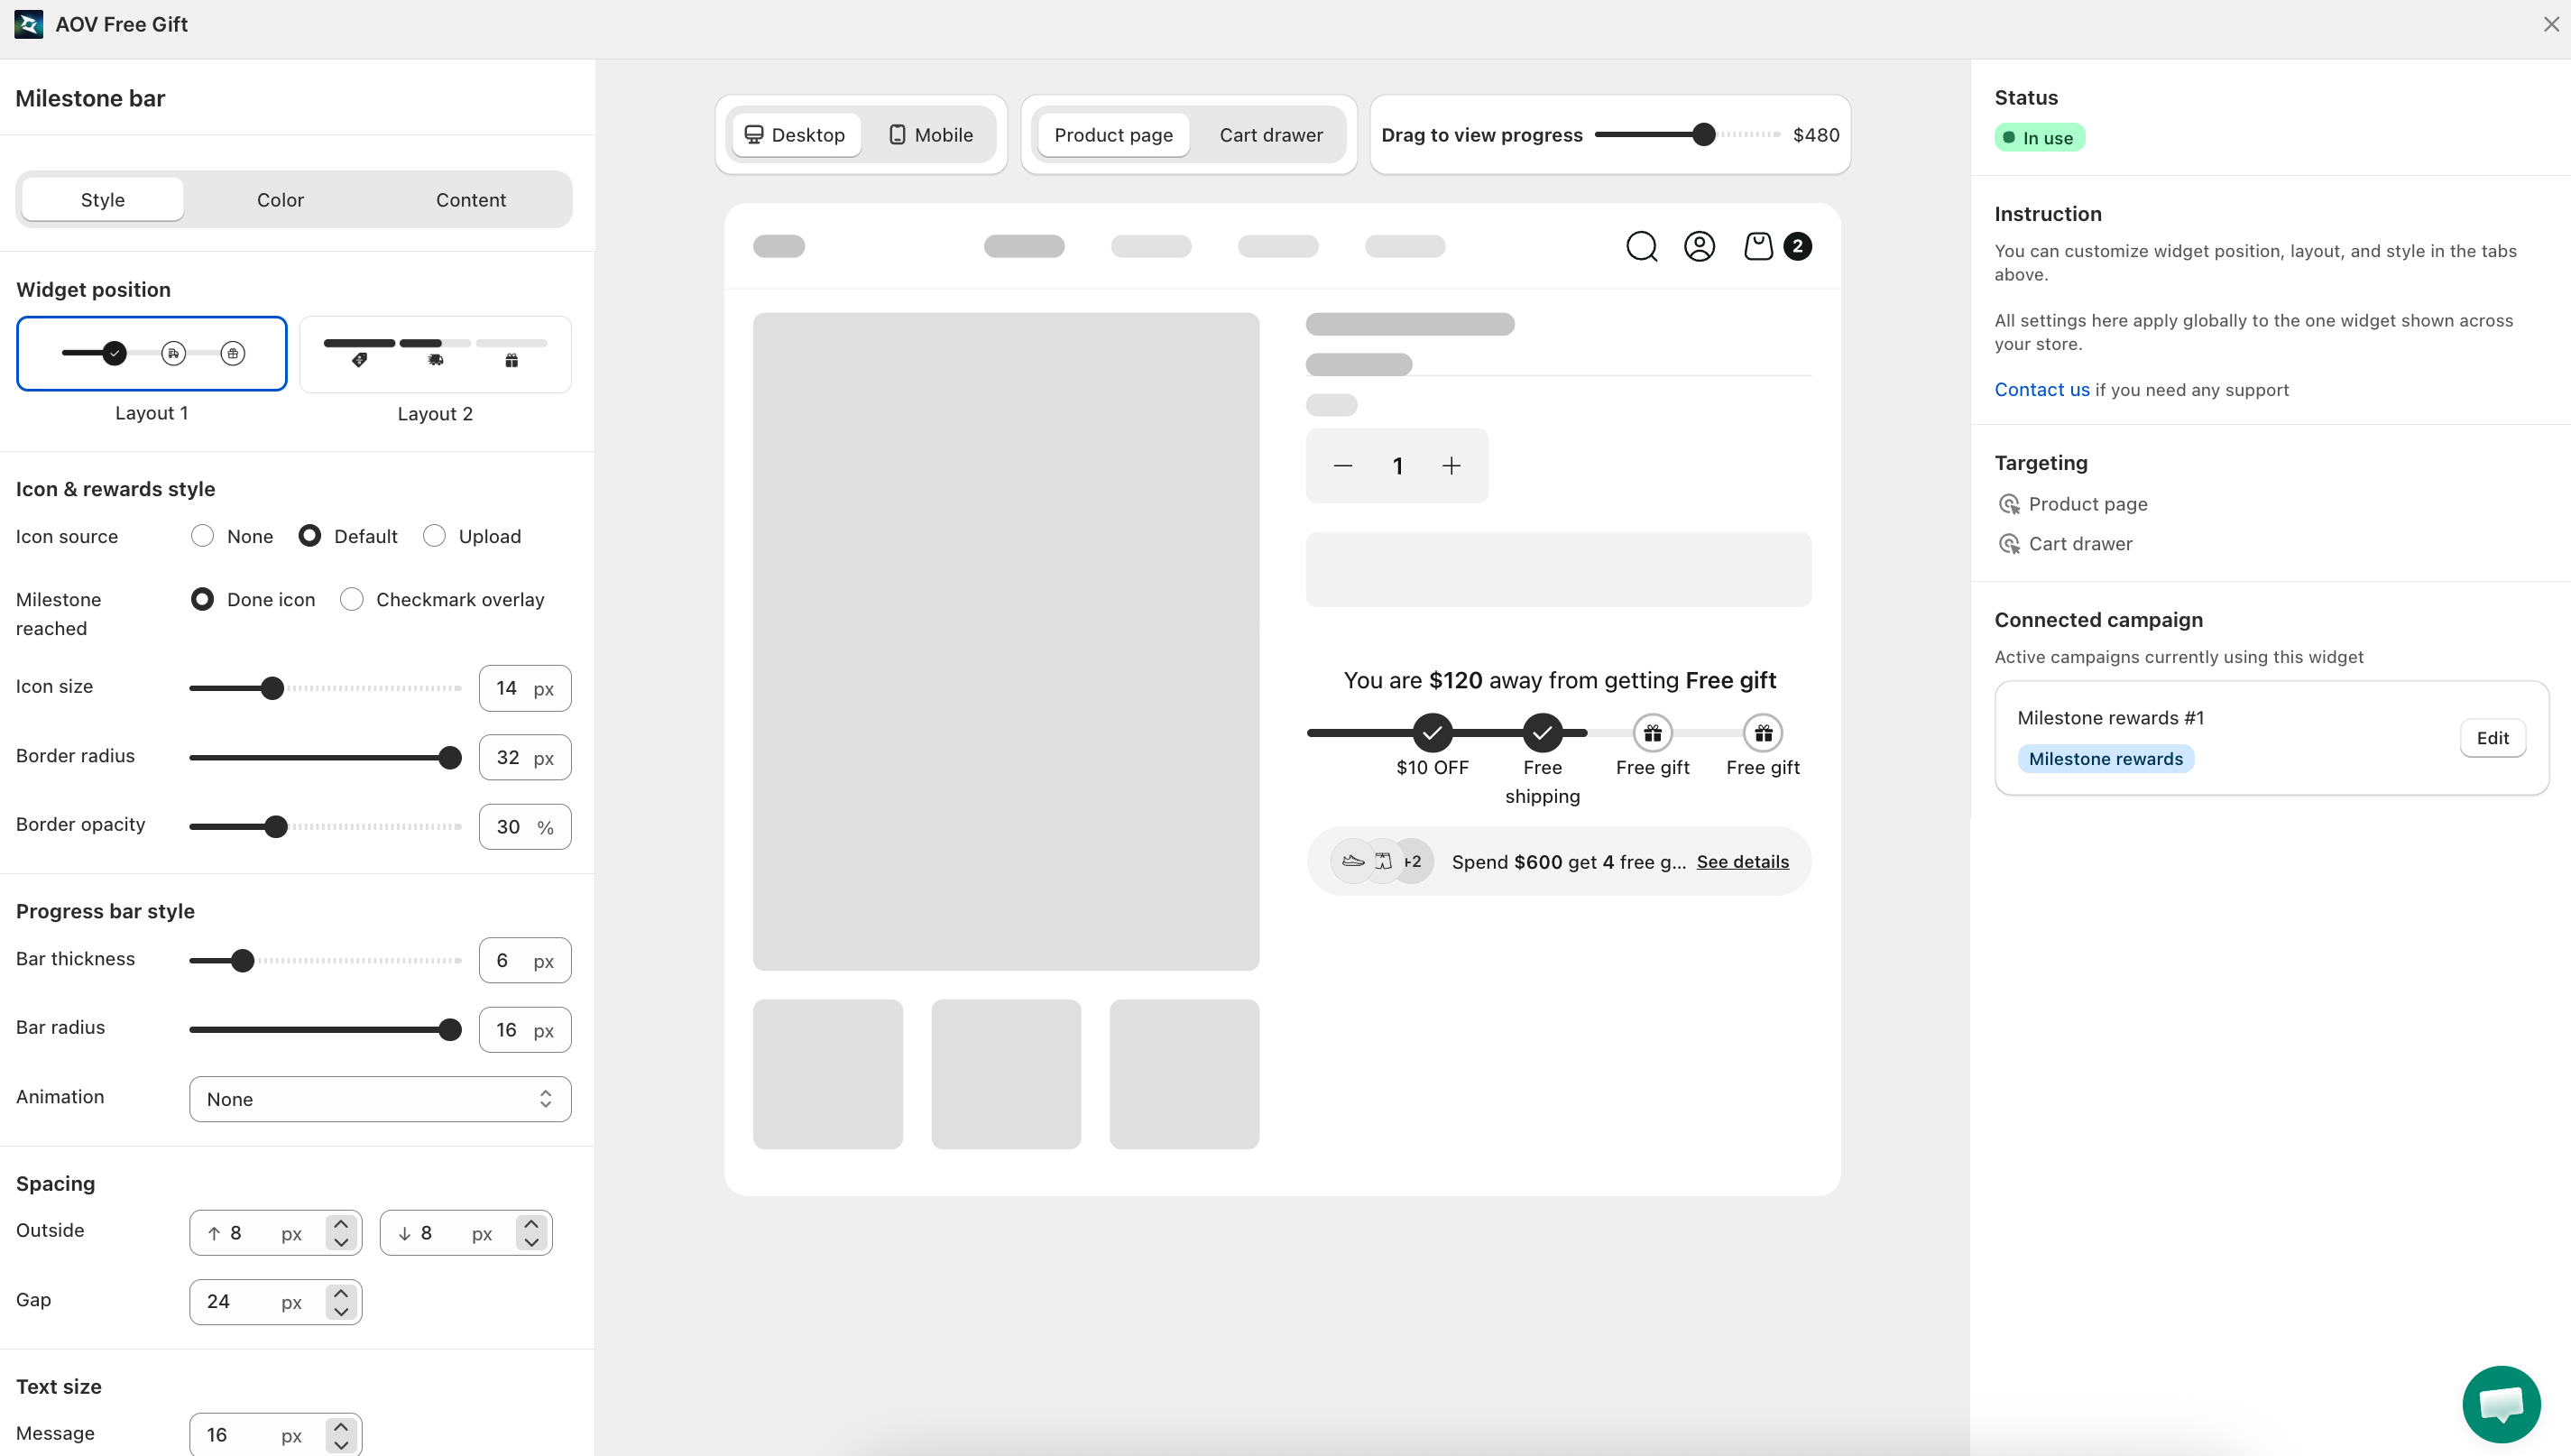
Step 3: Style tab
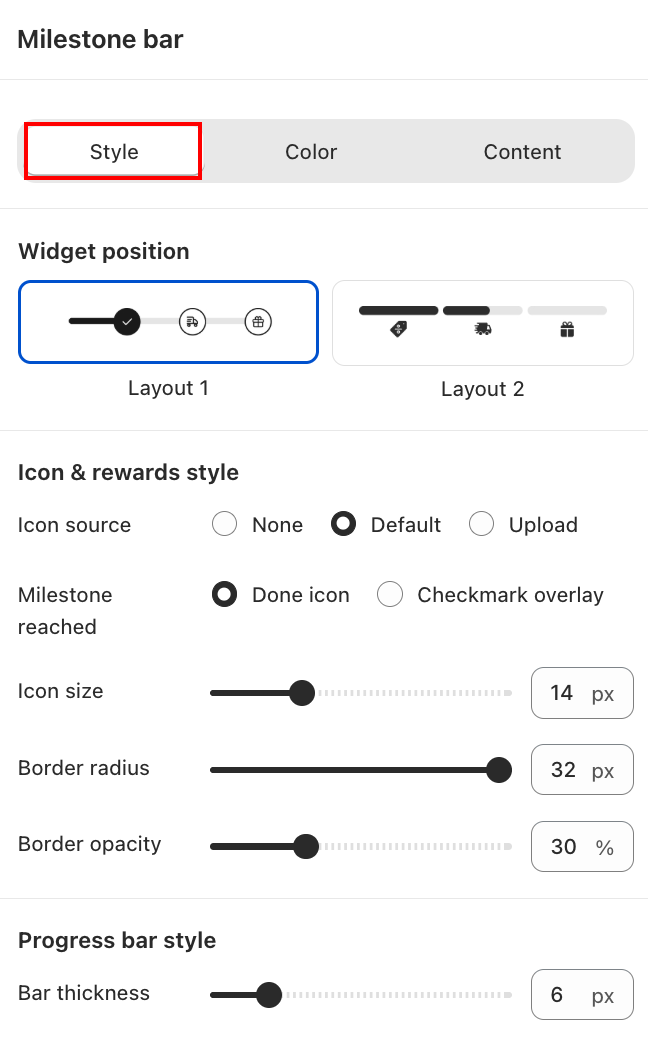
Widget position
Select how the bar is presented:
- Layout 1 — clean linear design with milestone icons and a highlighted progress marker.
- Layout 2 — compact icon-based layout displaying reward types only.
Icon and rewards style
- Icon source — choose None (no icon), Default (built-in icon set), or Upload (your own image).
- Milestone reached — select how a completed milestone is displayed: Done icon or Checkmark overlay.
- Icon size — adjust icon size (default 14 px).
- Border radius — controls how rounded the icon frame appears (default 32 px).
- Border opacity — controls the visibility of the icon border (default 30%).
Progress bar style
- Bar thickness — controls the height of the progress track (default 8 px).
- Bar radius — controls how rounded the bar ends appear (default 16 px).
- Animation — choose an animation effect for the progress fill.
Spacing and text size
- Outside / Gap — adjust padding around the widget and spacing between milestone icons.
- Message — set the font size of the progress message text (default 16 px).
Step 4: Color tab
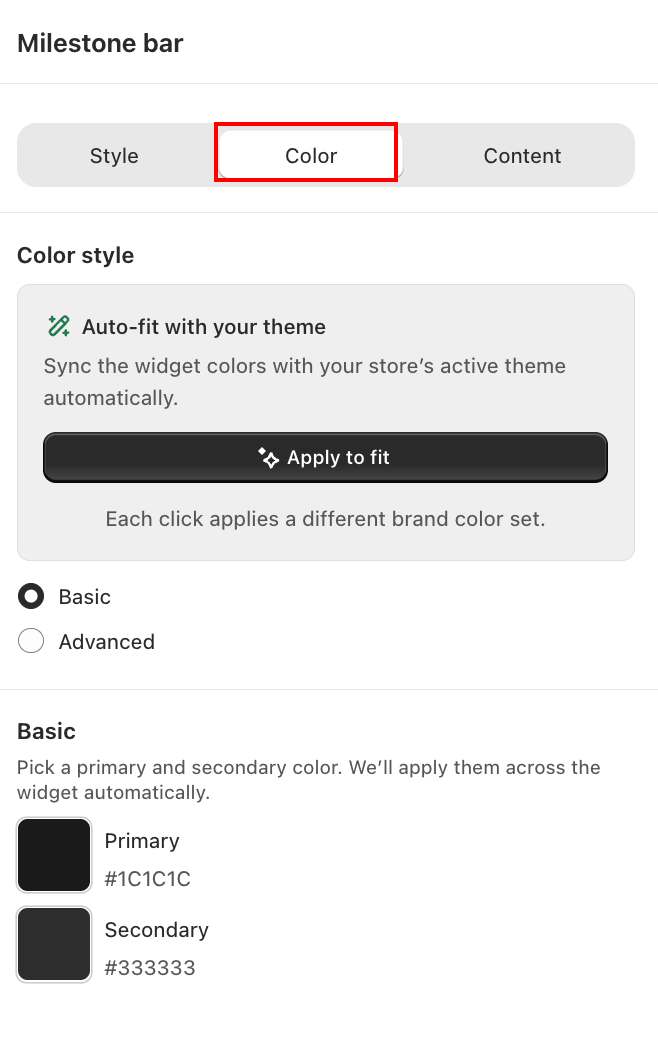
In the Color tab, choose how colors are applied:
- Auto-fit with your theme — automatically syncs colors with your store's active theme. Click Apply to fit to apply. Each click cycles through a different brand color set.
- Basic — manually set a Primary and Secondary color applied consistently across the widget.
- Advanced — fine-tune individual color values for each element.
Step 5: Content tab
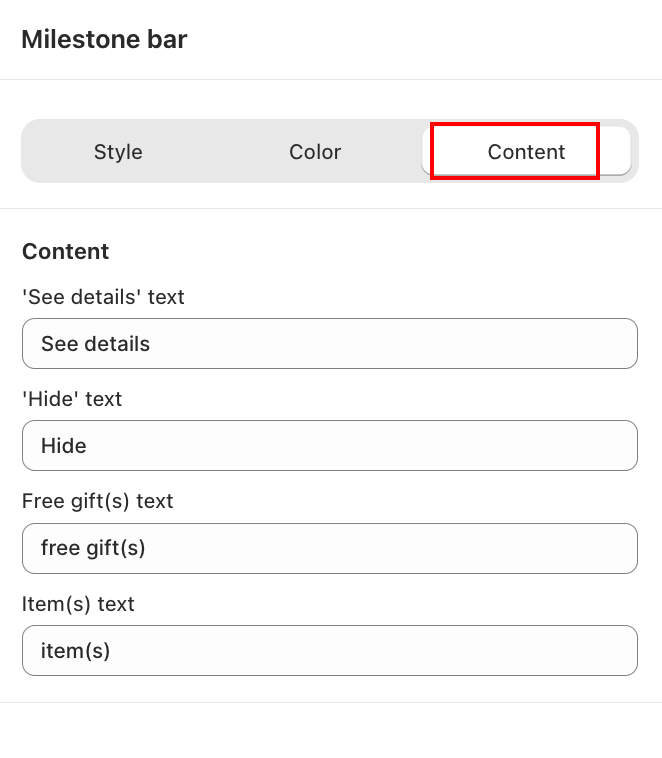
In the Content tab, customize the widget-level labels:
- 'See details' text — the link label that expands reward details, for example "See details".
- 'Hide' text — the label to collapse the details panel, for example "Hide".
- Free gift(s) text — the label used to refer to gifts, for example "free gift(s)".
- Item(s) text — the label used to refer to cart items, for example "item(s)".
Step 6: Connected campaign
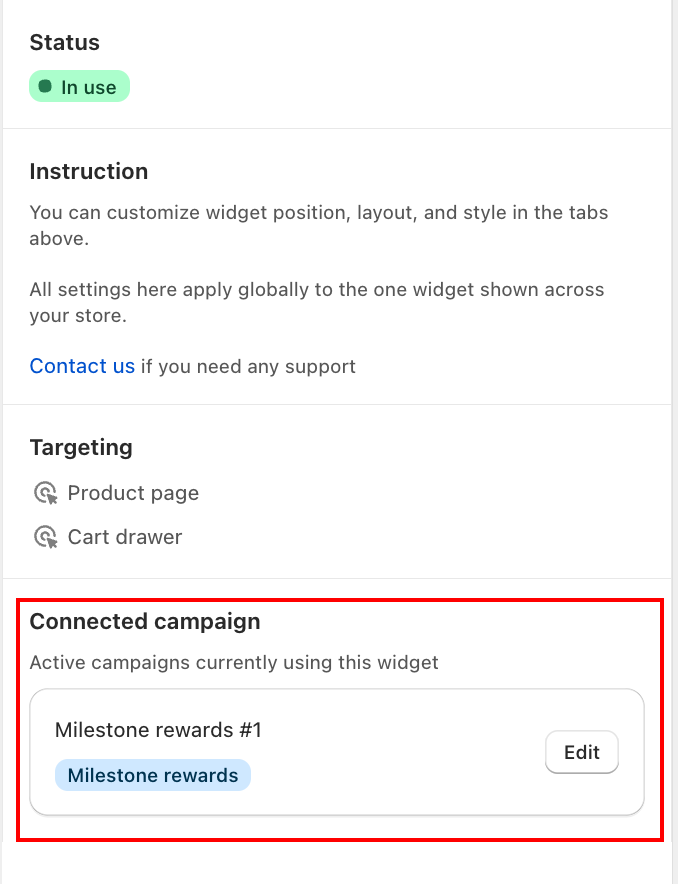
The Connected campaign panel on the right shows which Milestone rewards campaigns are currently linked to this widget. Click Edit next to any campaign to adjust its connection.
Final step: Preview and save
Check the Preview panel on the right to verify the widget style, then click Save.
The Milestone Bar is one of the most effective tools in AOV.ai Free Gift to gamify the shopping experience. It appears on product pages and inside the cart drawer once correctly configured.