Milestone Rewards
Explore how to create tiered reward campaigns based on cart value or item quantity to increase average order value.
What is Milestone Rewards?
Milestone Rewards is a powerful campaign type that lets you offer tiered rewards as customers add more to their cart. Whether it’s discounts or free shipping, shoppers unlock new rewards as they reach spending or quantity thresholds you define.
This creates a fun, game-like experience that encourages customers to add more to their cart to reach the next tier
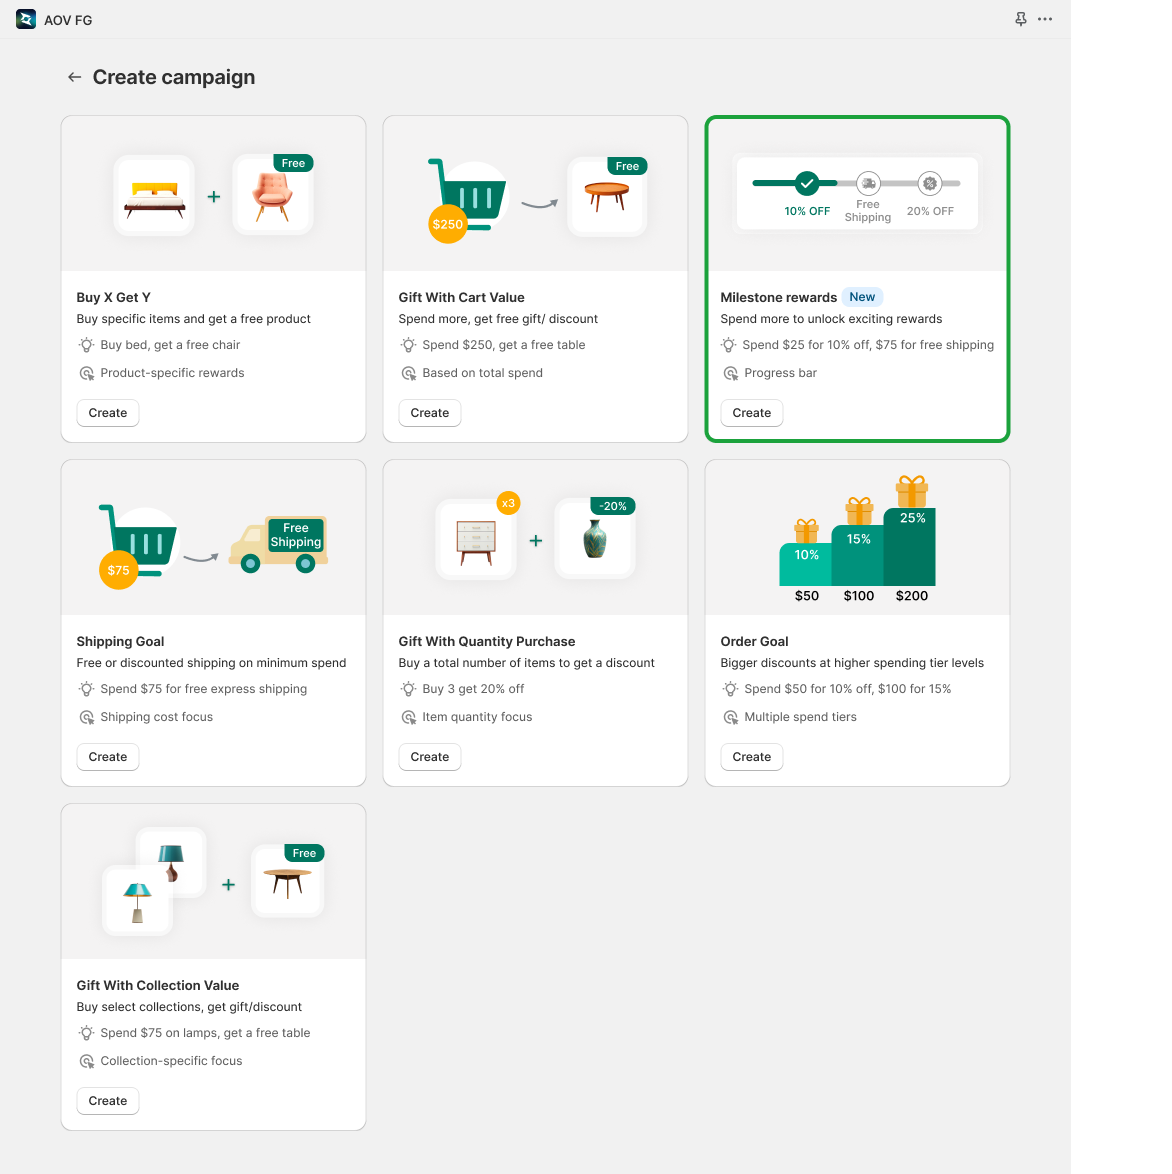
Step 1: Access Milestone Rewards
In the AOV.ai Free Gift app:
- Go to Campaigns
- Click Create Campaign
- Select Milestone Rewards and click Create to begin setup
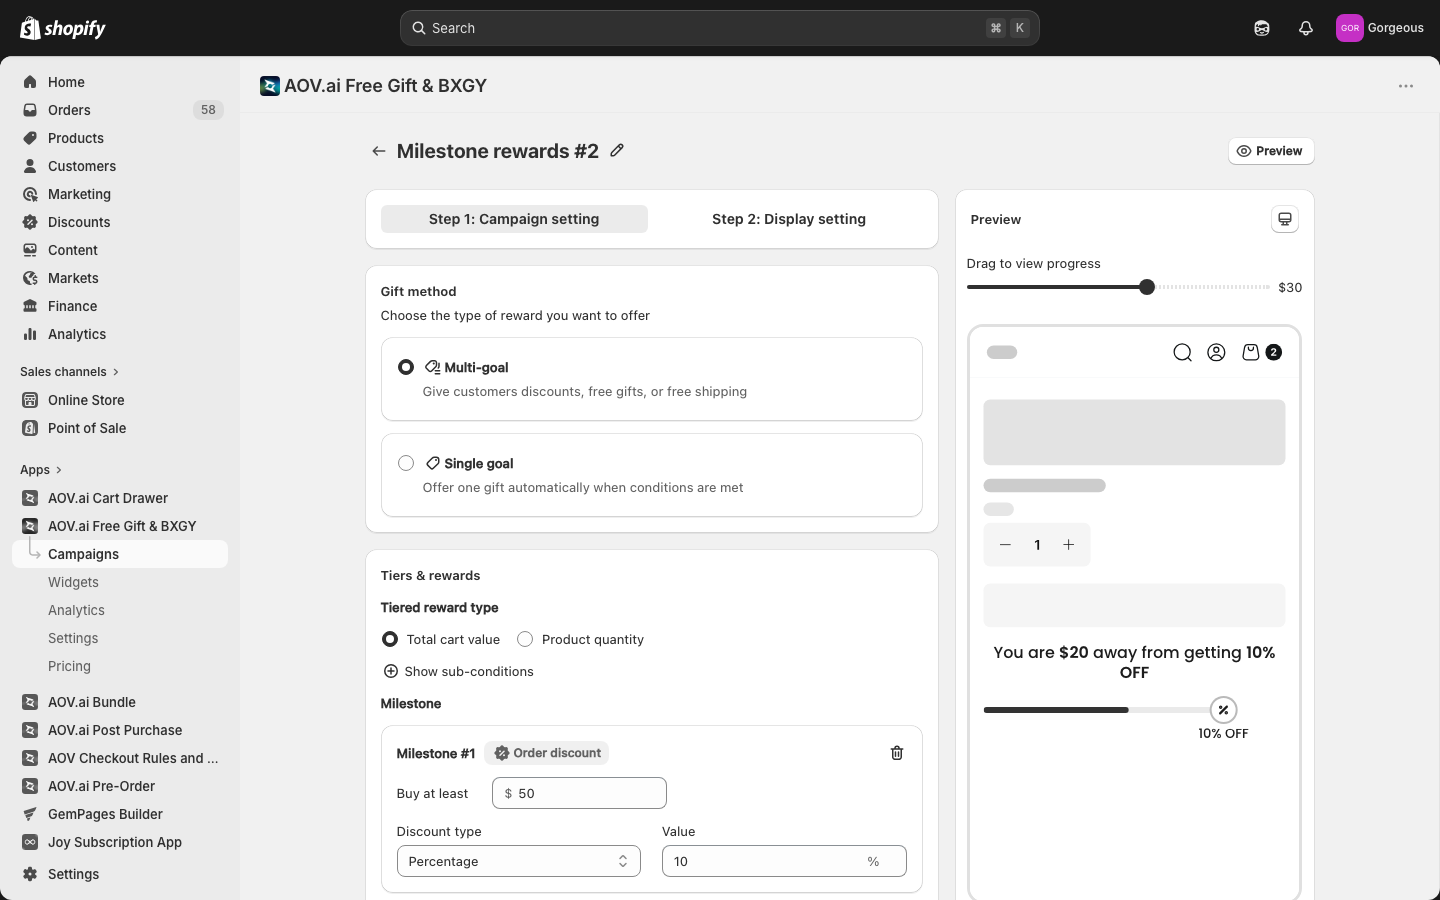
Step 2: Choose a Gift Method
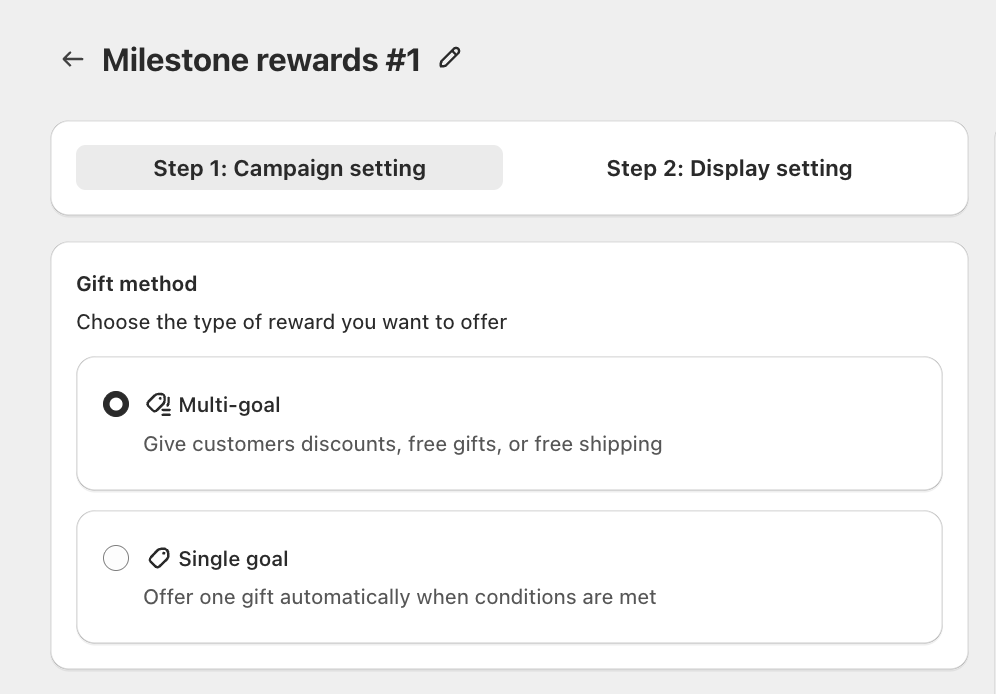
After creating the campaign, choose the type of reward you want to offer:
- Multi-goal: Give customers discounts, free gifts, or free shipping across multiple spending tiers. Use this when you want to show a visual progress bar with multiple reward milestones.
- Single goal: Offer one gift automatically when a single spending condition is met. Use this for simpler, focused promotions.
Step 3: Set Up Milestones & Rewards
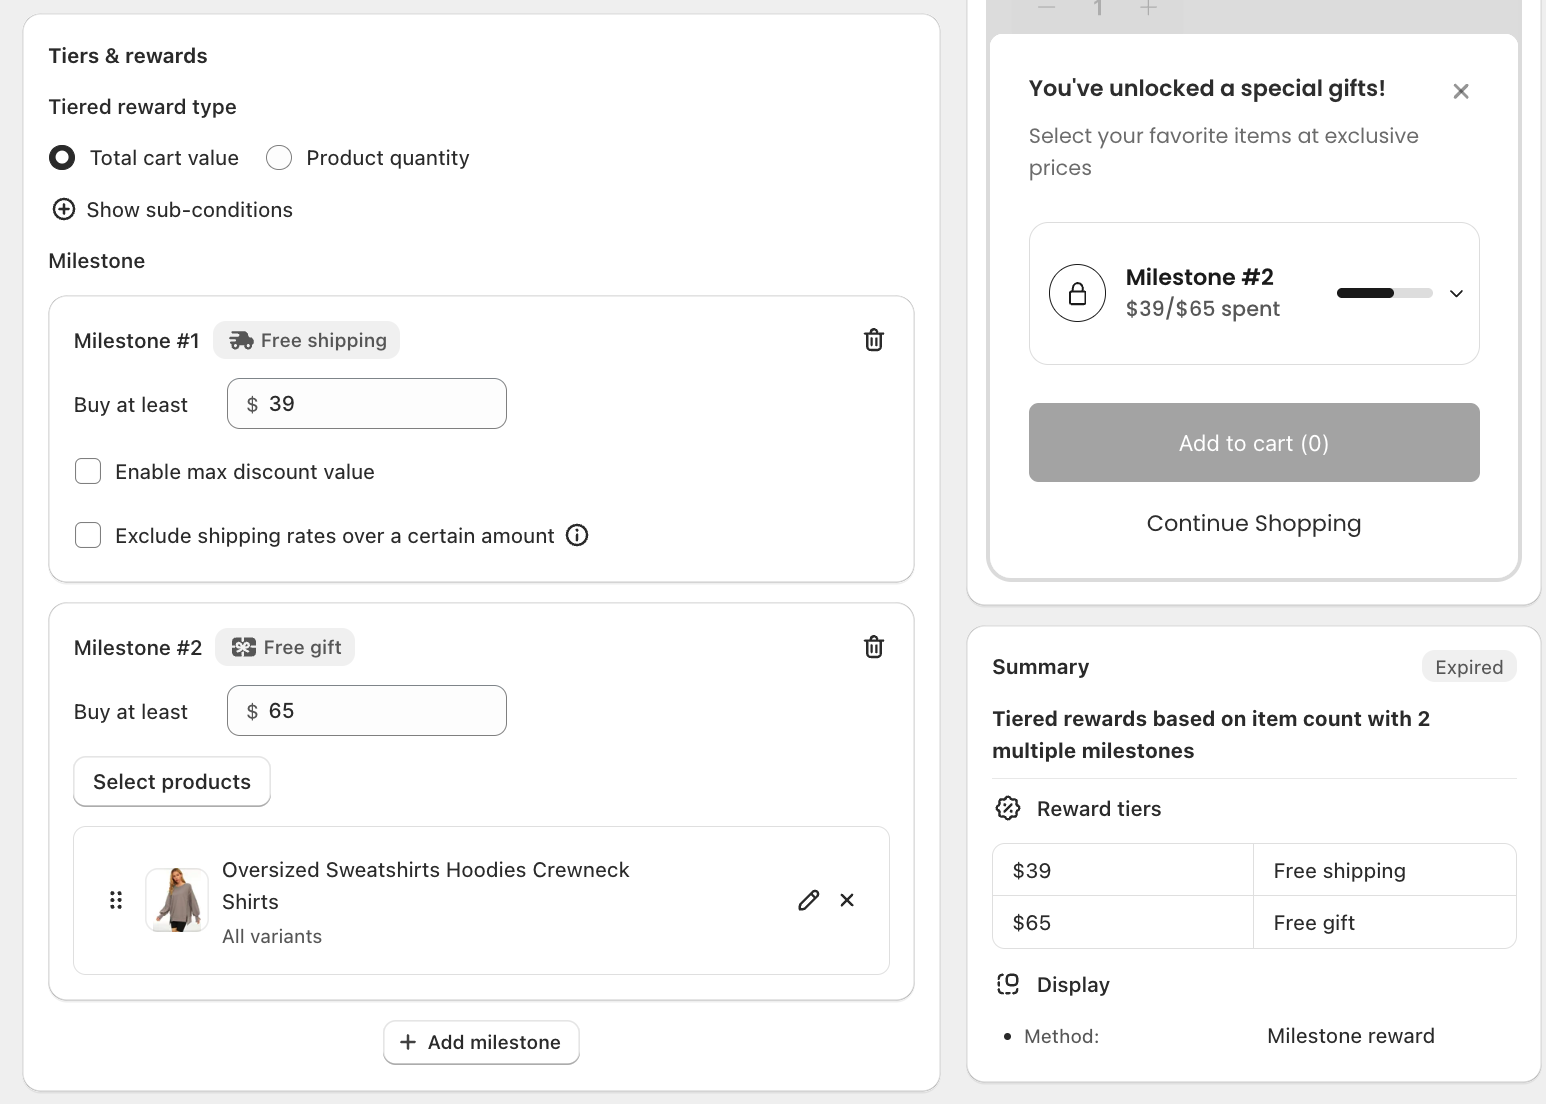
3.1 Choose the tiered reward type:
- Total cart value: Milestones trigger based on how much a customer spends.
- Product quantity: Milestones trigger based on how many items they add.
You can also click Show sub-conditions to refine when the campaign applies. Currently supports Exclude product/collection: choose specific products or collections to exclude from counting toward the milestone threshold.
3.2 Add milestones
Click + Add milestone to create each reward tier. For each milestone, set the minimum spend or quantity threshold and choose one of 3 reward types:
- Free shipping: Enable max discount value or exclude shipping rates over a certain amount if needed.
- Free gift: Click Select products to choose the gift item(s) from your store. You can add multiple products, set a quantity for each gift product (see 3.2.1), and optionally cap how many a customer chooses with Gift limit (see 3.2.2).
- Order discount: Choose between Percentage discount or Fixed discount.
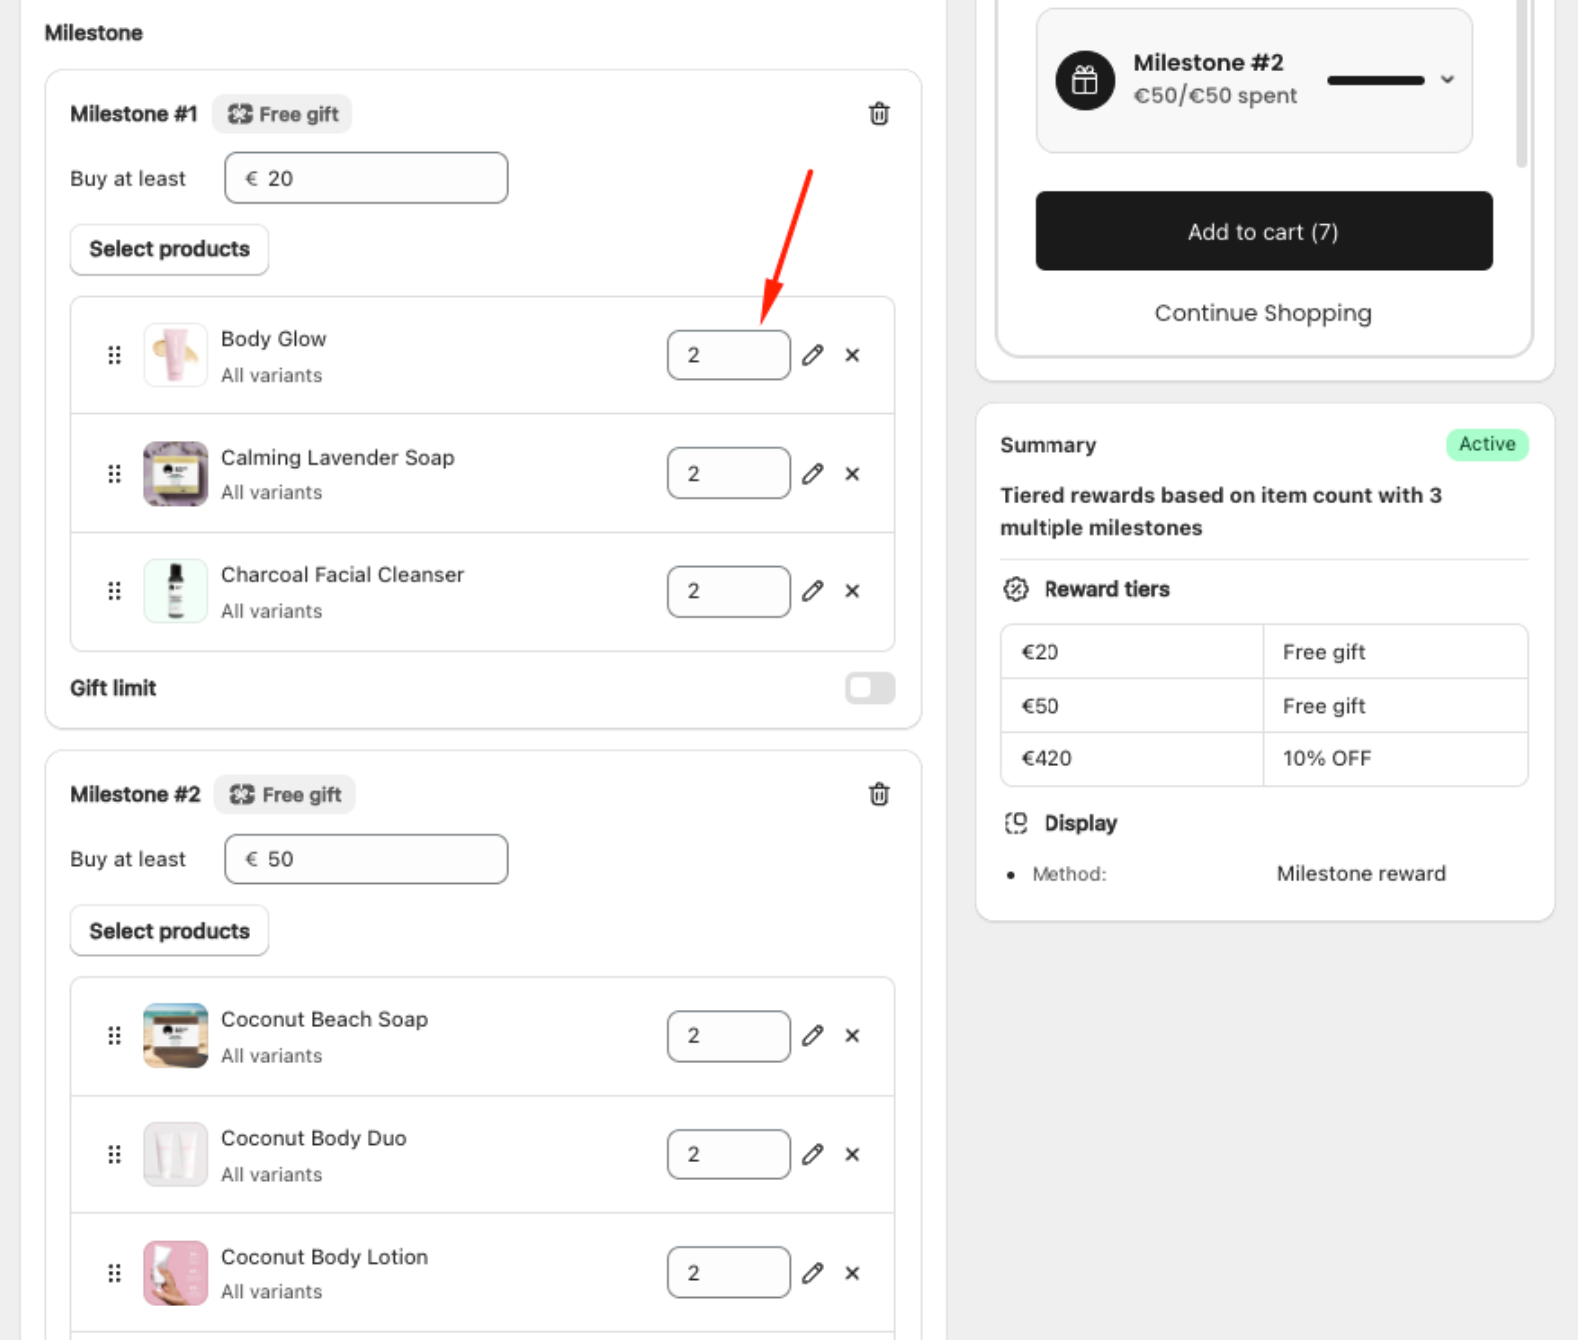
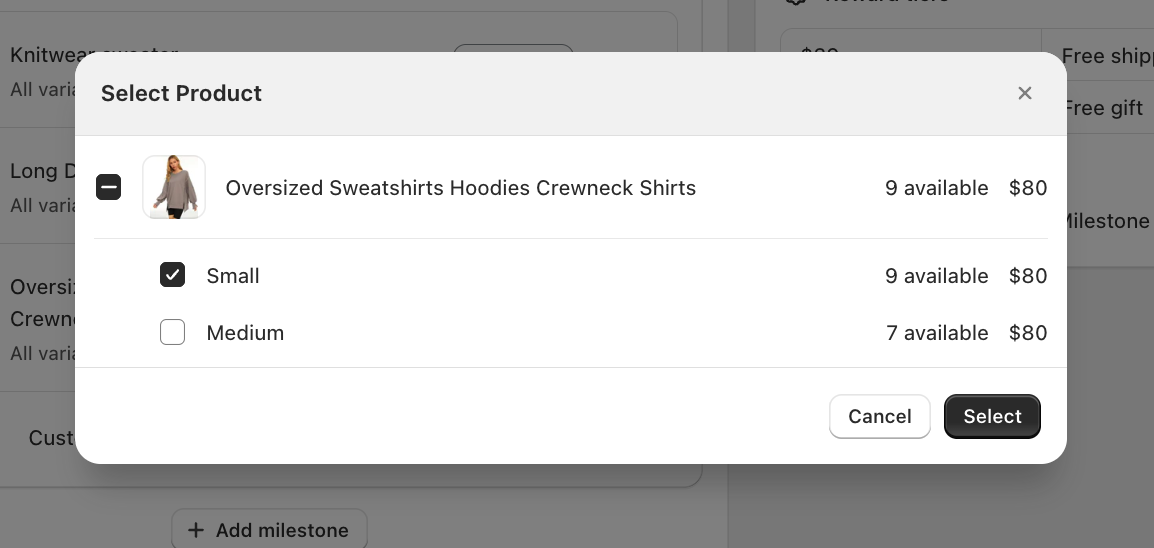
3.2.1 Free gift: set a quantity for each product
When a Free gift milestone gives more than one gift, every product you add shows a quantity field. Type the number to set how many units the customer receives when they unlock that tier (no longer limited to one).
Click the Edit (pencil) icon next to a product to open the Select Product dialog, where you pick which variants to include. Each variant shows its available stock and price.
- It works on every milestone (Milestone #1, #2, and so on) and every variant.
- The configured quantity is added to the cart automatically when the customer unlocks the tier.
3.2.2 Free gift: gift limit
When a Free gift milestone has more than one gift product, turn on Gift limit to let customers choose how many gifts they get instead of receiving all of them. Set Customer can choose {N} gift(s) from the list, where {N} is at most the number of products you added.
- Gift limit requires the Gift selection display method. Auto-add is not available on a tier with a gift limit, because customers must pick their gifts.
- Tick Multiply gift limit to set a quantity for each gift product (see 3.2.1).
Step 4: Reward distribution rule
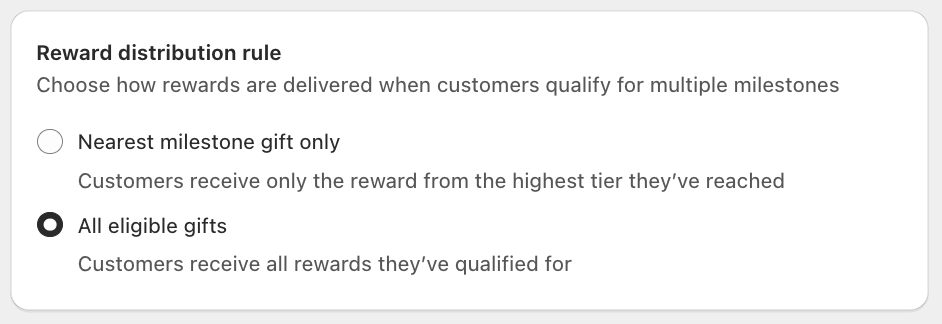
Choose how rewards are delivered when customers qualify for multiple milestones:
- Nearest milestone gift only: Customers receive only the reward from the highest tier they have reached.
- All eligible gifts: Customers receive all rewards they have qualified for across every milestone tier.
Set Campaign Schedule
- Start Date/Time: Pick when your campaign goes live (based on your Shopify timezone).
- End Date (Optional): Enable End Date if the campaign is for a limited time.
Step 5: Advanced settings
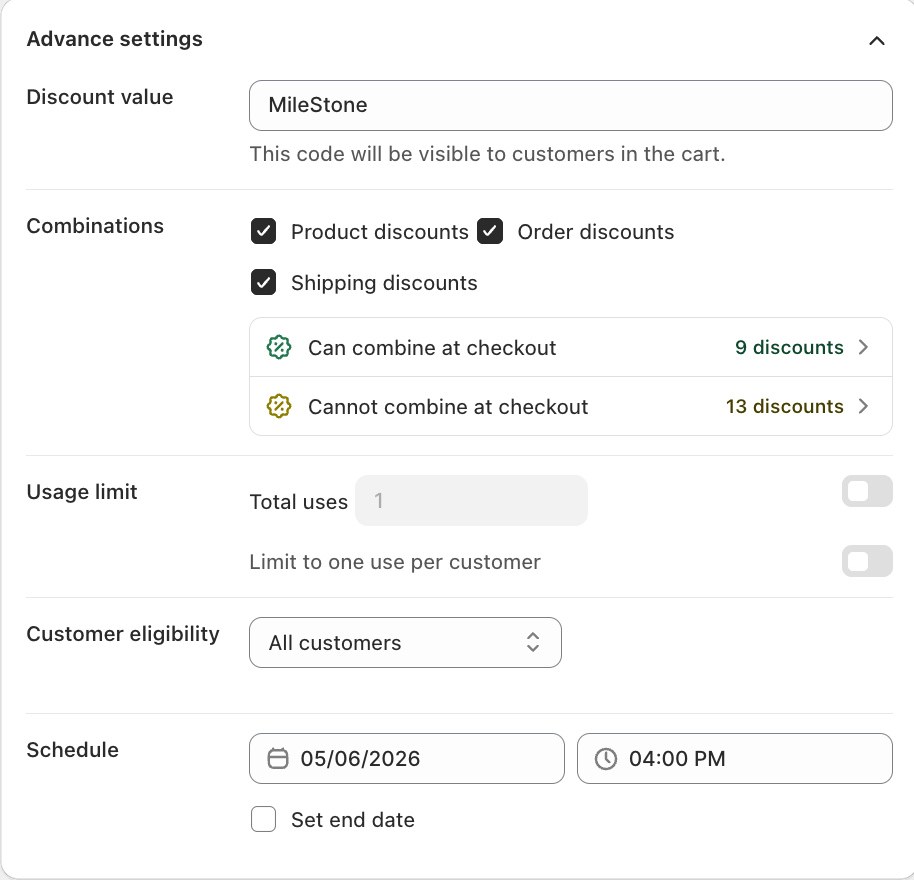
5.1 Discount value
The system auto-applies a discount code to your campaign. You can edit the code as you like, and it will be visible to customers in the cart.
5.2 Combinations
Choose which other discount types customers can combine with this campaign at checkout:
- Product discounts
- Order discounts
- Shipping discounts
5.3 Usage limit (optional)
- Total uses: Limit how many times the campaign gift is available overall.
- Limit to one use per customer: Restrict each customer to one redemption.
5.4 Customer eligibility
Control who can see and redeem this campaign:
- All customers: The campaign applies to anyone who meets the conditions.
- Specific link: Only customers who click a unique campaign link can access the promotion.
- Customer location: Limit to customers from specific countries or regions.
- Specific customer segment: Target specific customer segments from your Shopify admin.
5.5 Schedule
Set when your campaign is active:
- Start date: Select the date and time when the campaign begins.
- End date (optional): Enable Set end date and pick a date and time to automatically stop the campaign.
Step 6: Set up display settings

6.1 Milestone display location
Choose where the milestone progress bar appears for customers:
- Product page: The milestone bar is shown as a block on your product page. You can move or reposition the widget via the Theme editor.
- Cart drawer: Shows real-time milestone updates inside the cart drawer as customers add items. This option requires the AOV Cart Drawer app to be integrated (auto-detected if installed).
6.2 Free gift selection method
Choose how customers receive their free gift when a milestone is reached:
- Auto-add gift to cart: The gift is automatically added to the cart when the milestone is reached. No action needed from the customer.
- Gift selection: A pop-up appears for the customer to select their preferred gift when the milestone is reached.
6.3 Setting widget
The Setting widget section updates based on the gift selection method chosen in 6.2. Click Add variables to insert dynamic variables into any text field.
Auto-add gift to cart
When Auto-add is selected, the Setting widget shows two tabs: Milestones reward and Congrats bar.
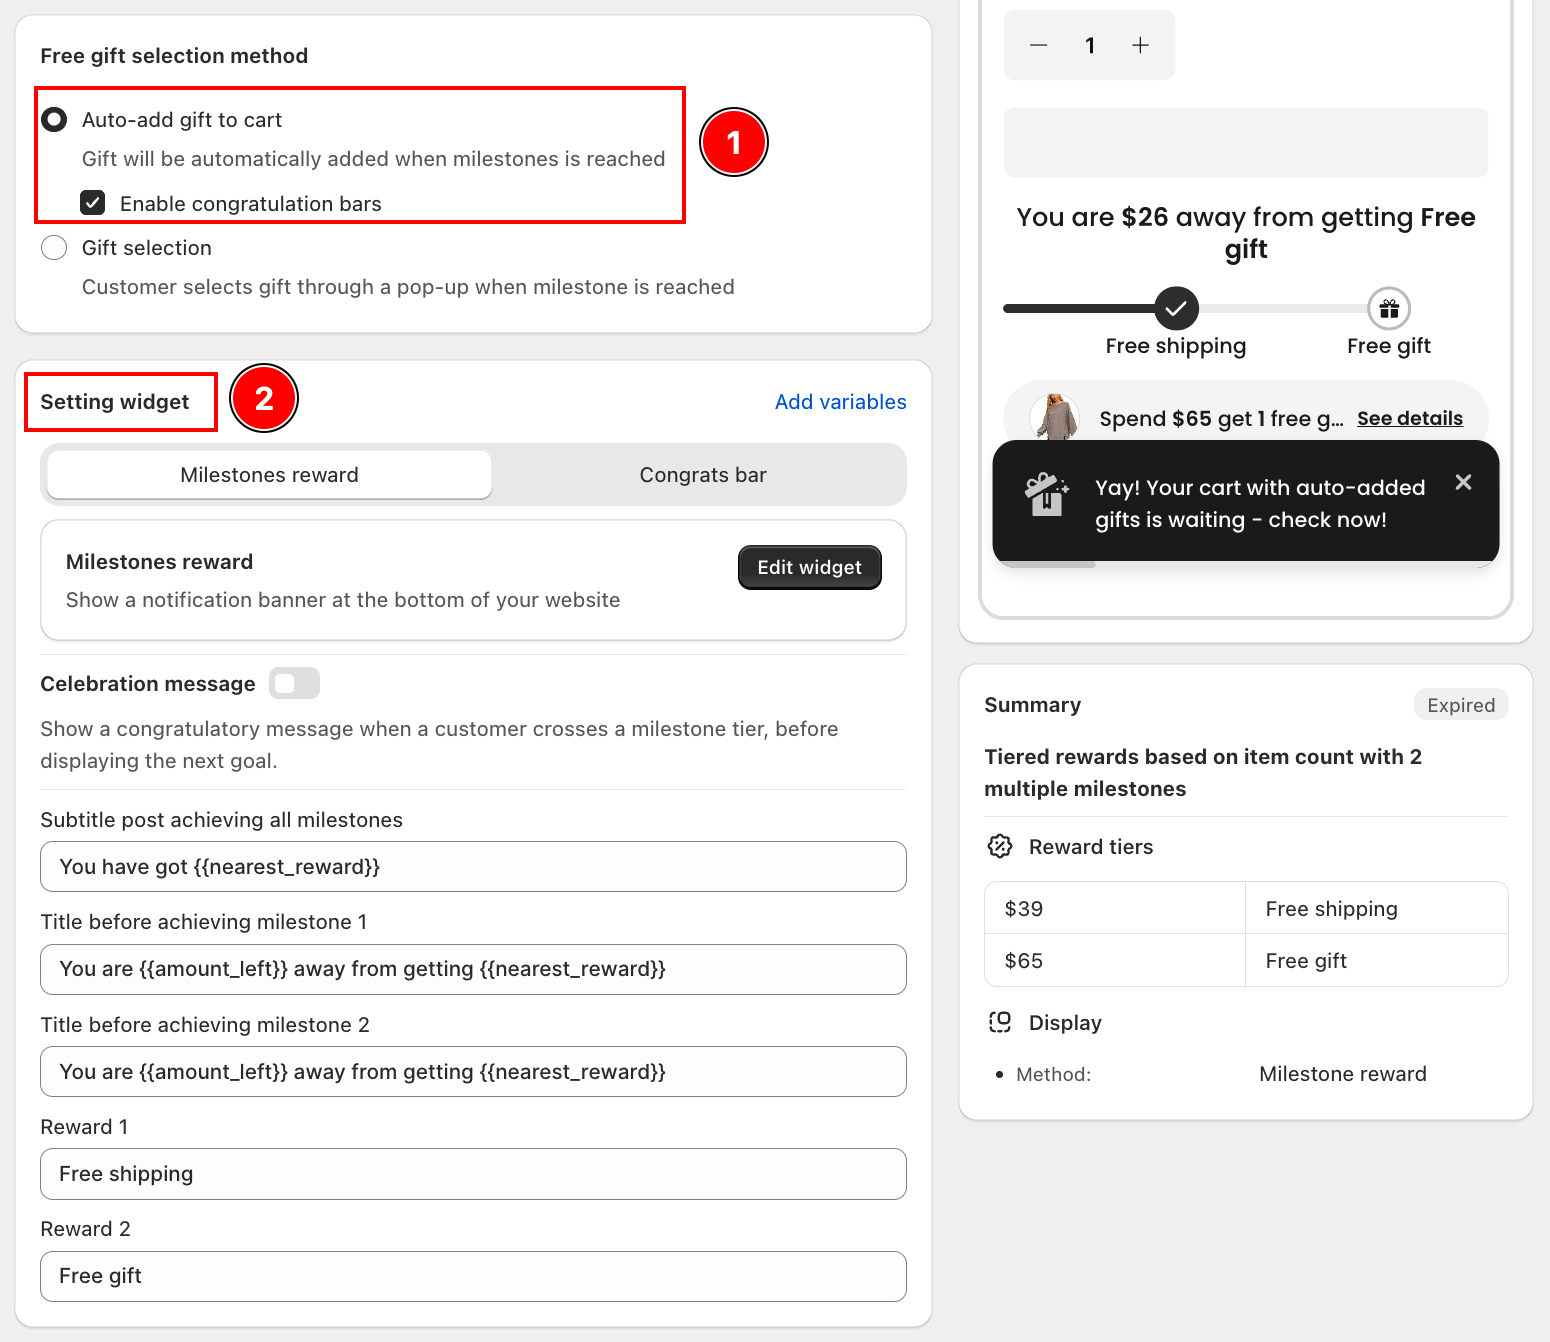
- Milestones reward: Customize the notification banner shown at the bottom of your website as customers progress.
- Celebration message (optional): Enable to show a congratulatory message when a customer crosses a milestone tier, before displaying the next goal.
- Subtitle post achieving all milestones: The message shown after all milestones are unlocked (e.g., "You have got
{{nearest_reward}}") - Title before achieving milestone 1, 2...: The progress message shown before each milestone is reached (e.g., "You are
{{amount_left}}away from getting{{nearest_reward}}") - Congrats bar: Customize the congratulation bar that appears when the gift is auto-added to the cart.
Gift selection
When Gift selection is selected, the Setting widget shows two tabs: Milestones reward and Pop-up.
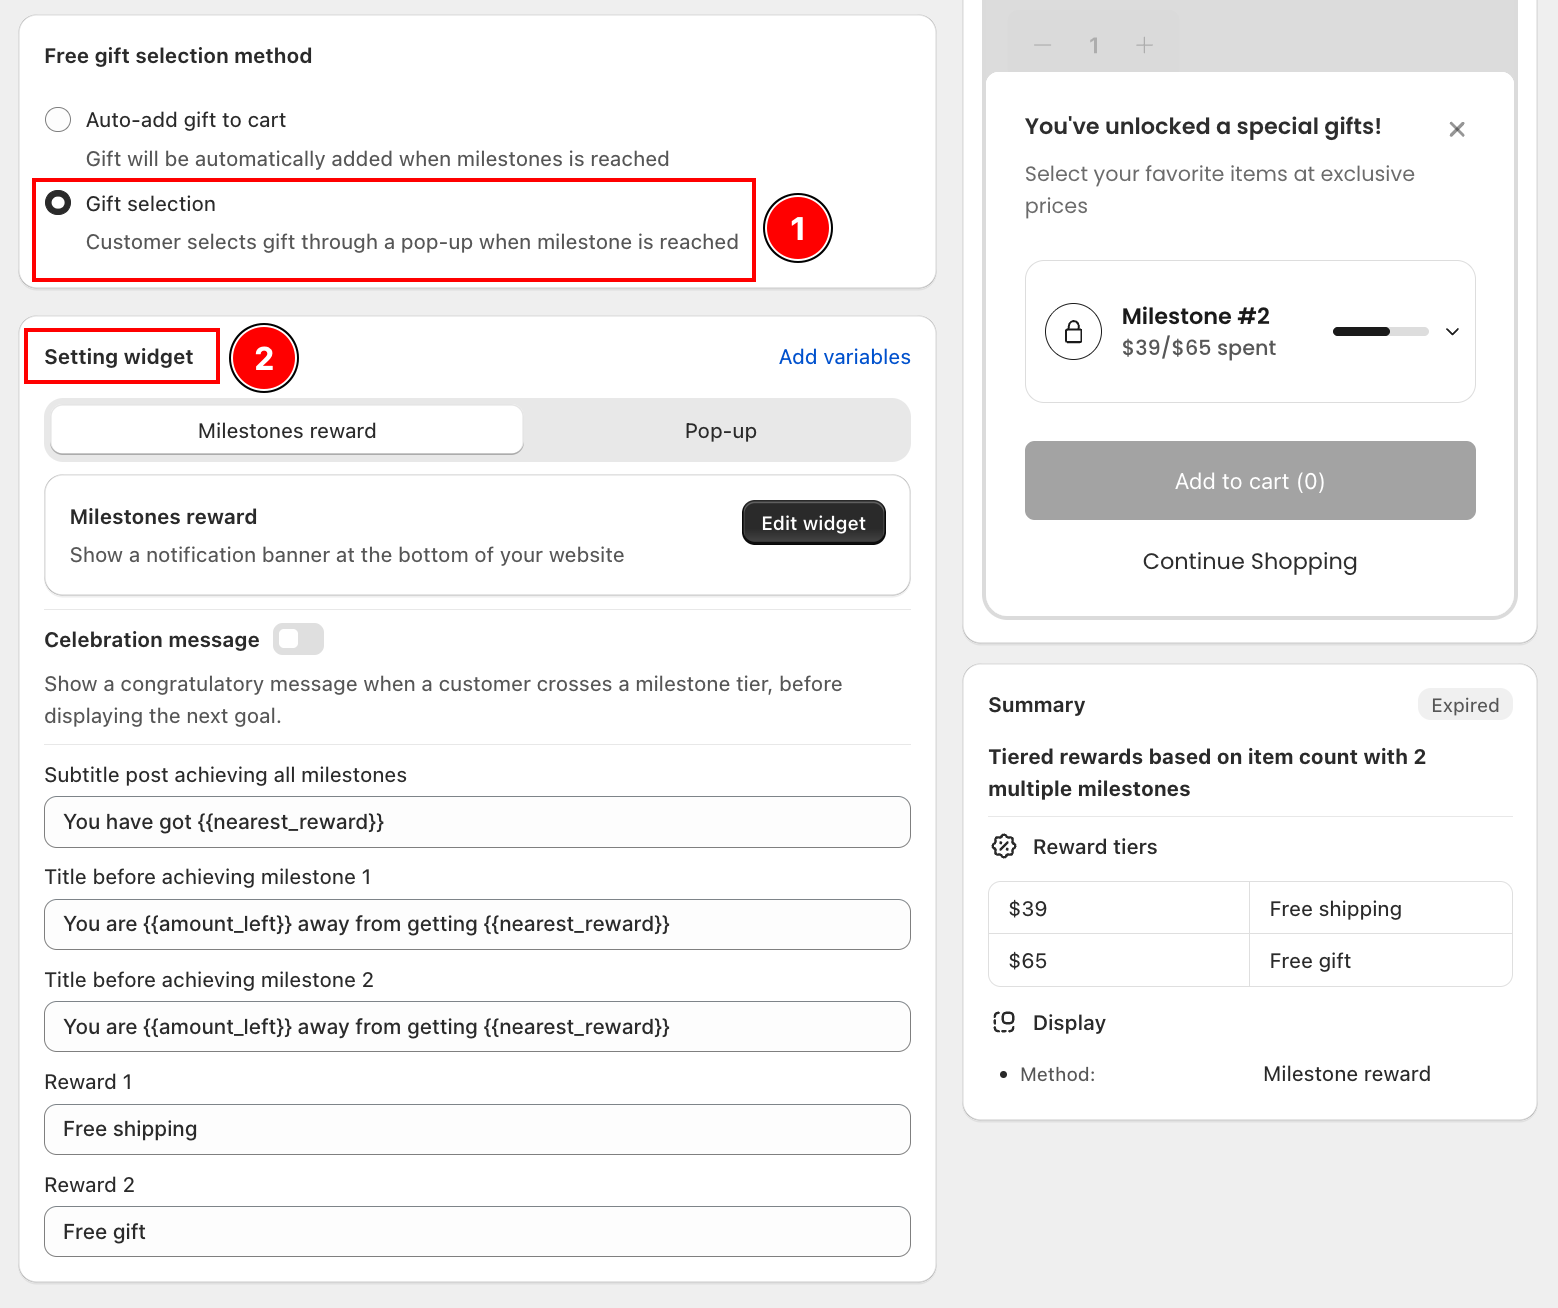
- Milestones reward: Same customization fields as above (Subtitle, Title before achieving milestone 1, 2...).
- Pop-up: Customize the gift selection pop-up that appears when a customer reaches a milestone and needs to choose their gift.
Step 7: Enable the app on the theme and add block
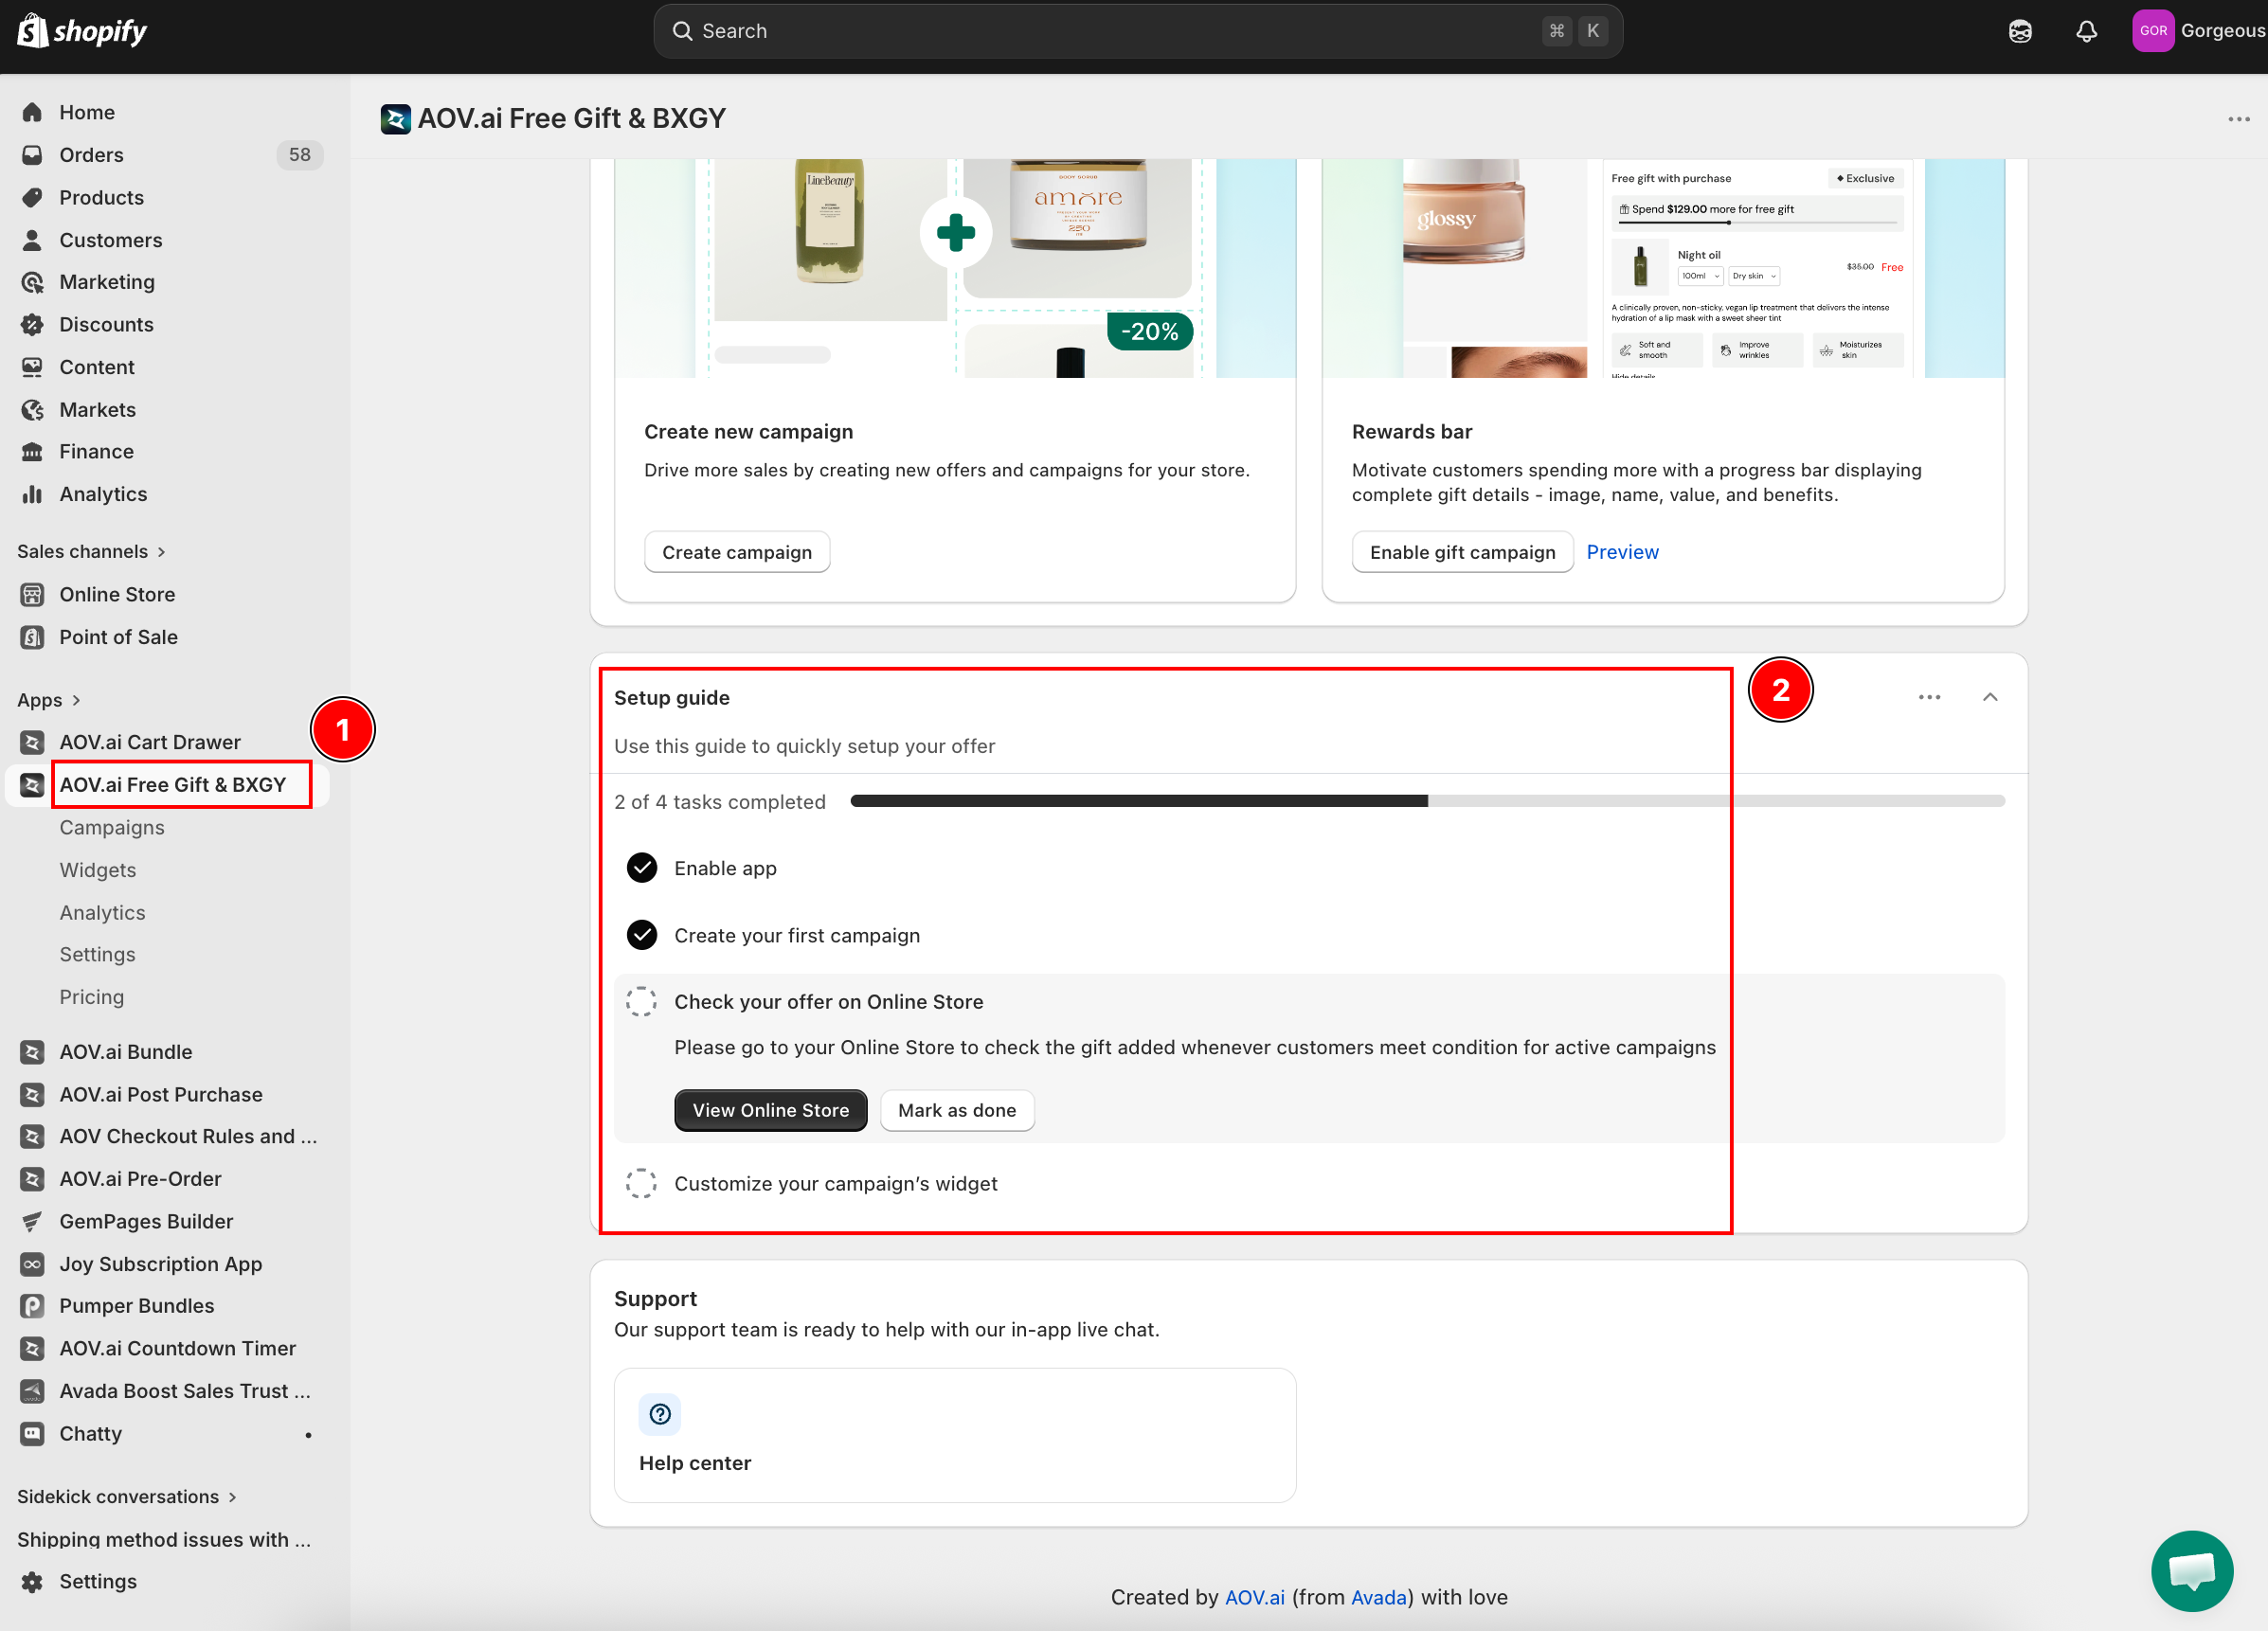
Follow the Setup guide inside the app to complete the remaining steps:
- Enable app: Make sure the AOV.ai Free Gift app is enabled on your store.
- Create your first campaign: Confirm your campaign has been saved and activated.
- Check your offer on Online Store: Click View Online Store to verify the gift is added correctly when customers meet the campaign conditions. Click Mark as done once confirmed.
- Customize your campaign's widget: Adjust the appearance of the milestone bar widget to match your store's branding.
Voila! By following those steps, you can create a compelling, clear, and attractive Milestone Reward campaign to engage more customers. Happy selling!