Quickstart
Get your first upsell offer live in under 5 minutes.
If this is a brand-new install, you'll actually land in a guided 2-step setup first (build an offer, then pick a plan) before you reach the Dashboard described below, see Onboarding. The steps below still apply either way, whether you're finishing that first offer or creating another one later.
Step 1: Install the app
Install AOV.ai Post Purchase Upsell from the Shopify App Store (opens in a new tab). Once installed, you'll be taken to the app dashboard.
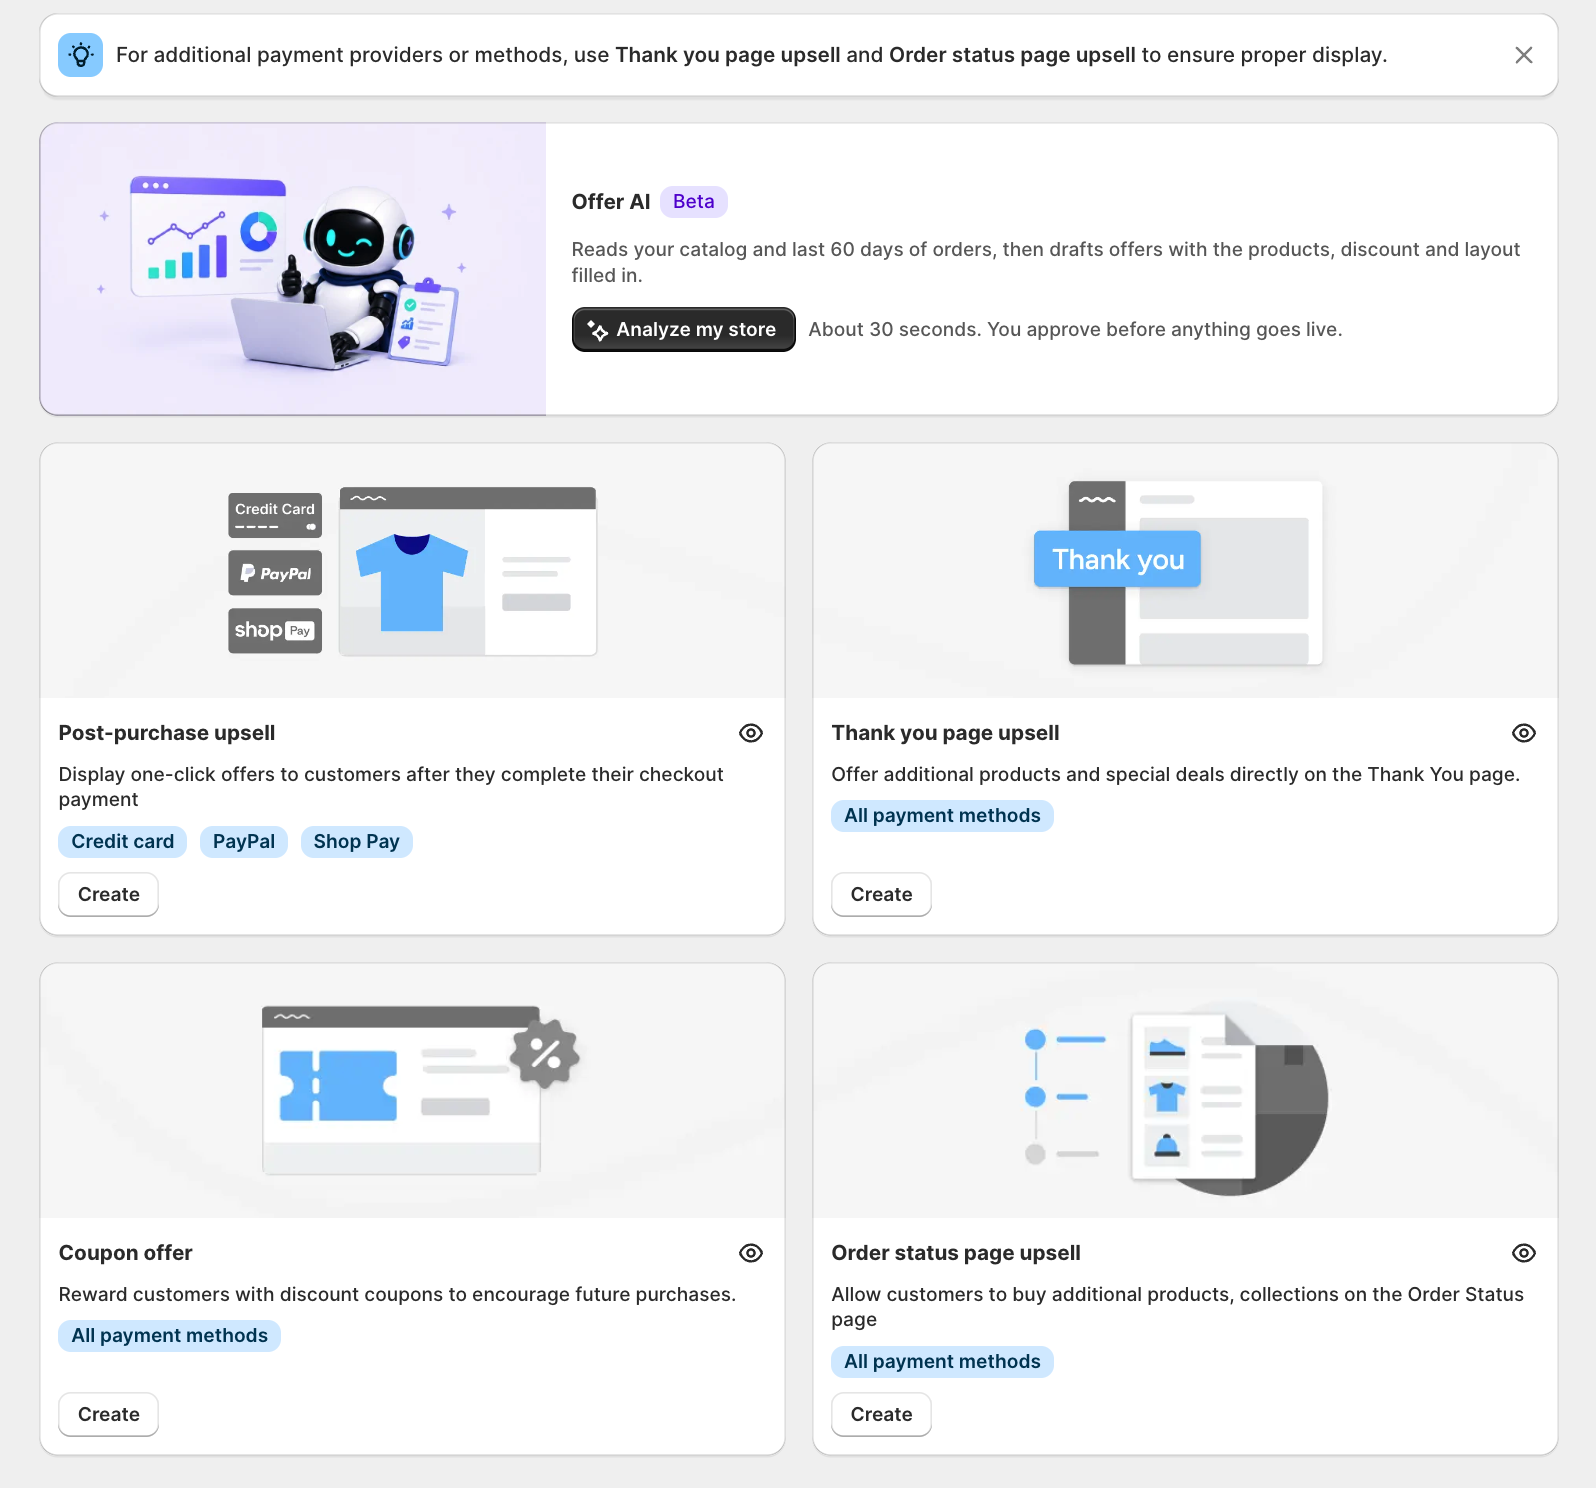
Step 2: Choose your offer type
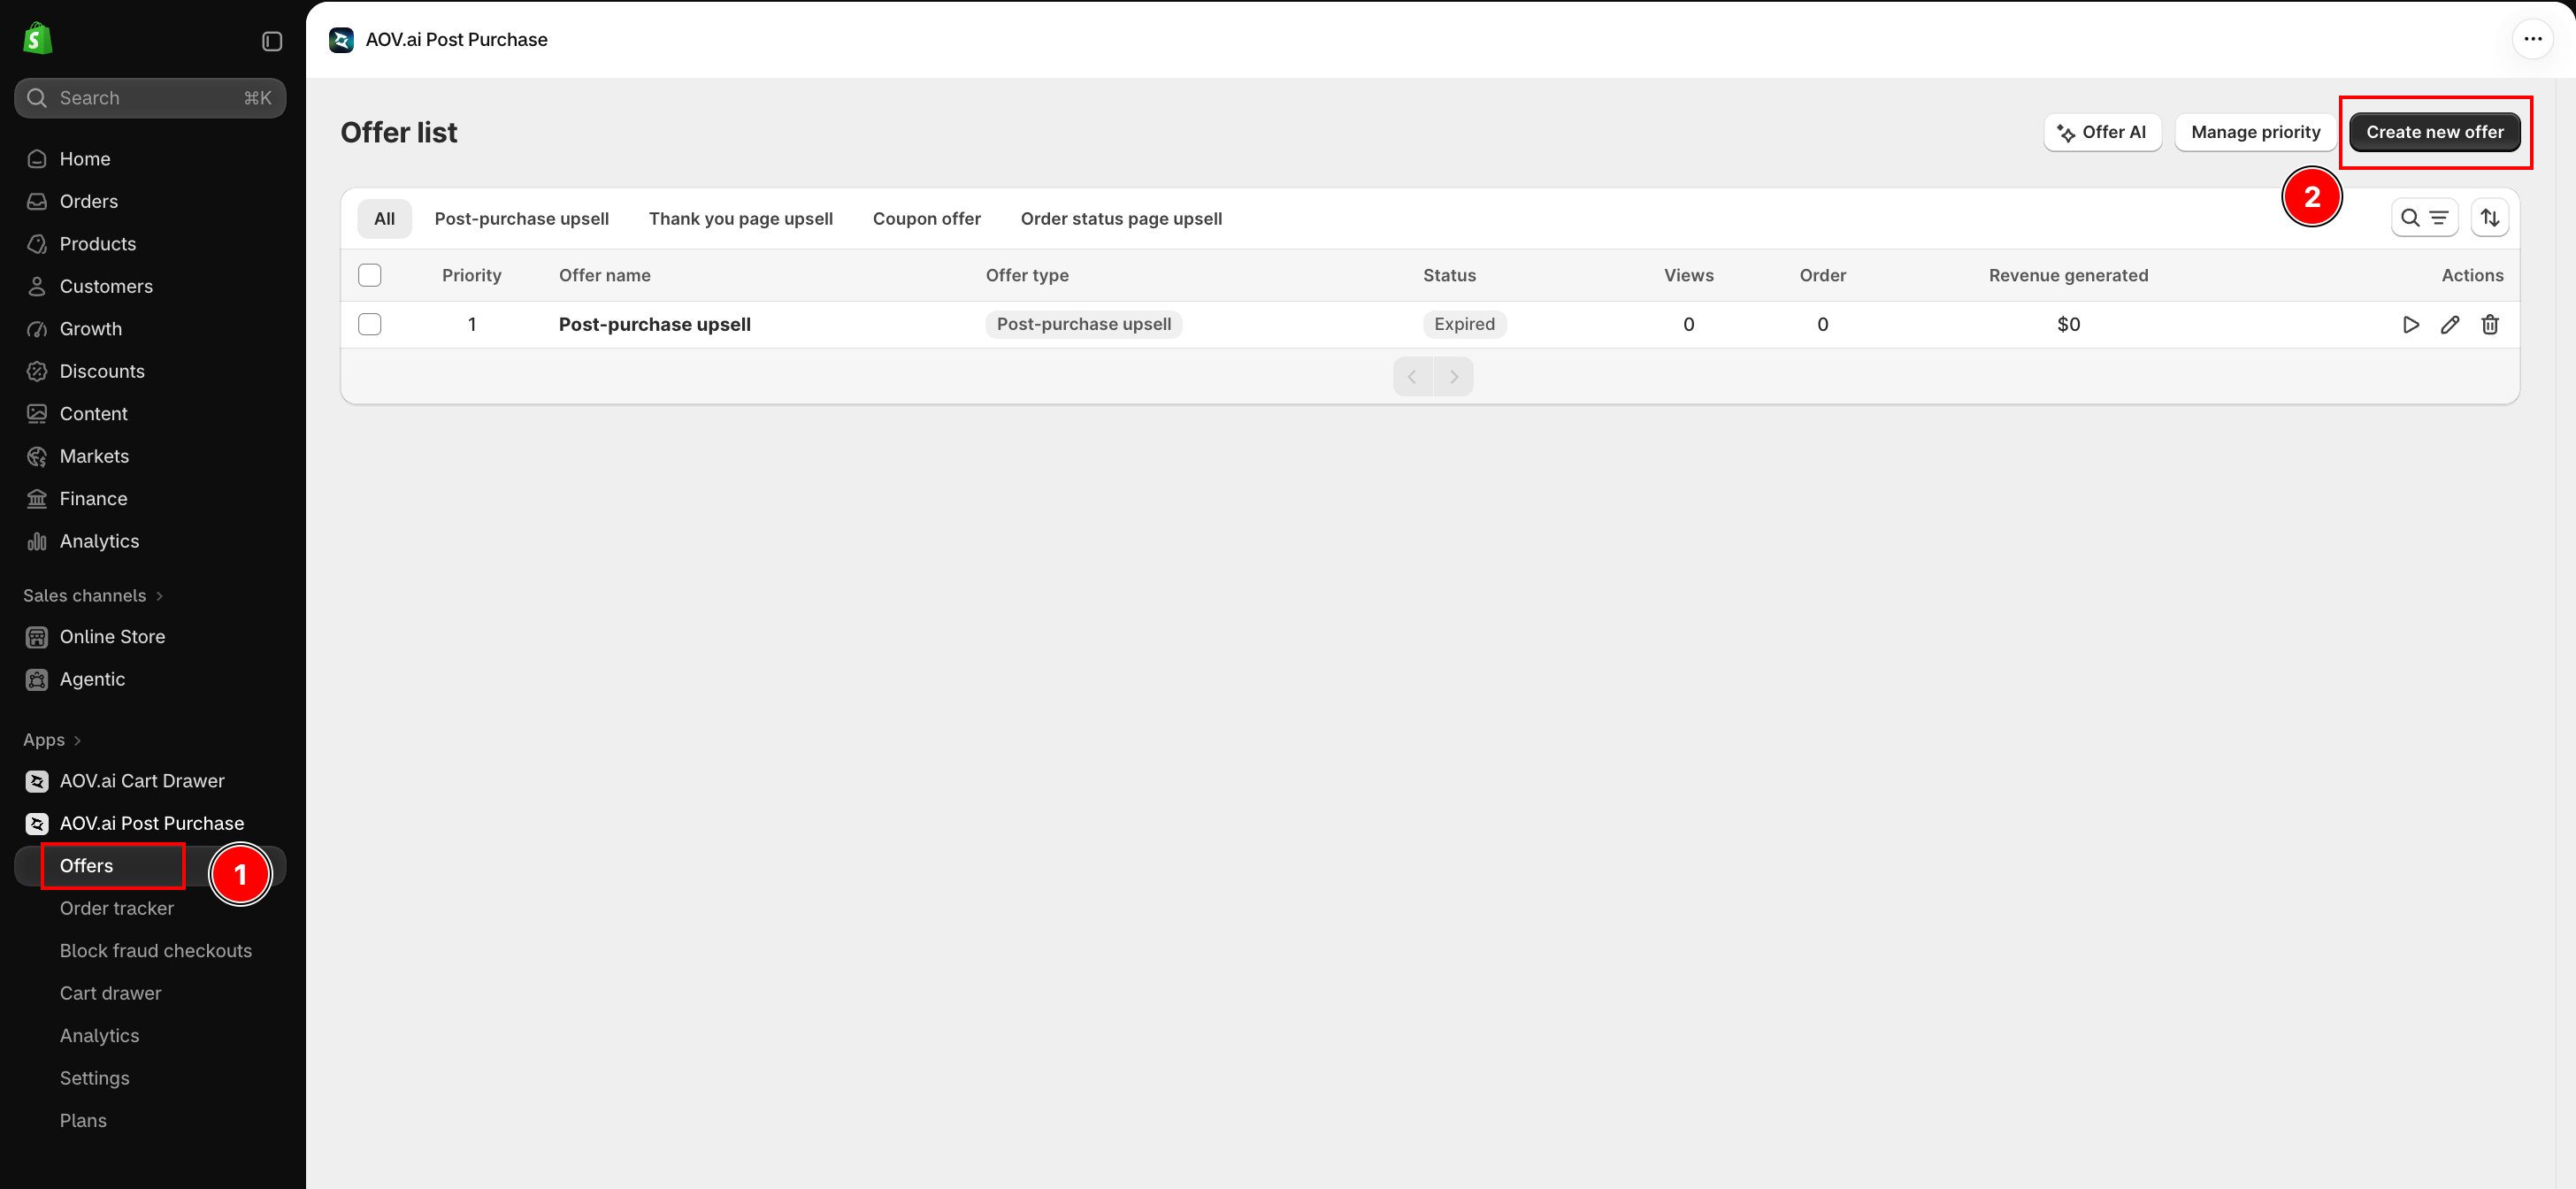
AOV Post Purchase Upsell supports four offer types:
| Offer Type | Where it appears | Payment support |
|---|---|---|
| Post-purchase upsell | Between checkout and thank you page | Credit card, PayPal, Shop Pay |
| Thank you page upsell | On the thank you page | All payment methods |
| Coupon offer | On the thank you page (discount code) | All payment methods |
| Order status page upsell | On the order status/tracking page | All payment methods |
From Offers in the menu, select Create new offer to open the Choose offer type page, then click Create on the card for the type you want.
Step 3: Pick a quick-start template (Post-purchase upsell only)
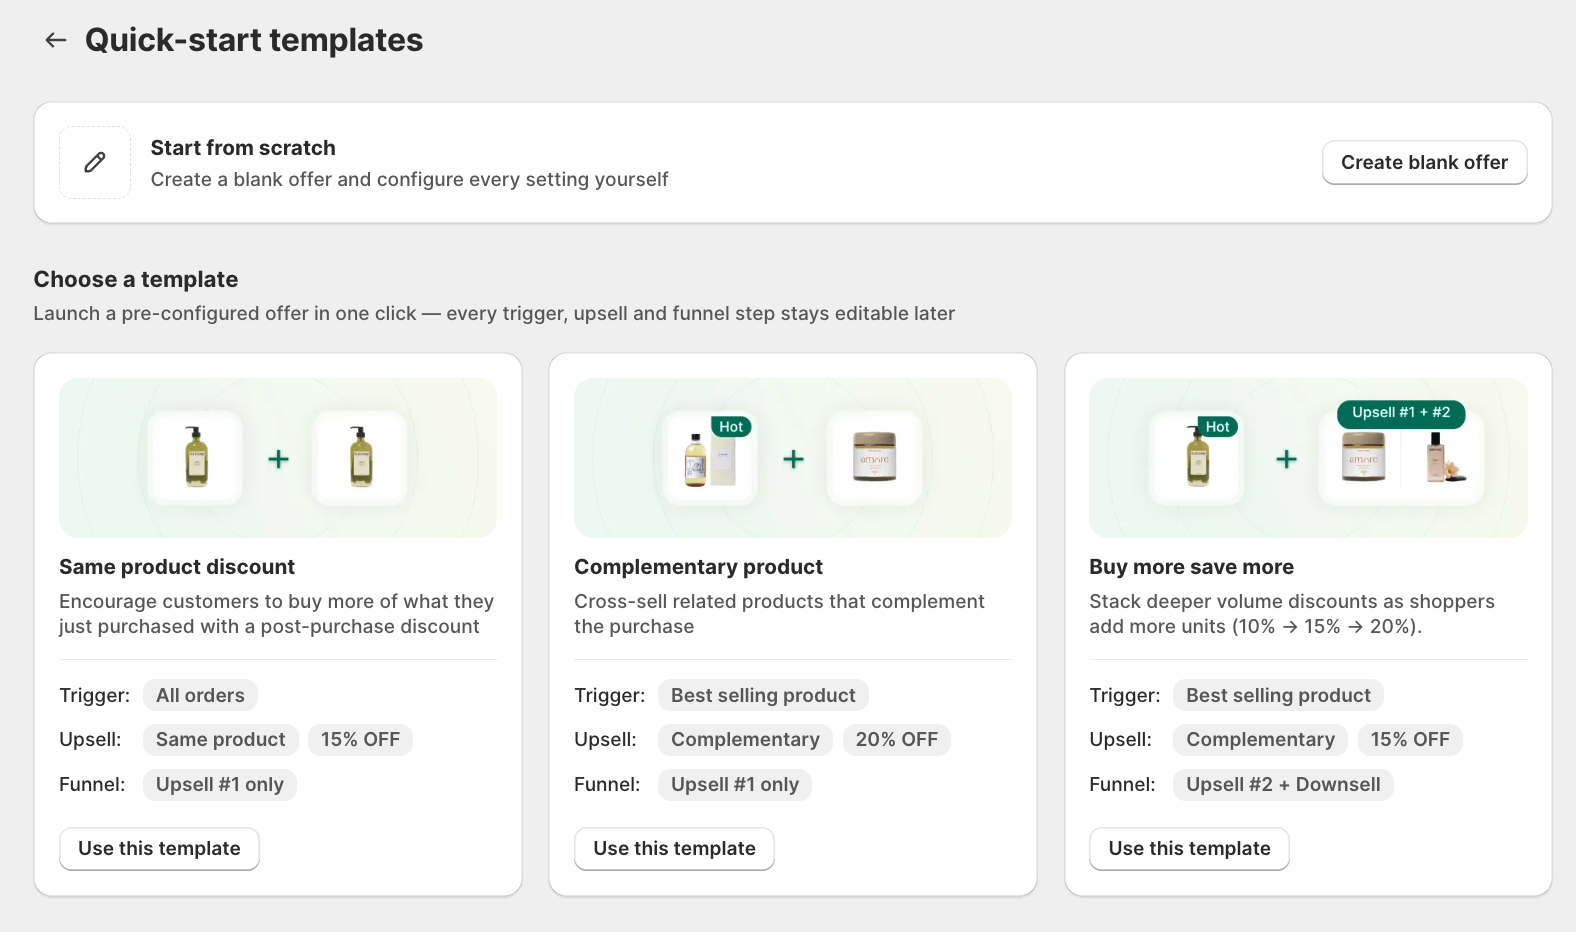
After clicking Create on the Post-purchase upsell card, you can either:
- Start from scratch: create a blank offer and configure every setting yourself.
- Choose a template: launch a pre-configured offer in one click (trigger, upsell, and funnel already set). Trigger, upsell, and funnel stay editable afterward.
Step 4: Set trigger conditions
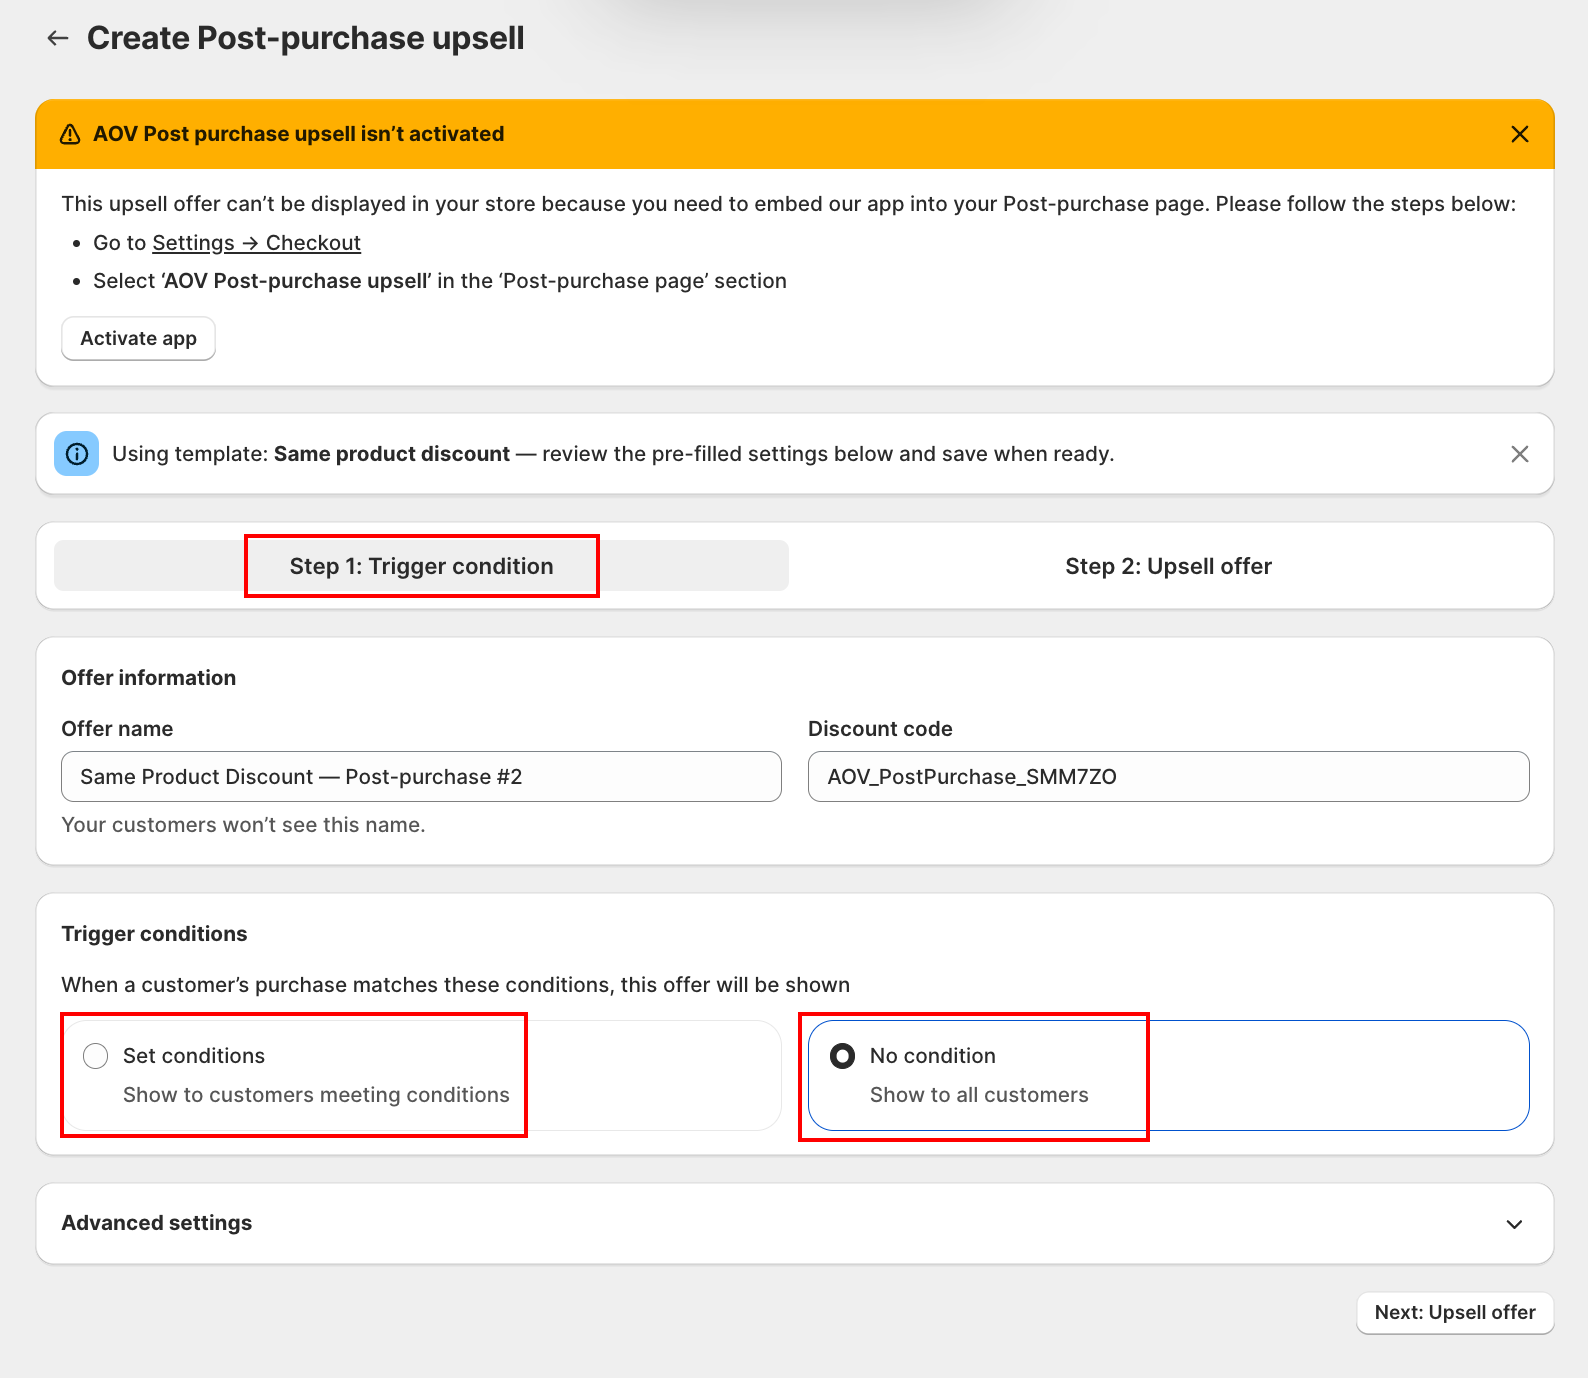
Fill in the Offer information (an internal Offer name, plus an editable Discount code), then choose when the offer shows:
- No condition (default): show the offer to all customers.
- Set conditions: narrow it down by one or more of:
- Product (or variant), Collection, included or excluded product tag
- Total order value, total product quantity, shipping fee, shipping country
- Specific customer segment
Step 5: Select upsell products
On the Upsell offer step, click Add products on the Upsell #1 card and choose a source:
- AI smart pick: let the app suggest a product for you; it's labeled "AI recommendation" on its tile.
- Specific product: pick products/variants manually, or auto-select whichever item already in the cart is the most or least expensive.
- Specific collection: offer products from a collection.
- Complementary product: auto-suggests add-ons often bought with the trigger product. Only available when the trigger condition is set to Specific product.
Set a discount (percentage or fixed amount) to make the offer irresistible. Each upsell card can also chain further:
- Downsell (off by default): shown only if Upsell #1 is declined, good for a smaller or cheaper alternative.
- Upsell #2 (off by default): shown only if Upsell #1 is accepted, a follow-up offer.
- Add a bundle deal: turn any Upsell/Downsell card into a quantity-break or Buy X Get Y deal instead of a single-unit discount. Post-purchase upsell only.
- Create A/B test: compare offer variants against each other.
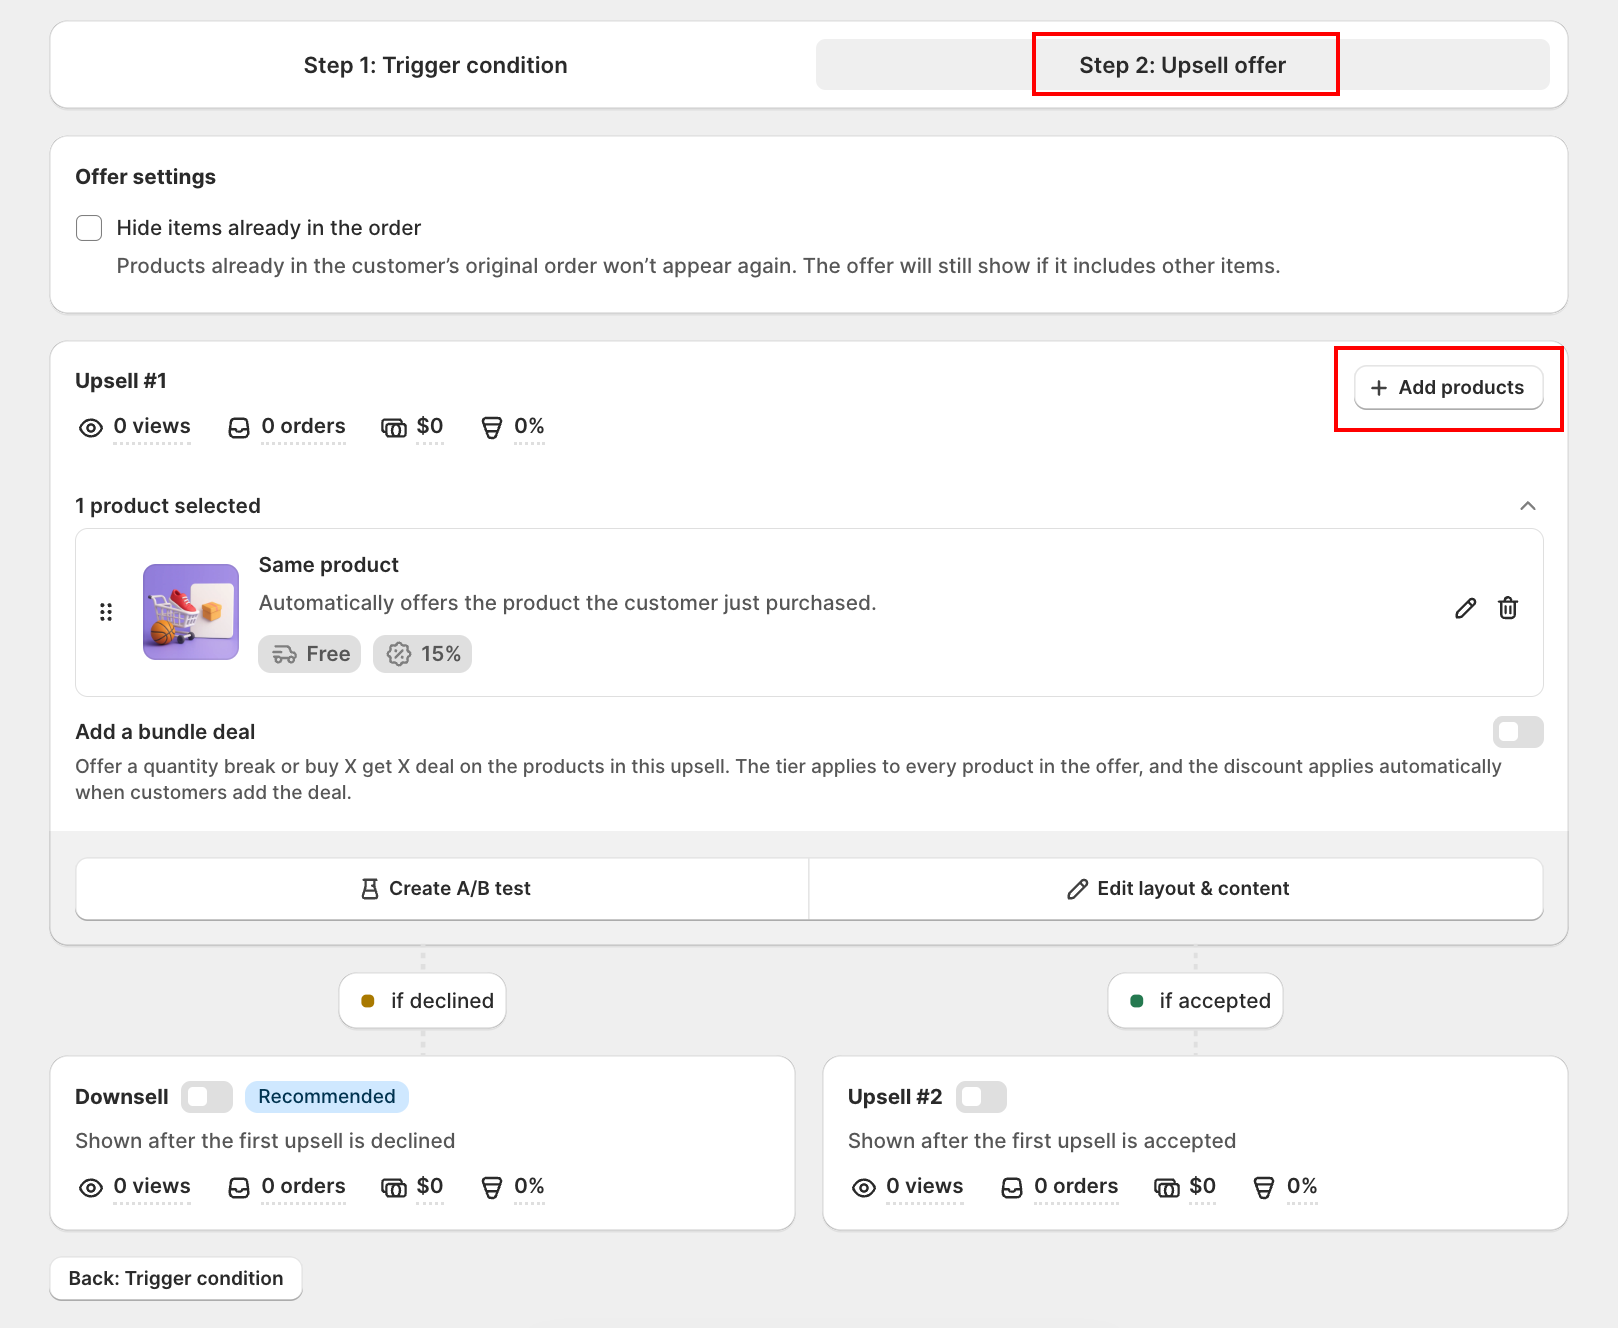
See the Post-purchase upsell setup guide for the full funnel, including the optional third level (Upsell #3 / Downsell #2).
Step 6: Customize the design
Click Edit layout & content to open the visual editor.
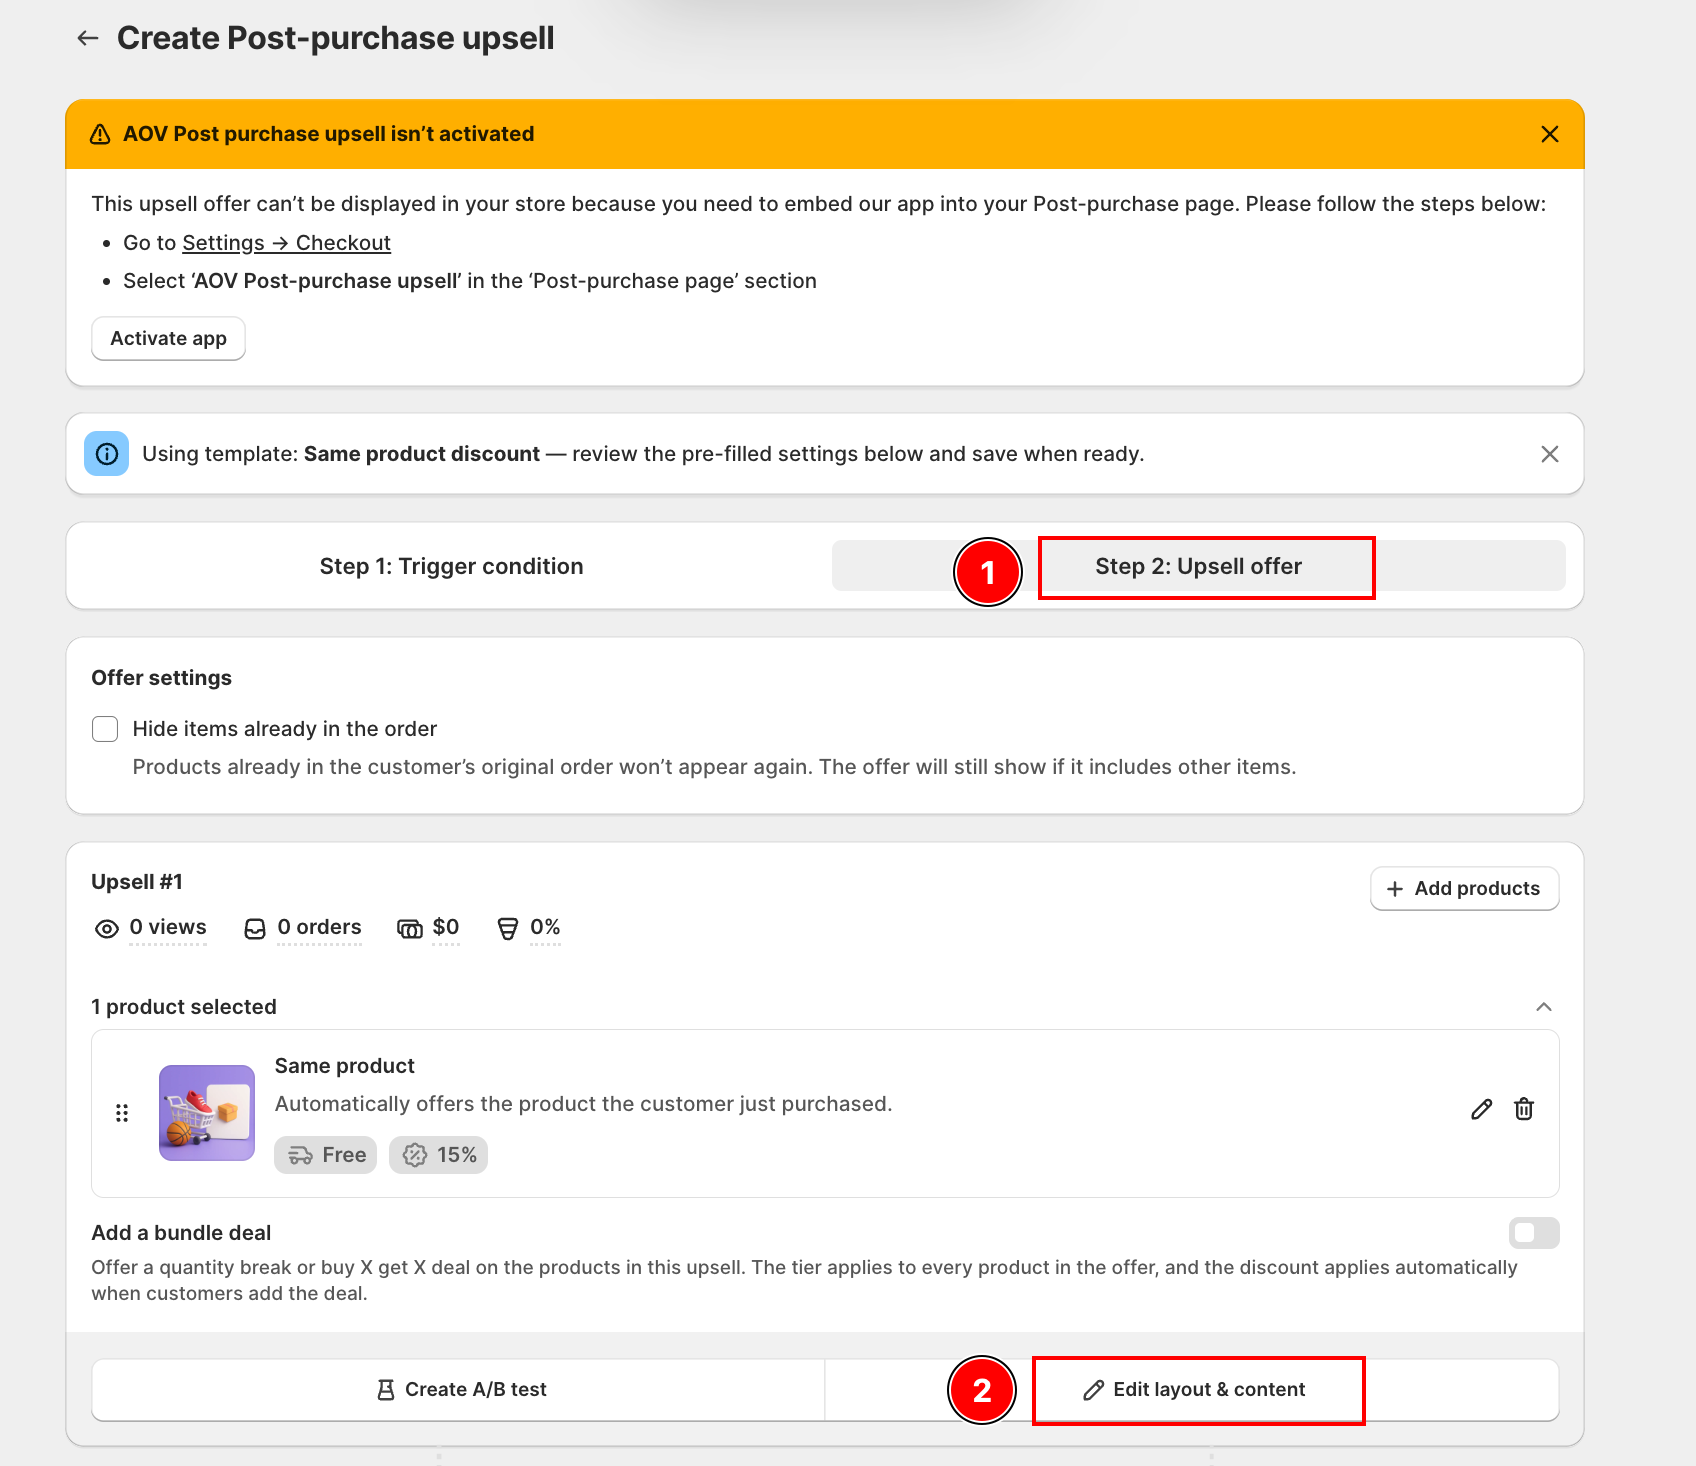
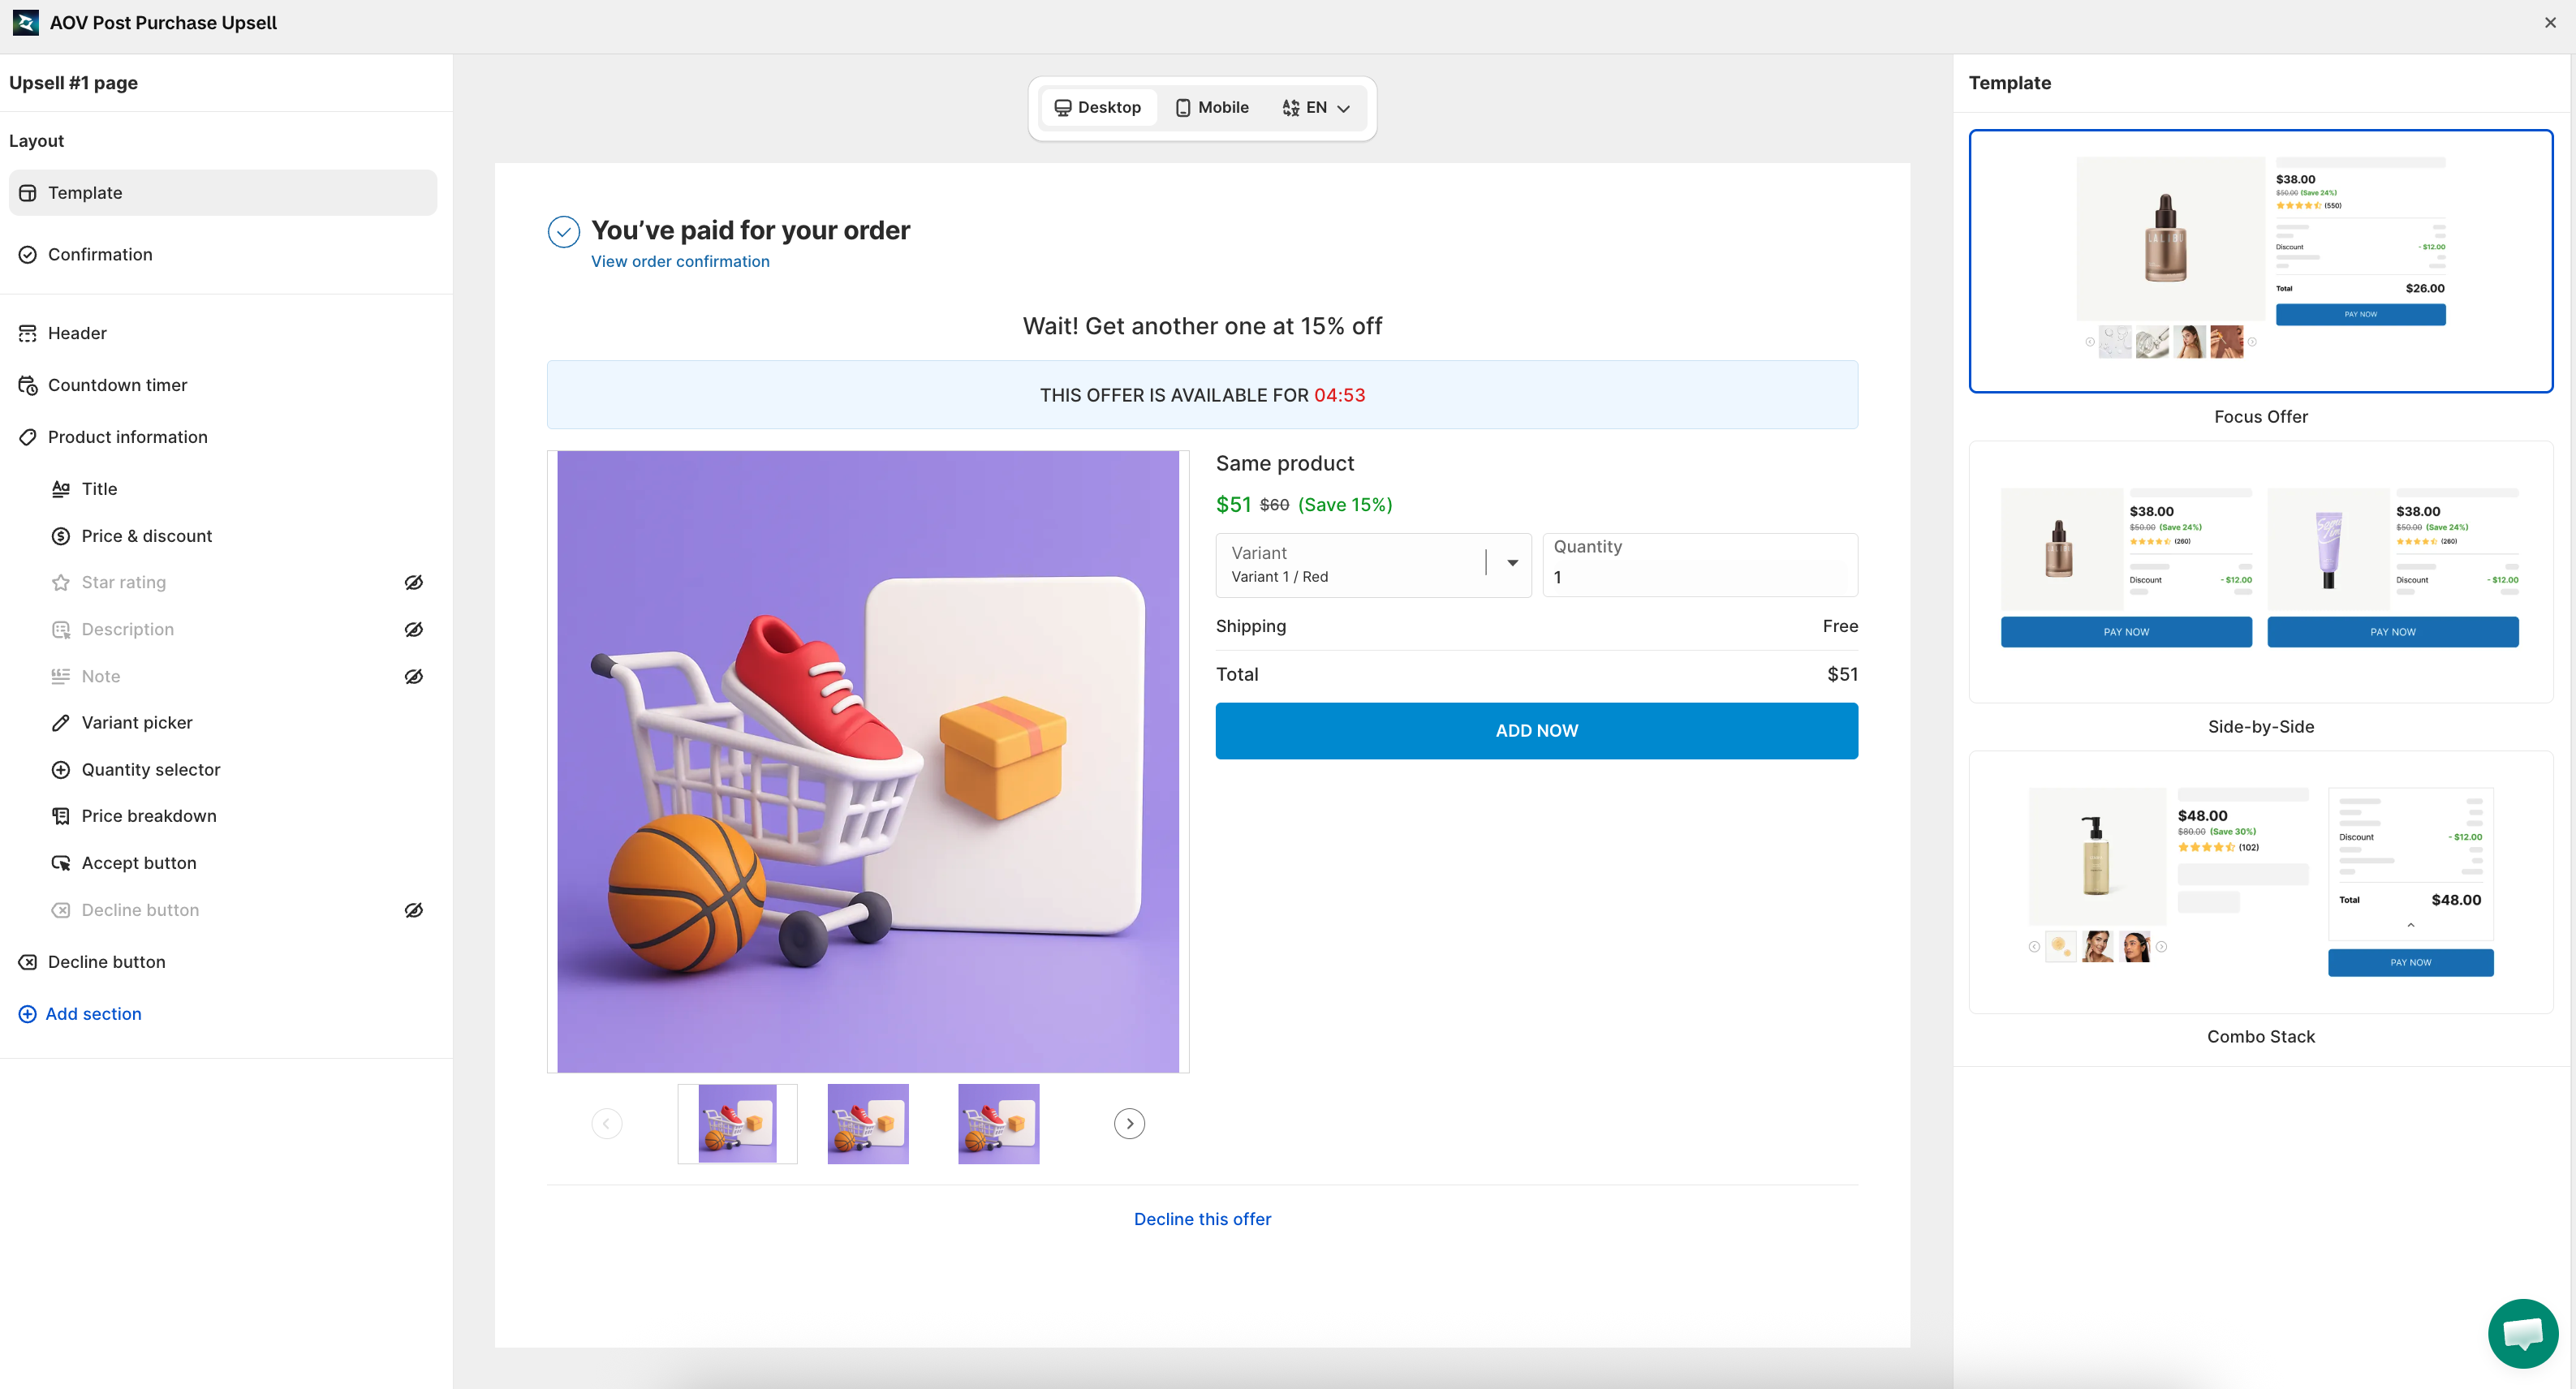
Use the editor to customize:
- Choose a template: Focus Offer, Side-by-Side, or Combo Stack.
- Edit the header text, countdown timer, and button text.
- Edit the product info block: title, price & discount, star rating, description, note, variant picker, quantity selector, and price breakdown.
- Add sections: extra buy button, image, text, callout block, FAQs, testimonial, or trust badges.
- Preview on desktop and mobile, in any of your store's languages.
Step 7: Activate and test
Each offer type is activated from a different place:
- Post-purchase upsell: Shopify Admin → Settings → Checkout → Post-purchase page → select AOV.ai Post Purchase Upsell.
- Thank you page upsell and Coupon offer: Shopify Admin → Online Store → Customize Theme → Checkout and customer accounts → Thank You Page → add the app block. Both offer types share this same block.
- Order status page upsell: Shopify Admin → Online Store → Customize Theme → Checkout and customer accounts → Order Status Page → add the app block directly, no Thank You Page step needed.
Open your offer and use Verify offer (under "How can you verify your offer?") to test it with a real or test checkout.
What's next?
- Post-purchase upsell setup guide: full field-by-field walkthrough.
- Thank you page upsell setup guide: full field-by-field walkthrough.
- Order status page upsell setup guide: full field-by-field walkthrough.
- Coupon offer setup guide: full field-by-field walkthrough.
- A/B Testing: compare offer variants.
- Multi-language support: translate your offers.