How to set up
Learn how to use the Thank you page upsell feature to boost customer engagement and increase sales.
What is Thank you page upsell?
Thank you page upsell feature allows you to present additional offers to customers on the offer confirmation (thank you) page. This will help to engage with customers post purchase and encourage them to take advantage of exclusive deals.
Why to use Thank you page upsell?
Maximize Post-purchase opportunities
The thank you page is often underutilized. By presenting targeted upsell offers here, you can maximize every transaction and increase your Average Order Value (AOV).
Encourage customer engagement
Offering discounts or exclusive products keeps customers engaged with your brand next times and fosters loyalty.
Seamless customer journey
Thank You Page Upsells feel natural and non-intrusive, blending into the customer's post-purchase experience.
How to set up Thank you page upsell?
Requirements before using
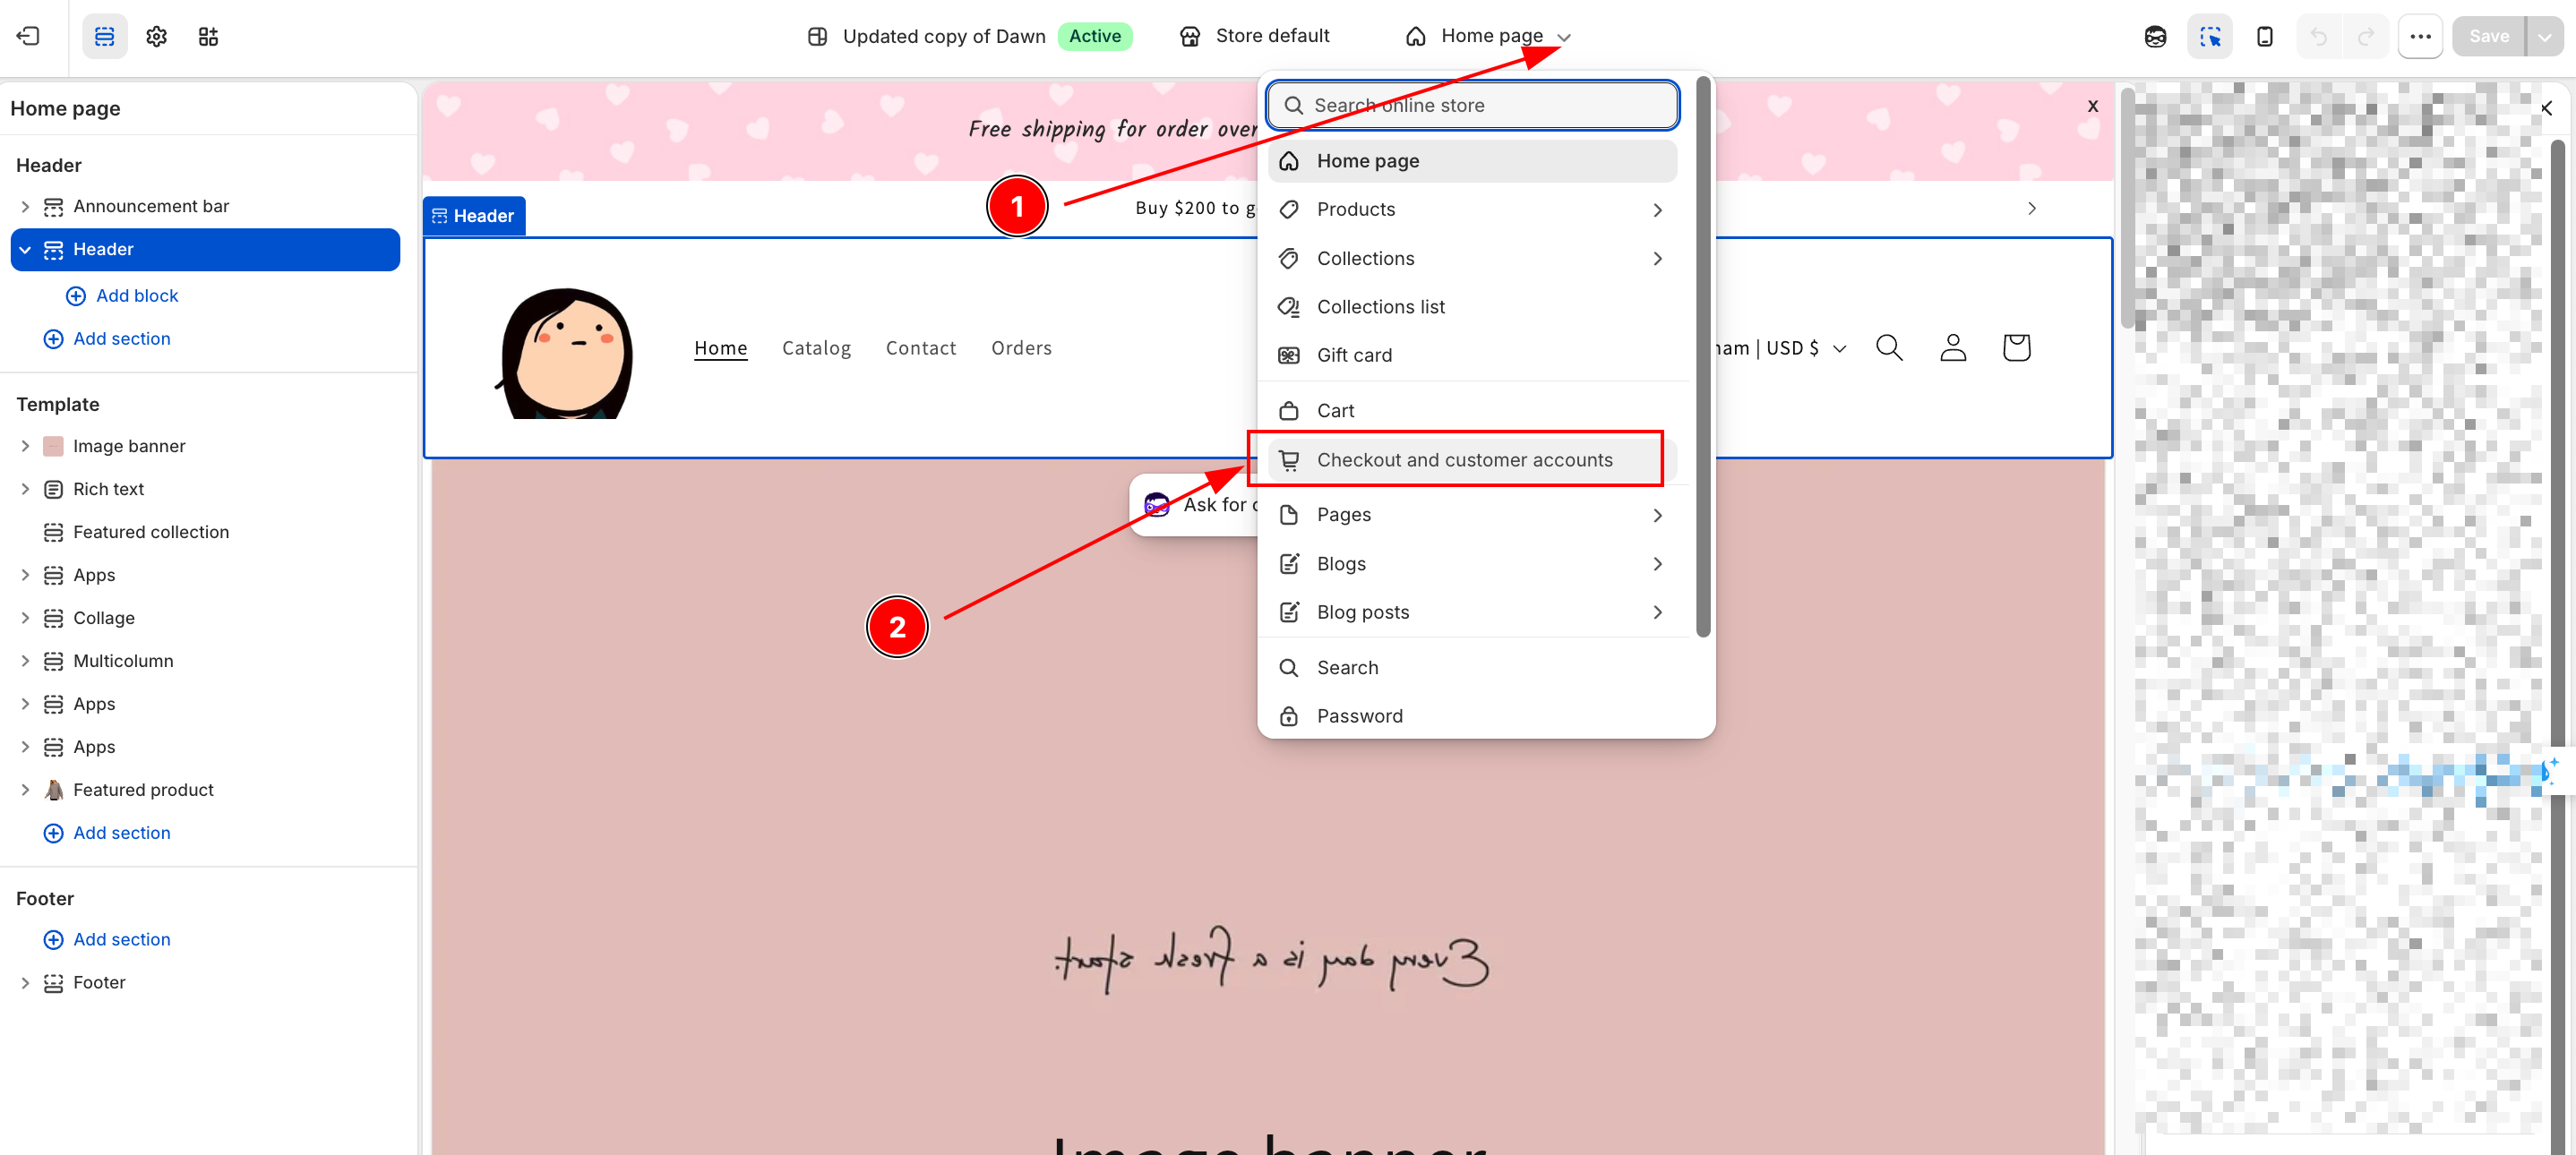
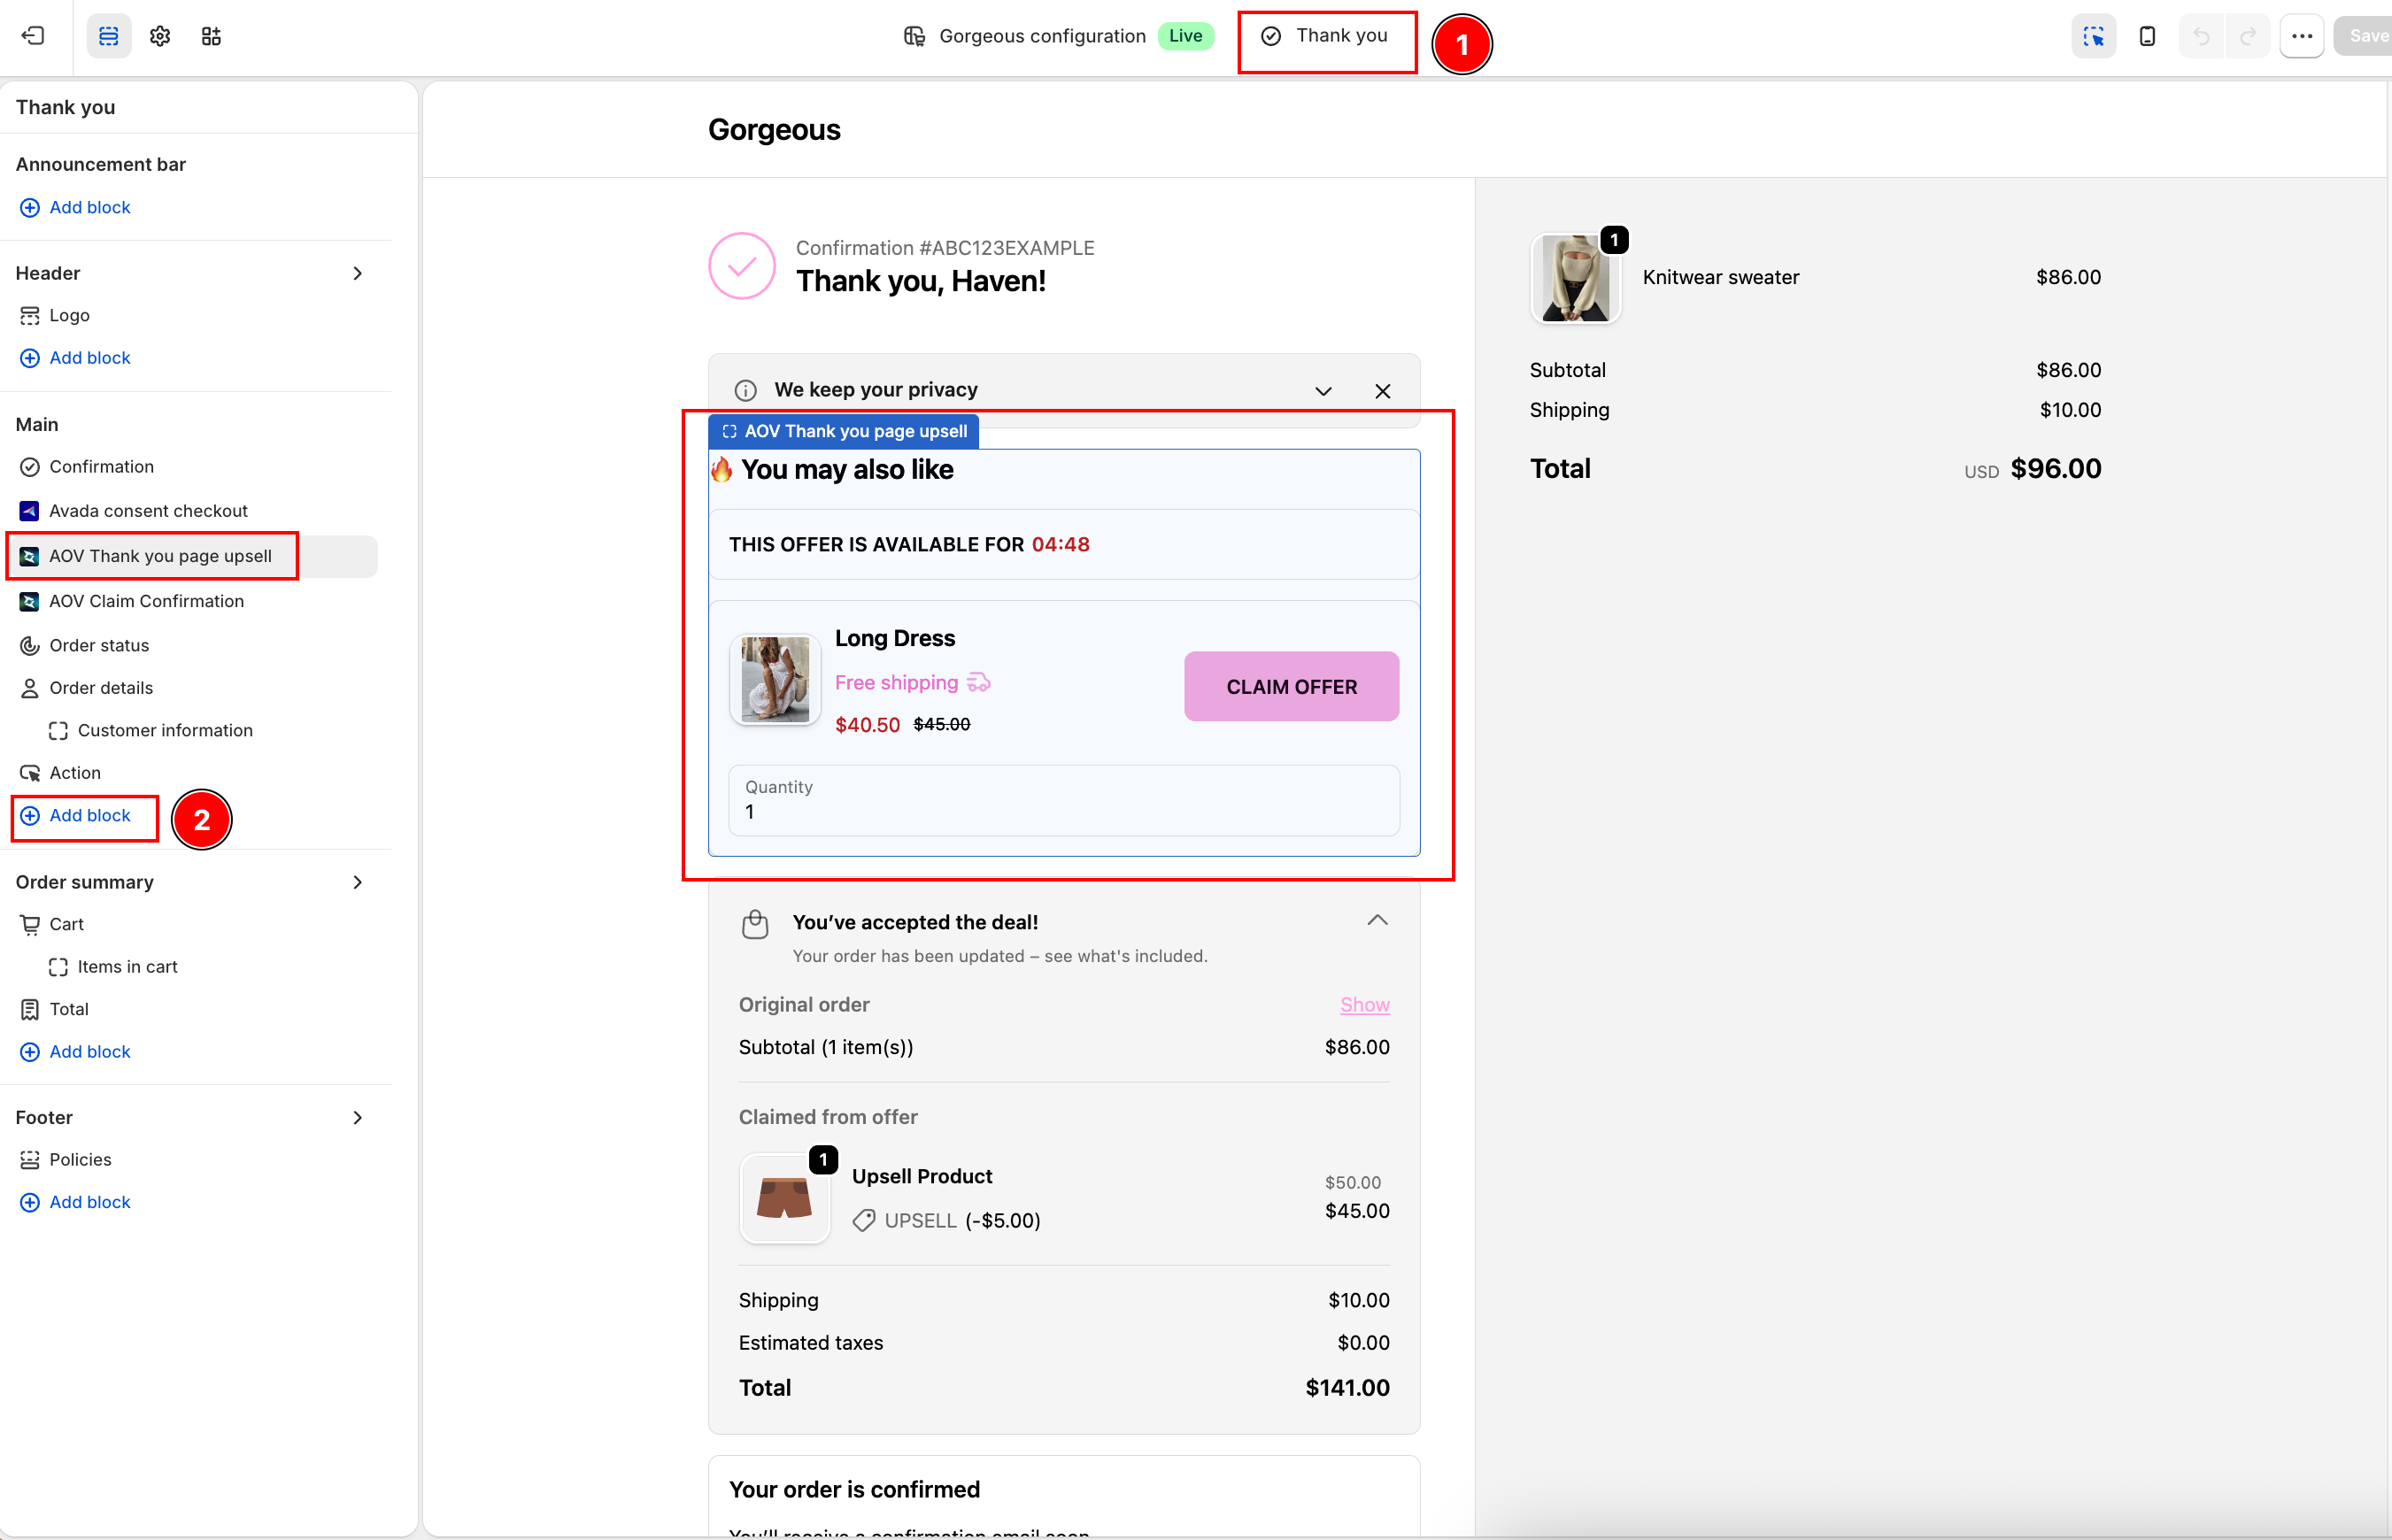
- Add the Thank You Page Upsell block in Shopify Admin → Online Store → Customize Theme → Checkout and customer accounts → Thank You Page.
- Offers must be created in the Offers tab of the AOV.ai Post Purchase app.
- No payment restrictions (unlike Post Purchase Upsells).
Trigger condition
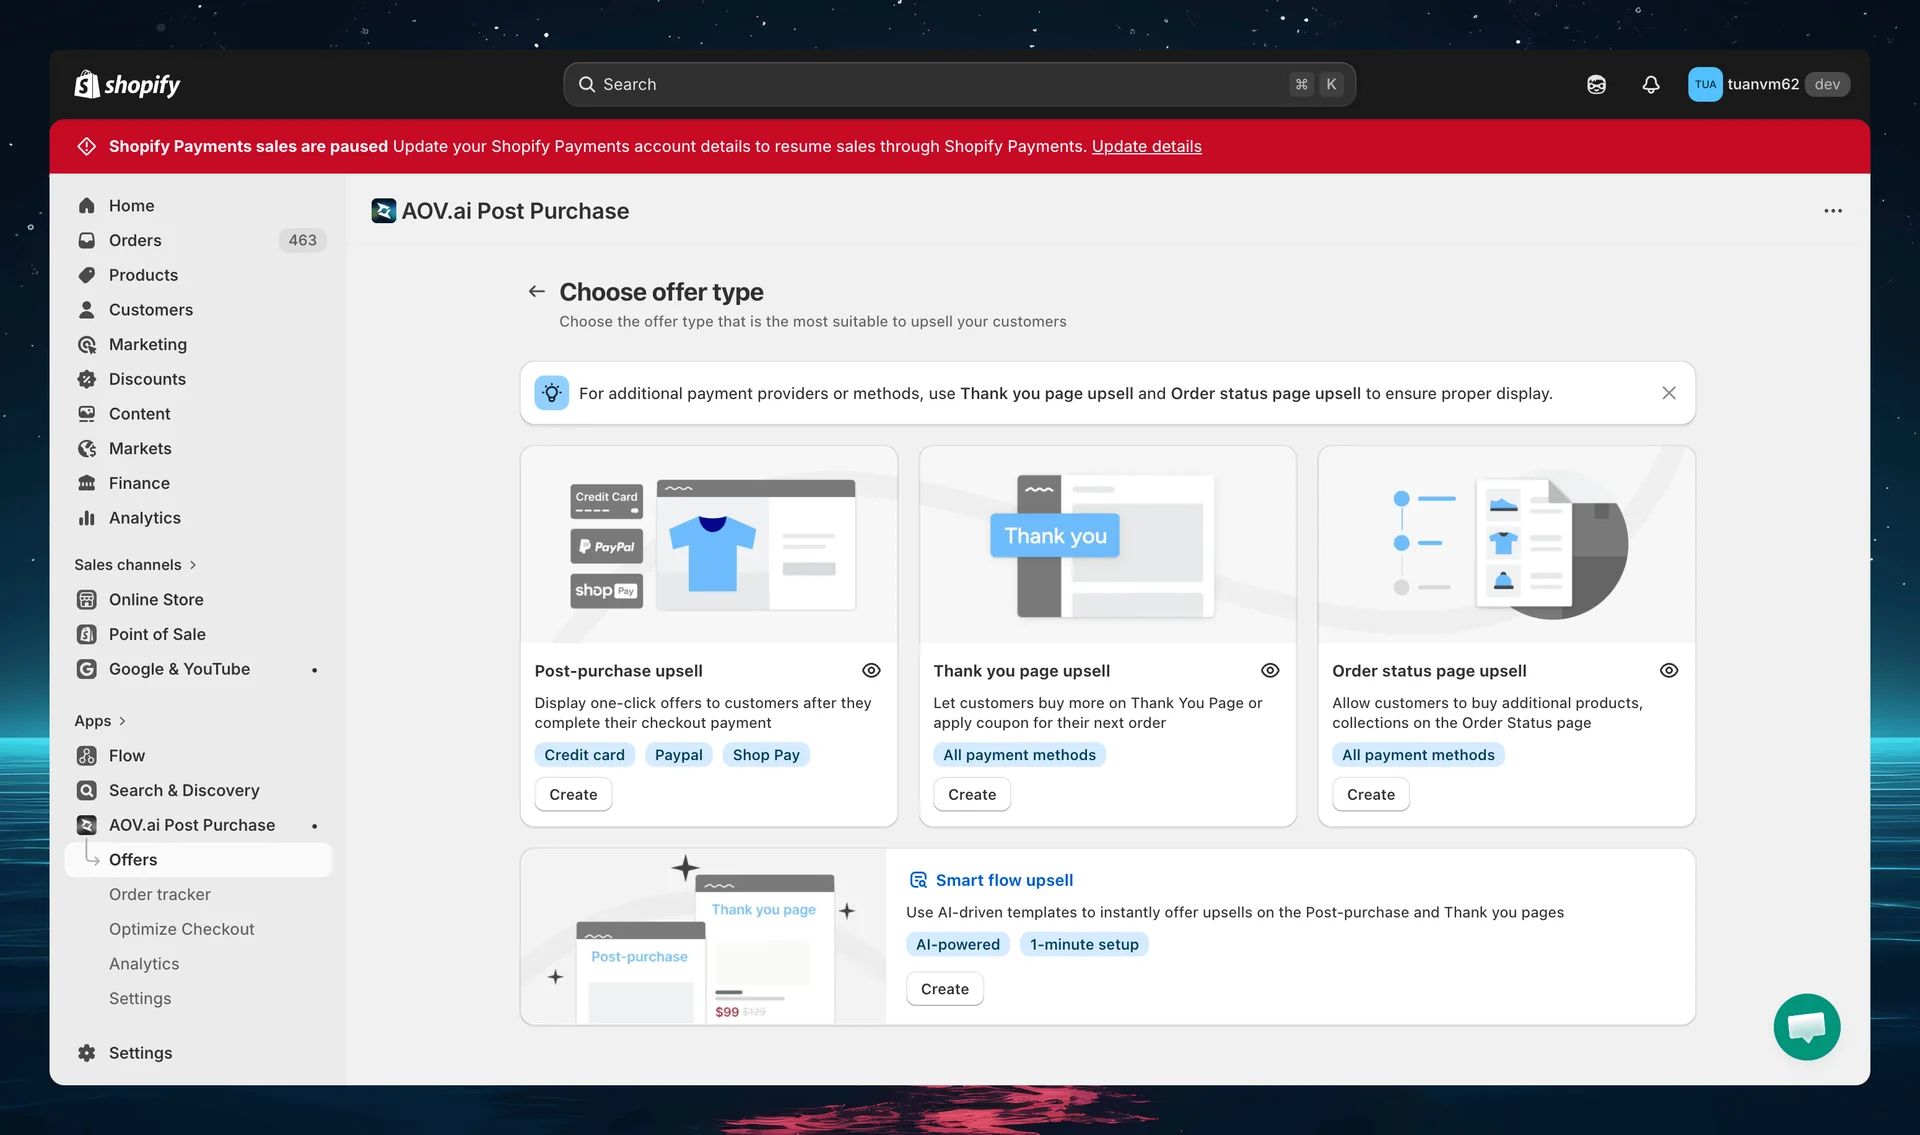
Step 1: Access Thank you page upsell feature
Navigate to the Offers section in the menu > select Create new offer (this opens the Choose offer type page) > click Create on the Thank you page upsell card.
Step 2: Define your Offer information
Offer name
Enter a name for your campaign so that you can easily identify it later on. You customers won't see this name on the storefront.
Discount code (optional)
Edit the discount code if you're creating a coupon offer.
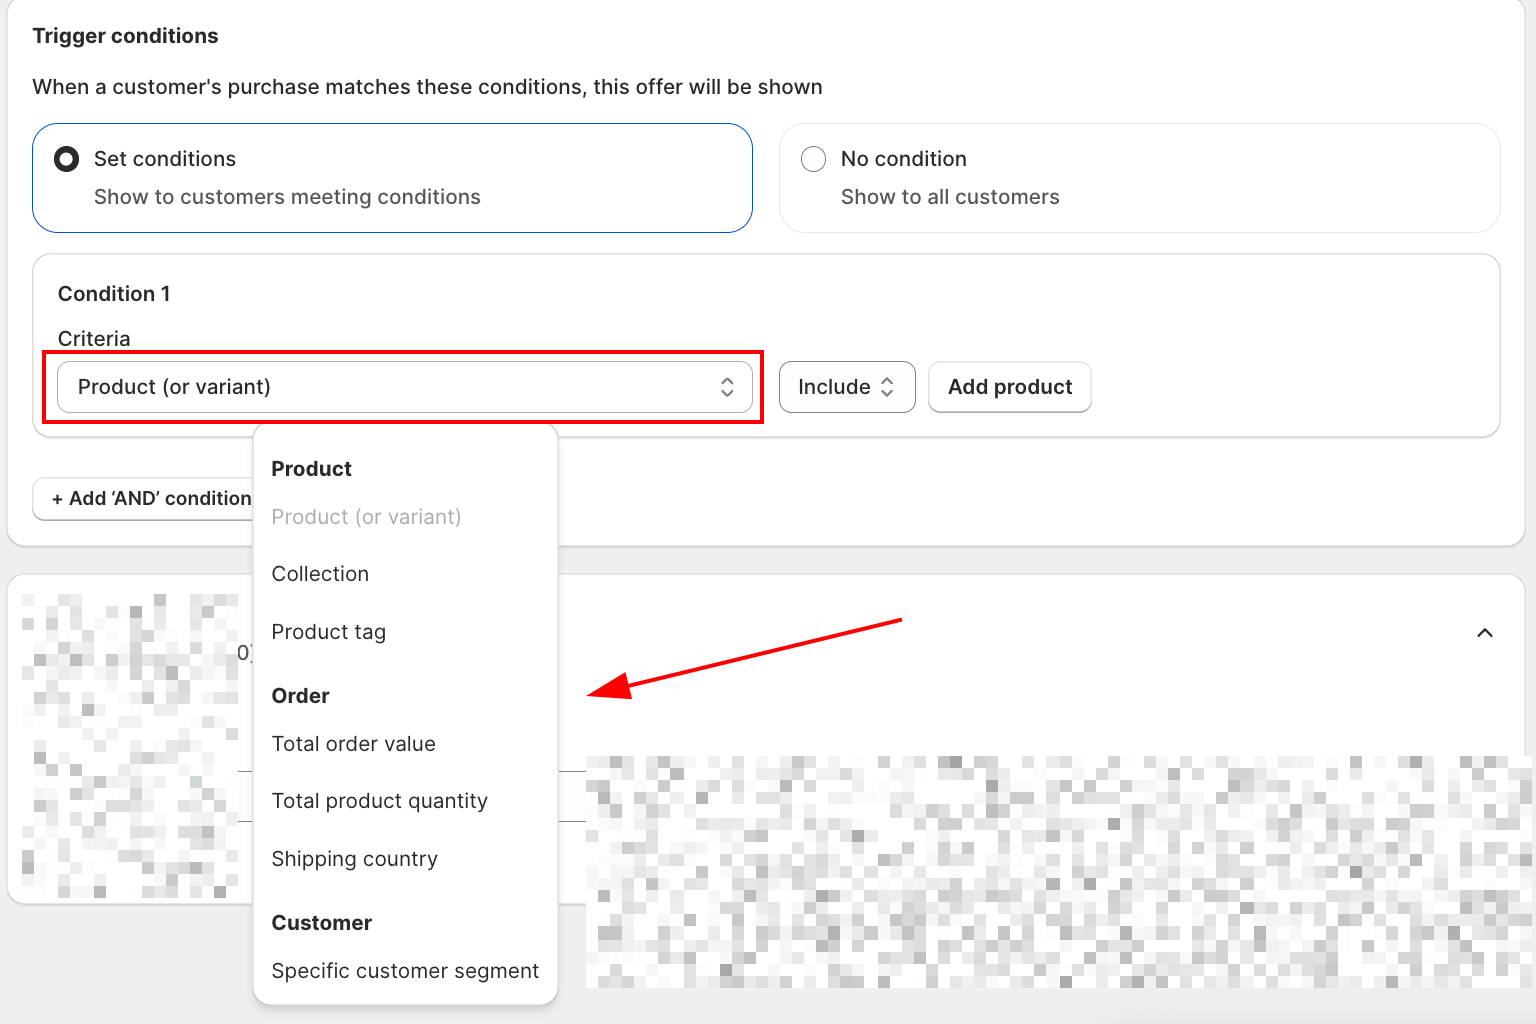
Step 3: Add Trigger conditions

Under Trigger conditions, choose one the trigger conditions so that your post-purchase offers can be shown:
- Set conditions: Target specific purchases.
- No condition: Show the offer to all customers.
If you select Set conditions, you can build rules using criteria:
| Category | Condition | Description |
|---|---|---|
| Product | Product (or variant) | Show only if the order includes or excludes specific SKUs. |
| Collection | Target entire collections (e.g., "Winter Skincare"). | |
| Included product tag | Show only if products have ALL specified tags (AND logic). | |
| Excluded product tag | Hide the offer if any product in the order has one of the specified tags. | |
| Order | Total order value | Show only if cart subtotal reaches a threshold (e.g., orders above $50). |
| Total product quantity | Trigger based on the total number of items in the order. Supports ≥, ≤, and = operators. | |
| Shipping country | Restrict offers to customers shipping to specific countries. | |
| Customer | Specific customer segment | Target Shopify segments (e.g., returning buyers). |
For each condition:
- Select the Criteria from the dropdown.
- Choose an operator (Include / Exclude, or ≥ / ≤ / = for numeric fields).
- Add the value to match.
- Use + Add 'AND' condition to combine multiple rules.
Decision help
- Start with No condition if you need to validate the layout and copy.
- Use Set conditions when the add-on should match items in the order (accessories, refills, size-ups).
Step 4: Advanced settings
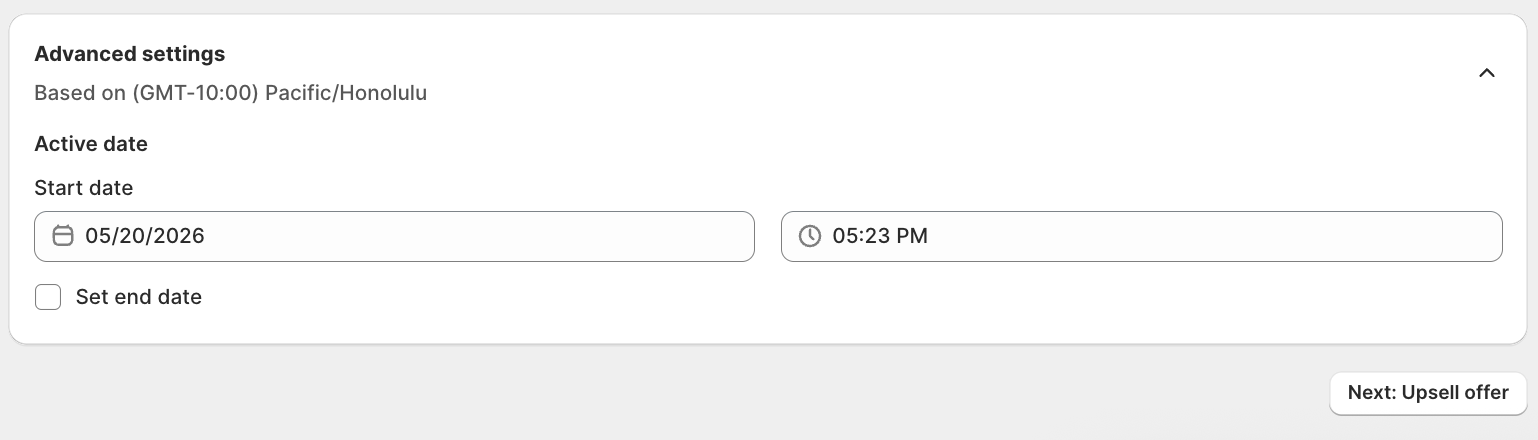
- Open Advanced settings.
- In Active date, pick a Start date and time. Use the timezone shown in the panel.
- (Optional) Select Set end date, then pick the end date and time.
- Select Save.
Upsell offer
Step 1: Adjust offer settings
After finishing Trigger condition, click Next: Upsell offer.
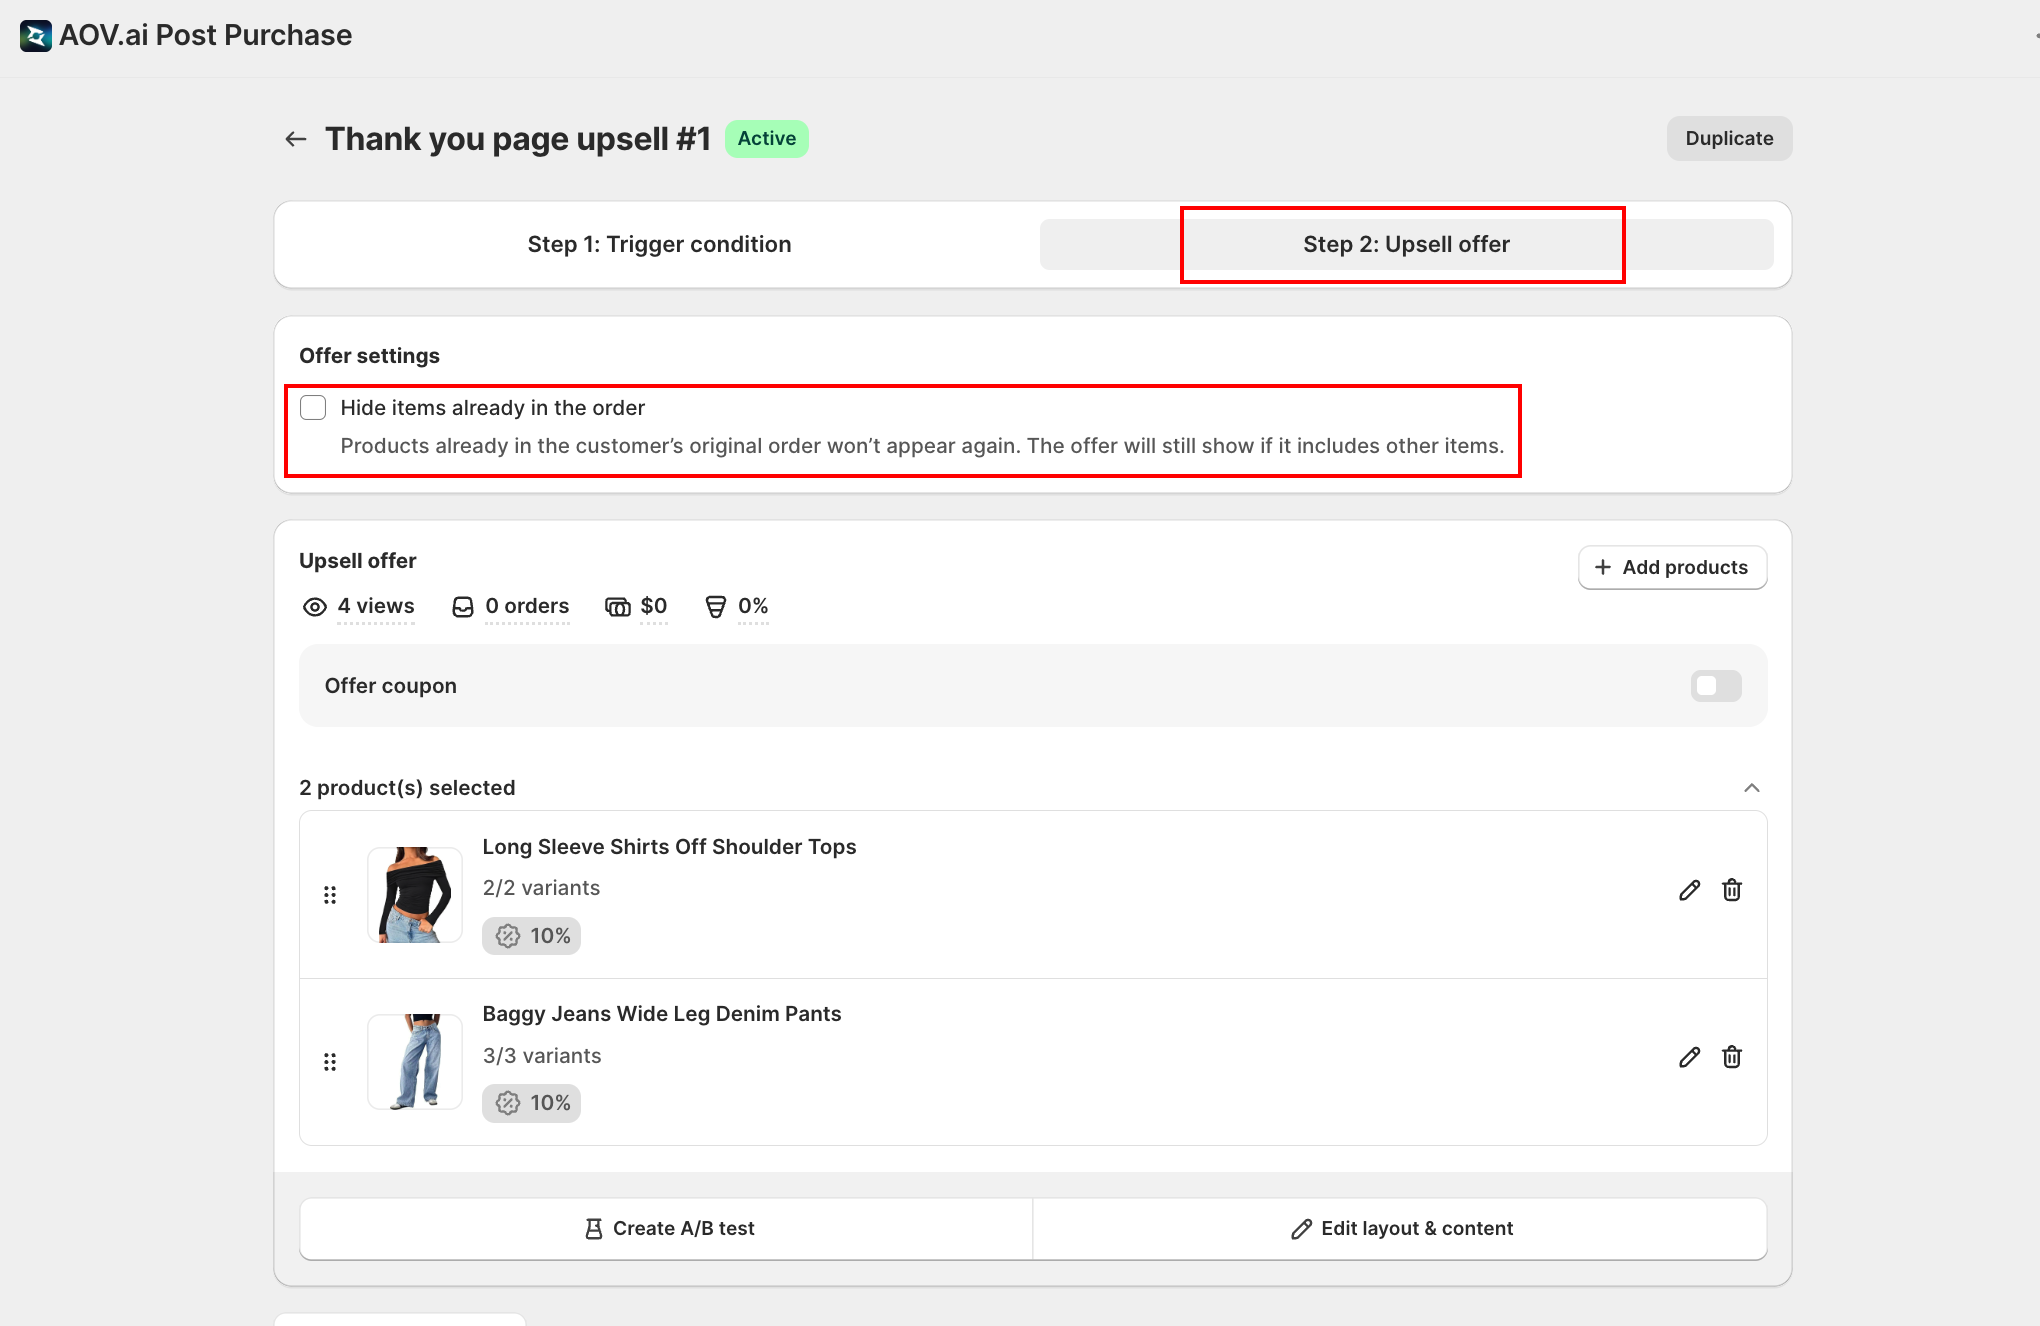
- Hide items already in the order: Check this box if you don't want to upsell items that the customer already purchased.
- If left unchecked, upsells can include duplicate items.
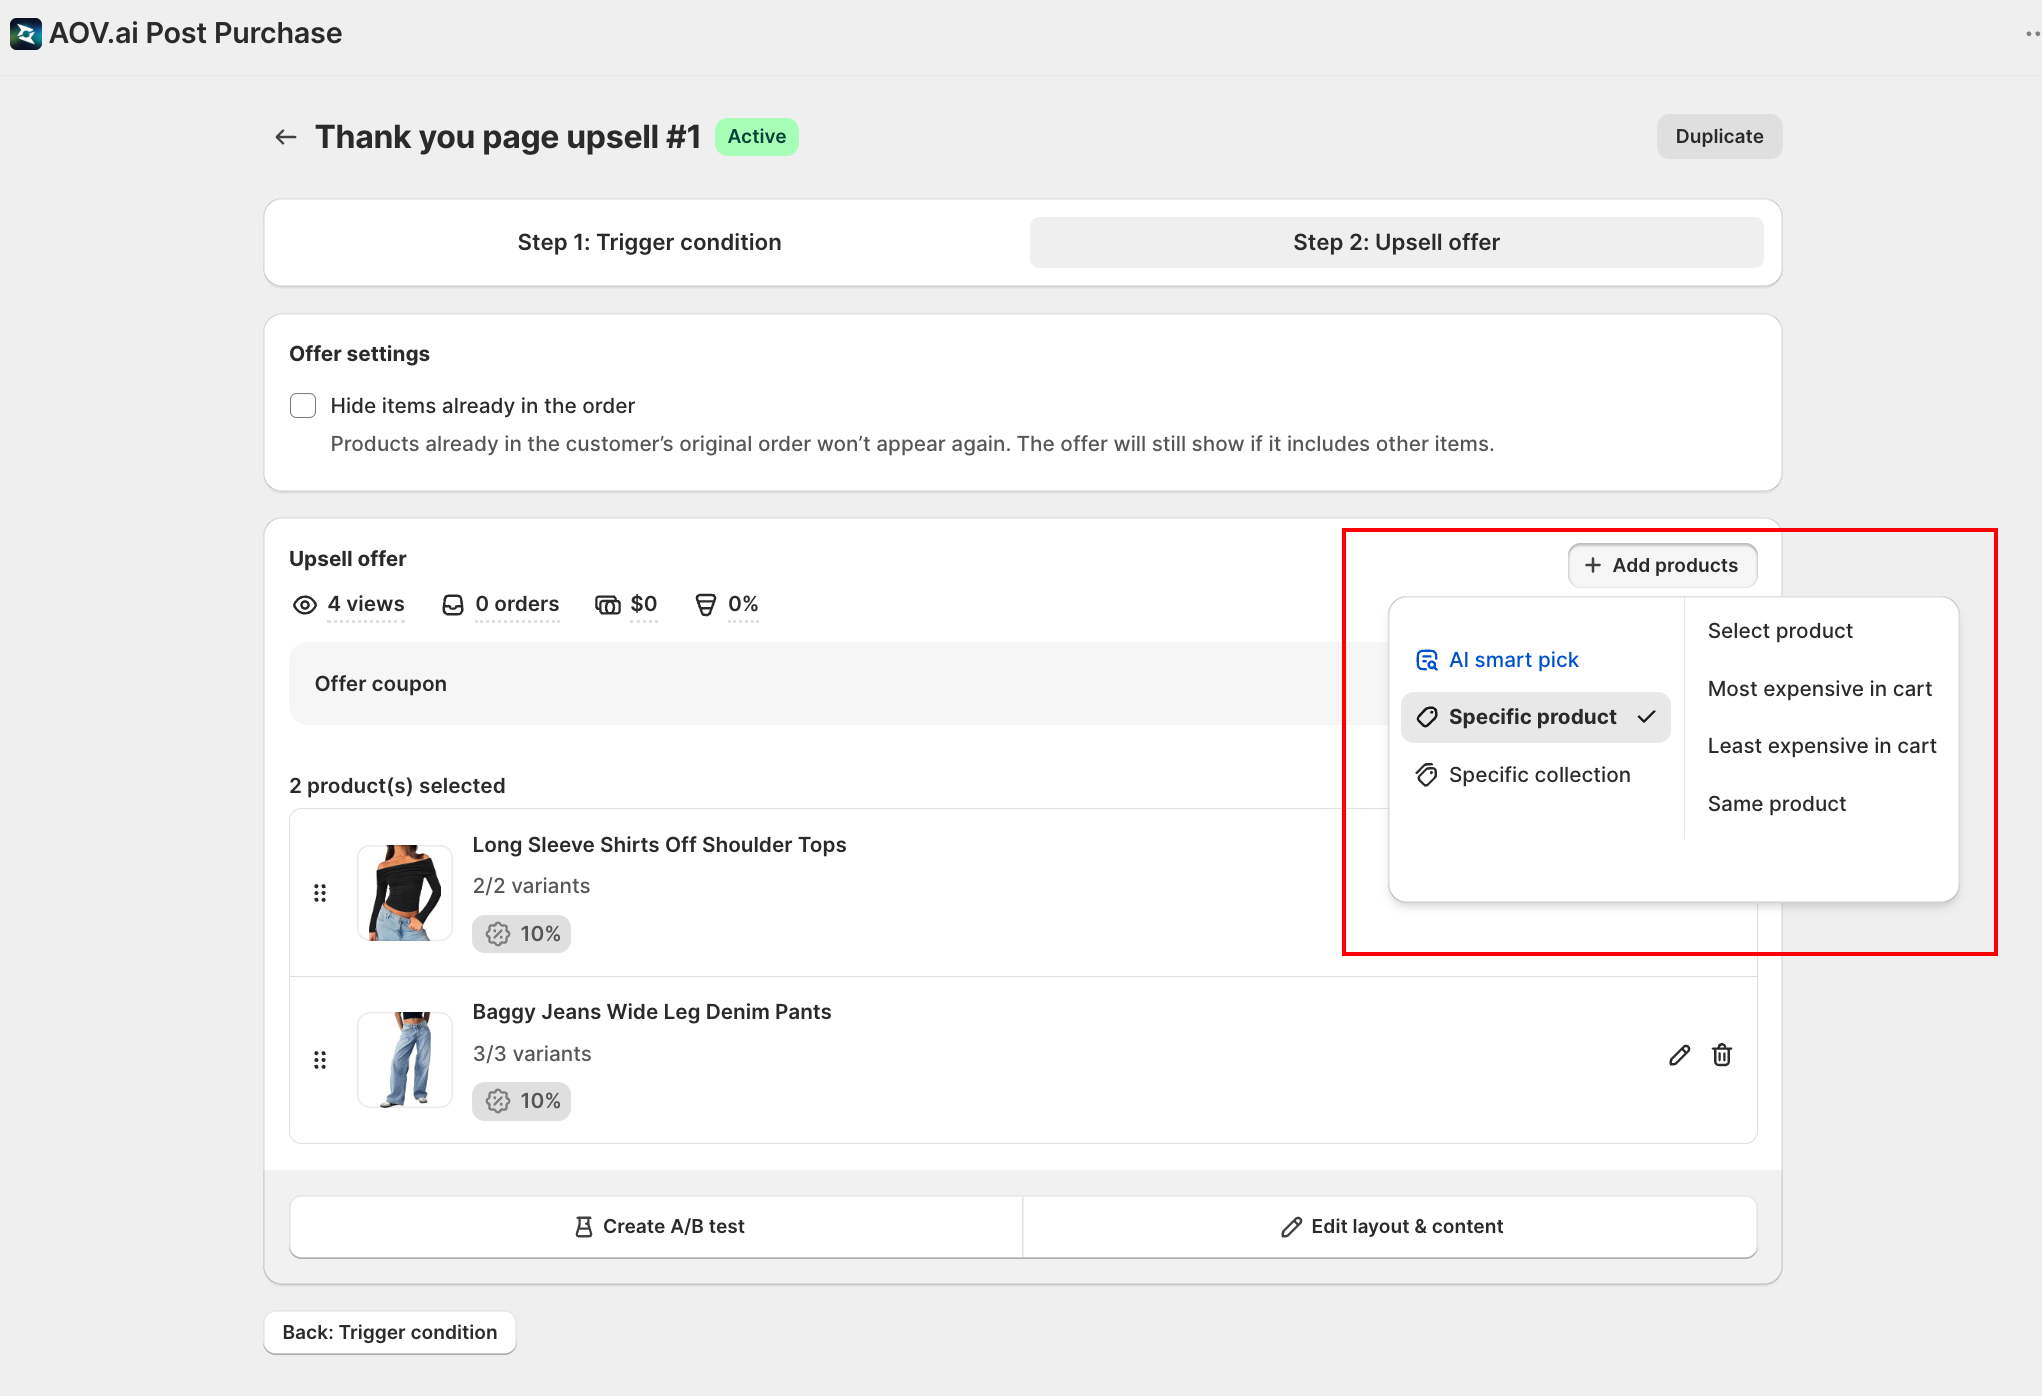
Step 2: Set up Upsell offer
Option A: Product Upsell
- Click Add products and choose a source:
| Source | Option | Description |
|---|---|---|
| AI smart pick | - | Automatically suggests products based on order history and trending choices. Added products are labelled AI recommendation on the tile. |
| Specific product | Select product | Search and choose specific products or variants. |
| Most expensive in cart | Offers a discount on the highest-priced item in the order. No manual selection needed. | |
| Least expensive in cart | Offers a discount on the lowest-priced item. Useful for "add cheapest item free" promotions. | |
| Specific collection | - | Promote a predefined collection. |
- Click the pencil icon beside a product to configure its discount:
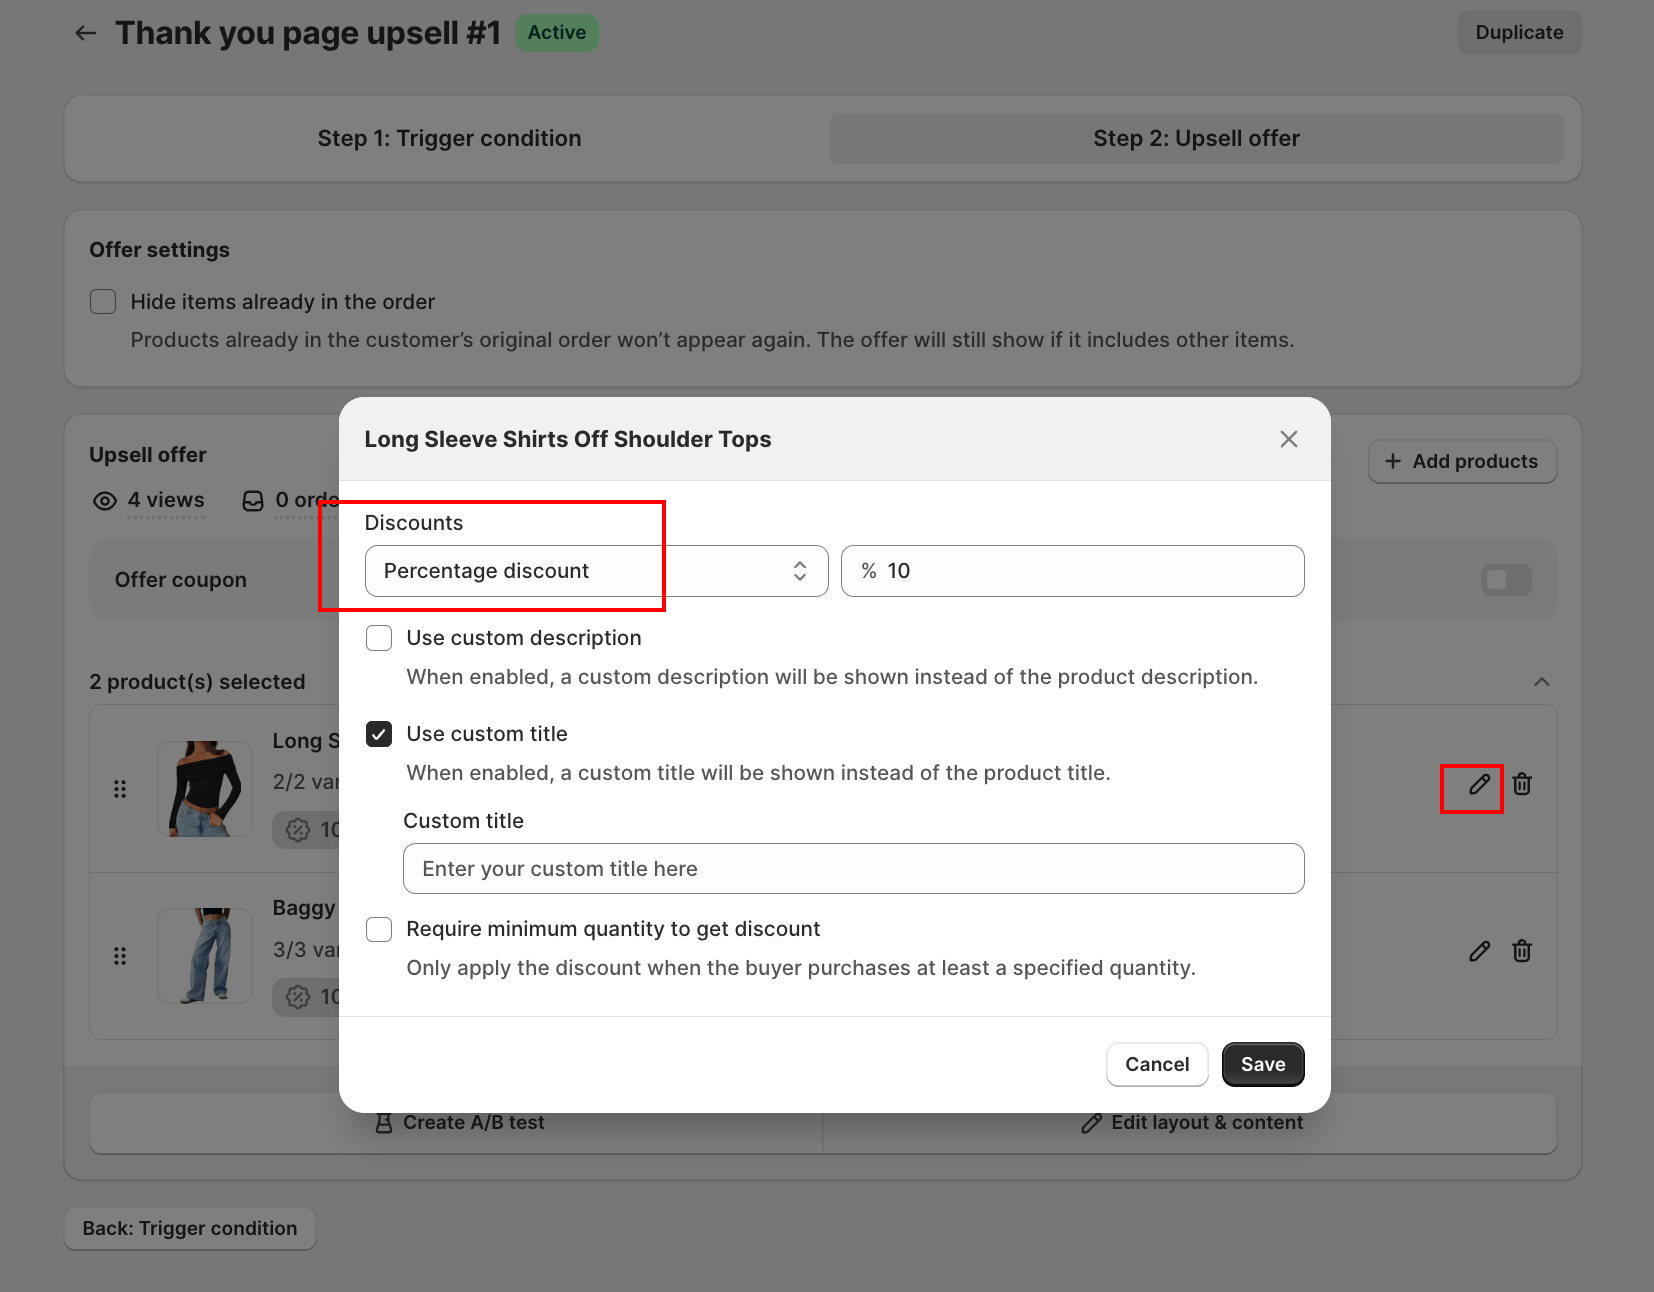
| Setting | Description |
|---|---|
| Discount type |
|
| Use custom description | Show a custom description instead of the default product description. |
| Use custom title | Show a custom title instead of the default product title. |
| Require minimum quantity to get discount | Only apply the discount when the buyer purchases at least a specified quantity. |
Click Save when done.
- Use the Summary panel on the right to review included items, then click Preview offer to see how it appears to customers.
Option B: Coupon Upsell (now a separate offer type)
Coupons are now their own offer type. To give a discount code instead of a product, create a Coupon offer rather than using the old in-offer toggle. See Coupon offer: How to set up.
If you have an older offer with Offer coupon already turned on, it keeps working. The toggle is now deprecated: turning it off here is one-way (once off, it is gone), and to use a coupon again you create a new Coupon offer.
Personalizing header text with variables
The offer header and coupon title text support dynamic variables that are replaced with real order data at the time the offer is shown:
| Variable | Replaced with |
|---|---|
{{first_name}} | Customer's first name |
{{last_name}} | Customer's last name |
{{discount_value}} | Discount percentage or amount (e.g., "20%") |
To insert a variable, click the { } button next to the text field and select the variable from the list. The header field offers First name and Last name; the coupon title field also offers Discount value.
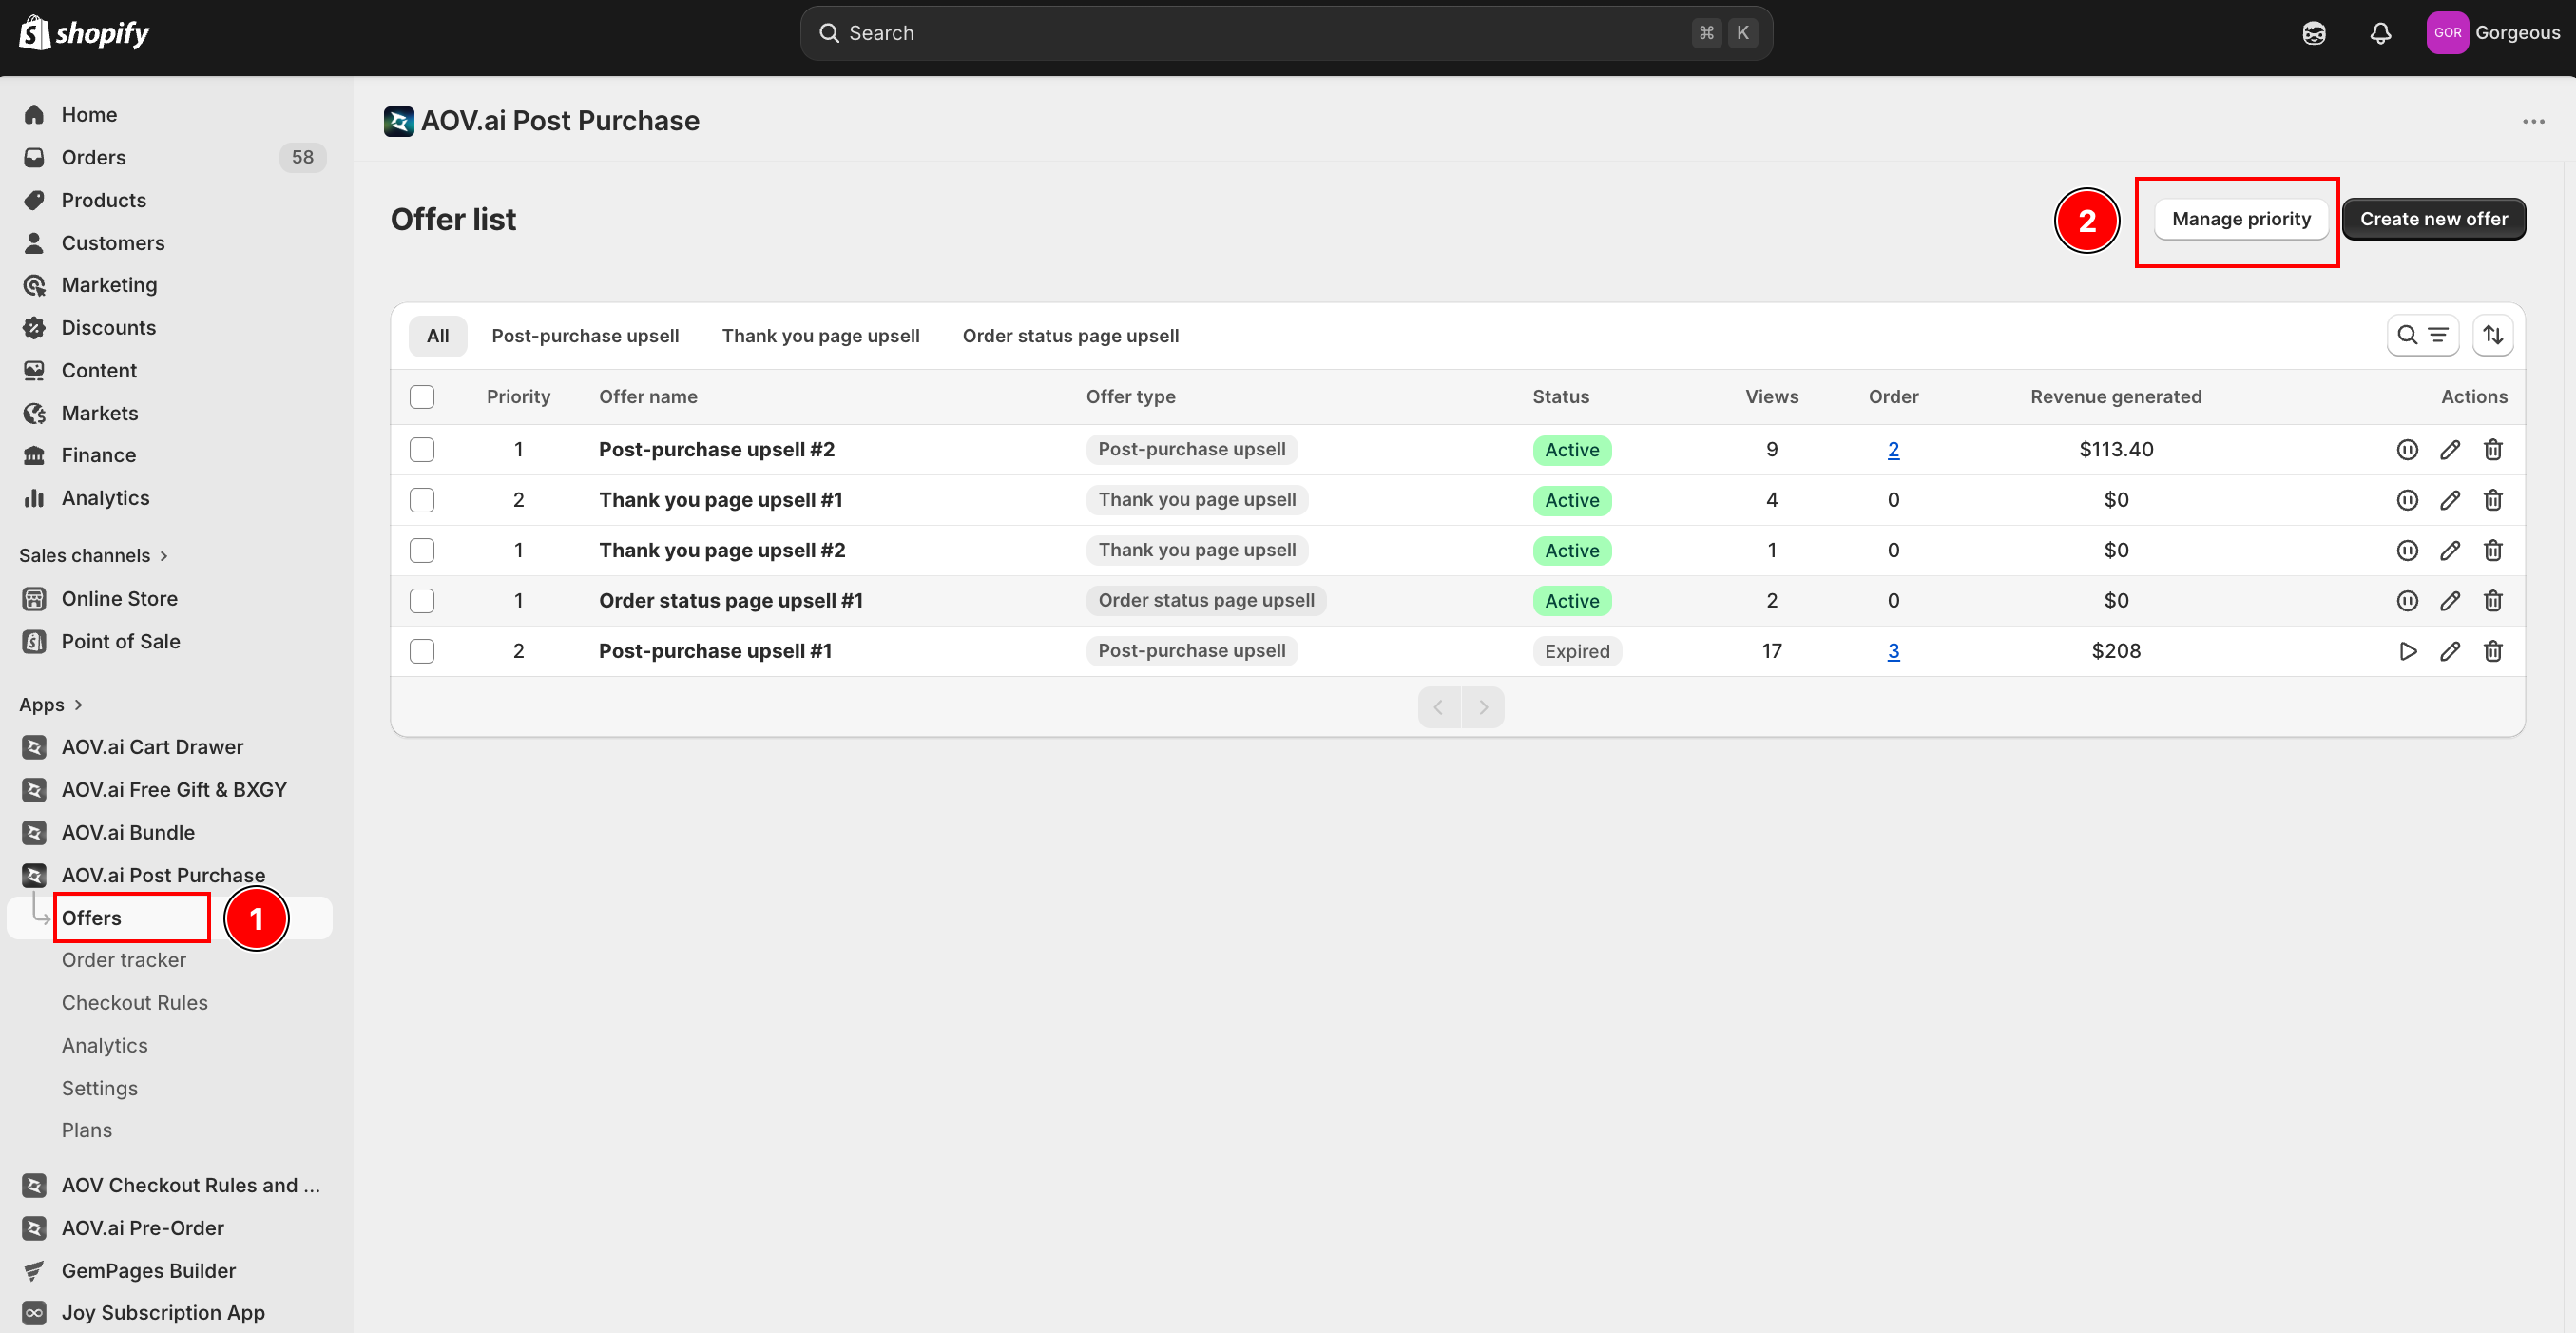
What happens when multiple offers qualify?
If more than one Thank you page upsell offer matches the same order, the app shows only one: the offer with the highest priority (priority 1 wins). Newly created offers are automatically placed at priority 1; you can reorder at any time from the Offer list page via Manage priority.