Onboarding
New installs (and reinstalls) go through a guided 2-step setup before they reach the regular Dashboard: build a first offer, then pick a plan. Shops that are already using the app never see this flow, it only runs once, the first time.
Welcome screen
The first screen is built from your own store's products, not sample images. It shows two of your real products (the one a buyer just checked out with, and the one they'd be offered next), with real photos and prices, and the actual Total and order-value increase your offer would add.
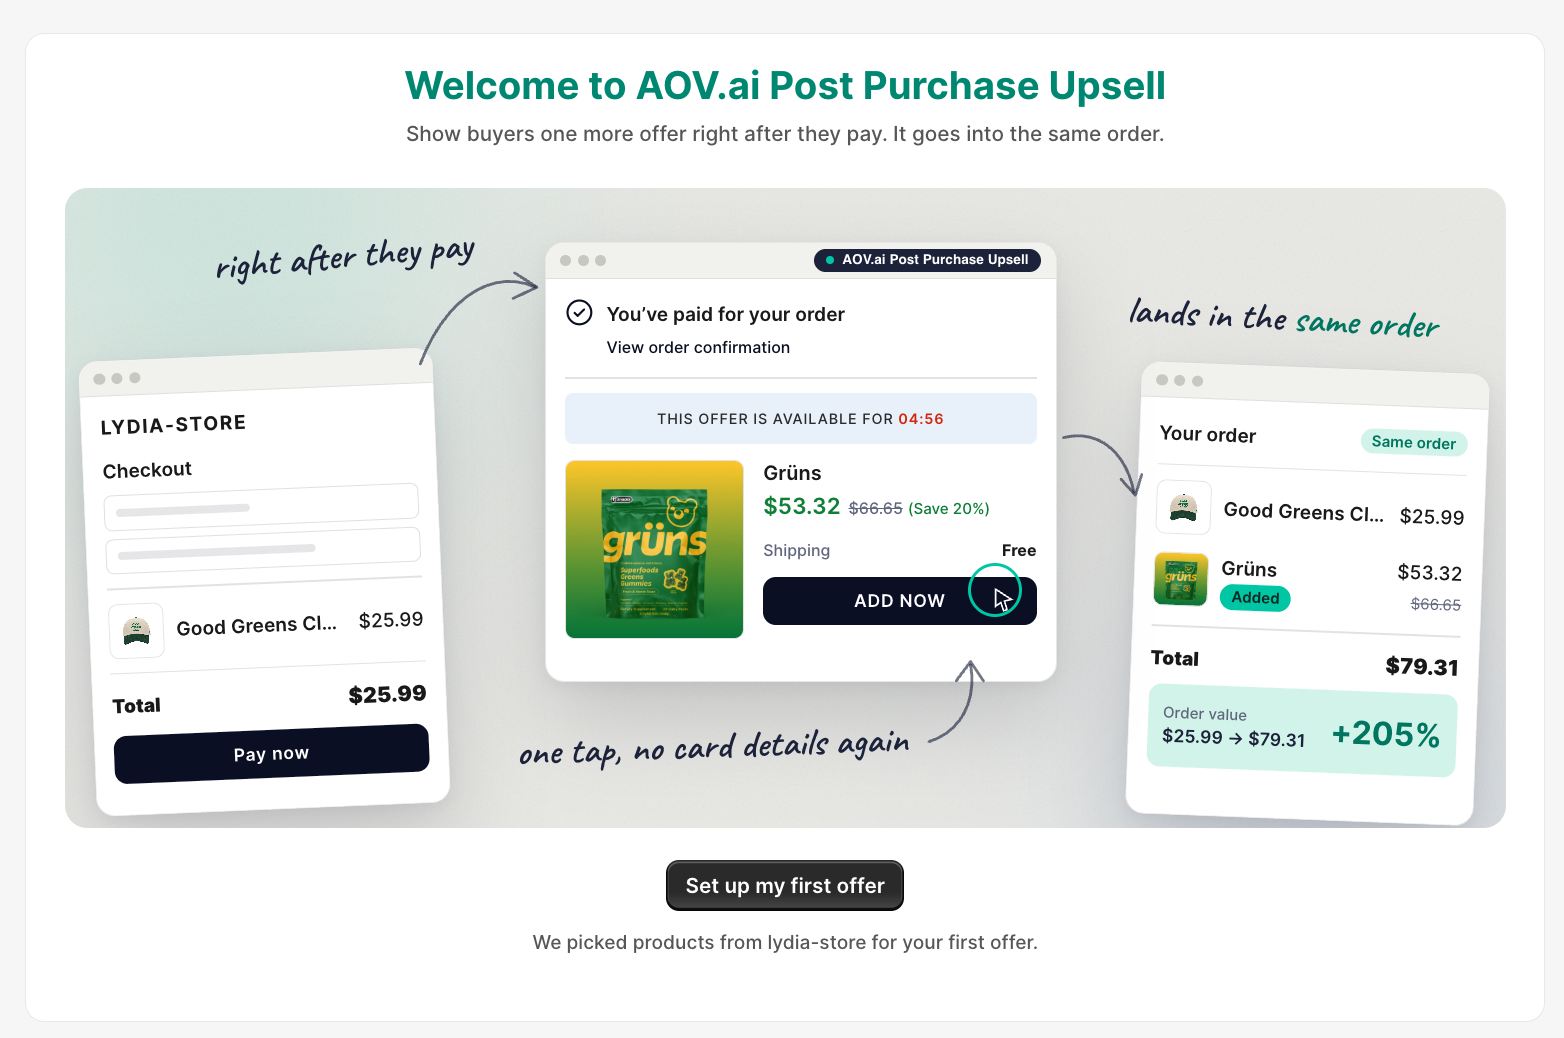
Click Set up my first offer to continue.
Step 1: Build your first offer
The form comes pre-filled with up to 3 real best-sellers from your store as the upsell suggestion, you can change everything before saving:
- Trigger condition: defaults to No condition (shows to everyone). Switch to Specific product or Total order value to narrow it down. Choosing Specific product reveals its own Change products button for the trigger's product list.
- Upsell offer: the pre-filled products, with a Change products button that opens the picker for this block only, separate from the trigger's picker.
- Discounts: defaults to Percentage discount at 20% with Free shipping on. Switch to Fixed amount discount or None, and turn off free shipping if you don't want it.
- Preview: the panel on the right is the actual post-purchase widget rendered from your current form values, not a mockup.
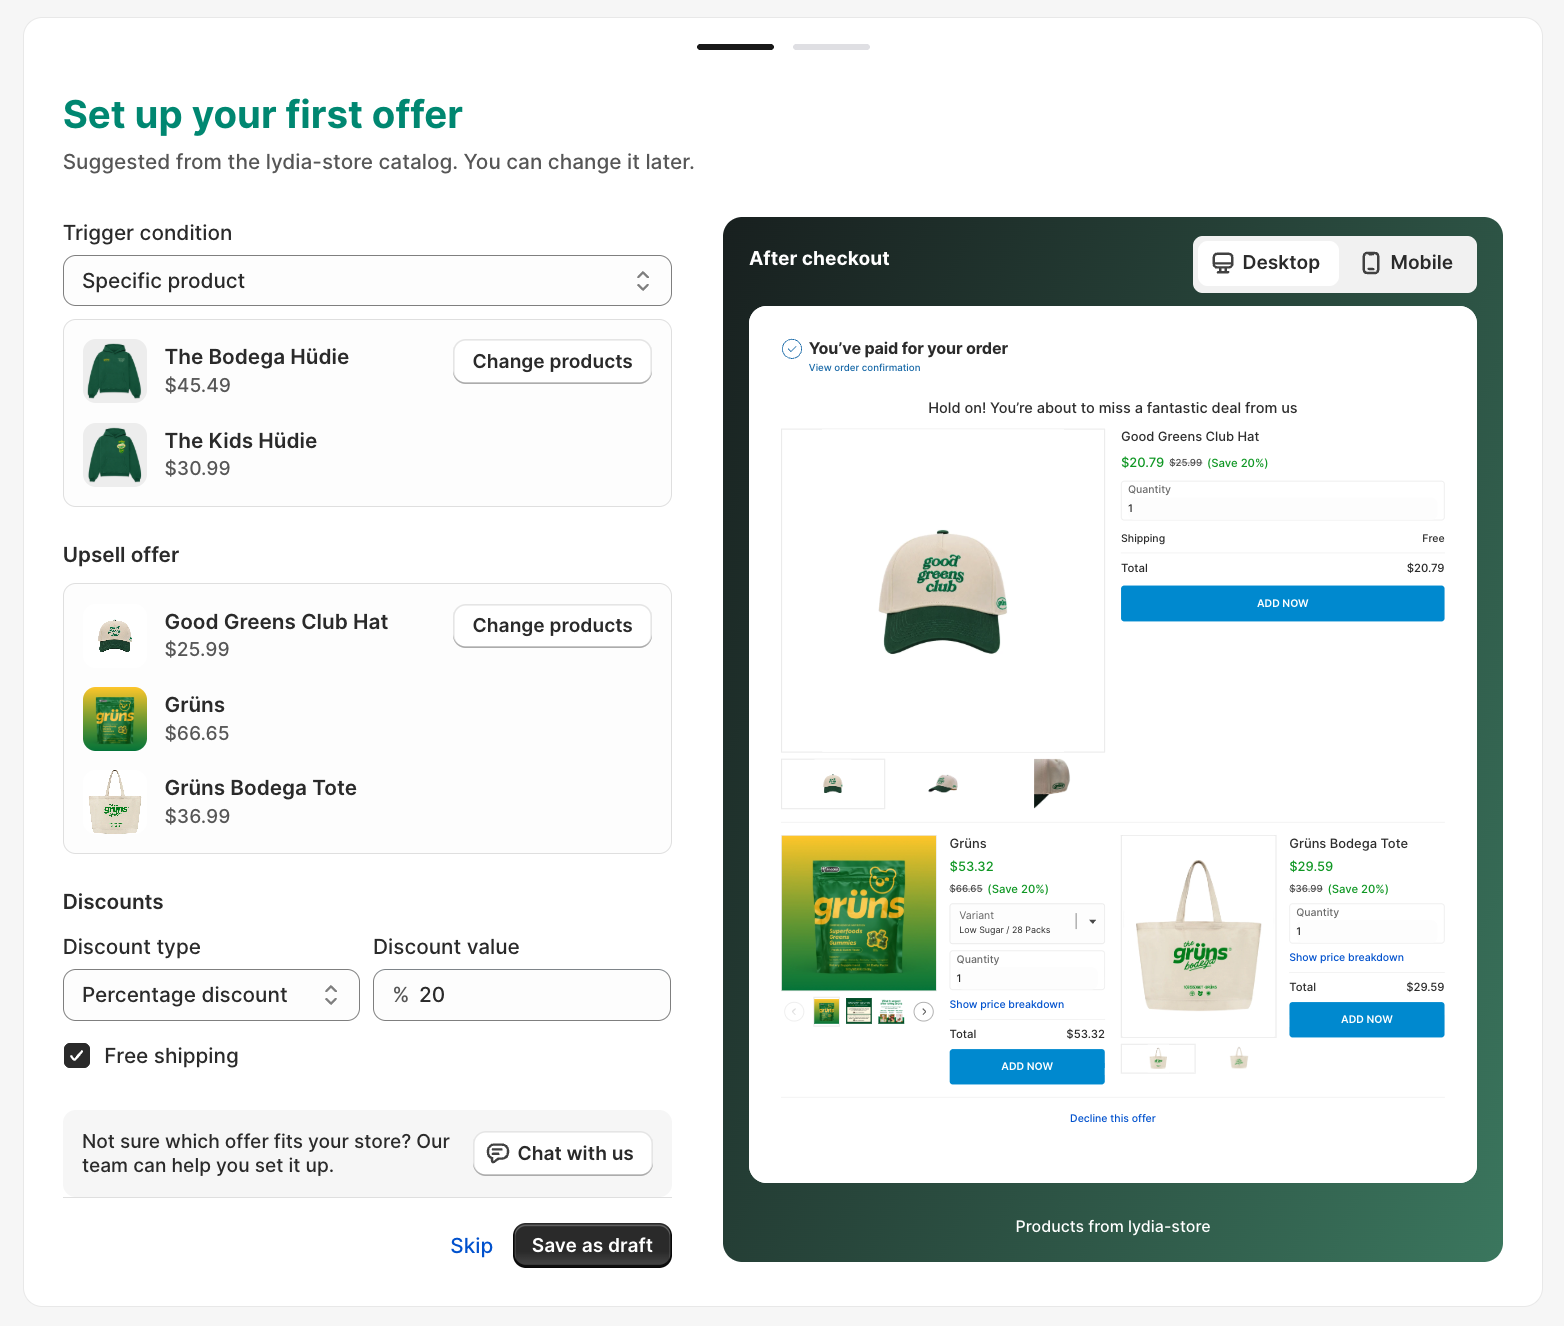
At the bottom, Skip opens a confirmation ("Skip offer setup? You can create an offer later from the Offers page.") before moving on to the plan screen without creating anything. Save as draft requires at least one upsell product and saves the offer, then continues to the plan screen.
"Save as draft" doesn't mean the offer is live, and it doesn't literally save it with a Draft status either. Saving here creates the offer with an Expired status, the same status you'd see if you look it up afterward in Offers (it does not show as "Draft" there). Either way, buyers don't see it at checkout yet. To make it run, open the offer in Offers and switch it to Active. If a merchant says "I created the offer but checkout doesn't show it," this is almost always the reason, check the offer's status in Offers first.
Step 2: Choose a plan
The Monthly, Yearly, and Free cards price themselves off your store's current Shopify plan, the same way the Plans page does. If you're already on one of the paid intervals, that card shows Current plan and its button is disabled.
If you skipped step 1, this screen's heading changes to "Pick a plan to get started" and the progress bar is hidden.
Picking any plan, including Free, turns the guided setup off for good: refreshing the page won't bring it back. Where you land next depends on whether an offer exists:
- Built and saved an offer in step 1: you're taken straight into that offer's editor.
- Skipped step 1: you land on the regular Home dashboard.
A paid plan sends you to Shopify's charge-approval screen first; declining it returns you to this same onboarding flow rather than dropping you into the app.
After onboarding: the setup checklist
Once onboarding is done, a small Checklist tile appears fixed in the bottom-left corner of every page, it stays in place while you scroll.
Click the tile to expand it into a card. Two tasks count toward the N/2 steps progress:
| Task | What it does |
|---|---|
| Activate app on Post-purchase page | Opens Shopify Admin → Settings → Checkout, on the Post-purchase page tab, directly |
| Create your first offer | Opens Choose offer type to start a new offer |
The second task ticks green as soon as any offer exists, whatever its status, not only once it's Active. So the checklist can show 2/2 done while the offer is still Expired/Draft/Scheduled and buyers still can't see it. A green checklist is not proof the offer is live, check the offer's actual status in Offers.
Below the two required tasks, an Also recommended section lists three more (add the app block on the Thank you page, add the coupon block, add the app block on the Order status page). These are useful but don't count toward the step total.
Every time you expand the card, it re-checks your app-embed and extension status once, so collapsing and reopening it after activating the app shows the checkmark without a page reload.
At the bottom of the card, Contact us opens a message box pre-filled with a question about whichever task is currently open (for example, activating the app or creating your first offer). Edit it if you like, then Send, it goes straight to your Crisp support chat.
The ✕ in the tile's top-right corner dismisses the widget permanently. There's no setting inside the app to bring it back, only reinstalling the app resets it.
Language
The whole onboarding flow and the checklist widget follow whichever admin language you've selected (English, German, French, or Italian), see the Admin language bullet on the Welcome page.
Related
- Quickstart: the general install-to-first-offer walkthrough.
- Post-purchase upsell setup guide: finish or edit the offer created during onboarding.
- Pricing plan: Free vs. Pro, in full.