Authentication
There are two tabs in Settings, and two access levels on each. Together they decide how you authenticate and what the connection can do; neither tab's method is weaker than the other's.
| Server URL | https://avada-bundle-upsell.firebaseapp.com/mcp |
| Credential (Developer Tools only) | A token beginning aovmcp_ |
| Sent as | Authorization: Bearer aovmcp_… |
| Access levels | Read-only, or Read and write |
| Rate limit, reads | 60 requests per minute, per connection |
| Rate limit, writes | 60 writes per hour, per connection (Read and write only) |
Copy the Server URL from the app rather than typing the one above. It is shown on both tabs in Settings, and it is the one correct for your store.
Choosing an access level
Both tabs ask you to choose, before you connect:
- Read-only: the assistant can see your offers, design and results. Any staff member who can view products can approve this
- Read and write: the assistant can do what you do in the offer editor and on Widget display, create, edit, turn on, pause, duplicate and delete offers, and change widget colors, fonts and text. Only the store owner can approve this. Offers it creates start switched off, and a deleted offer can't be restored from the app
The level can't be changed after you connect. There is no upgrade or downgrade action, revoke the connection and create a new one at the level you want.
Option A: AI assistants tab (sign in, no token to copy)
For Claude, ChatGPT, Gemini and Grok. The assistant fetches its own credential, so there is nothing for you to copy, store, or leak.
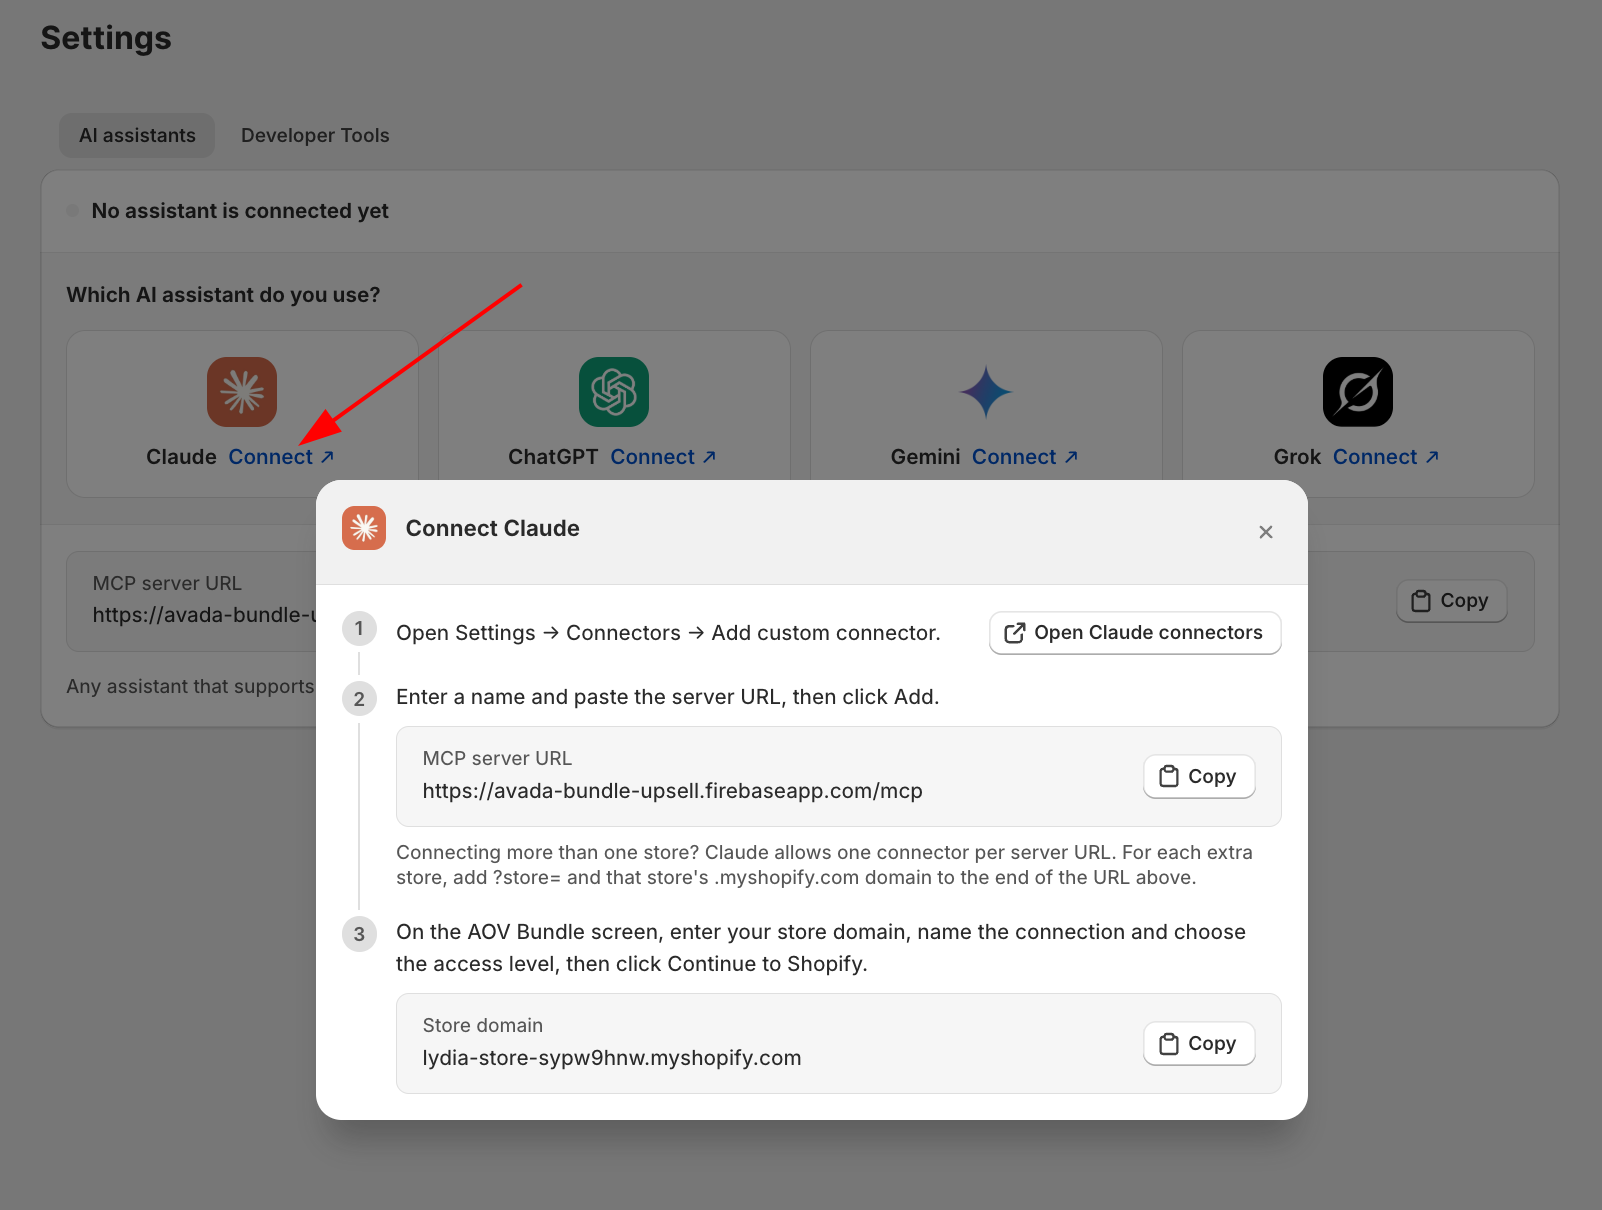
- In AOV.ai Bundle Upsell, go to Settings → AI assistants.
- Click Add assistant, then pick the assistant you use.
- Follow the steps shown for it: open the assistant, paste the MCP server URL into its connector settings, and start connecting. Exact steps differ a little by assistant, for example Claude asks you to add a custom connector under Settings → Connectors, while ChatGPT asks you to turn on Developer mode first.
- A consent screen appears, naming the assistant and the address it will return to.
- Enter the store's
.myshopify.comdomain, not your custom domain, name the connection, and choose Read-only or Read and write. - Click Continue to Shopify, sign in, and approve.
Read the consent screen before you approve it. The assistant's name is free text, anyone can register a connector called "Claude". The line that says where the connection will be sent back to is the part an impostor cannot fake. If you do not recognise that address, stop. And if you did not start this yourself, from your own assistant's settings, close the page.
Connecting the same assistant again either replaces its previous connection or adds a second one, side by side, you are asked which when the store already has one that matches. Reconnecting after a problem is safe either way.
The connection then appears in Settings → AI assistants, named after the assistant, with its access level shown as a badge.
Option B: Developer Tools tab (create a token)
For Claude Code, Cursor, Codex, and anything you script yourself.
- In AOV.ai Bundle Upsell, go to Settings → Developer Tools.
- Click Create token.
- Name it after the tool you are connecting, for example Claude Desktop. The name only exists to tell connections apart.
- Choose Read-only or Read and write.
- Click Create.
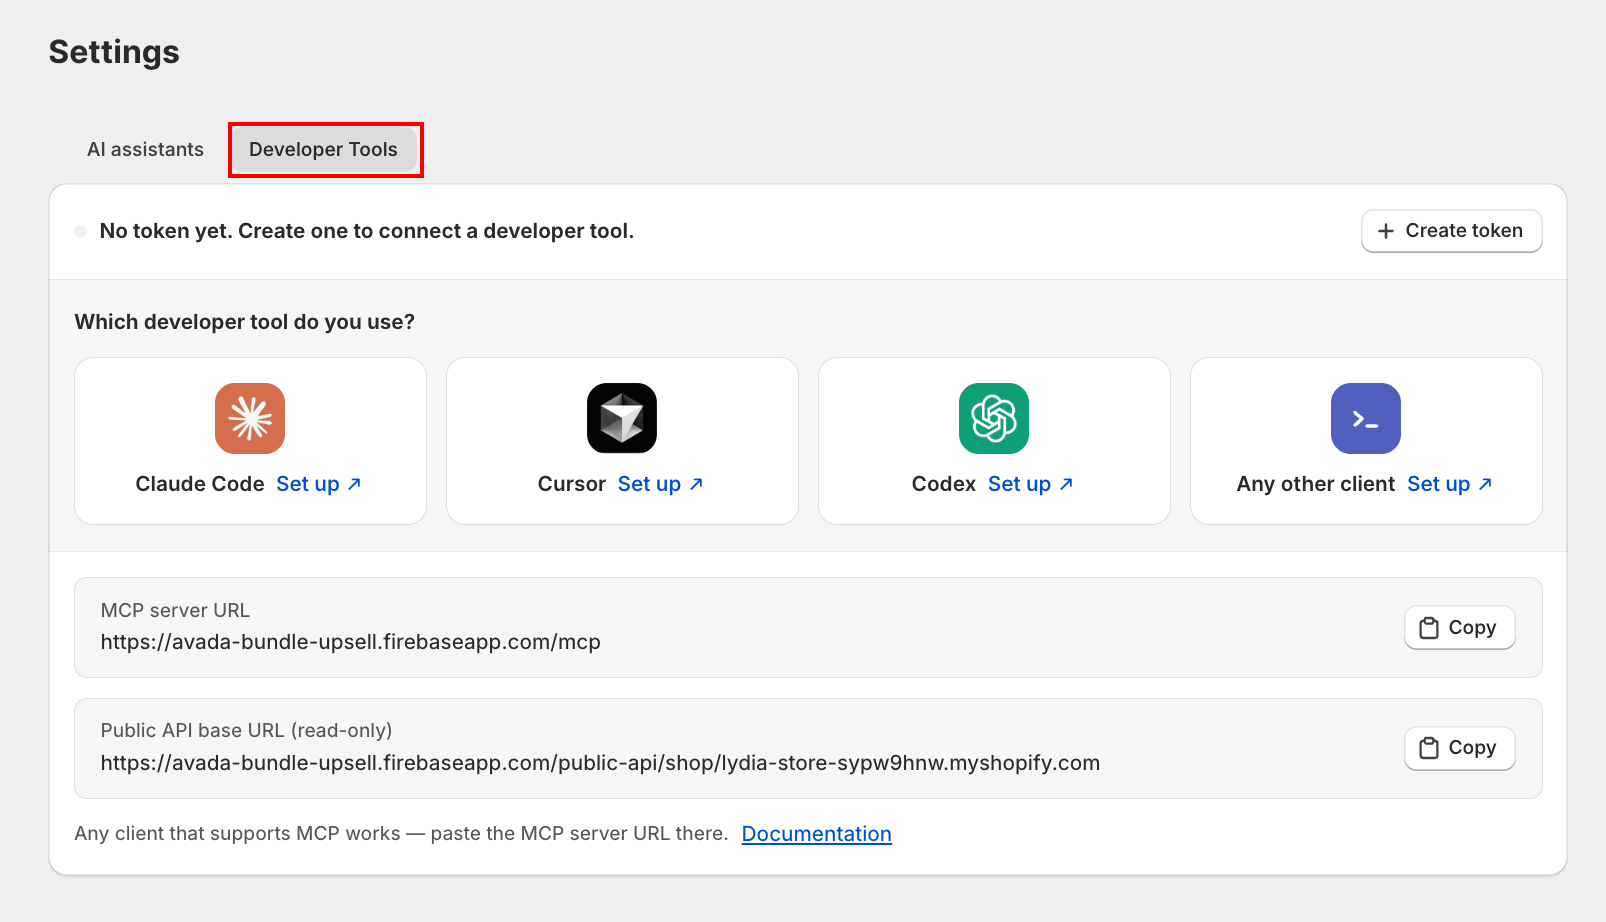
The token appears once, with ready-to-paste snippets for Claude Code, Cursor, Codex, any other client, and the Public API. Copy the one for your tool, then follow Install a client.
The token is displayed only at this moment. The server stores a fingerprint of it, not the token, so it cannot be shown again, not by you, and not by support. Put it in a password manager before you close the screen.
Already set up once and just need the snippet again? Use See setup instructions at the bottom of the connections list. That view shows a placeholder where the token goes, since the real one cannot be shown a second time.
Five is the limit
A store can hold 5 tokens created this way at once. The tab shows how many you have used, and Create token is disabled once you are at the limit, revoke one to free a slot.
Connections made by signing in on the AI assistants tab do not count against those five. If the tab says you are full but you only remember creating two, the rest were created by hand at some point, the connections list shows them all.
Where the token goes
Your client sends it as a bearer token on every call:
Authorization: Bearer aovmcp_your_token_hereThe word Bearer, a single space, then the token. The generated snippets already include it.
Nothing is ever sent in a URL, the token belongs in the Authorization header only.
The connections list
Each connection shows its access level, Name, when it was Created, and when it was Last used, or Never used, which is the fastest way to spot a client that has not actually connected yet.
The disconnect action is called Revoke on the Developer Tools tab and Disconnect on the AI assistants tab; both do the same thing. It stops the connection working from the very next call. There is no confirmation step and it cannot be undone, so read the row before you click. Use it when a token may have leaked, when you stop using a tool, or when a laptop leaves your control.
Disconnecting inside the assistant's own settings does not revoke it here. The assistant only forgets the connector on its side; the token or sign-in keeps working on the store until you click Revoke or Disconnect in Settings.
Uninstalling the app revokes every connection on the store. Reinstalling does not bring them back, connect again. Tokens themselves never expire on their own.
The same token also calls the Public API
The token is accepted at two places, and it grants exactly the same thing at both:
| Surface | For |
|---|---|
/mcp | AI clients |
/public-api | Your own scripts, over plain REST, GET only. See Store API |
The Public API is always GET only, on every token, whatever access level you chose. Revoking a
connection stops both surfaces at once. Because a read-only token grants no more on the Public API
than it does over MCP, a leaked read-only token is a read of the same data either way, but it is
still a leak. Treat it as one, and treat a leaked write-access token as worse: anyone who has it
can create, change and delete offers until you revoke it.
Keeping the token safe
- Never paste it into a chat, an issue, a commit, or a screenshot.
- Keep it out of shared config files and anything that reaches a repository. Where a client supports it, put it in an environment variable, the Claude Desktop snippet does this.
- Use one named connection per tool. A shared token makes the connections list meaningless and turns revoking into a choice between breaking everything and breaking nothing.
- Revoke rather than reuse. Creating a replacement takes seconds.
- Prefer the AI assistants tab where your tool supports it. There is no secret to leak in that flow at all.
Reading an authentication error
Your assistant reads the refusal back to you in plain language.
| Message says | Means | Action |
|---|---|---|
| Unauthorized | The token was not accepted | See the note below before you act |
| Rate limit exceeded | More than 60 calls in one minute | Wait about a minute |
| Write limit reached | More than 60 writes in the past hour, on a Read and write connection | Wait the number of minutes the message gives |
| This connection is read-only. Create a new connection with write access to change offers or design. | A write tool was called on a Read-only connection | Create a new connection with Read and write access |
| Only the store owner can approve Read and write. Ask the owner, or start again and choose Read-only. | Someone other than the store owner tried to approve a Read and write assistant connection | Ask the owner, or start again and choose Read-only |
Unauthorized is also what you get when the client sends no token at all. It covers a missing
header, an unknown token, a revoked one, and an app that has been uninstalled, all one message, on
purpose, so that the endpoint cannot be used to work out which tokens are real.
Before you create a replacement, check that your client is actually sending the Authorization
header. If it is not, a new token will not be sent either. See
Troubleshooting.