How to Set Up Frequently Bought Together
What Is Frequently Bought Together?
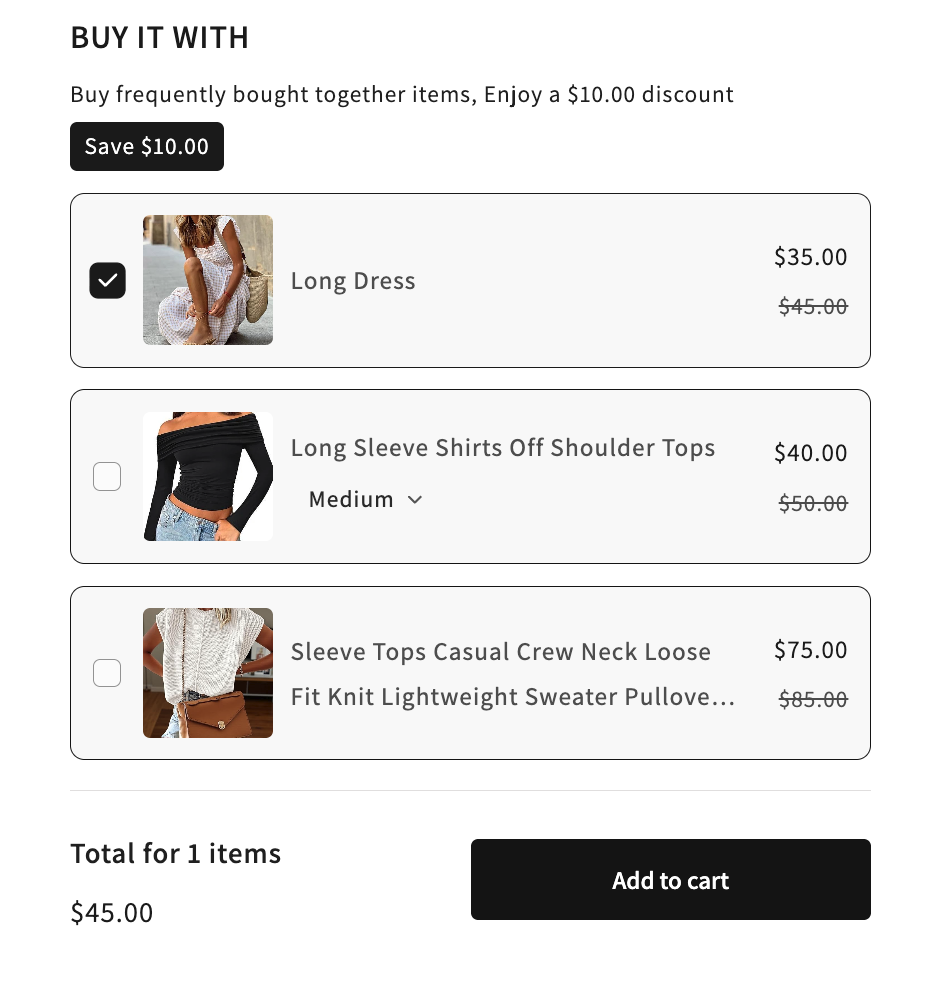
Frequently Bought Together (FBT) shows a small "Buy it with..." widget on the product page, suggesting one or more complementary products and offering a discount when the customer buys them all in a bundle. It's the Amazon-style cross-sell pattern, in your store.
You pick the trigger product (or collection), then choose how the suggested products are sourced: AI recommendation, same collection, or a manual product / collection pick.
When to Use It
- You want to suggest complementary products on a product page (accessories, refills, "goes well with" items)
- You want to lift AOV with a low-friction one-click bundle add-to-cart
- You sell products with natural pairings: a phone case for a phone, a serum for a moisturizer
Before You Start
You'll need:
- The trigger product or collection already in your Shopify catalog
- The suggested products in the catalog too (unless you're using AI Recommendation)
- The AOV.ai Bundle Upsell app installed
- Theme app embed enabled so the FBT widget can render on the product page. See App Embed and Theme Integration
Note: Frequently Bought Together does not have a template gallery. After you pick the FBT card, the configuration form opens directly.
Setup Walkthrough
Step 1: Open the Offer Chooser
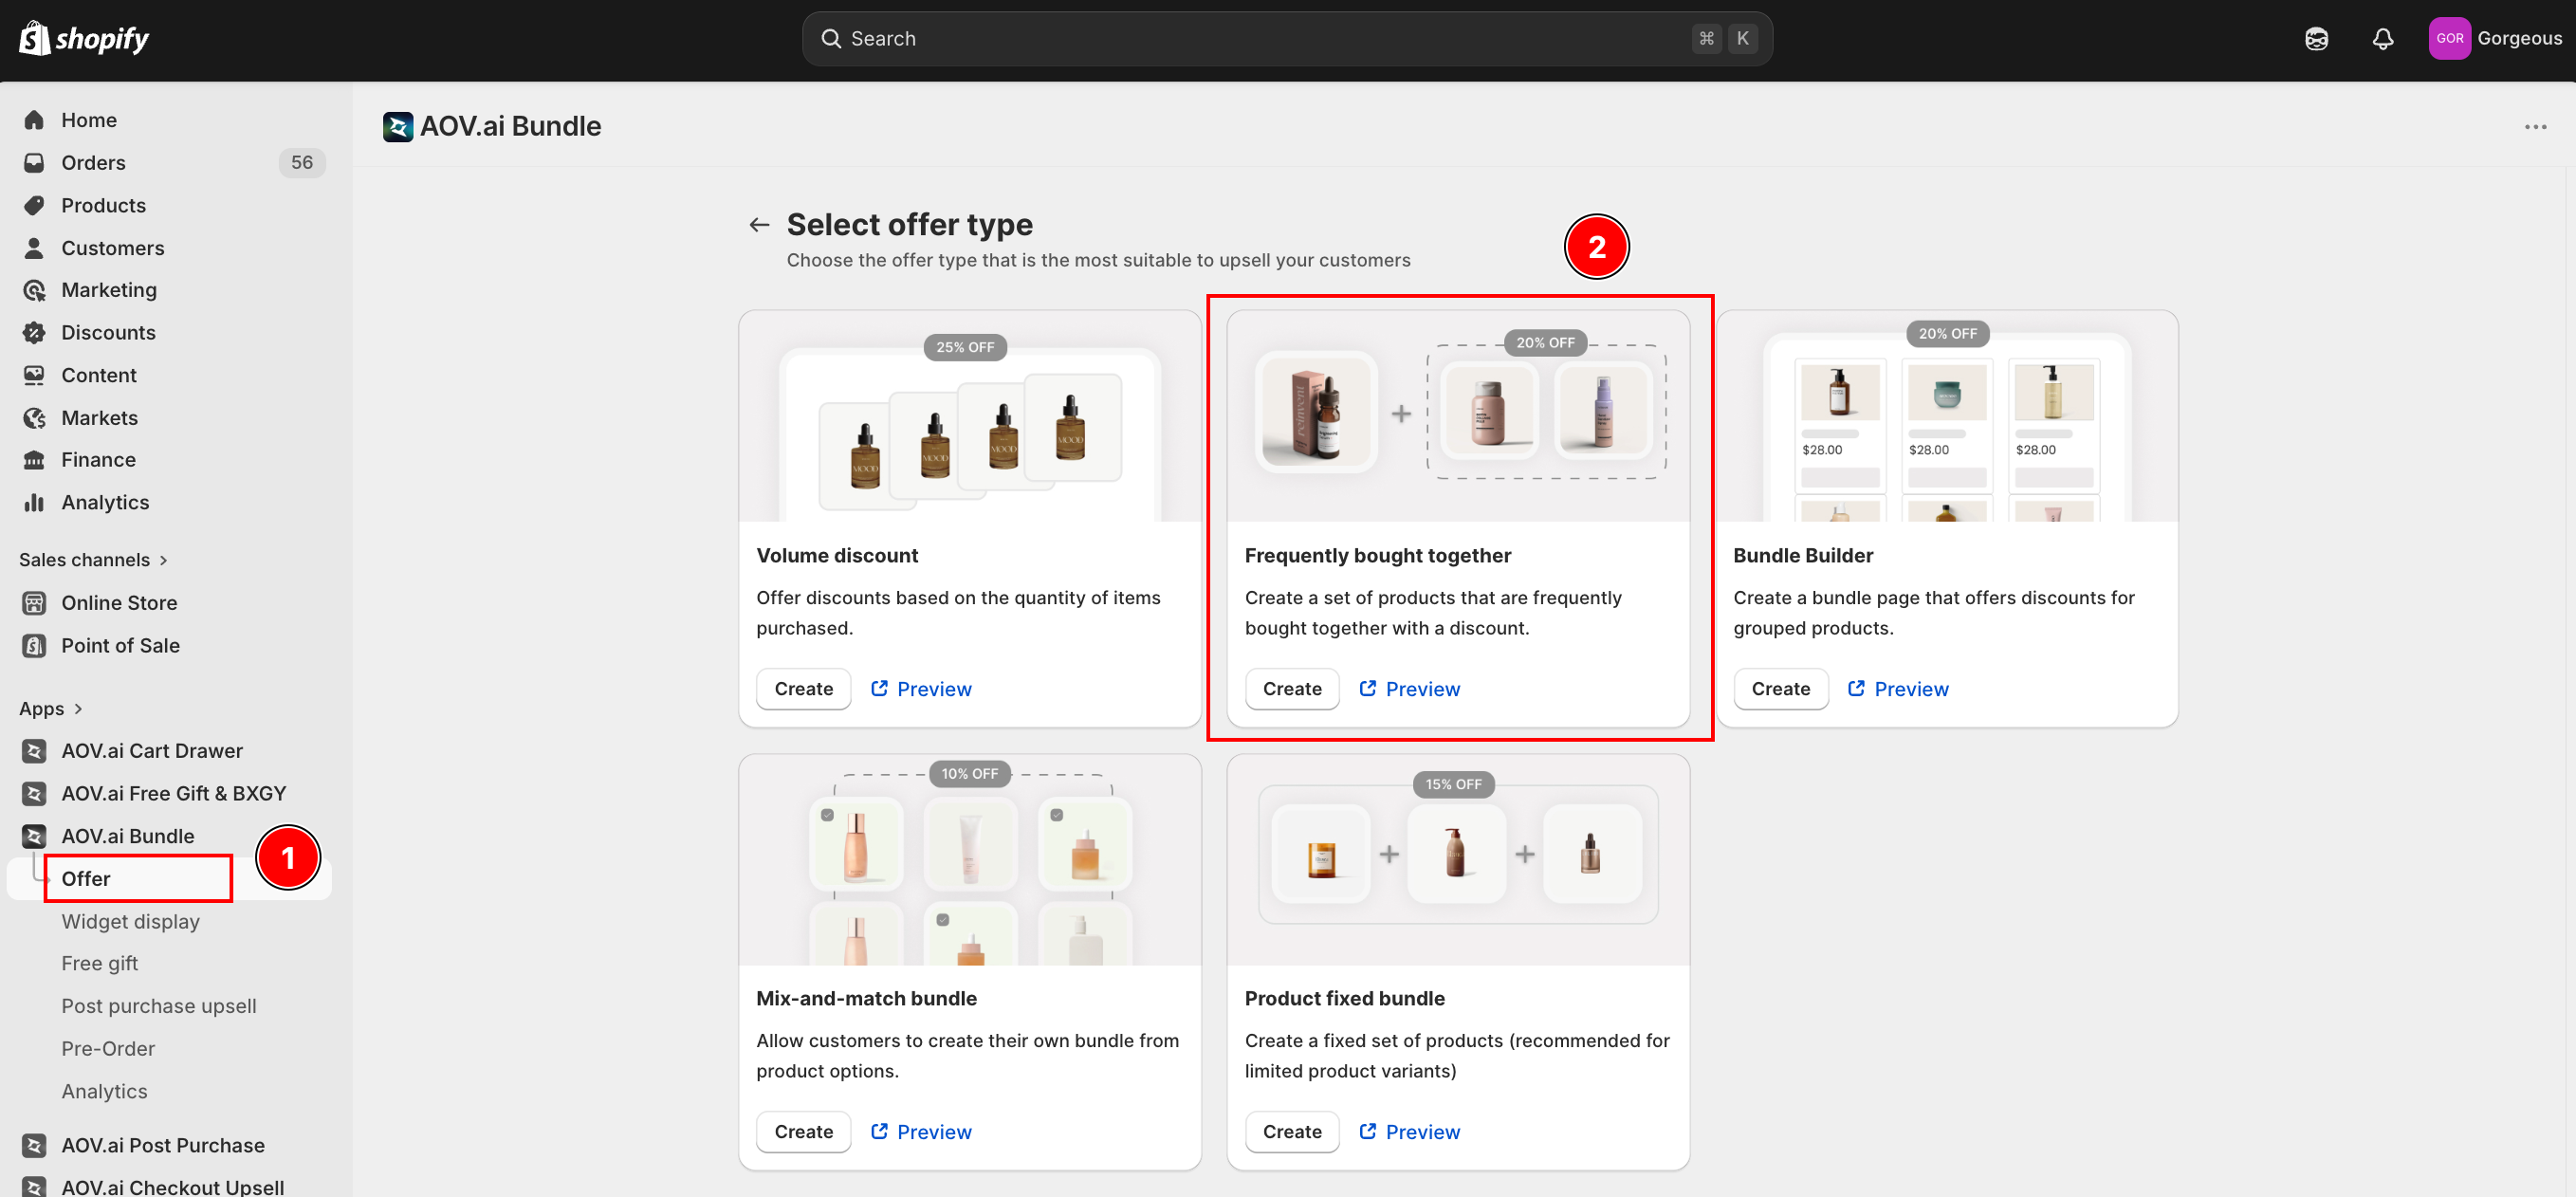
From the Shopify admin, open AOV.ai Bundle Upsell in the left sidebar. Click Offer, then click Create new offer in the top-right.

Step 2: Pick the Frequently Bought Together Card
On the Select offer type screen, find the Frequently bought together card and click Create.
The card description reads: "Create a set of products that are frequently bought together with a discount."
Step 3: Fill in Offer Information
The form opens at Step 1: Offer setting. The first card is Offer information.
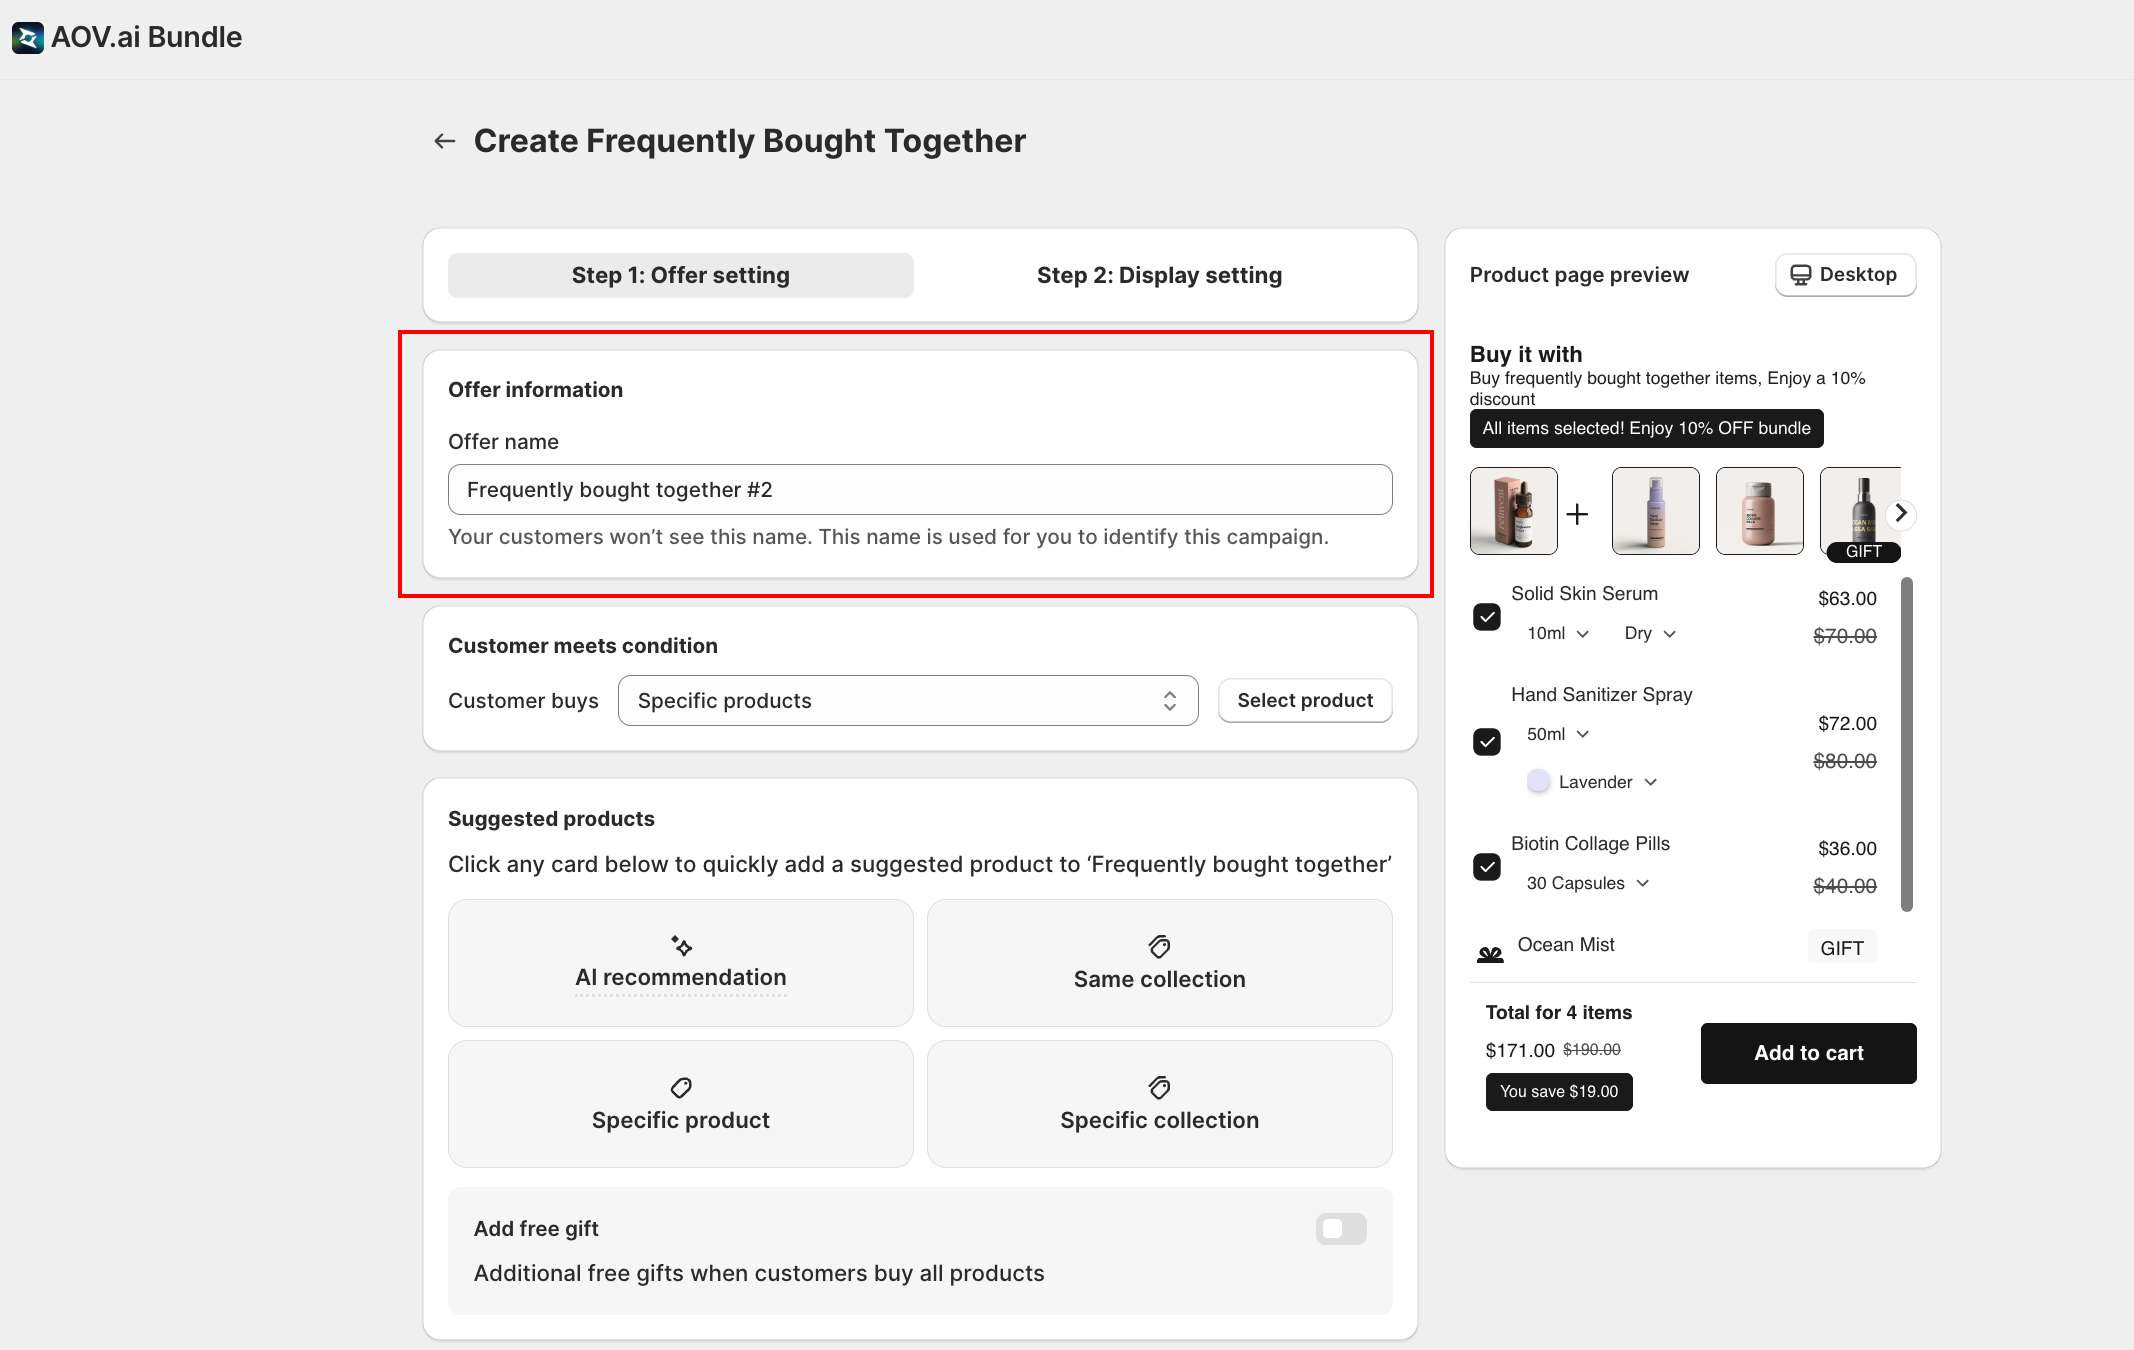
- Offer name: internal label only. Customers won't see it. Use it to identify the offer in the Offer list (for example Phone case + screen protector cross-sell).
Step 4: Set the Trigger Condition
The Customer meets condition card decides which product page the FBT widget appears on.
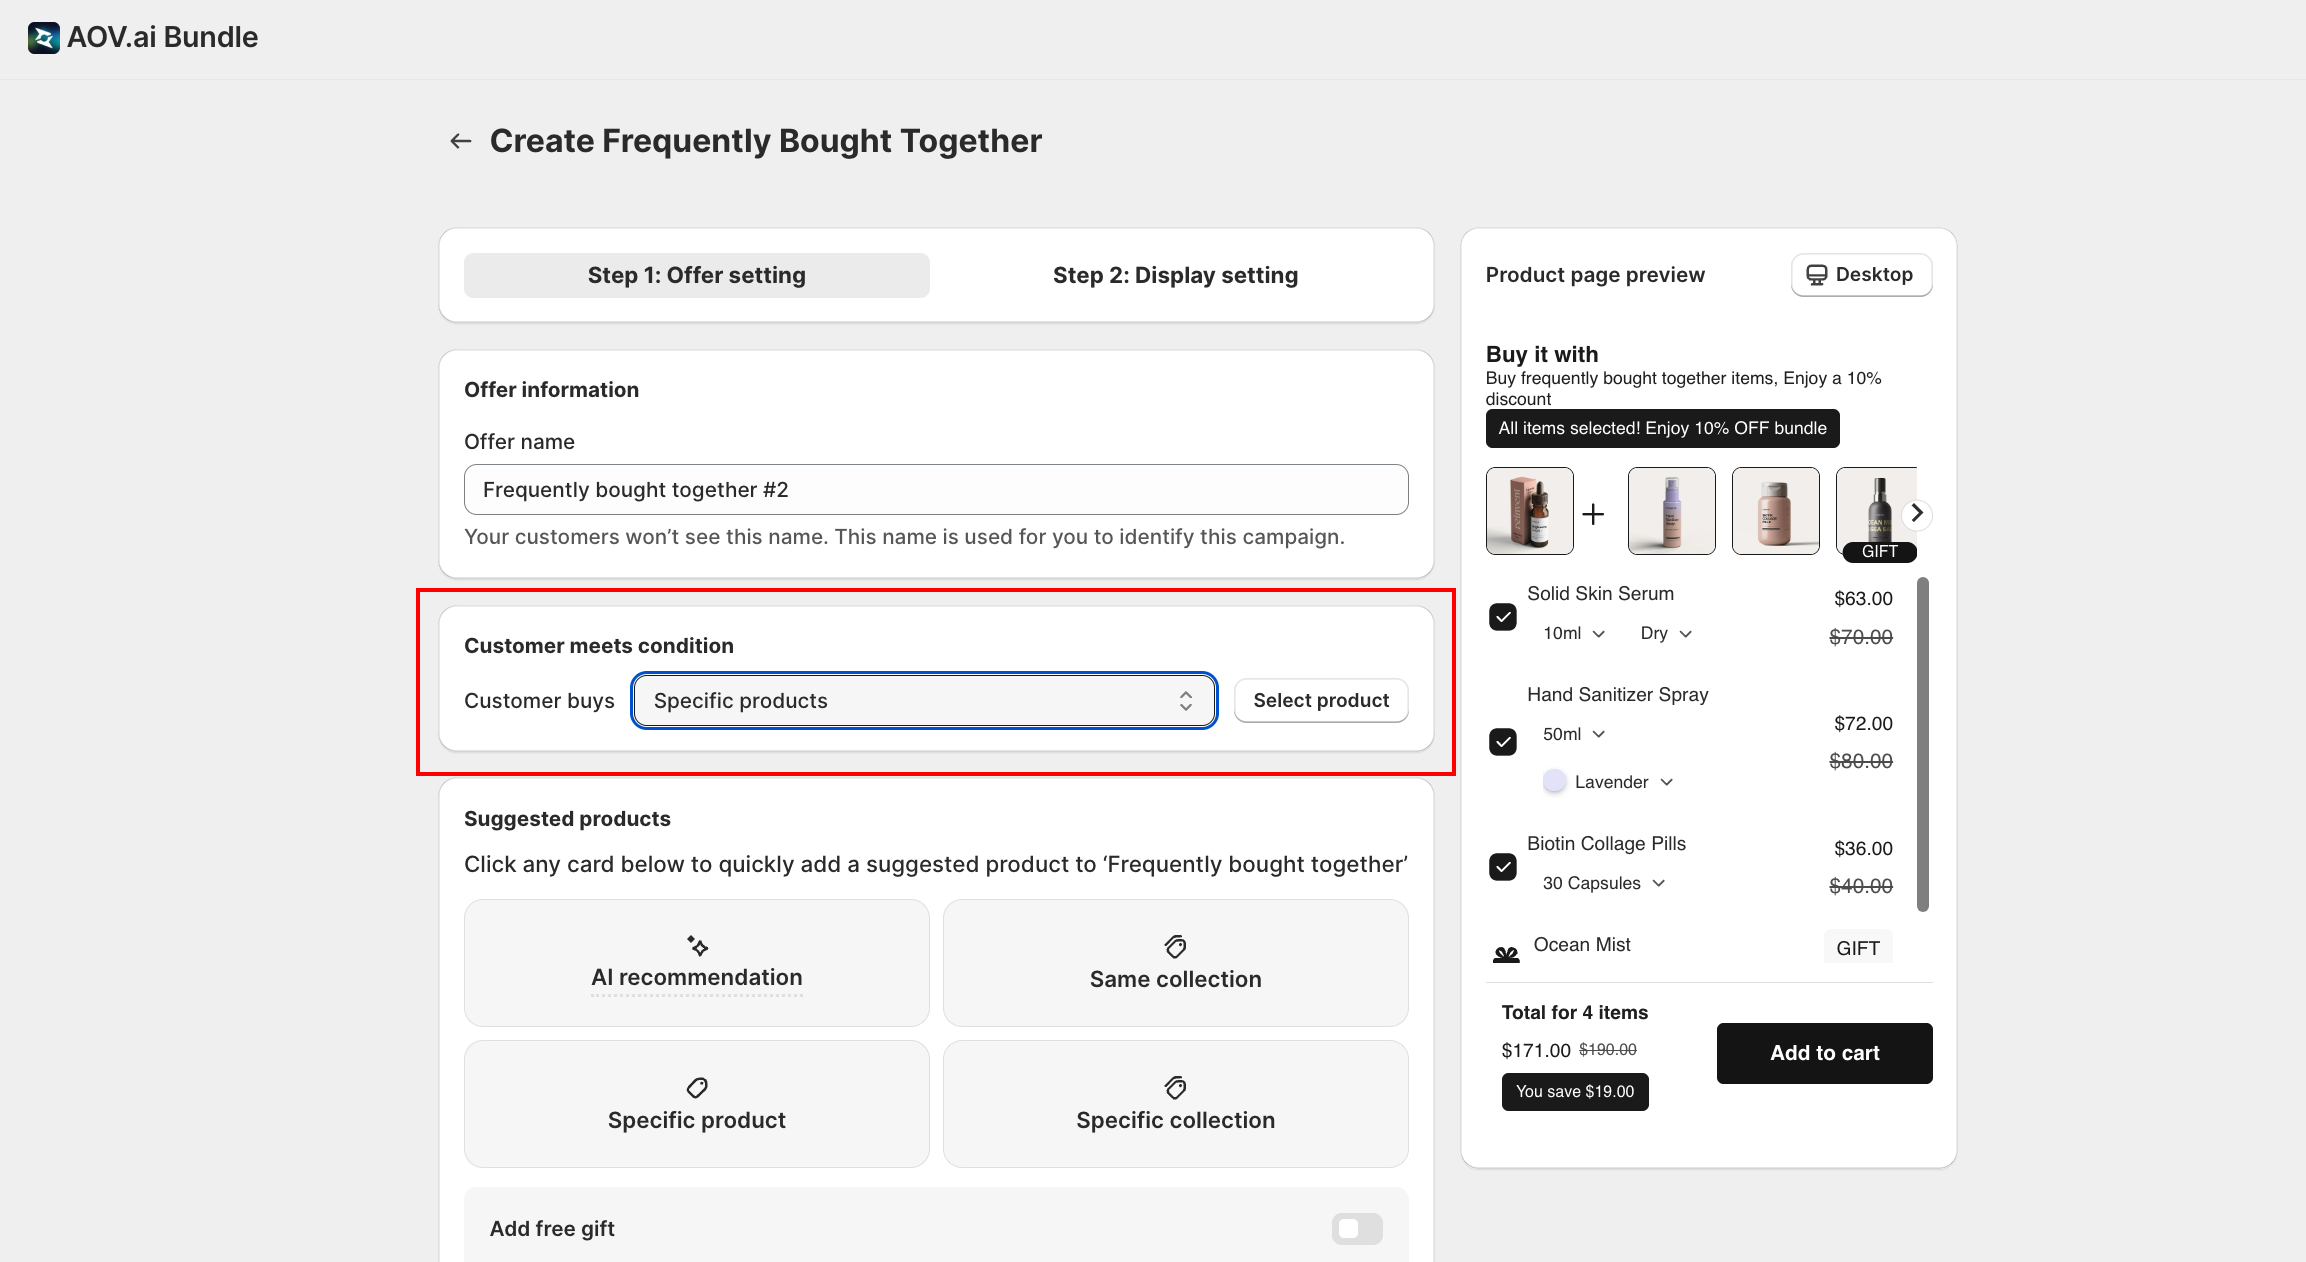
- Customer buys: pick one:
- Specific products: pick individual products one by one
- Specific collections: pick one or more collections; the widget appears on every product page in those collections
- Select product: click to open the product picker (or collection picker, depending on your scope choice)
Step 5: Choose the Suggested Products
The Suggested products card sets the cross-sell items. You'll see 4 source cards:
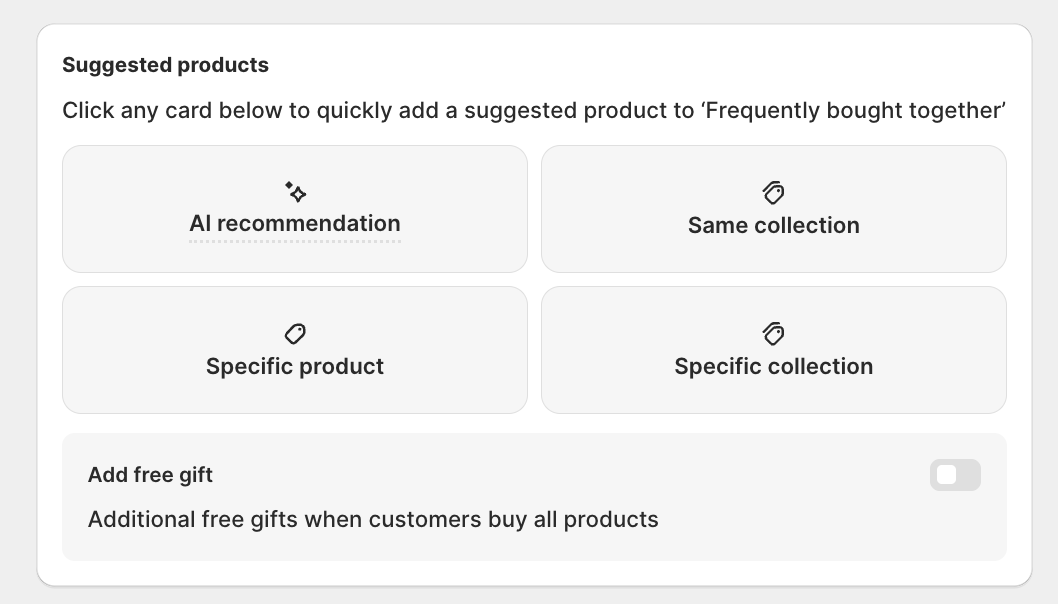
Click any card to add suggestions of that type:
| Source card | What it does |
|---|---|
| AI recommendation | Auto-suggested by AOV.ai based on store data and patterns |
| Same collection | Pulls items from the trigger product's own collection |
| Specific product | Manually pick an individual product |
| Specific collection | Manually pick a whole collection; the widget rotates suggestions from it |
You can mix sources. Two AI suggestions plus one manually picked product is a valid setup.
Add free gift (optional): below the source cards, toggle Add free gift on to attach a free gift item to the bundle. When the customer buys all the suggested products, the gift is added automatically. Toggle on, then pick the gift product.
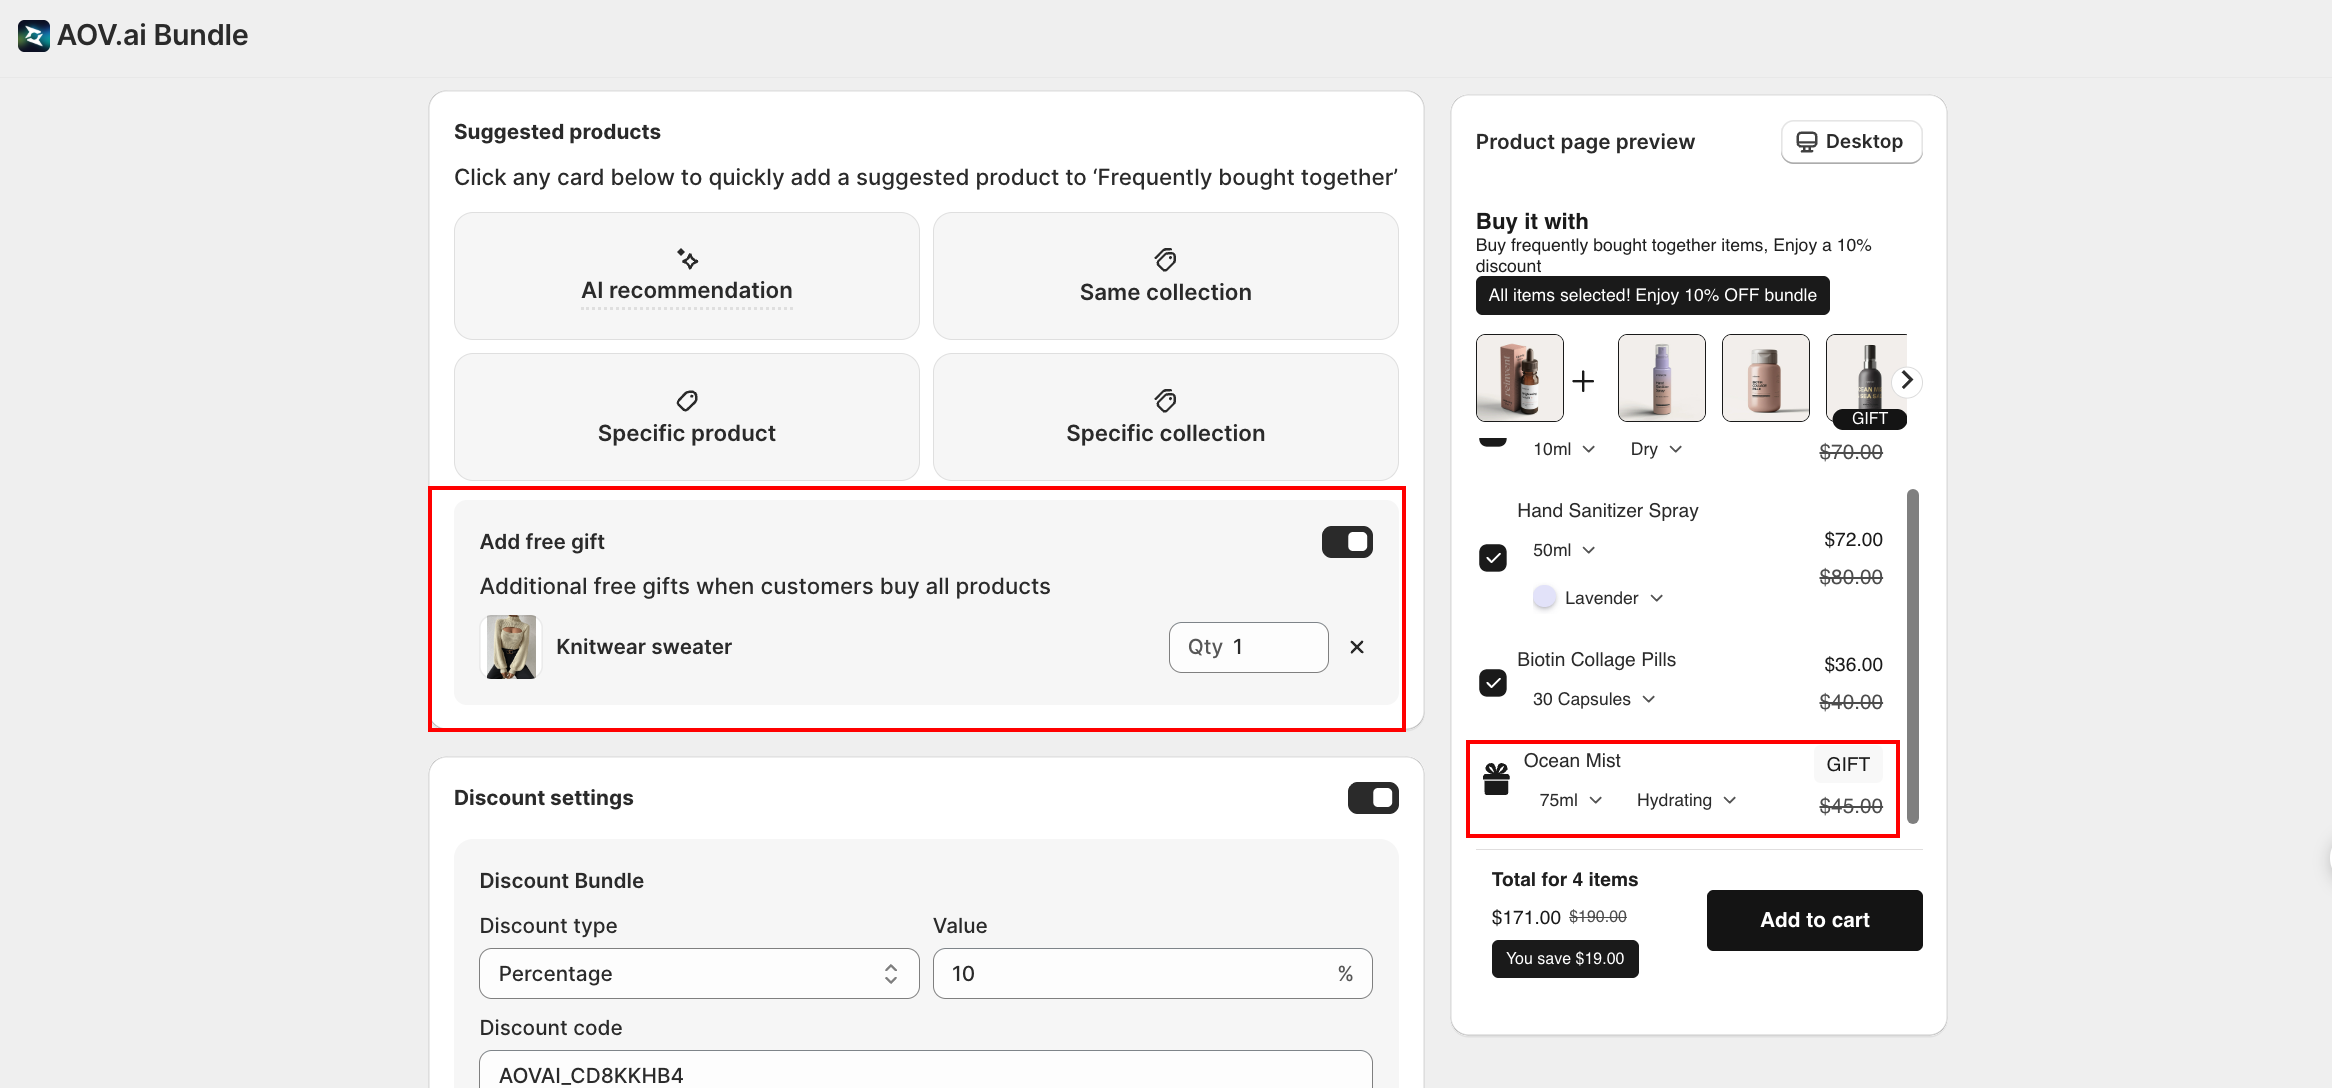
Step 6: Set the Discount
Scroll to Discount settings.
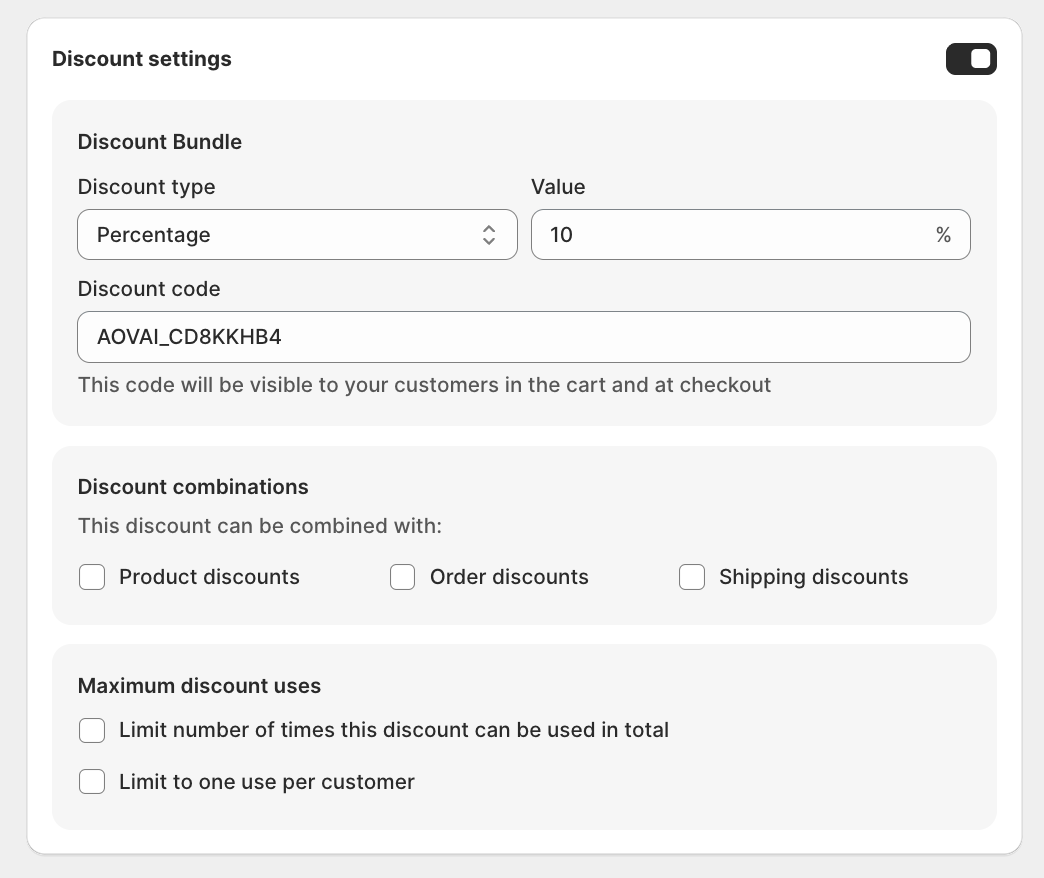
- Discount Bundle: the discount card title. This is the bundle-level discount applied when the customer buys the trigger plus all suggested products.
- Discount type: pick one:
| Type | What it does |
|---|---|
| Percentage | Discount expressed as a % off (for example 10% off) |
| Fixed amount | Flat amount off the bundle (for example $10 off) |
| Fixed total | Set a fixed bundle price (for example Buy all 3 for $99); the app computes the discount needed to hit that price |
- Value: enter the discount value (or fixed total)
- Discount code: visible to customers in the cart and at checkout. The app generates one automatically.
Note: manual editing of the discount code is gated. Click Contact support in the field if you need a custom code (say, to match an ad campaign).
Step 7: Configure Discount Combinations and Max Uses
Still inside Discount settings:
Discount combinations: choose whether this discount can stack with other Shopify discounts:
| Option | What it does |
|---|---|
| Product discounts | Stack with product-specific discounts |
| Order discounts | Stack with order-wide discounts |
| Shipping discounts | Stack with free or reduced shipping |
Maximum discount uses: cap how often the discount can be redeemed:
| Option | What it does |
|---|---|
| Limit total uses | Global cap across all customers (for example only the first 50 redemptions) |
| Limit to one use per customer | Each customer can redeem only once |
Step 8: Set the Advanced Rules (Optional)
The Advanced Configuration card has two toggles:
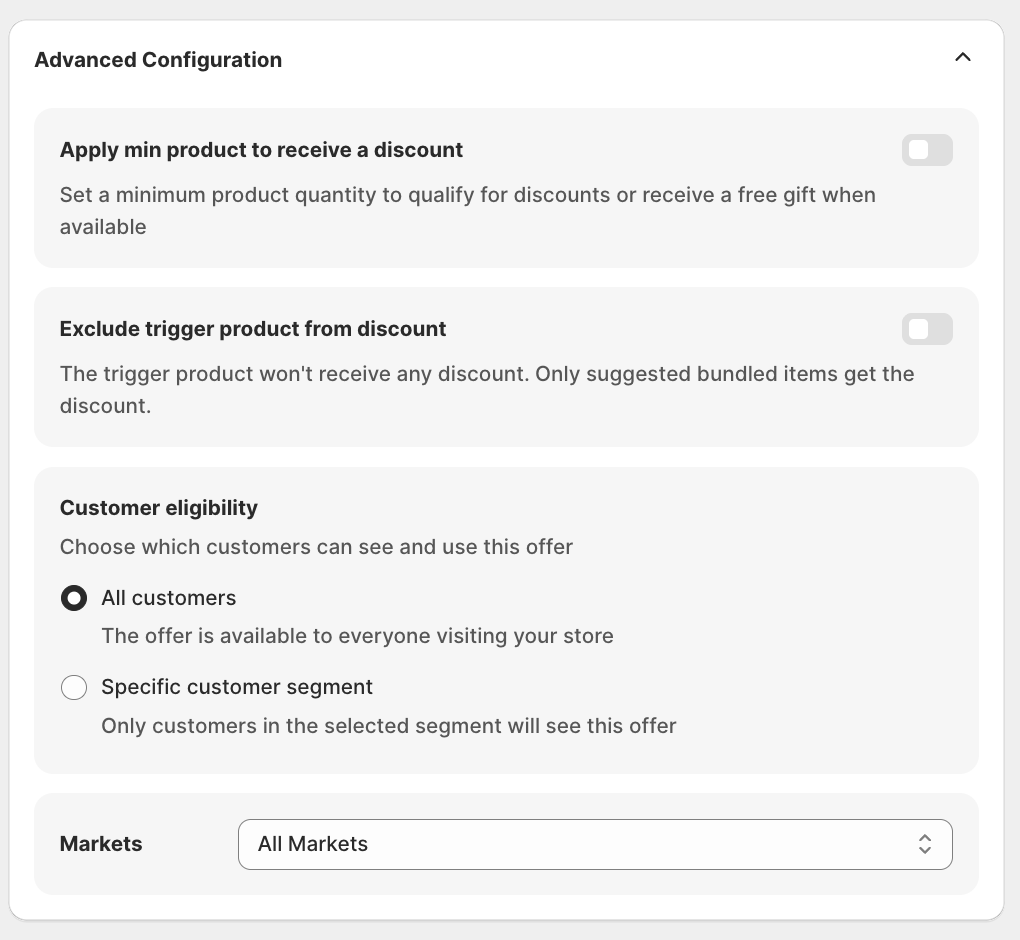
- Require a minimum number of products to add to cart: customers must select at least the set number of products before they can add the bundle to cart. For example, require at least 3 of the 4 suggestions to unlock the bundle deal.
- Exclude trigger product from discount: the trigger product stays at full price; only the suggested items get the discount. Useful when the trigger is your high-margin hero product.
Customer eligibility: controls who can use the discount:
| Option | What it does |
|---|---|
| All customers | Everyone can redeem |
| Specific customer segment | Only customers in a chosen Shopify segment (for example VIP customers, Wholesale) |
| Exclude specific customer segments | Everyone except the chosen segments |
Step 9: Markets and Schedule
- Markets: choose where the discount is active (for example All Markets, Canada, United States). See Markets.
- Schedule: set the start date / time and (optionally) an end date / time. Times use your store's timezone.
Step 10: Switch to Display Setting
Click Step 2: Display setting at the top of the form (or the Next: Display setting button at the bottom).
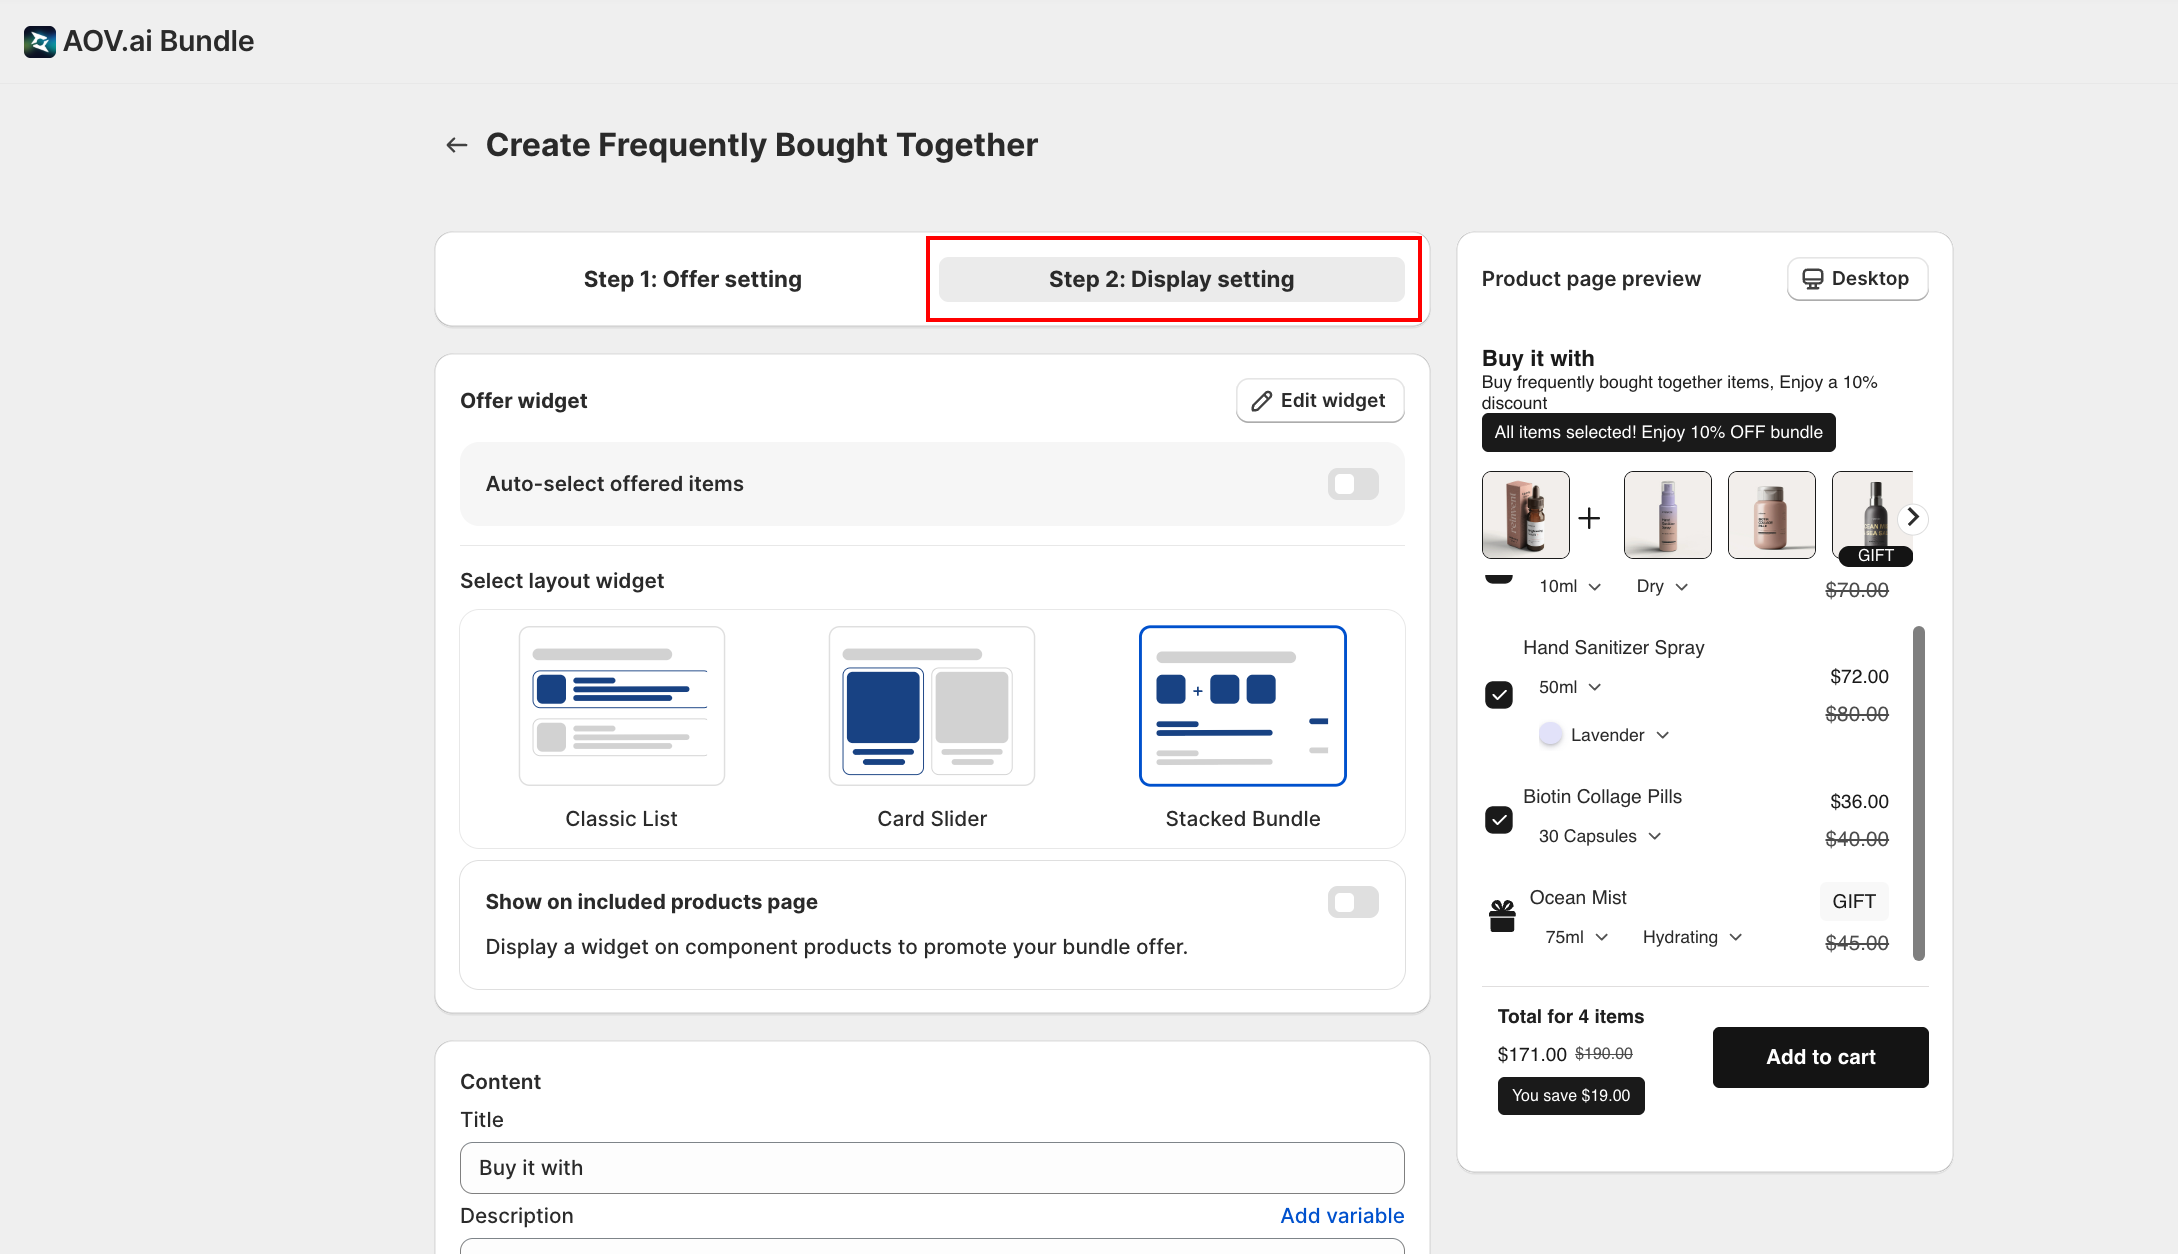
The display tab covers two layers:
- Per-offer layout: pick which of the 3 prebuilt layouts displays the suggested products for this specific FBT campaign. Each FBT offer can pick its own.
- Classic List: vertical list of products with checkboxes (the default)
- Card Slider: horizontal scrollable cards
- Stacked Bundle: visual stacked layout with combined images
- Widget-level styling: colors, labels, button text, fonts, etc. These live under Widget display → Frequently bought together widget and apply to every FBT offer on the store. Click Edit widget to jump straight there. See Frequently bought together widget for the full styling guide.
Next Steps
- Frequently bought together widget: customize colors, labels, and layout of the storefront widget
- Discounts: how discount codes, combinations, and max-uses work across all offer types
- Markets: geo-scoping the discount
Troubleshooting
Q1: The Buy it with widget doesn't show on my product page
Check that the theme app embed is enabled and the current product matches your trigger scope. See App Embed and Theme Integration. Also confirm the offer Status is Active.
Q2: AI Recommendation shows no suggestions
AI Recommendation needs enough store data (orders, product catalog) to surface patterns. New stores often see no suggestions until they have at least a few dozen orders. Use Same collection or Specific product as a fallback.
Q3: The discount doesn't apply at checkout
Check that the customer added the trigger plus the required minimum number of suggested products (if Apply min product is on). Also verify the schedule and Markets settings cover the customer.
Q4: The trigger product is being discounted but I want only the suggestions discounted
Toggle on Exclude trigger product from discount in Advanced Configuration.