How to Set Up Bundle Builder
What Is Bundle Builder?
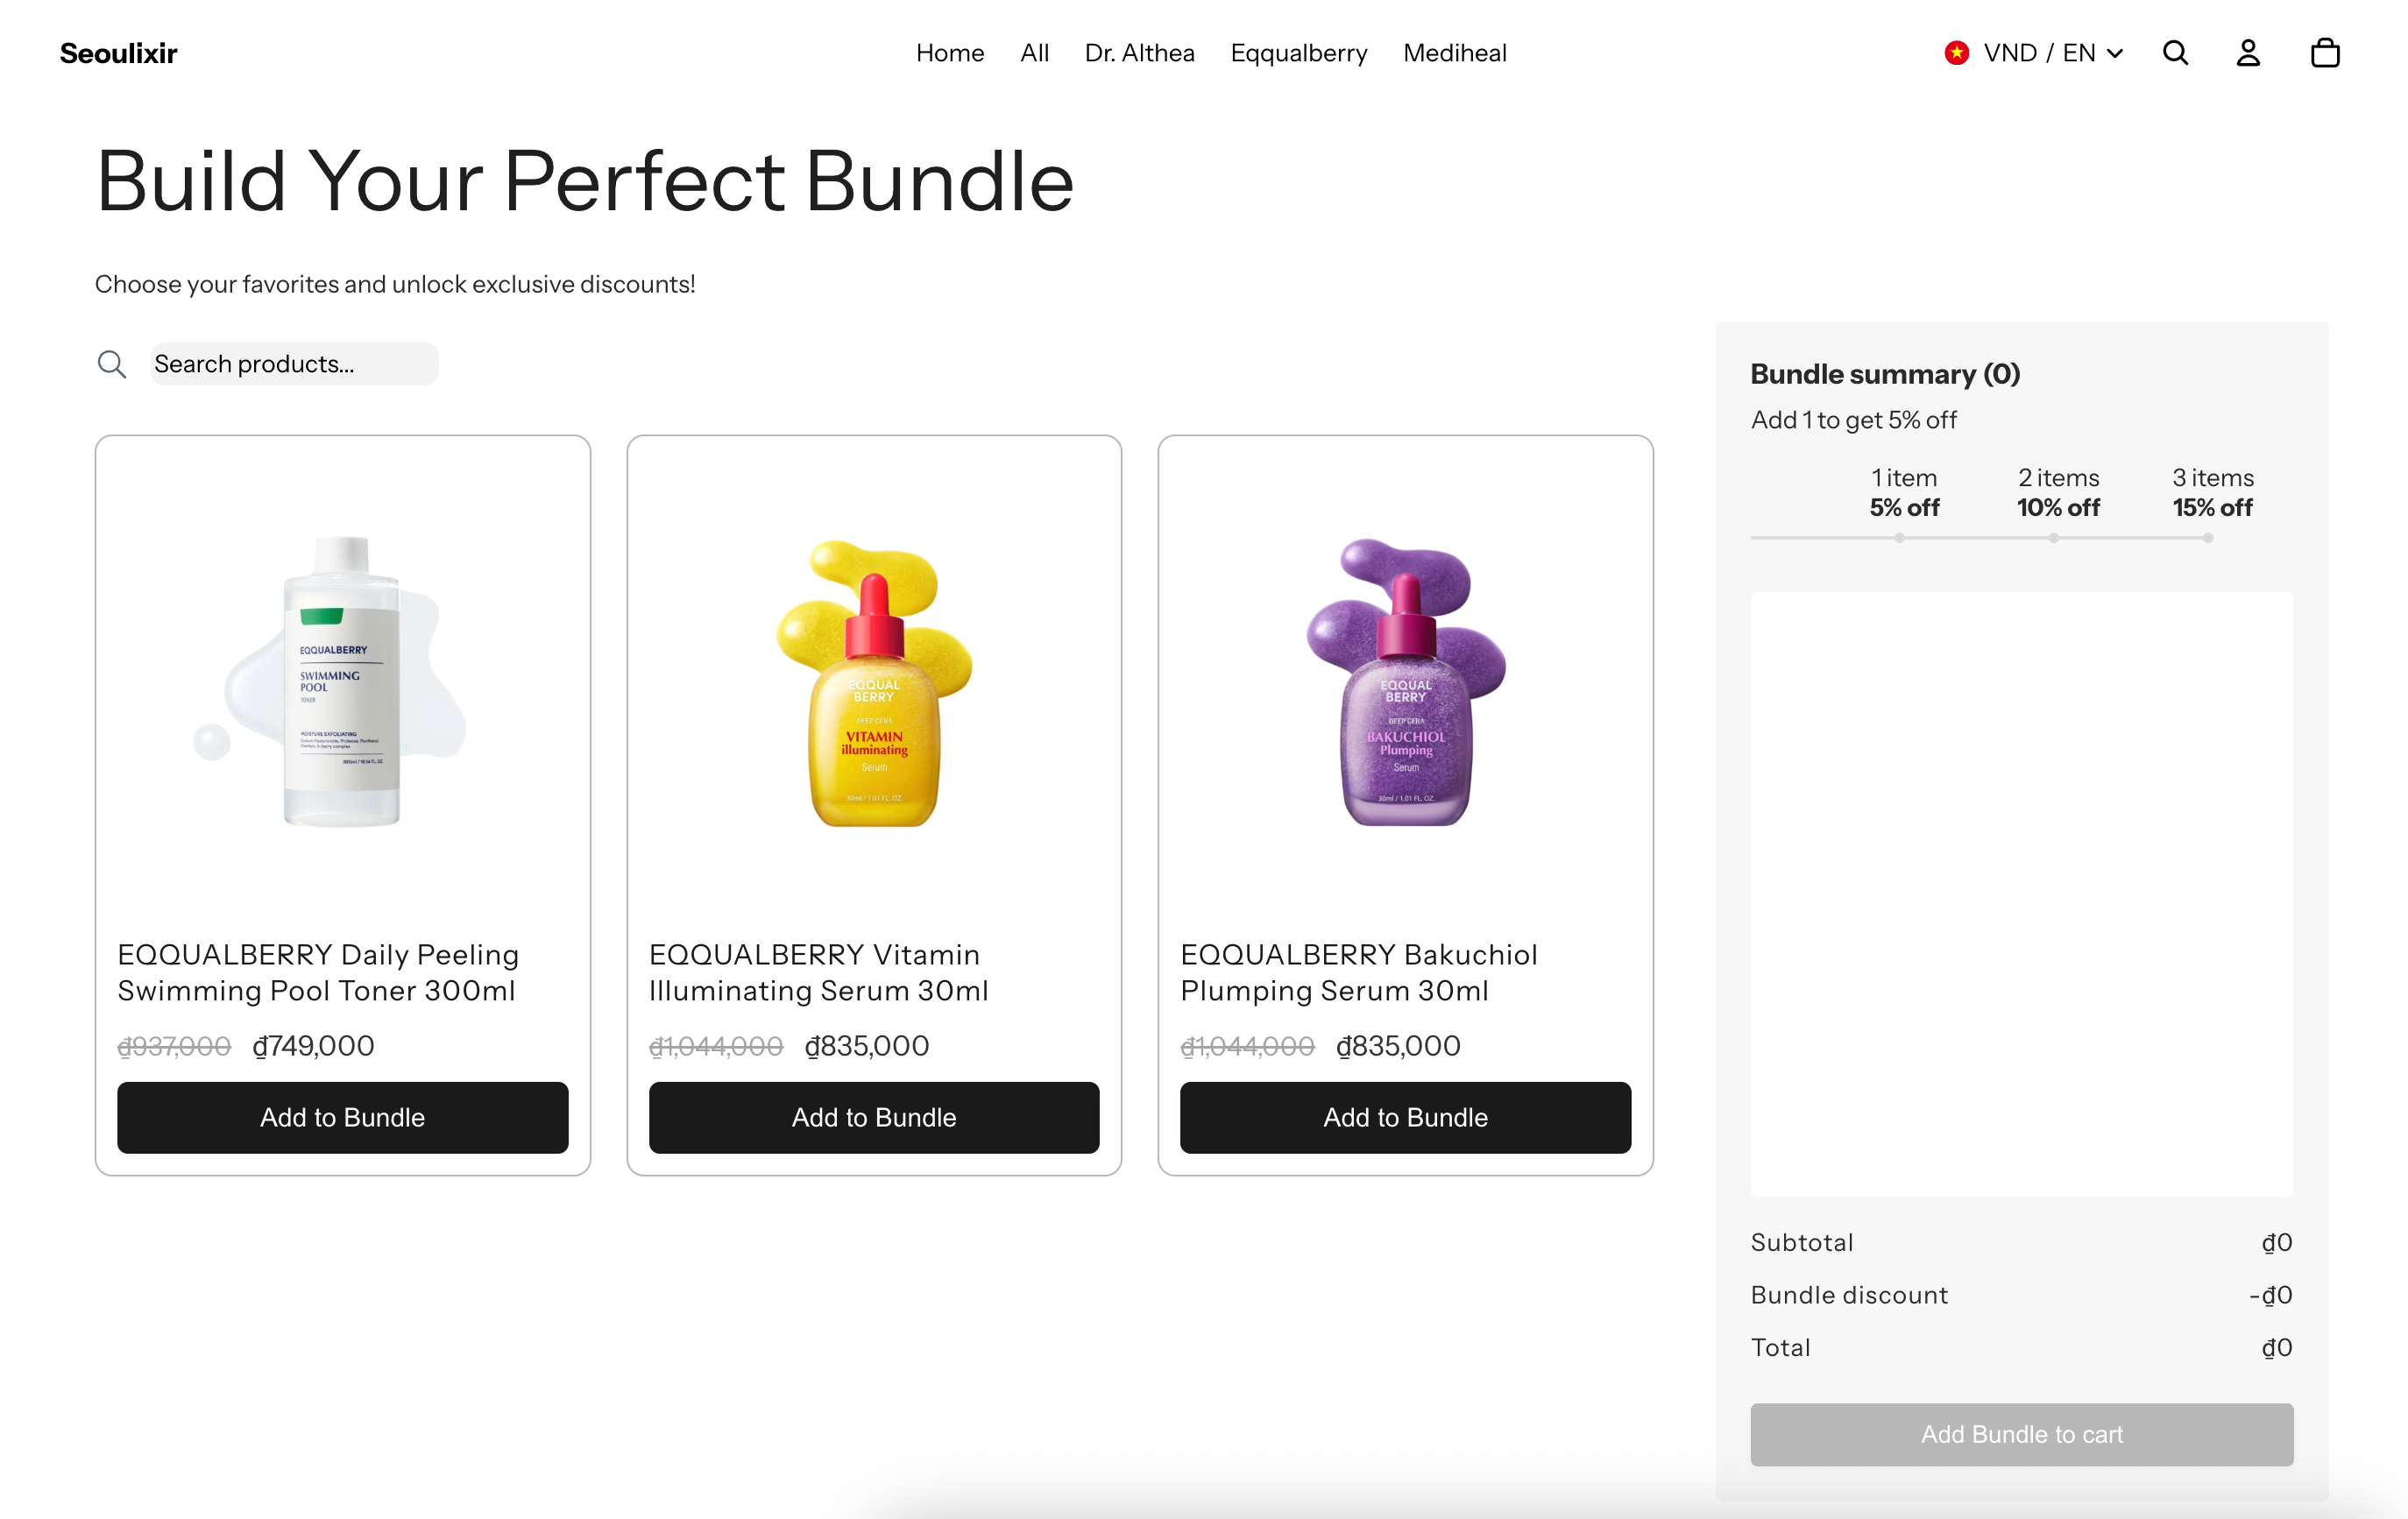
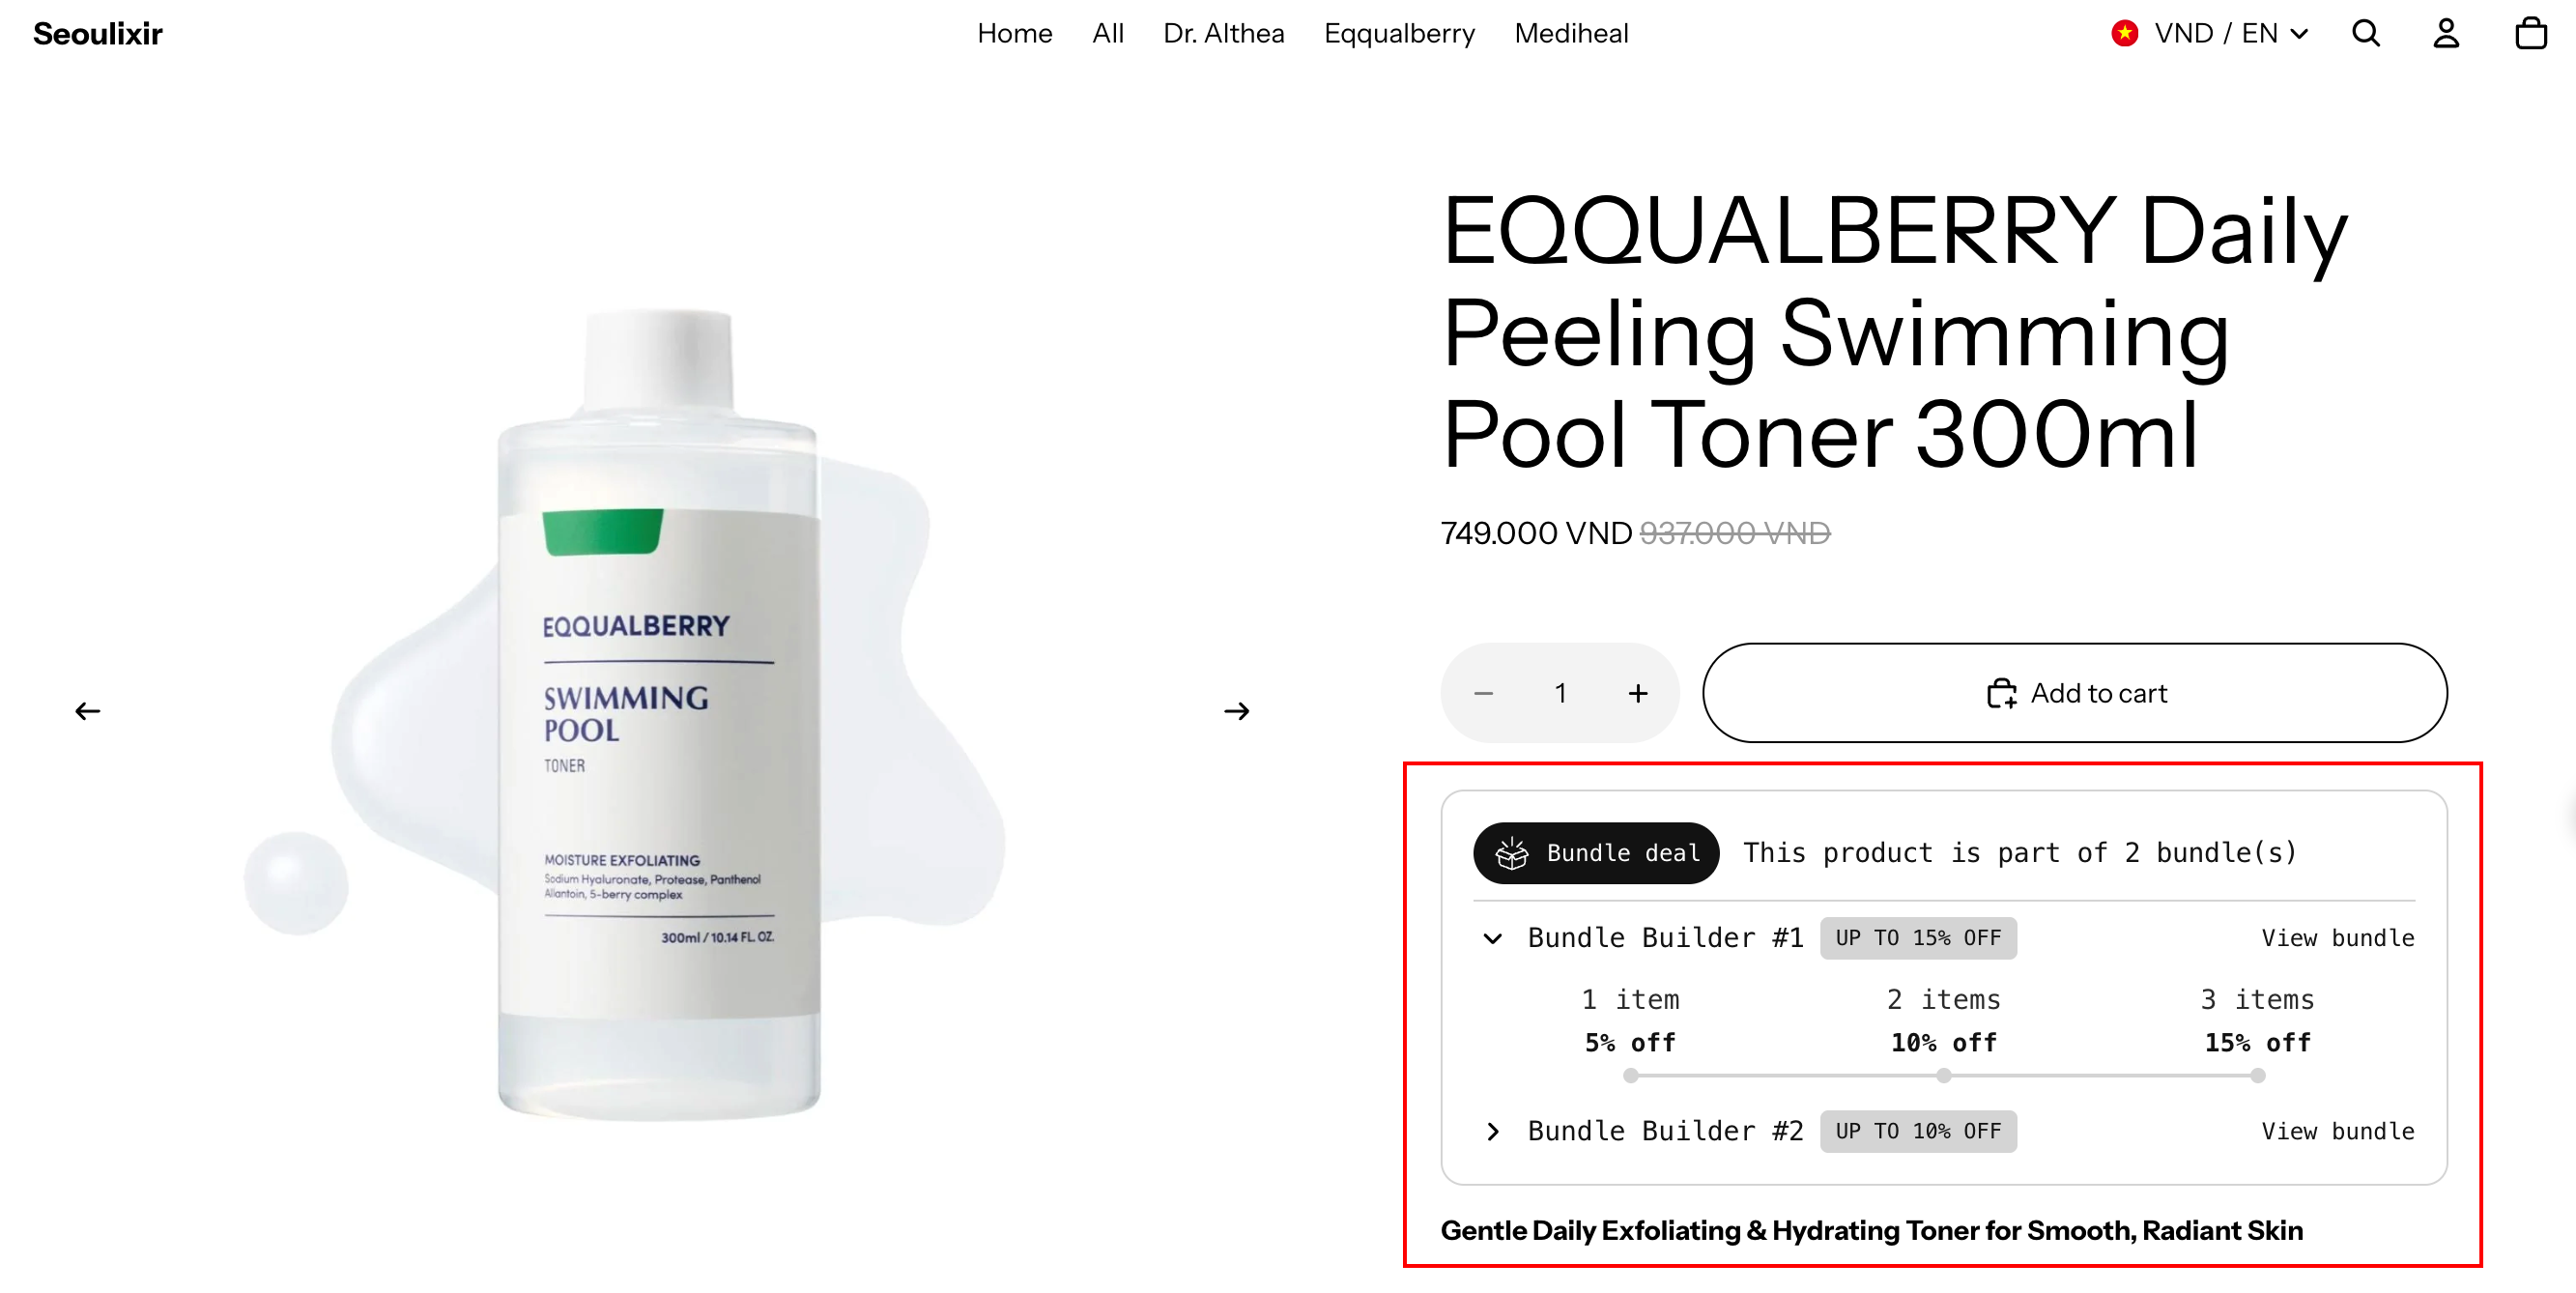
Bundle Builder runs a customizable bundle offer with tiered discounts. Customers mix and match products from a list you define, and unlock larger discounts as they add more items to the bundle.
When to Use It
- You want to grow Average Order Value by rewarding larger baskets
- You sell products that work well together but don't form a fixed kit (skincare lineups, apparel, supplements)
- You want a real-time progress bar that motivates customers to add the next item
Before You Start
You'll need:
- At least 2 products in your store you want to include in the bundle
- The AOV.ai Bundle Upsell app installed
- Theme app embed enabled so the bundle widget can render on your storefront. If you haven't done this yet, see App Embed and Theme Integration
Setup Walkthrough
Step 1: Open the Offer Chooser
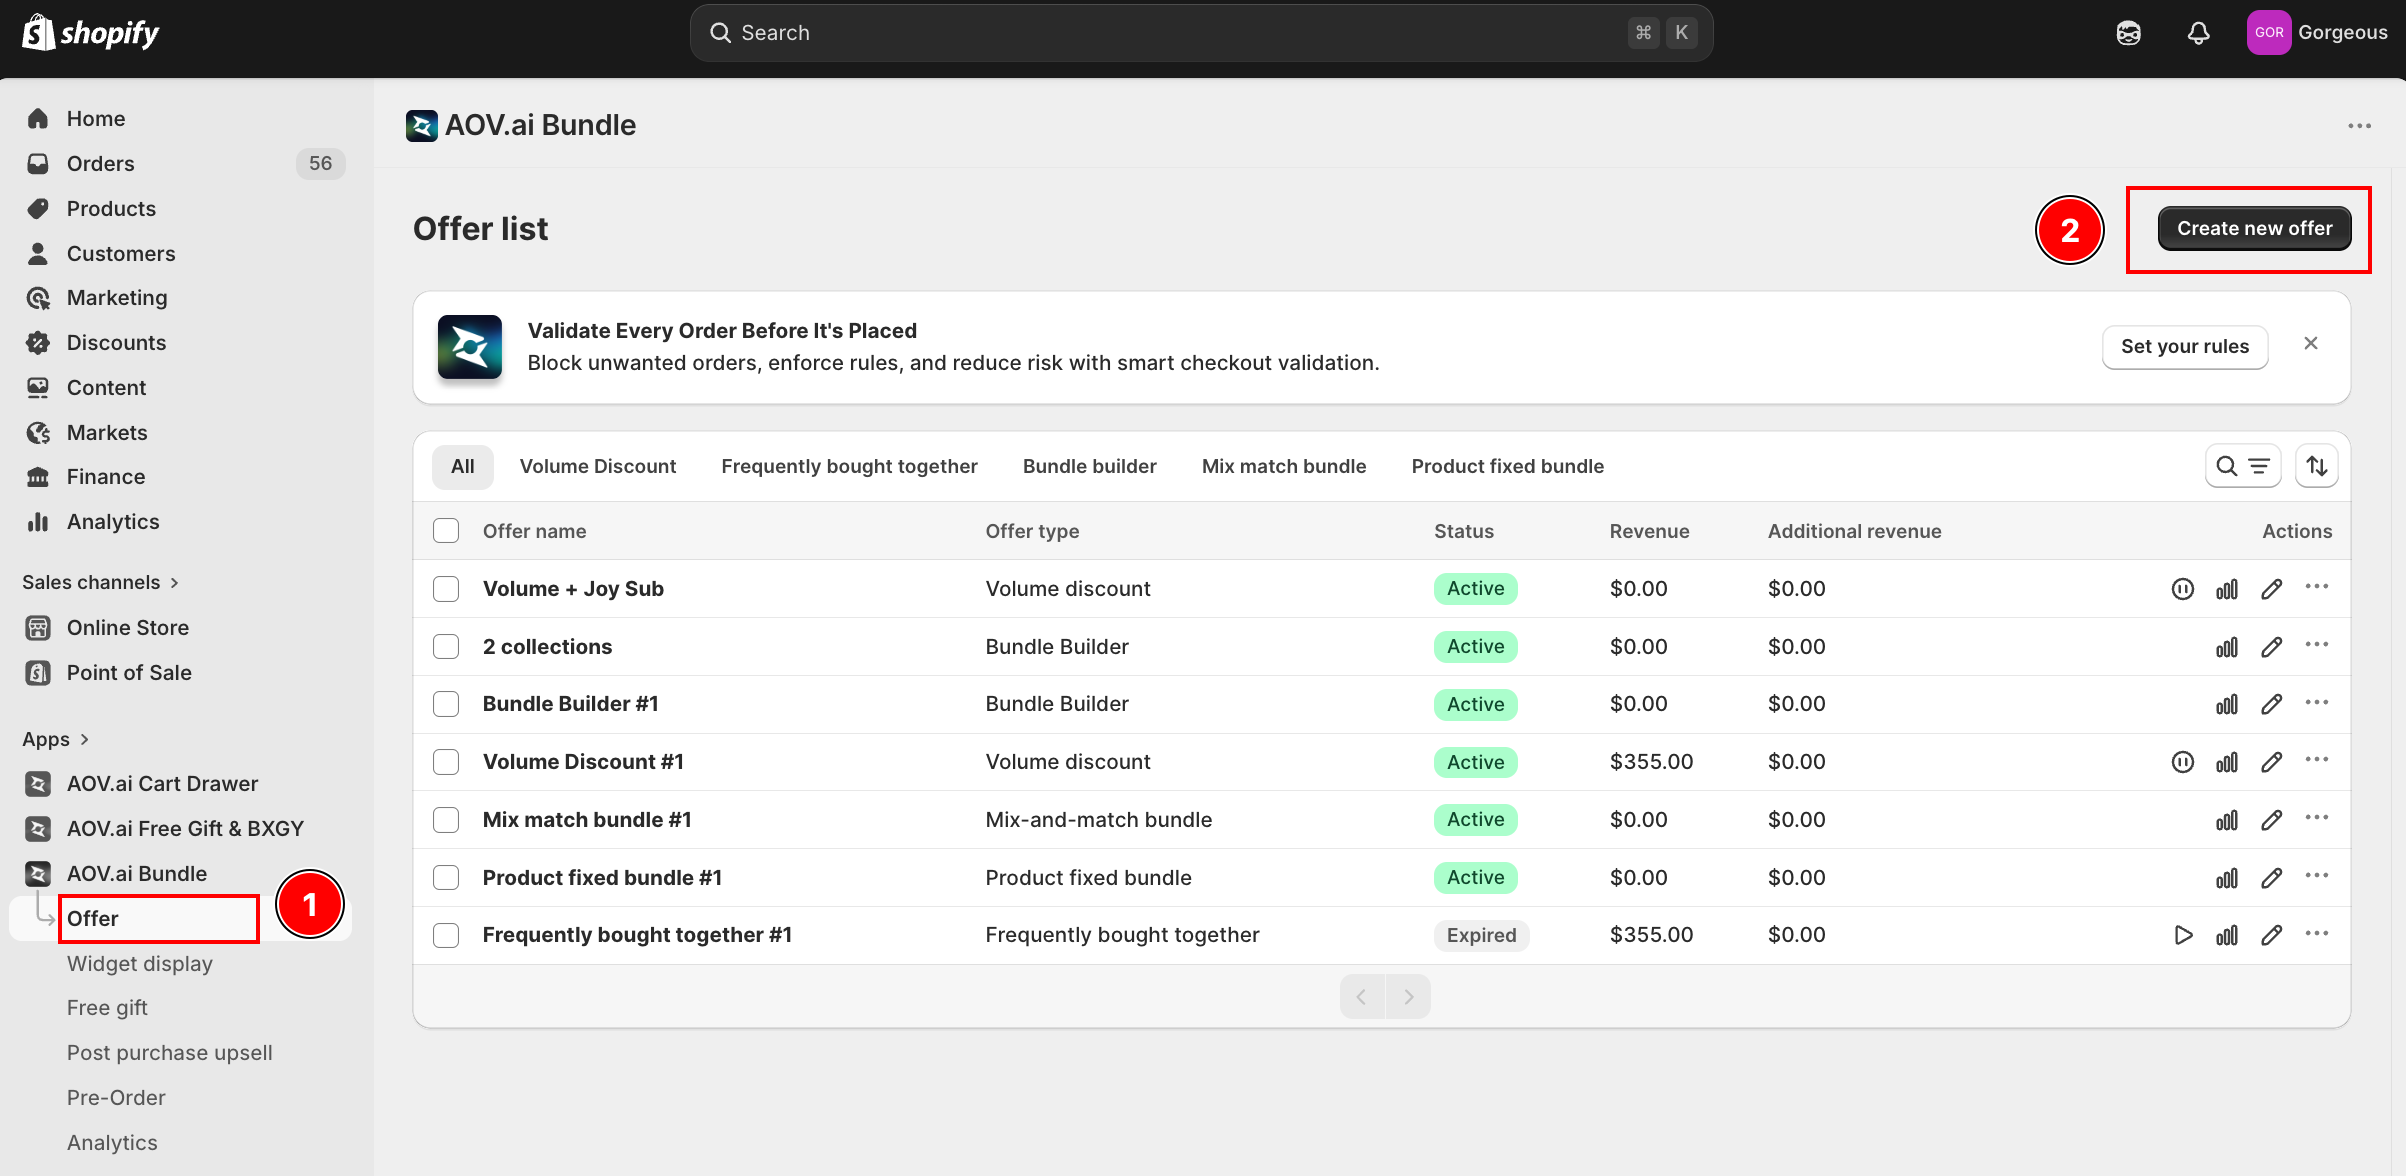
From the Shopify admin, open AOV.ai Bundle Upsell in the left sidebar. Click Offer, then click Create new offer in the top-right.
Step 2: Pick the Bundle Builder Card
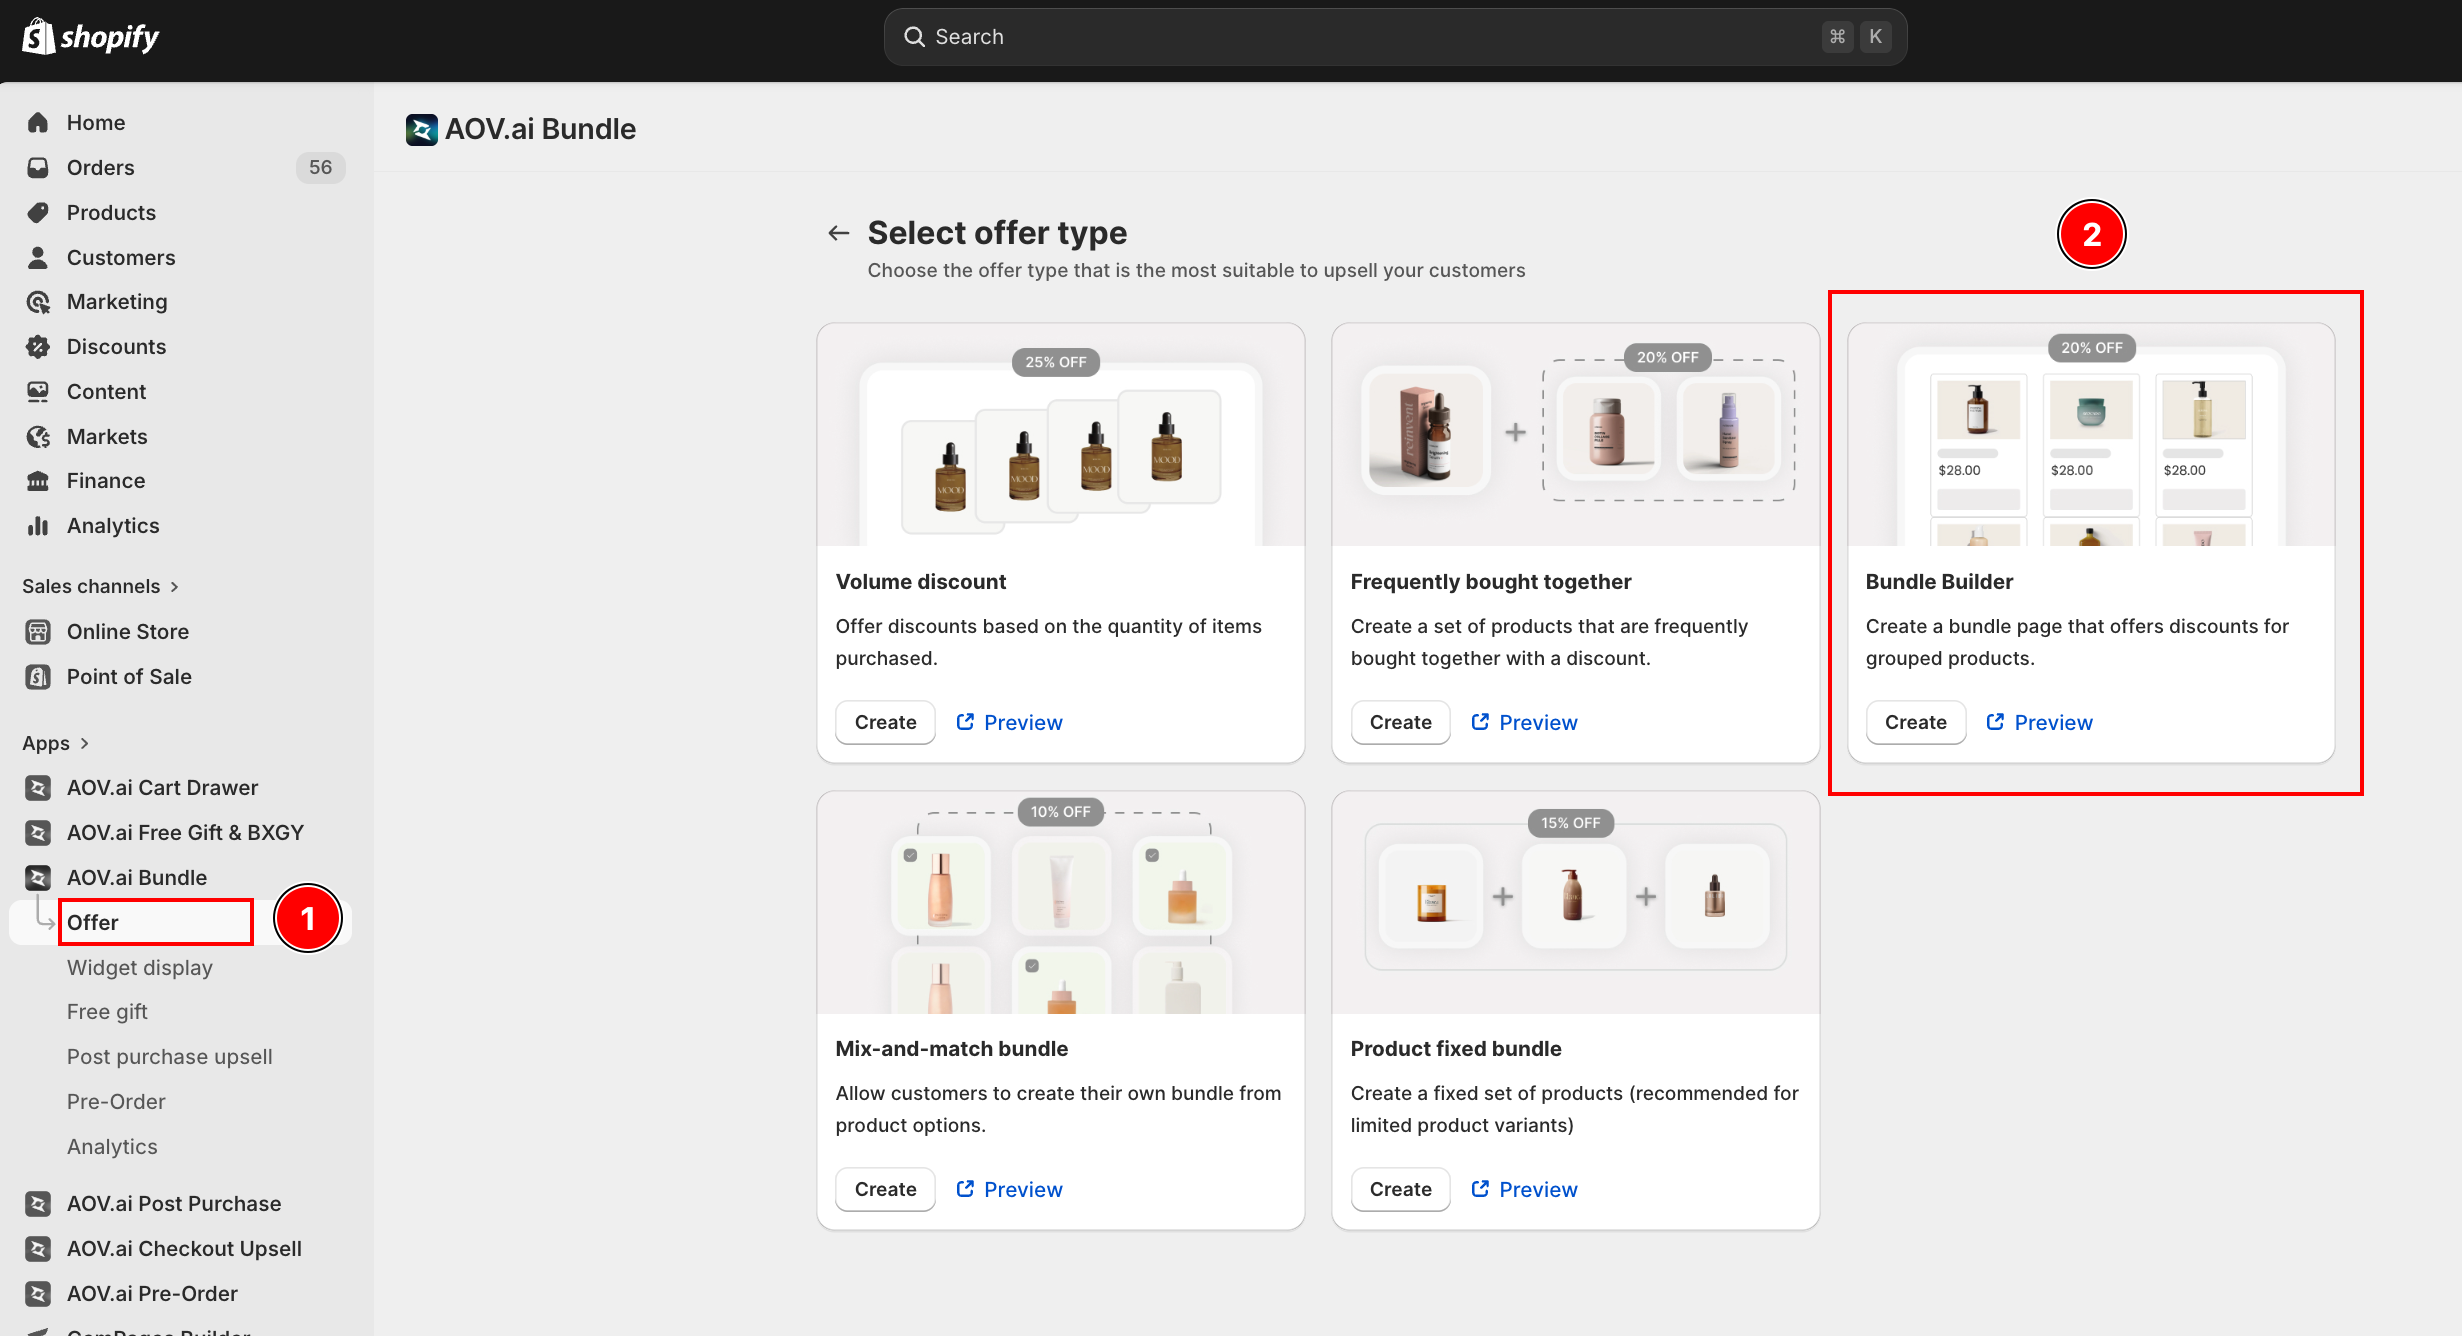
On the Select offer type screen, find the Bundle Builder card and click Create.
Step 3: Fill in Offer Information
The form opens at Step 1: Offer setting. The first card is Offer information.
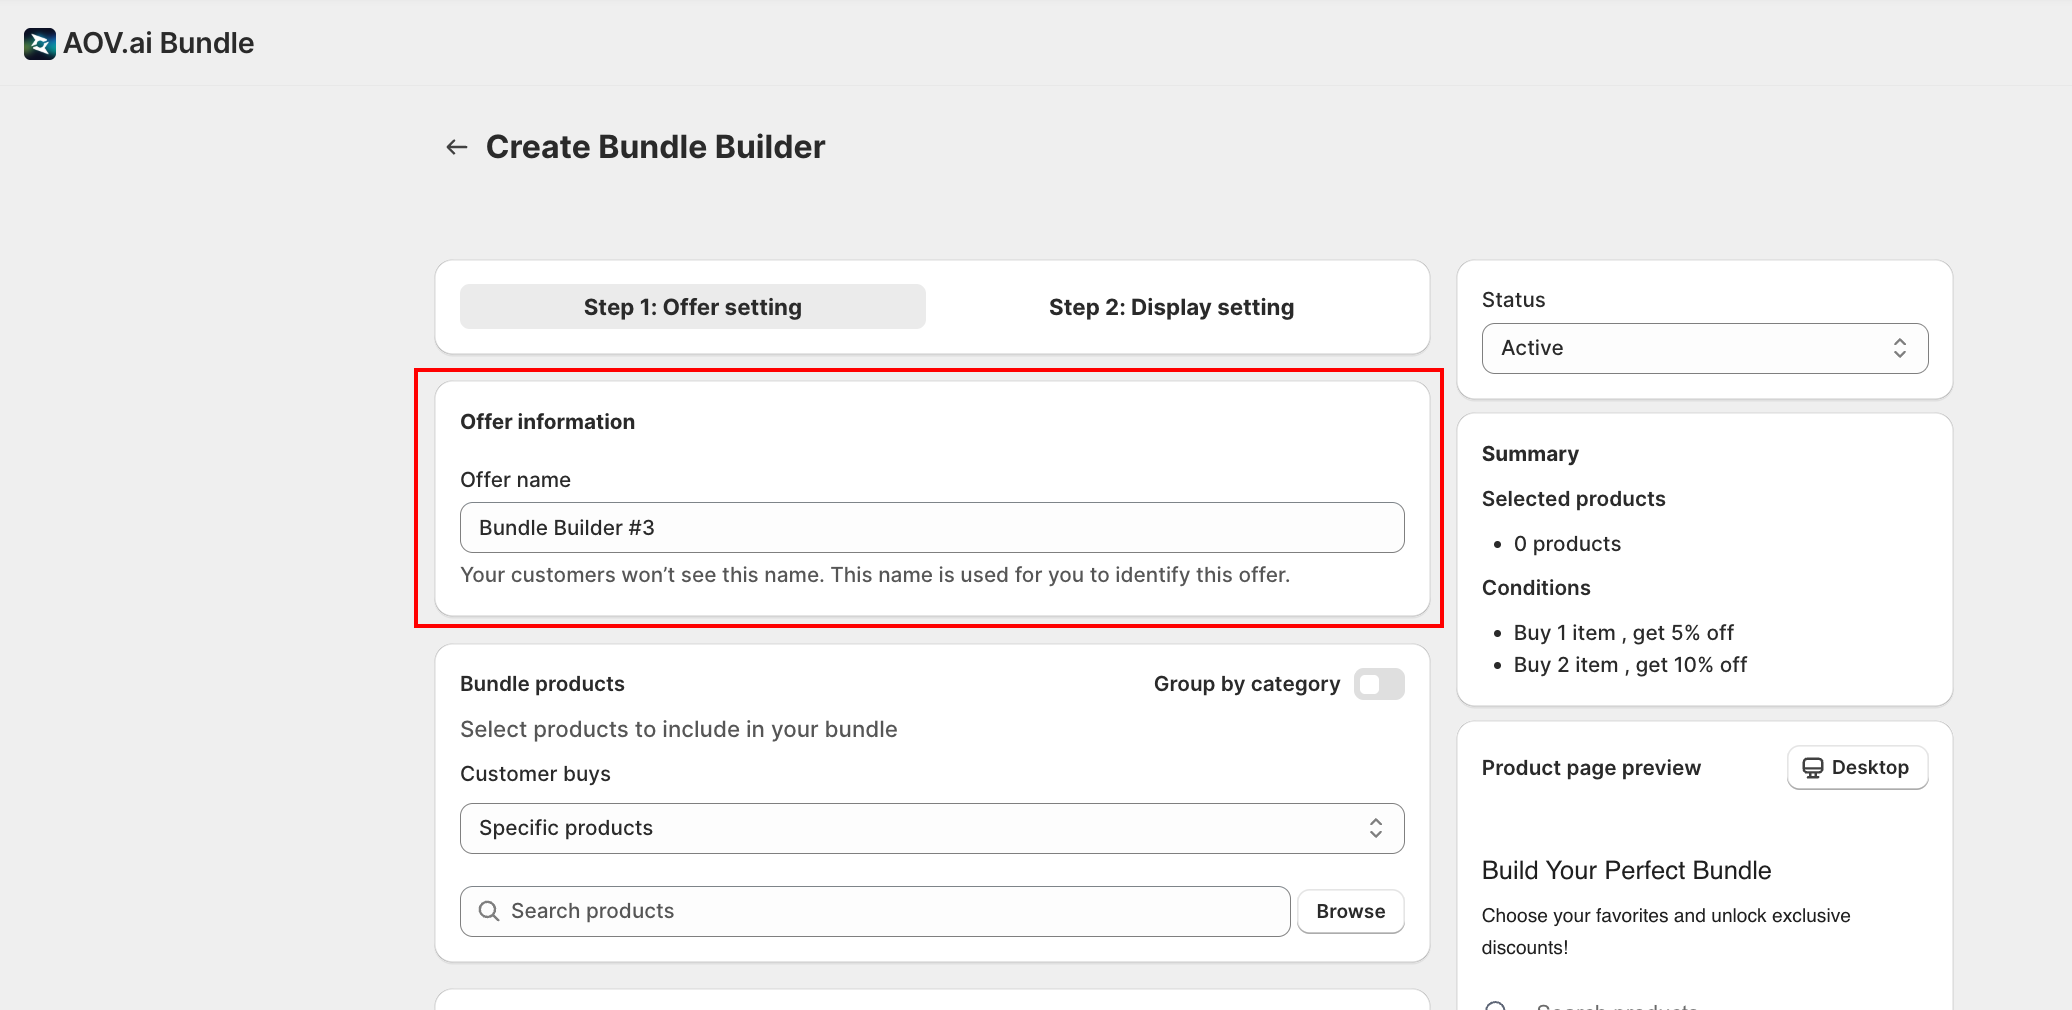
- Offer name: internal label only. Customers won't see it. Use it to identify the offer in the Offer list (for example Summer skincare bundle).
Step 4: Choose What Goes in the Bundle
The Bundle products card controls which products customers can pick from when building the bundle.
- Customer buys: choose how to scope the bundle:
- Specific products: pick individual products one by one
- Specific collections: pick one or more Shopify collections; every product in those collections becomes selectable
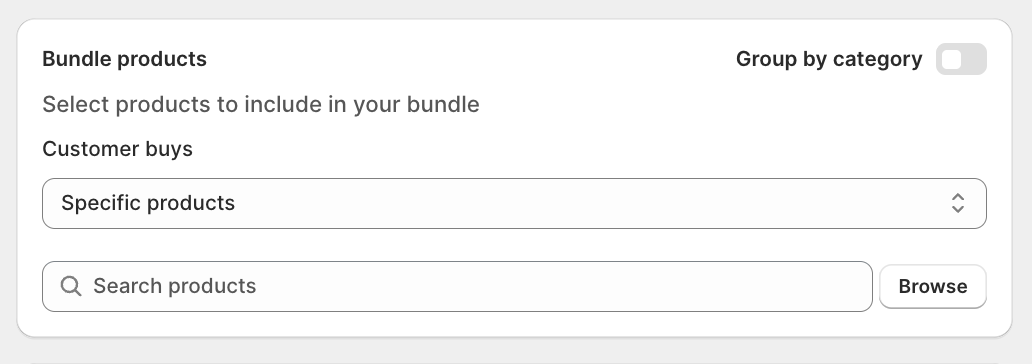
Once you pick the option, use the Search box or click Browse to add the products or collections.
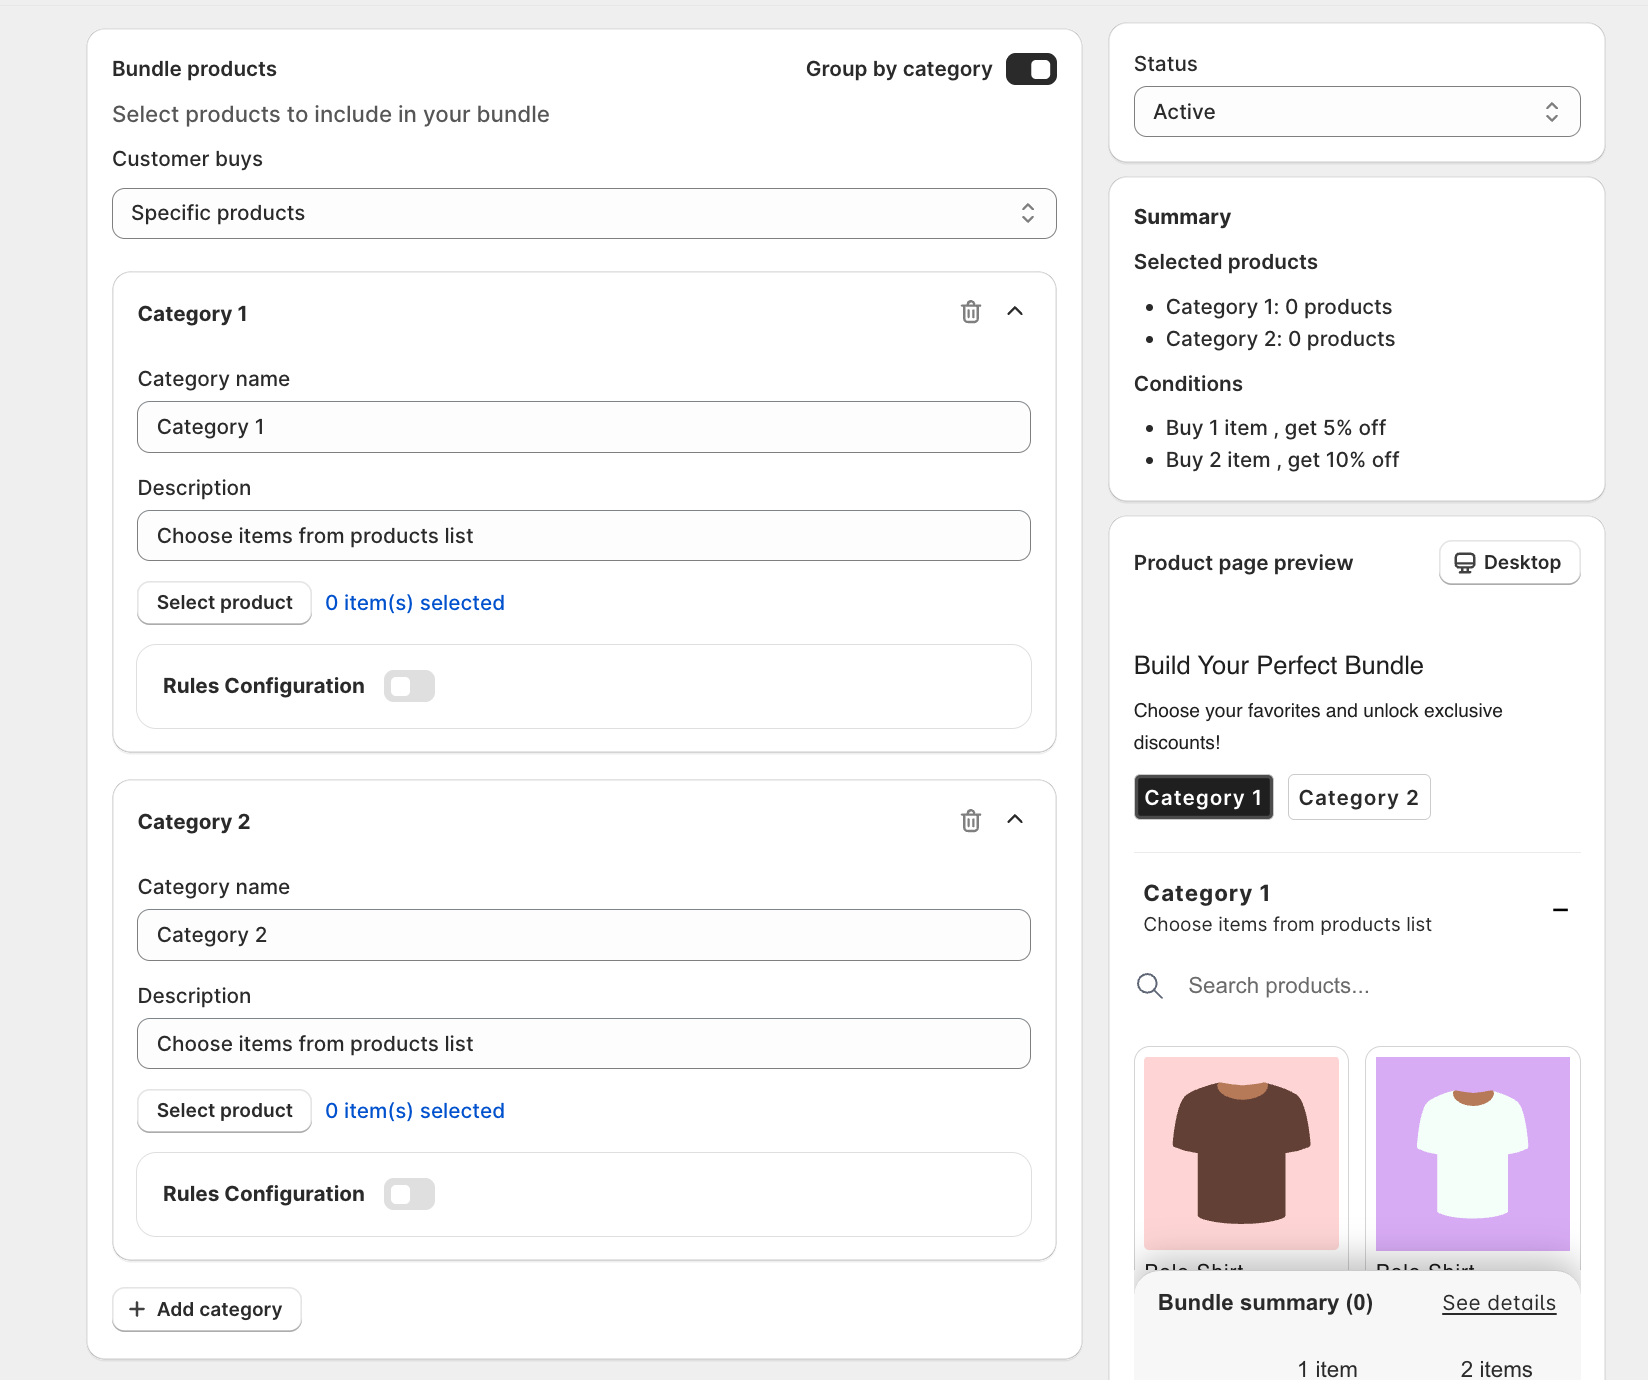
- Group by category: toggle on if you want the bundle widget to group selectable products by their Shopify category. Useful when the bundle spans different product types.
Step 5: Set Up the Discount Tiers
In the Discount settings card, you decide how the discount grows as the customer adds more items.
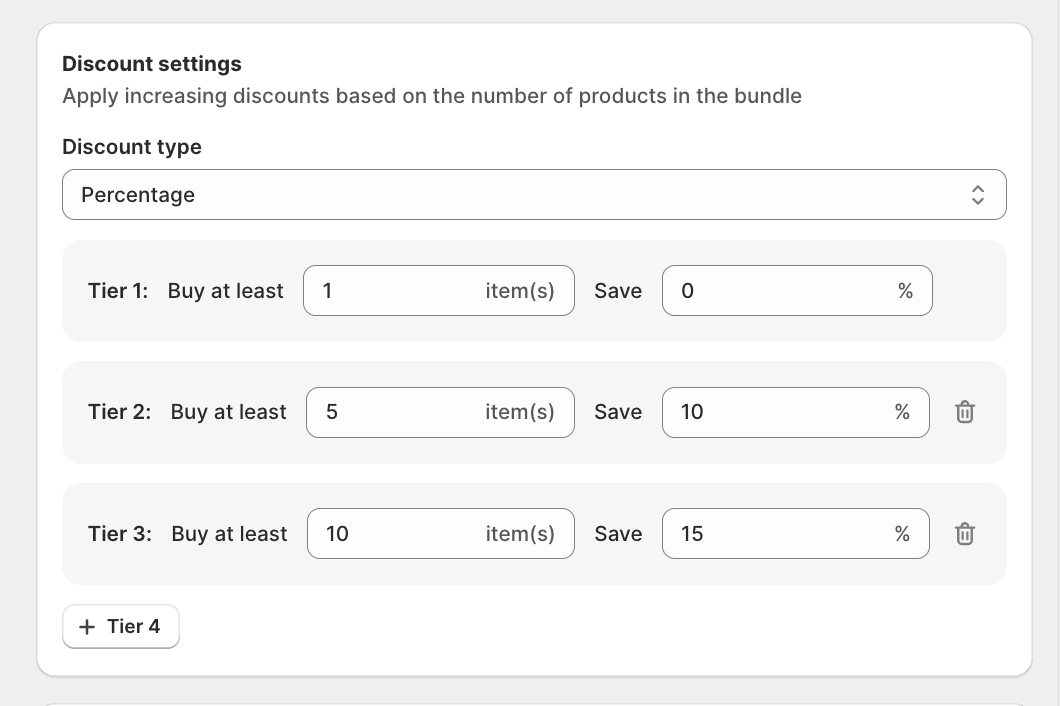
- Discount type: pick Percentage or Fixed amount
- Tiers: each tier sets a minimum item count and the discount the customer earns at that level. Example:
- Tier 1: Buy at least 2 items, save 5%
- Tier 2: Buy at least 3 items, save 10%
- Tier 3: Buy at least 5 items, save 15%
The summary in the right panel updates as you add tiers, so you can sanity-check the offer at a glance.
Step 6: Schedule the Offer
Scroll to the Schedule card.
- Start date / time: when the offer goes live
- End date (optional): tick Set end date to make this a limited-time campaign
Step 7: Move to Display Settings
Click Step 2: Display setting at the top of the form (or the Next: Display setting button at the bottom of Step 1).
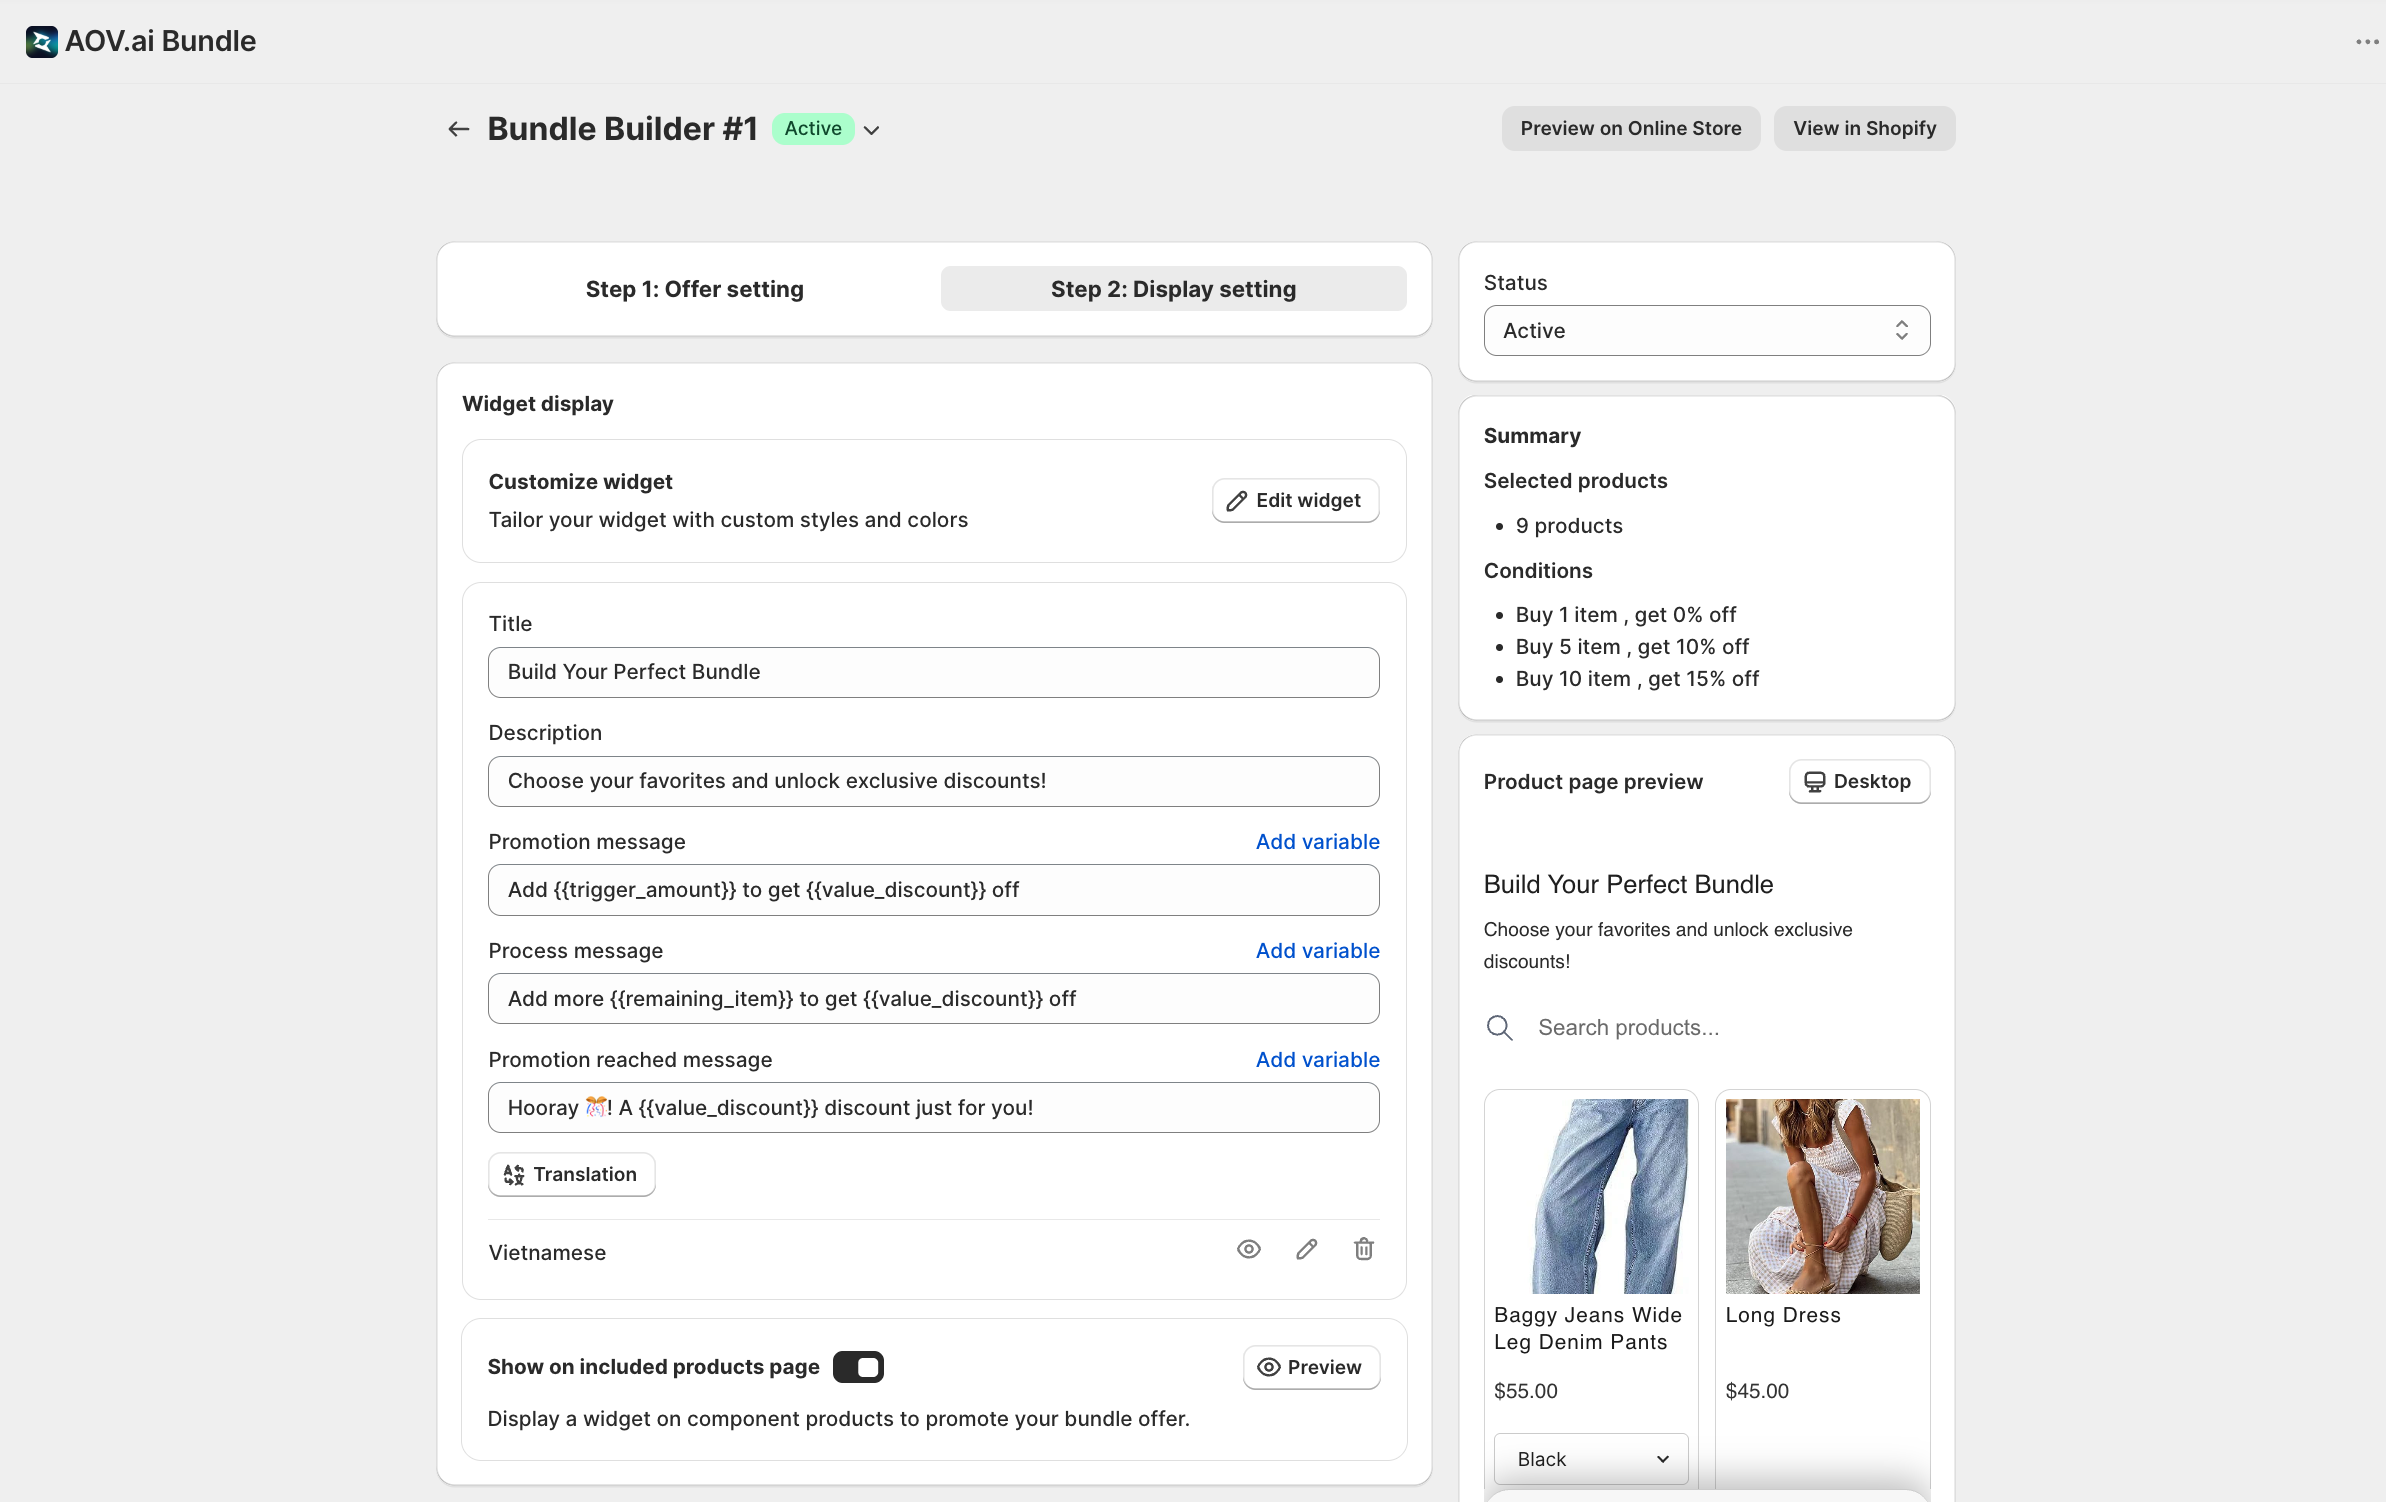
Step 2 controls how the widget looks on the storefront.
1. Widget display:
- Customize widget: click Edit widget to open the visual editor:
- Colors and label styles live under Widget display → Bundle builder widget in the left sidebar
- Style it once and every Bundle Builder offer picks it up
- See Bundle Builder Widget for the full styling guide
- Promotion messages: dynamic copy fields for the progress bar:
{{trigger_amount}}: the total number of items needed to unlock the discount{{remaining_item}}: how many items the customer still needs to add{{value_discount}}: the discount value they'll unlock- Translation: click to add translations for the languages active in your Shopify Admin → Markets
- Show on included products page: toggle on to display a small promo widget on each component product's own page.
- After enabling, you need to add the Bundle builder widget to your default product template in the Shopify theme editor so it renders on the storefront.
- Need help with this? Our support team is available 24/7 via live chat.
2. Upload banner image: upload a custom image displayed as a banner at the top of the bundle widget on the storefront.
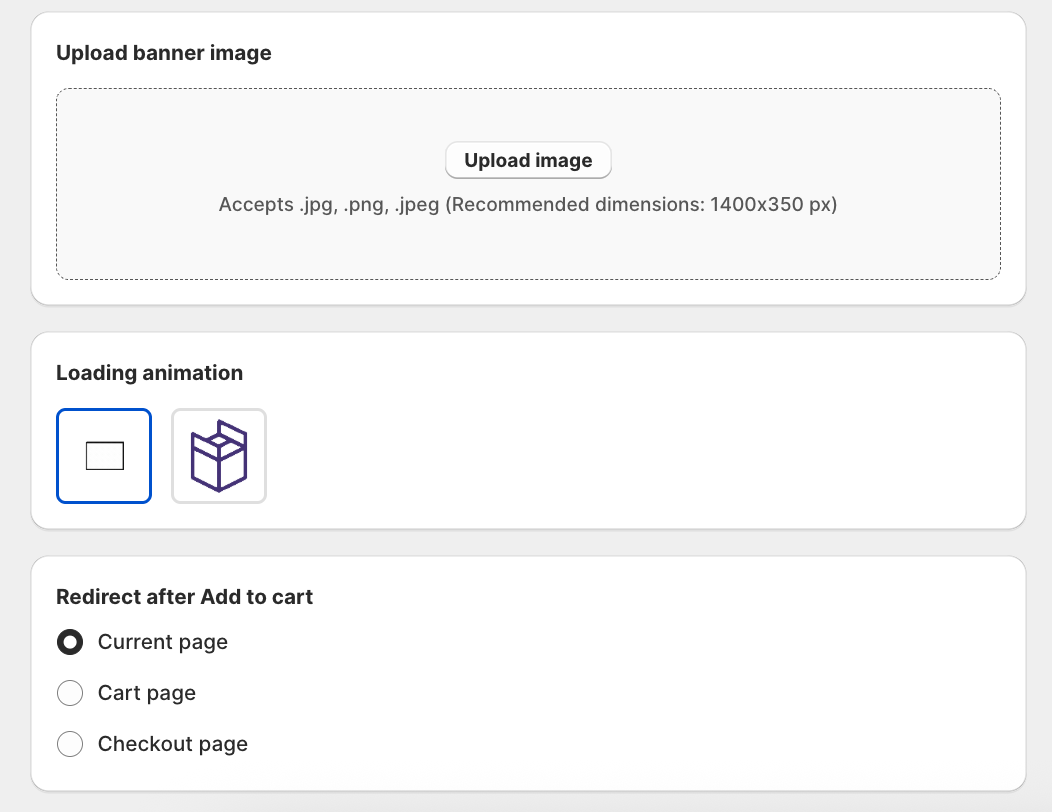
3. Loading animation: enable an animation shown while the bundle widget loads on the product page.
4. Redirect after Add to cart: choose where customers go after adding the bundle to cart:
- Current page: stay on the current product page
- Cart page: redirect to
/cart - Checkout page: redirect straight to checkout
Next Steps
- Bundle Builder Widget: customize colors, labels, and the bundle summary panel
- Discounts: how discount codes, combinations, and max-uses work across all offer types
- Status, Schedule and Activation: how offer status interacts with scheduling
Troubleshooting
Q1: The bundle widget doesn't appear on my storefront
The most common cause: the theme app embed isn't enabled. Open App Embed and Theme Integration and follow the 2-minute setup.
Q2: Customers cannot add the bundle to cart
Check that all selected products are in stock and not blocked by another discount or app. The bundle widget respects Shopify's variant inventory rules.
Q3: The discount doesn't apply at checkout
Verify the offer status is Active, the schedule covers the current date, and the customer's basket meets the Tier 1 minimum item count.