How to set up
Translate your checkout content — product offers, widgets, validation messages, customization rules — into multiple languages for international buyers.
Works with Shopify Markets. The app pulls the language list from your Shopify Markets settings — translate to any language you've published in Shopify Admin → Settings → Languages. Add a language there first if it's not in the picker. You can also customize translations per market, so each region of your store can show different wording for the same source text.

What it does
Translation lets you provide localized text for everything AOV.ai Checkout Upsell shows at checkout. When a buyer's checkout language matches one of your active languages, the app shows the translated copy. Otherwise, it falls back to the default text.
You can translate content in 9 areas:
| Area | What gets translated |
|---|---|
| Product Offers | Offer title, description, button label, variant label, quantity label (Volume Savings: widget title and per-tier title/badge) |
| Custom Buttons | Section title, subtitle, per-button labels |
| Discount List | Widget title, button label, expiry text, no-expiry text |
| Checkout Validation | Error messages (VAT rules split into empty-field and invalid-format errors) |
| Checkout Customization | Renamed payment/delivery method names and the shipping discount label |
| Testimonials | "Verified" badge, "Anonymous" name, "Show more" / "Show less" |
| Trust Badges | Heading, per-badge title and description |
| Custom Banners | Title, message (formatting like lists, bold, italic is preserved automatically) |
| Cart Editor | Edit link text, variant/quantity labels, remove-confirmation text, Remove and Cancel button labels |
In the editor, the first four areas (Product Offers, Custom Buttons, Discount List, Checkout Validation) appear as primary tabs; the rest sit under More views. On non-Plus stores only Checkout Validation and Checkout Customization are shown.
Translations only ship to checkout for languages you've activated.
Step 1: Open Translation
In the app sidebar, click Translation. You'll see the Language List page.
The first row shows your Source language — usually English. This is the default text shown when no translation matches.
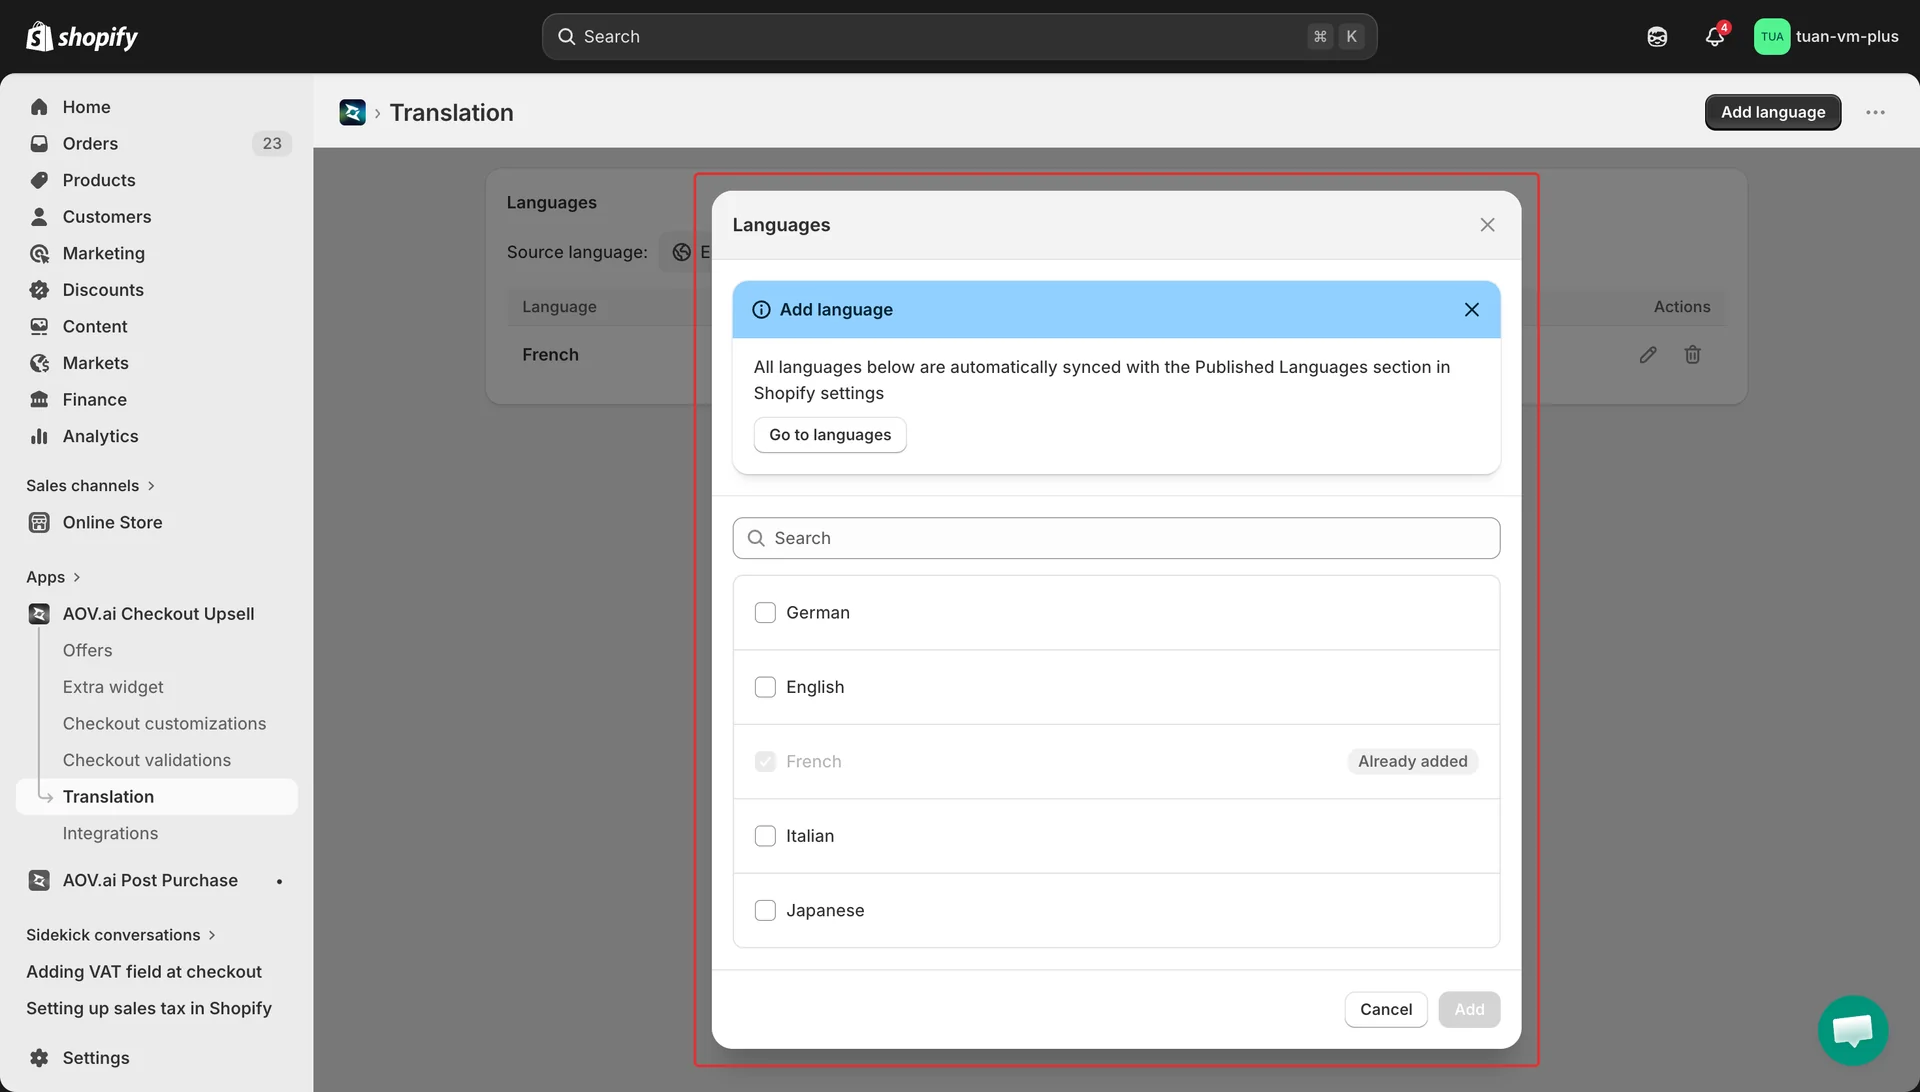
Step 2: Add a language
Click Add language (top right). A modal opens with all languages you've published in Shopify Markets.
- Use the search box to filter by language name
- Tick the languages you want to translate to
- Languages already added show an "Already added" badge
- Click Add to confirm
Newly added languages are active by default — they'll start being delivered to checkout as soon as you save translations.
Don't see a language? It needs to be published in Shopify Admin → Settings → Languages first. The banner inside the Add language modal links you straight to the right Shopify settings page.
Step 3: Toggle a language Active or Inactive
Each row in the language table has an Active toggle.
- Active — translations for this language are shown at checkout
- Inactive — translations stay saved, but checkout falls back to the default language for buyers using this language
Toggling takes effect at checkout within about a minute.
Step 4: Open the Translation Editor
Click Edit (or the language name) on any row to open the editor for that language.
The editor has:
- Breadcrumb — Translation / Français
- Auto Translate button (top right) — fills in all empty fields using AI
- Tabs — one per content area (Product Offers, Custom Buttons, Discount List, etc.). Less-used tabs sit under More views
- Side-by-side rows — default text on the left (read-only), translation input on the right
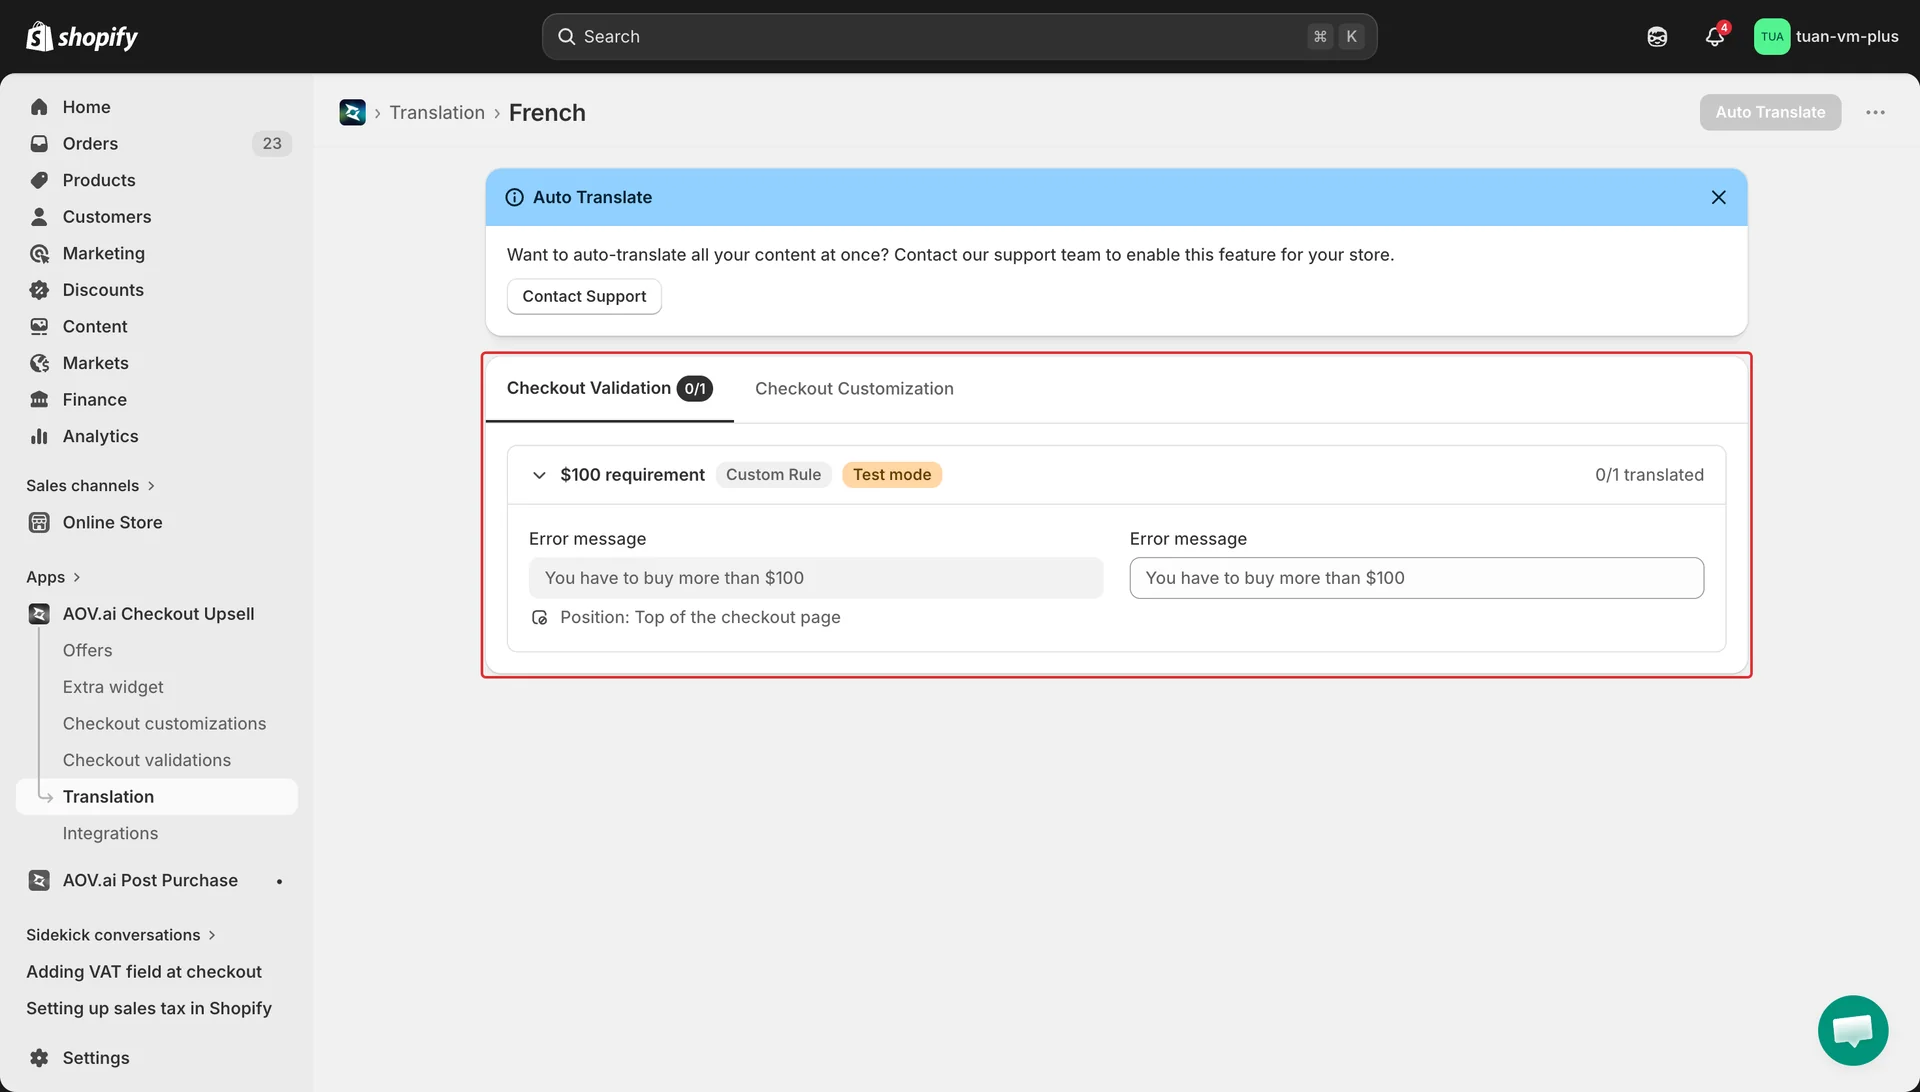
Step 5: Translate manually
Each tab groups content by entity (one accordion per offer, widget, or rule). Click a row to expand it.
Type the translated text in the right column. The completion count in the row header (for example, "3/5") updates as you fill in fields.
A few things to keep in mind:
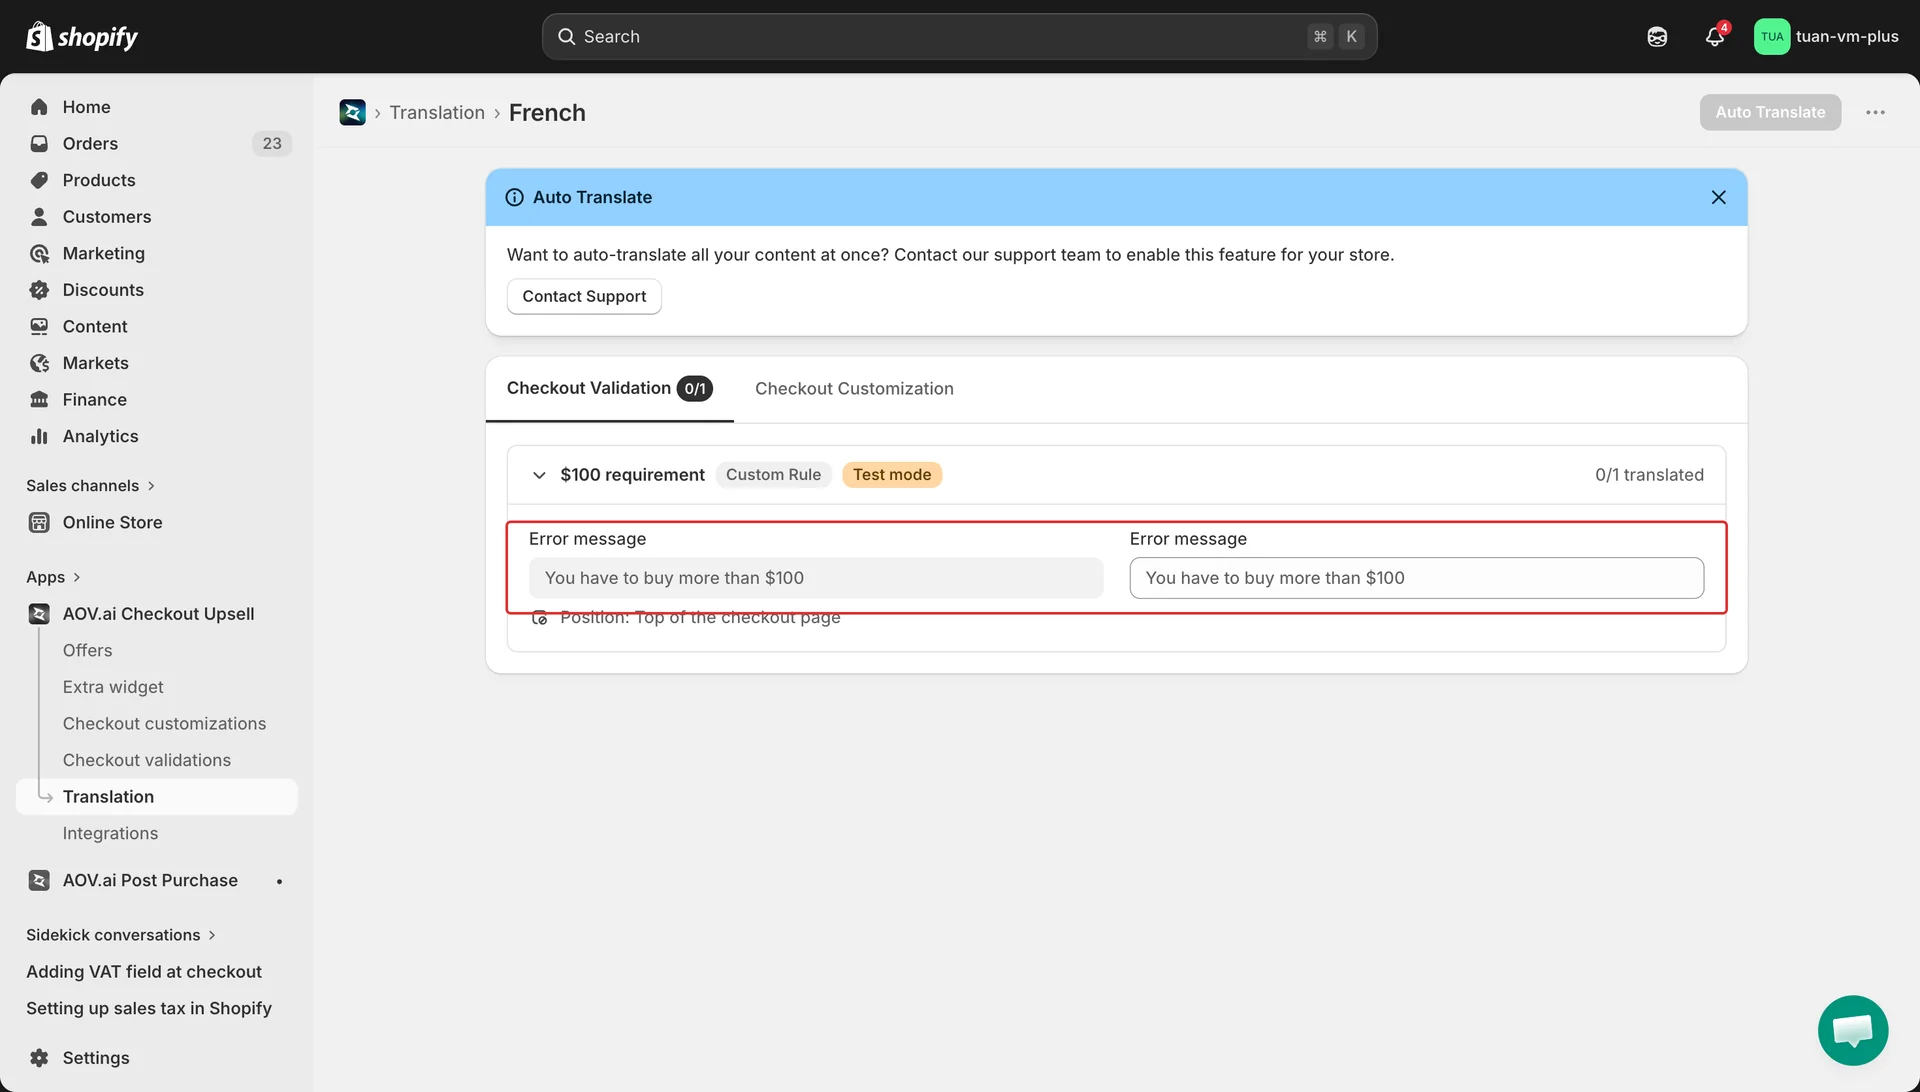
- If the original text contains a variable in curly braces (for example, the minimum or maximum amount in a validation error), keep it in your translation — use the Add variable button to insert it instead of typing it manually
- For Custom Banner messages, type the translated message normally. Any formatting in the original (bullet lists, bold, italic) is preserved automatically — you don't need to copy the formatting marks yourself
- Long text fields automatically expand to a multi-line text box
Saving:
- A save bar appears at the top whenever you have unsaved changes
- Click Save to persist. All edited fields across all tabs save together
- All inputs disable while saving — wait for the toast confirmation before continuing
Step 6: Auto Translate (optional)
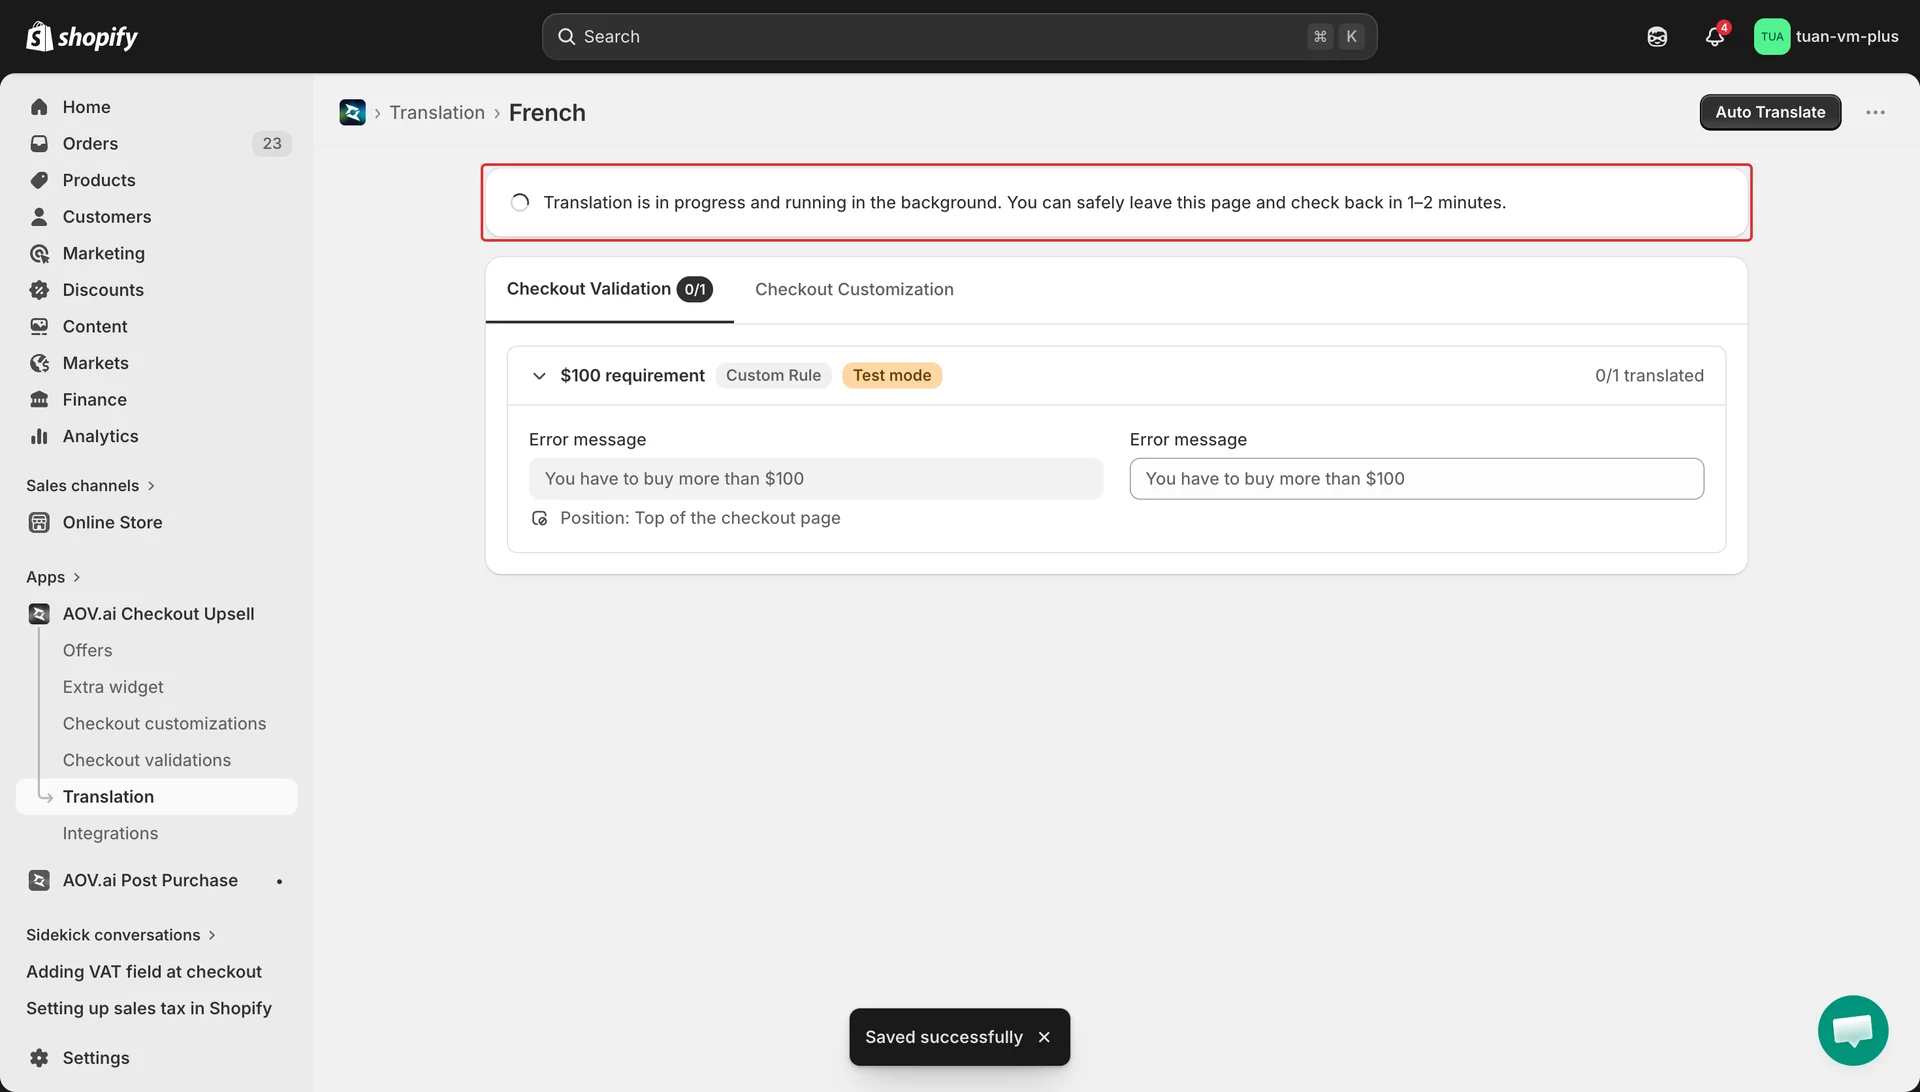
Click Auto Translate in the top right. A confirmation modal opens.
When you confirm:
- The app sends all empty fields for the current language to AI in batches
- A progress banner appears: "Translation is in progress and running in the background. You can safely leave this page and check back in 1–2 minutes."
- AI fills in every empty field while keeping variables and formatting intact
- Translations are saved and published to checkout
- The banner clears and a "Last translated at …" badge appears
You can edit any auto-translated field afterwards — manual edits override the AI output.
Auto Translate is gated. If you don't see the button enabled, contact our support team — it requires a one-time activation per store. Use the Contact Support banner shown on the page.

Step 7: Verify on checkout
Open your store's checkout in a buyer's browser, switch the language using the Shopify language selector, and check that:
- Offer titles, button labels, and widget content show the translated text
- Validation errors (e.g. VAT field invalid) display in the buyer's language
- Renamed payment/delivery methods show the translated name
- Custom Banner formatting (lists, bold, italic) renders correctly
If something still appears in English, check that:
- The language is Active in the Language List
- The field actually has a translation saved (check the editor — empty fields fall back to default)
Delete a language
Click Delete on a row. A confirmation modal appears.
When you confirm, all translations for that language are removed from every offer, widget, validation rule, and customization rule. The change reaches checkout shortly after.
Deletion is permanent — re-adding the language won't restore the previous translations.
How language fallback works
| Buyer's checkout language | What they see |
|---|---|
| Matches an Active language with a saved translation for the field | Translated text |
| Matches an Active language but the field has no translation | Default (source language) text |
| Matches an Inactive language | Default text |
| No match (e.g. buyer uses a language you haven't added) | Default text |
The app matches by main language, not region. A buyer using French (Canada) sees your French translation — you don't need to add separate translations for French (Canada) and French (France) unless you actually want different copy.
FAQ
Q: Do I need Shopify Plus? A: For the translations to actually show at checkout, yes — the checkout features that render translated content require Shopify Plus. The Translation admin UI works on any plan.
Q: Can I import/export translations as CSV? A: Not yet. CSV bulk import/export is on the roadmap.
Q: Does Auto Translate work with the formatting in Custom Banner messages? A: Yes. The AI is instructed to keep all formatting (bullet lists, bold, italic, line breaks, links) intact while translating only the words.
Q: What happens if I deactivate a language with translations saved? A: Translations stay in the database. Checkout immediately stops showing them — buyers using that language see the default text again. Toggle it back to Active any time.
Q: Why isn't Image Carousel in the tab list? A: Image Carousel doesn't show any text content visible to buyers. There's nothing to translate.
Q: Can I have one language fall back to another (e.g. French Canada to French France)? A: No. The app matches by main language only. Either there's a translation for that language or it falls back to the default — there's no per-region inheritance.