Custom Rules
Block orders that don't meet your requirements by creating custom validation rules. Set conditions based on cart value, product quantity, or specific products — and display clear error messages at checkout.
Available on all Shopify plans. Custom Rules uses Shopify Functions — no Shopify Plus required.
What it does
Custom Rules lets you create validation rules that block checkout when specific conditions are met:
- Subtotal value — require a minimum or maximum order subtotal, or a subtotal range
- Product restrictions — block (or exempt) checkout when certain products or variants are in the cart
- Customer tag — apply the rule based on whether the customer has (or doesn't have) a tag
- Shipping country — apply the rule based on the order's shipping country
Each rule shows a custom error message at a position you choose — either as a banner at the top of the page or inline next to a specific field.
Looking for cart-quantity or per-product limits? Minimum/maximum cart quantity, per-product quantity, and per-product value live in the separate Order Limits validation type, not in Custom Rules.
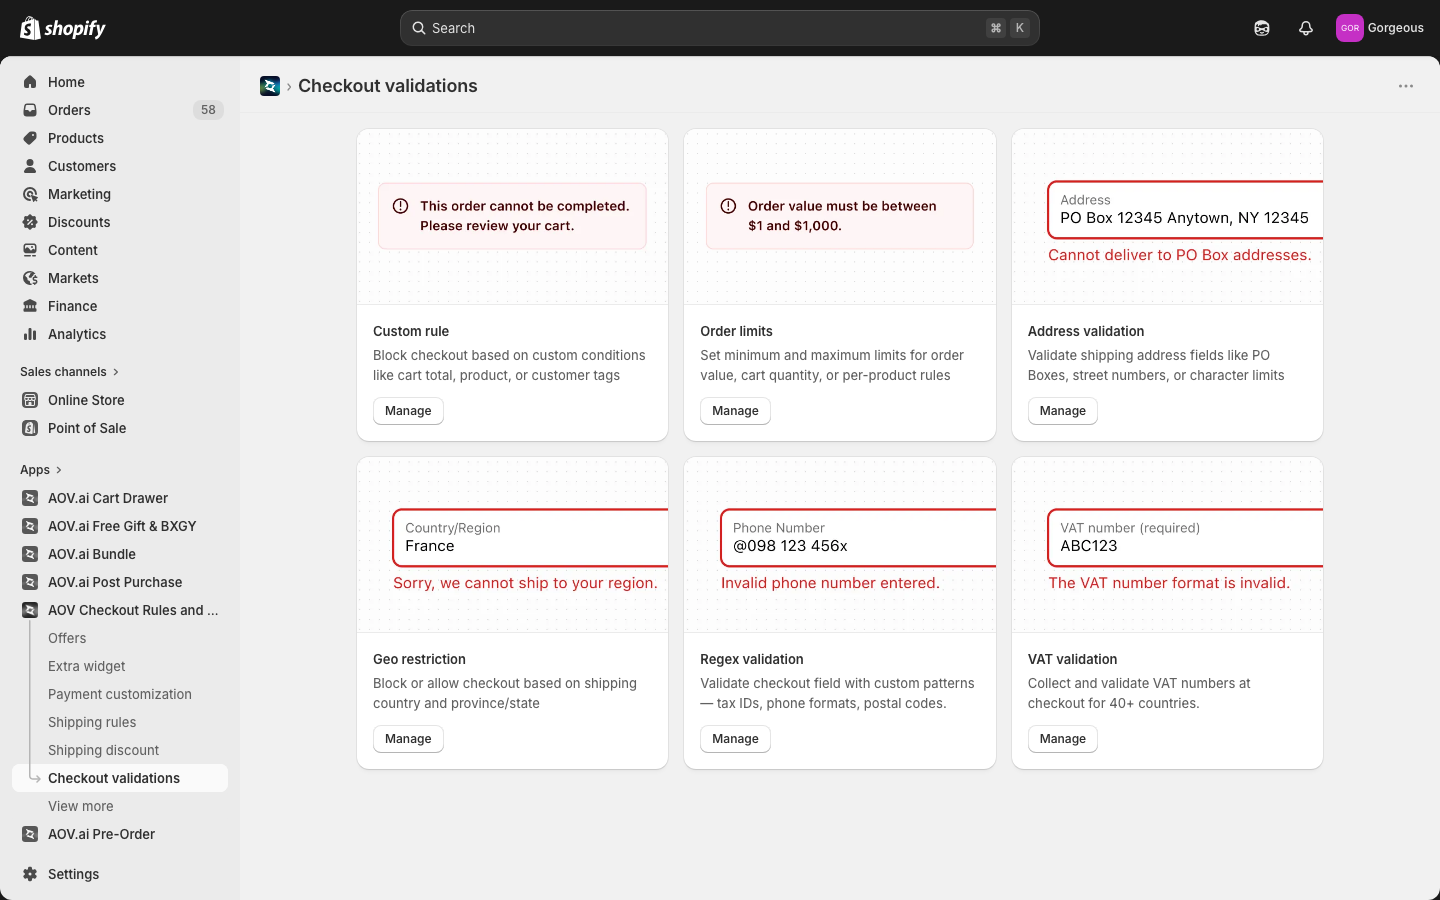
Step 1: Go to Checkout Validations
In the app sidebar, click Checkout Validations. You'll see the list of all validation rules.
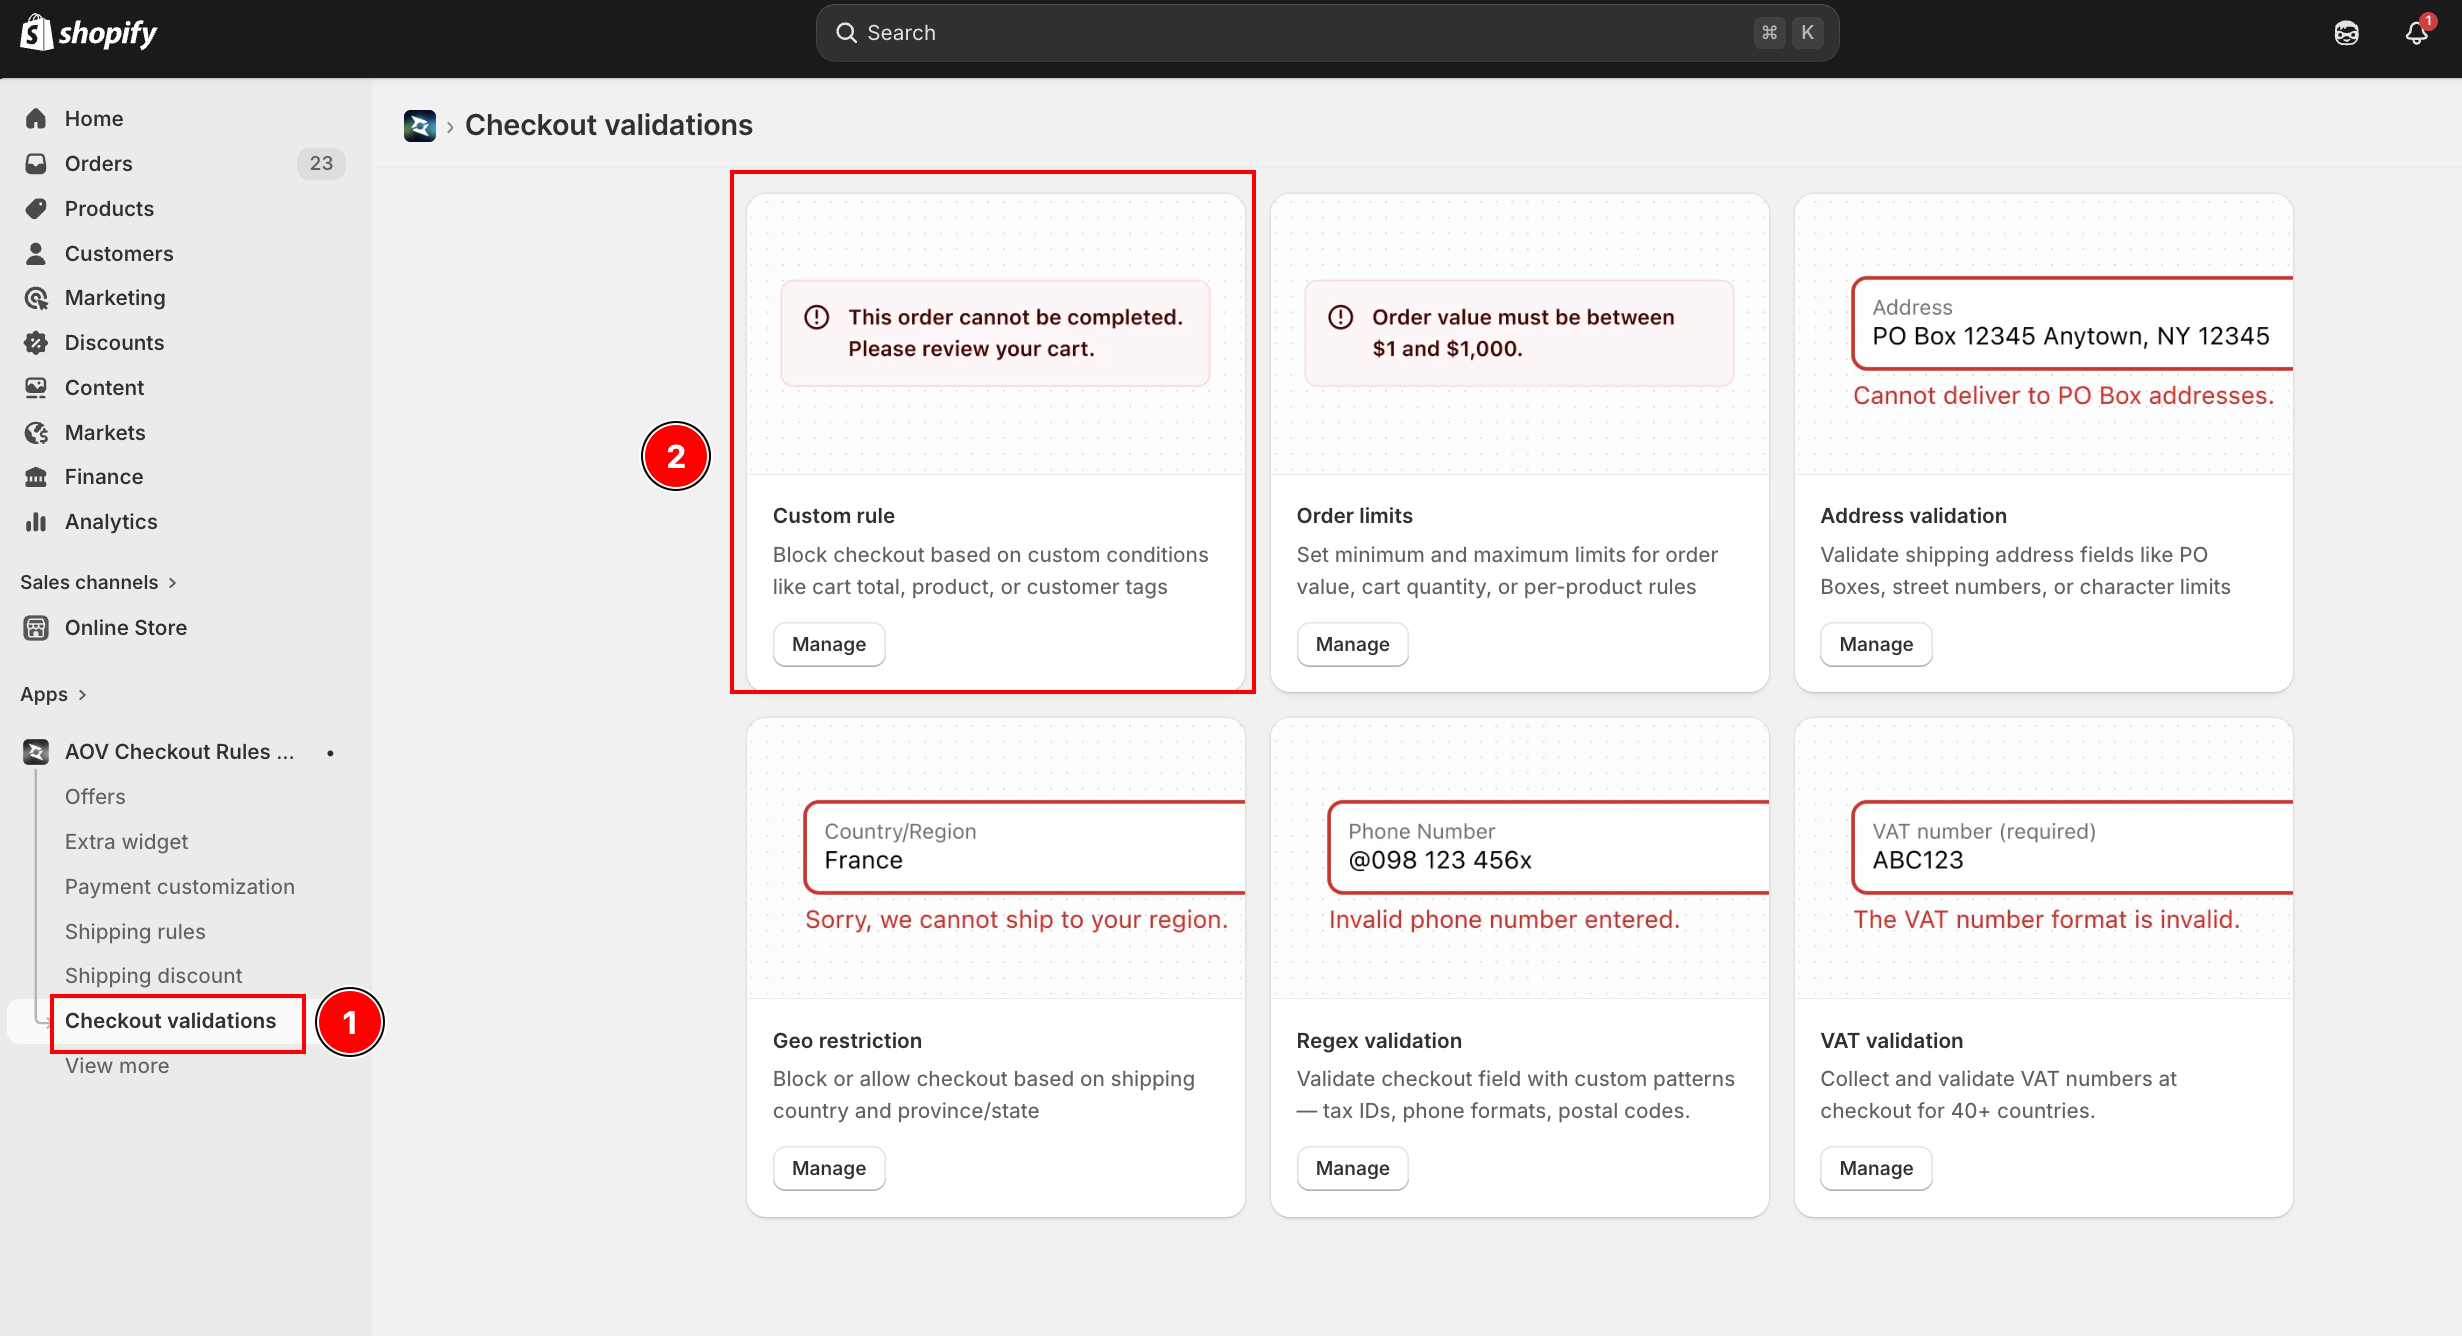
List page overview
| Feature | Description |
|---|---|
| Search | Find rules by name |
| Status filter | Filter by status (Active, Test mode, etc.) |
| Table | Shows rule name, status, conditions summary, and actions |
| Actions | Activate/Deactivate, Edit, Delete for each rule |
| Bulk actions | Select multiple rules to activate, deactivate, or delete |
Step 2: Create a new rule
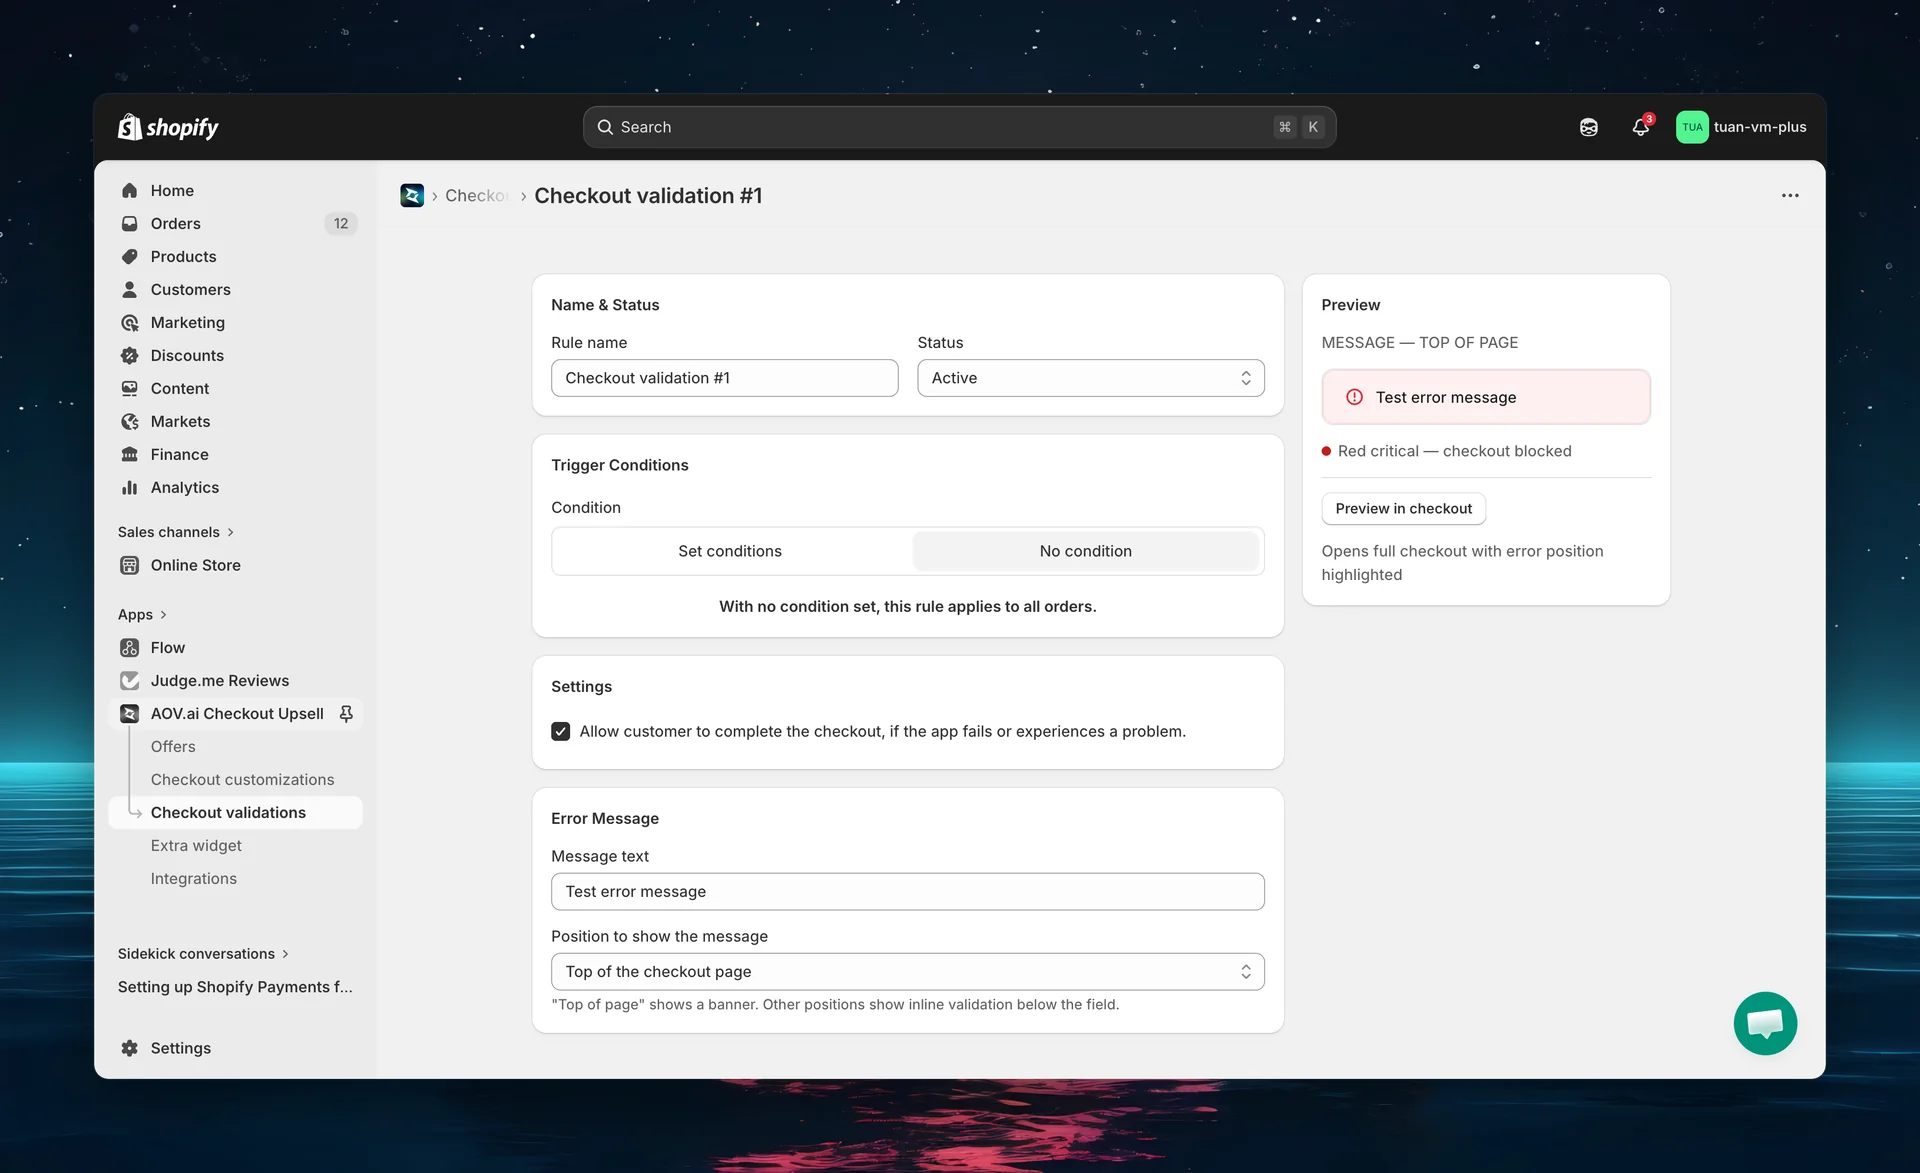
Click Create validation (top right). The editor opens with these sections: Name & status, Trigger conditions, App failure fallback, and Error message.
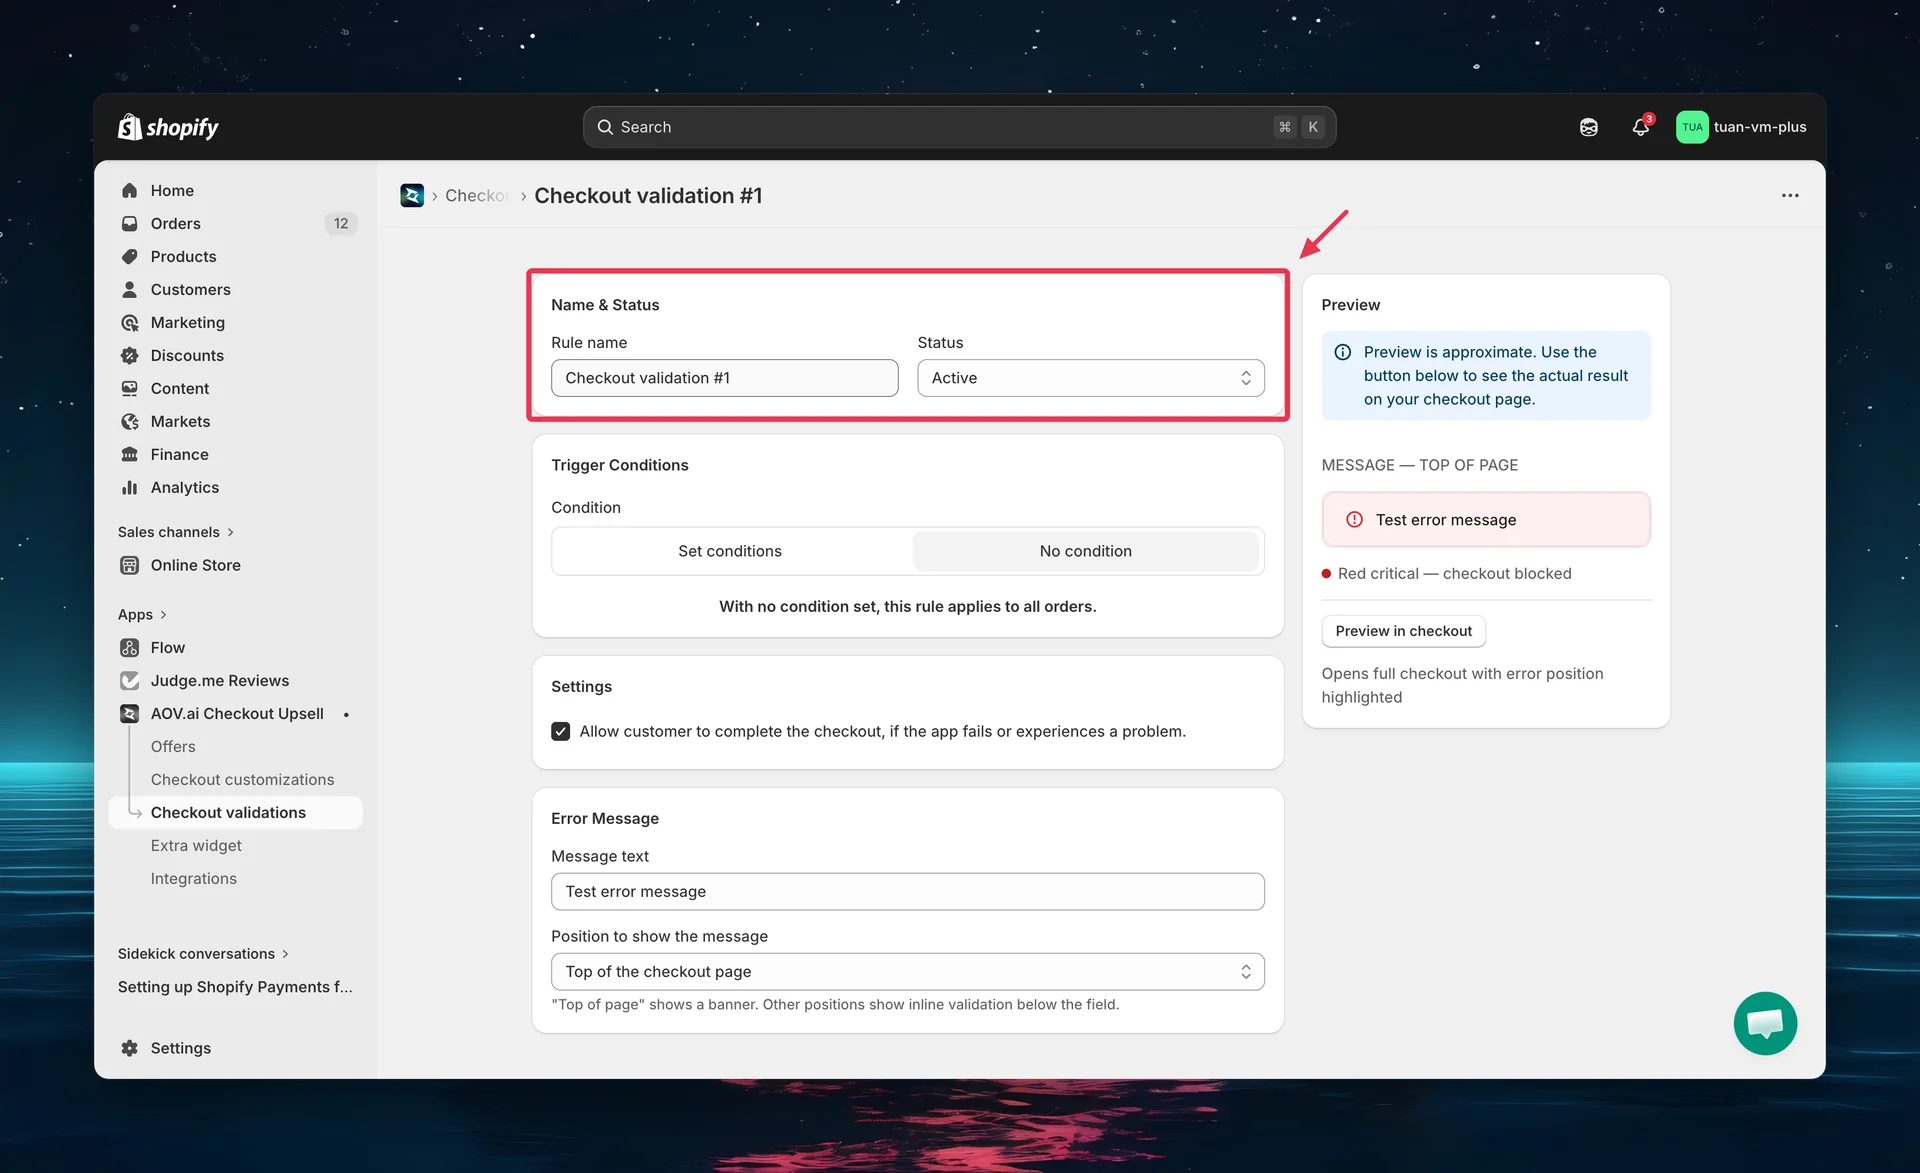
Step 3: Set name and status
| Setting | Description |
|---|---|
| Rule name | A descriptive name for your reference (e.g., "Minimum order $50") |
| Status | Active — rule applies at checkout. Test mode — only triggers when checkout email is [email protected]. Expired — rule is saved but not applied. (You can also pause a rule from the list page to stop it without deleting it.) |
Tip: Start with Test mode to verify the rule works correctly before activating it for all customers.
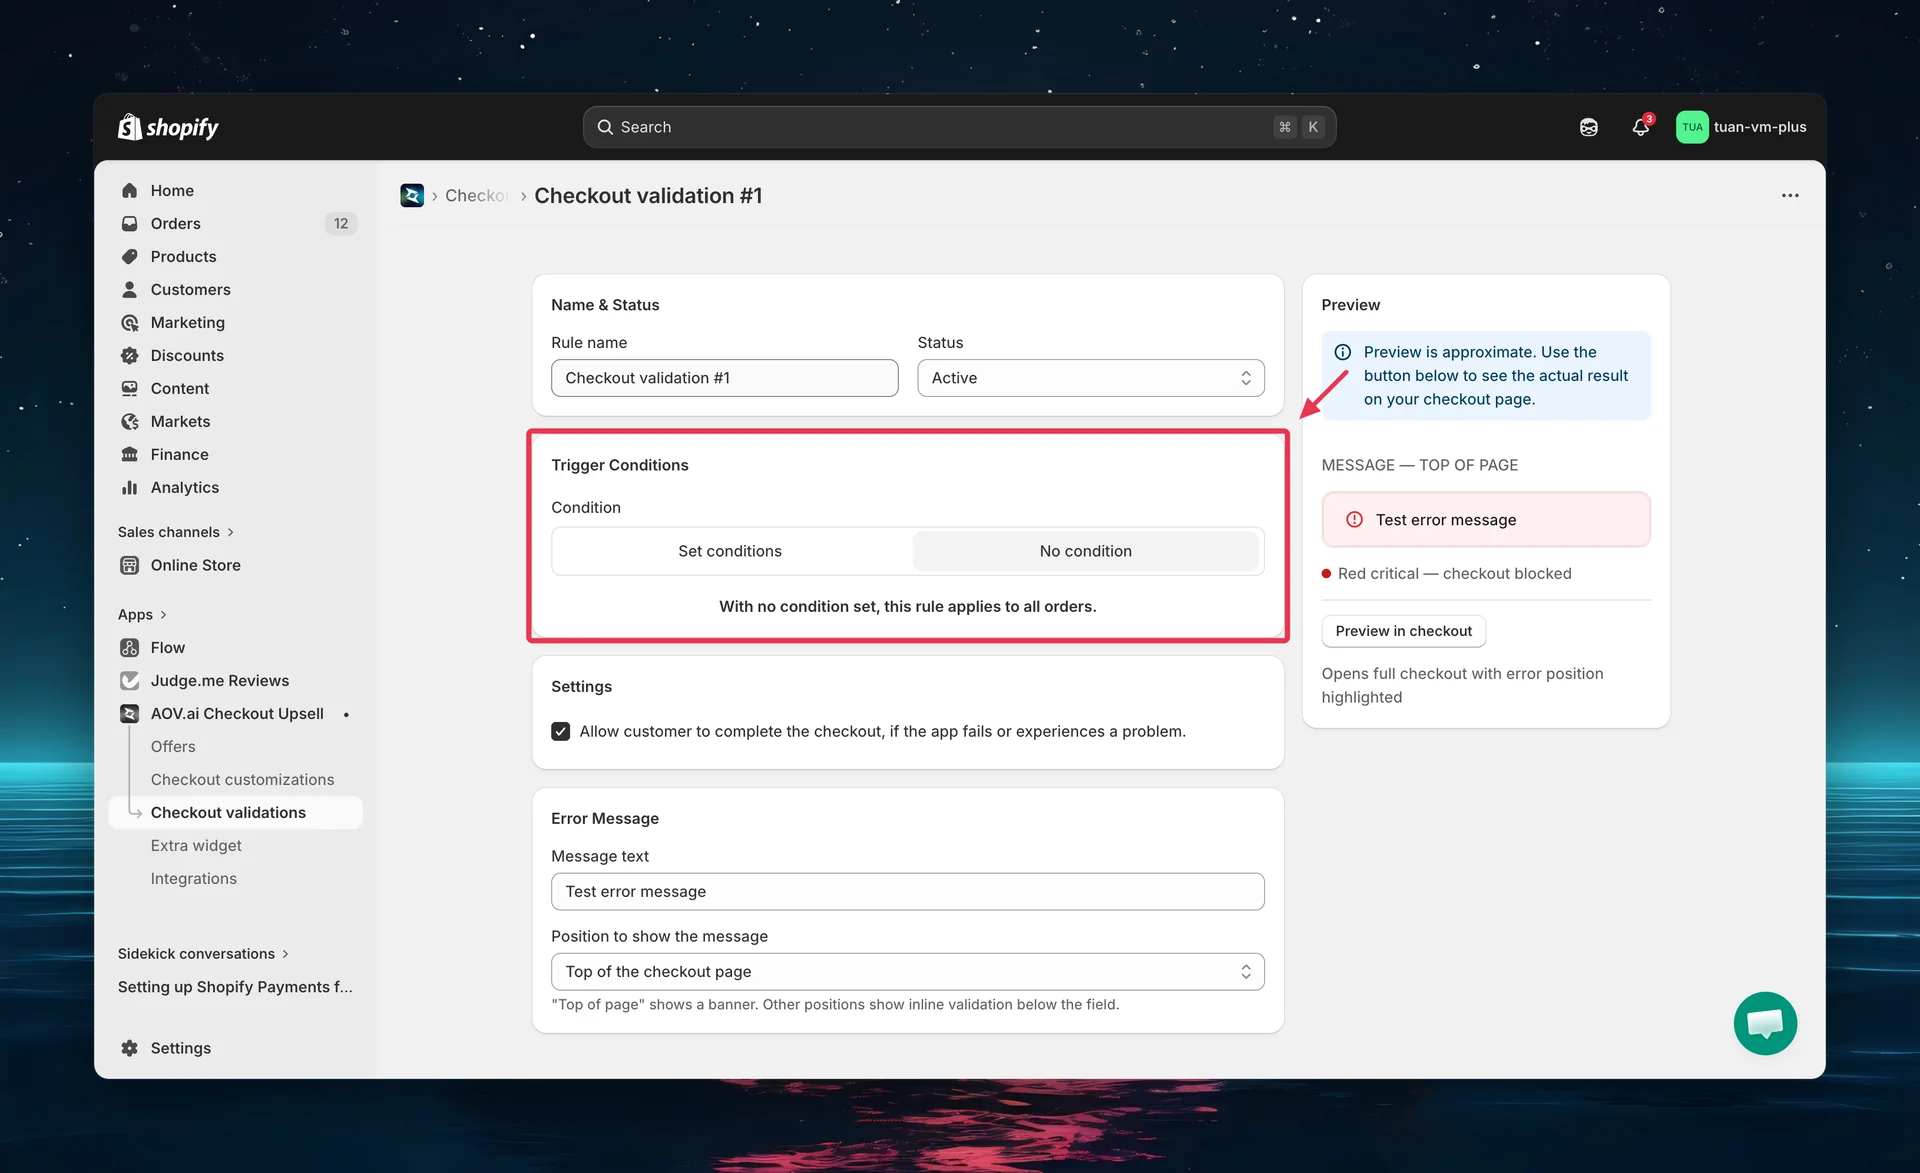
Step 4: Configure trigger conditions
Trigger conditions define when the rule blocks checkout. By default, rules apply to all orders.
Two modes
The mode is set by the Trigger criteria selector at the top of this section:
| Mode | Behavior |
|---|---|
| No condition | Rule always applies to all checkouts |
| Set conditions | Rule only applies when all conditions are satisfied (AND logic) |
When you choose No condition, the editor reminds you: "Rule applies to all checkouts — all checkouts will be blocked. Use 'Set conditions' to narrow the scope."
Available condition types
When you select Set conditions, a condition builder appears. Click "+ Add 'AND' condition" to add more rows.
| Condition | Operators / options | Example |
|---|---|---|
| Included product (or variant) | Include / Exclude — pick specific products or variants | Cart contains "Fragile Item" → block checkout |
| Excluded product (or variant) | Include / Exclude — pick specific products or variants | Cart does NOT contain "Digital Download" → block checkout |
| Subtotal value | Greater (>), Greater or equal (≥), Less (<), Less or equal (≤), Equal (=), or Use a range | Subtotal under $50 to require a minimum order |
| Customer tag | Include / Exclude — match customers with (or without) a tag | Customer is tagged "wholesale" → apply rule |
| Shipping country | Include / Exclude — pick one or more countries | Order ships to a restricted country → apply rule |
For Subtotal value, the basic mode uses one comparator and a value; click "Use a range" to switch to a from–to range, or "Change to basic" to switch back.
All conditions use AND logic — every condition must be true for the rule to trigger. For example: "Subtotal value under $50" AND "Cart contains Product A" means both must be satisfied for the error to show.
Step 5: Set the app failure fallback
| Setting | Default | Description |
|---|---|---|
| Allow customer to complete the checkout, if the app fails or experiences a problem | Checked | When enabled, if the app encounters an error or times out, checkout proceeds normally — buyers are not blocked by a technical issue. |
We recommend keeping this checked. Unchecking it means a temporary app issue could block all checkouts.
Step 6: Configure error message and position
This section controls what buyers see when the rule triggers.
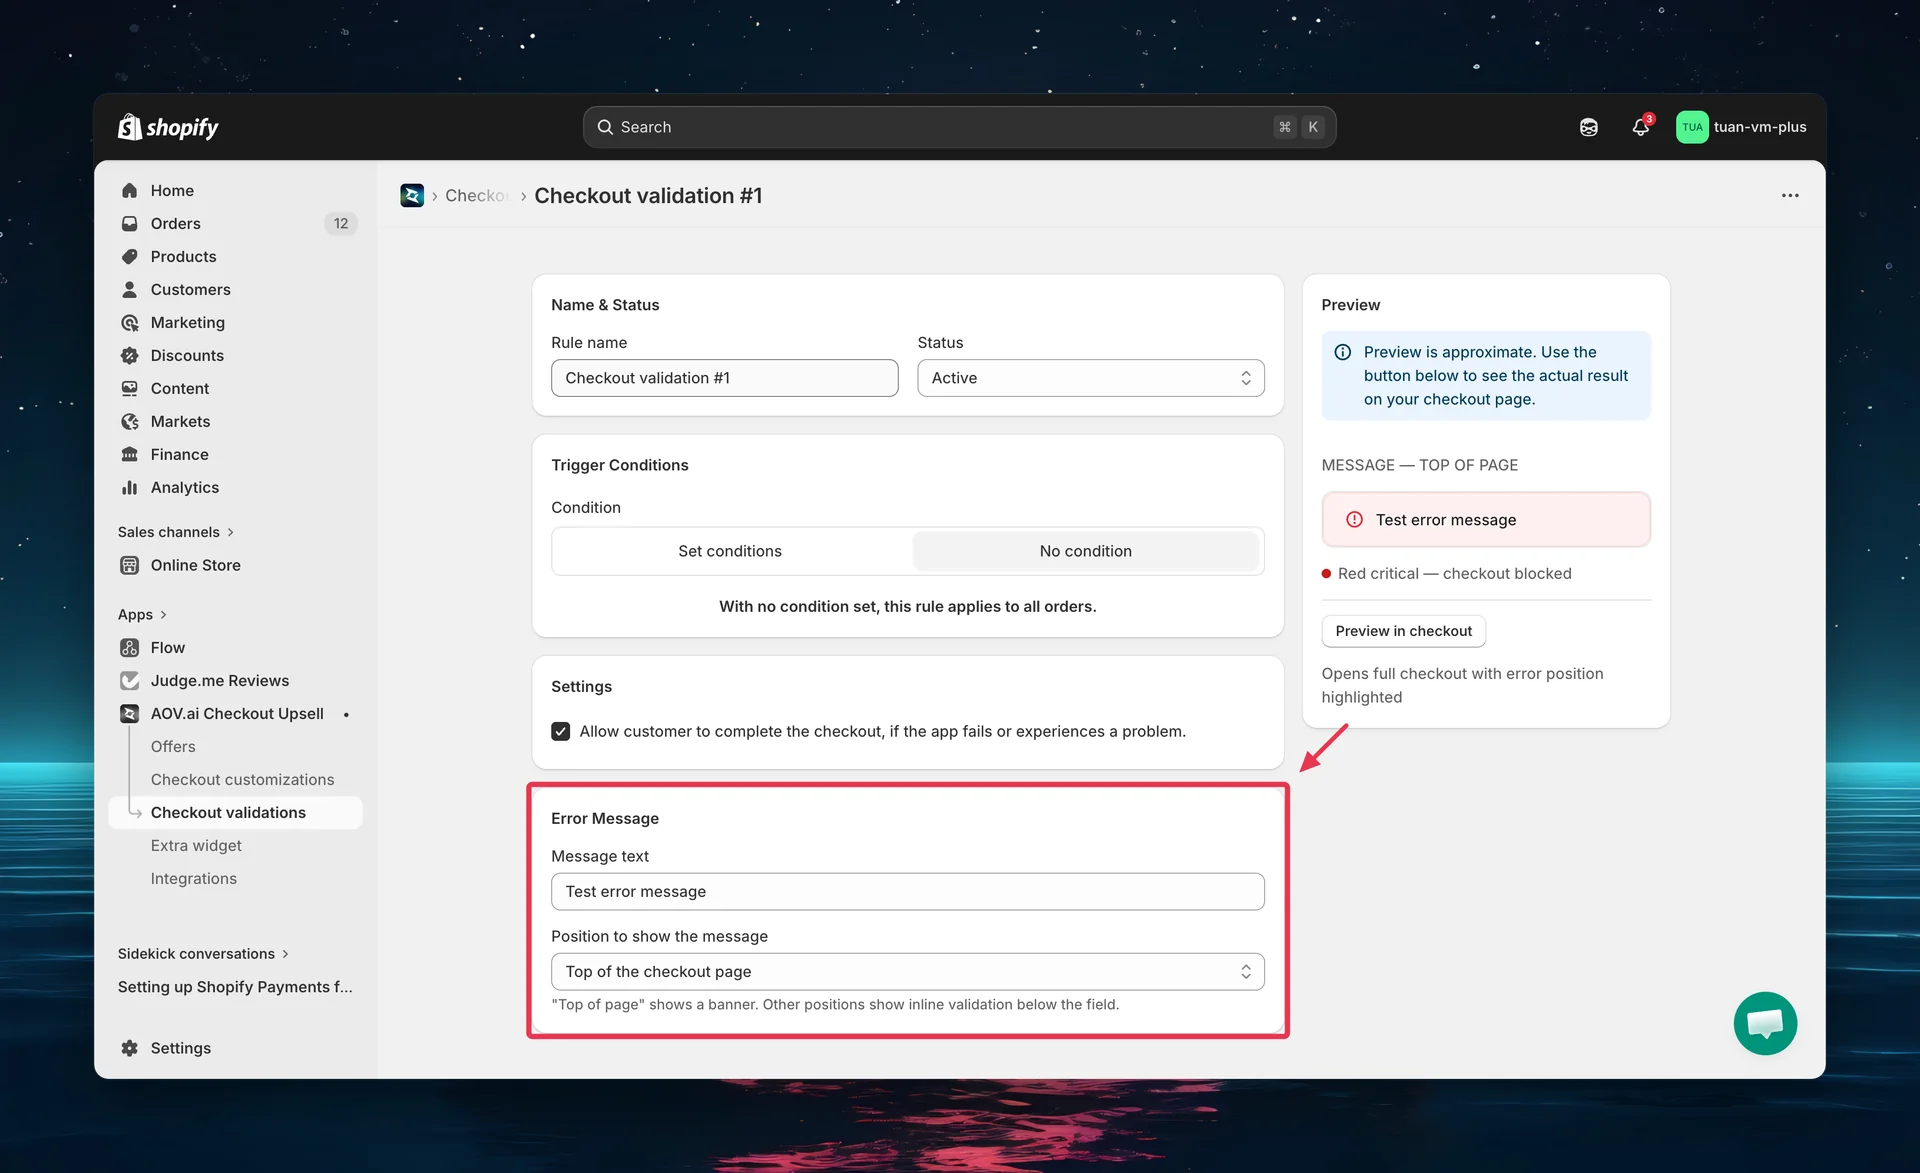
Error message
Enter the message buyers will see at checkout. Keep it clear and helpful — explain what they need to do (e.g., "Your order must be at least $50 to proceed. Please add more items."). The default message is "This order cannot be completed. Please review your cart."
Editing the message: By default the message field may be read-only and show a banner: "Want to customize your checkout error message? Contact us to update for free." Click Contact us to have the team enable custom messages for your store.
Error position
Choose where the error message appears on the checkout page:
| Position | Display |
|---|---|
| Top of the checkout page | Red banner at the top of the page — most visible |
| First name | Inline error below the First name field |
| Last name | Inline error below the Last name field |
| Company | Inline error below the Company field |
| Address line 1 | Inline error below Address line 1 |
| Address line 2 | Inline error below Address line 2 |
| City | Inline error below the City field |
| Email or phone number | Inline error below the Email/Phone field |
| Delivery phone | Inline error below the Delivery phone field |
| ZIP / Postal code | Inline error below the ZIP code field |
| Country | Inline error below the Country dropdown |
| Province / State | Inline error below the Province/State dropdown |
"Top of the checkout page" is recommended for most rules — it's the most visible position and doesn't confuse buyers into thinking a specific field has an error.
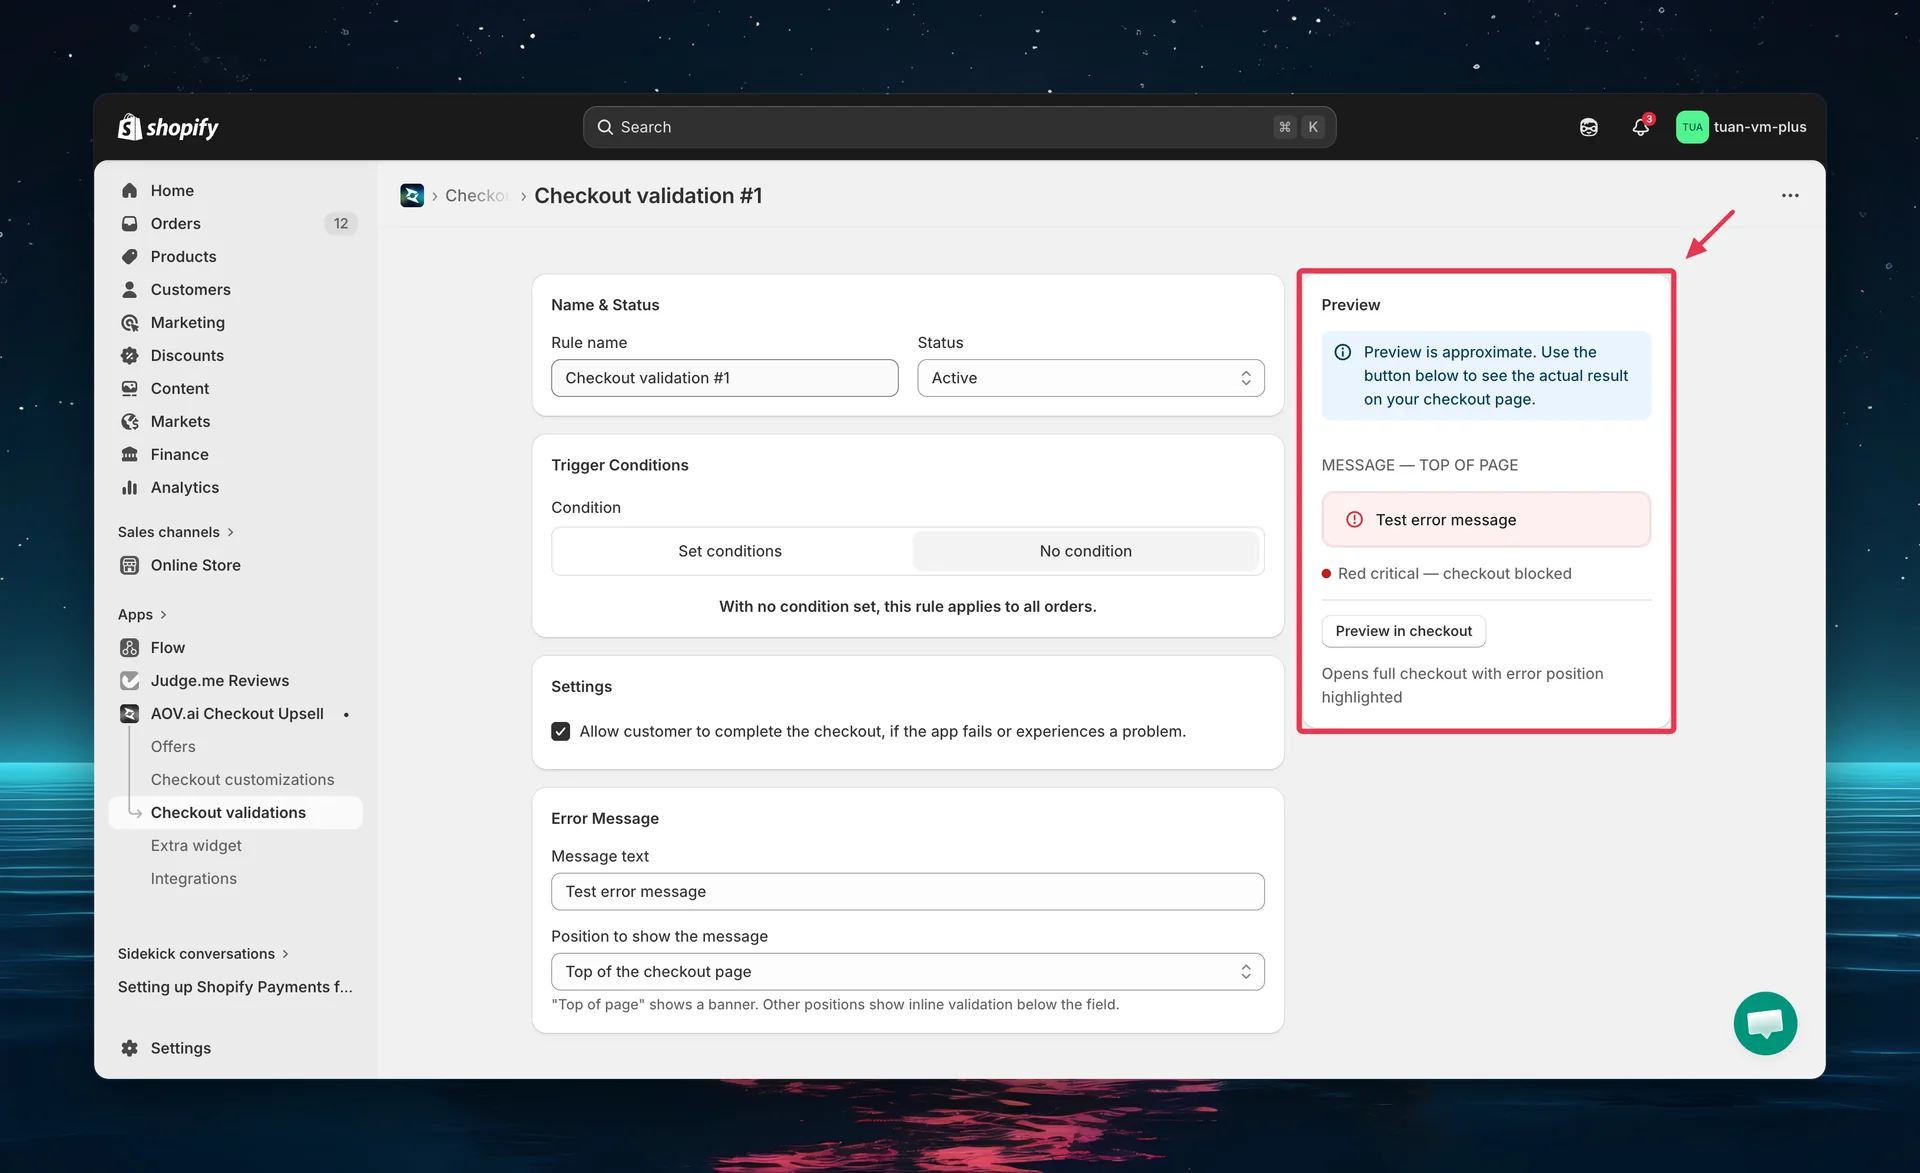
Step 7: Preview and save
The right sidebar shows a live preview of how your error message will appear based on the selected position.
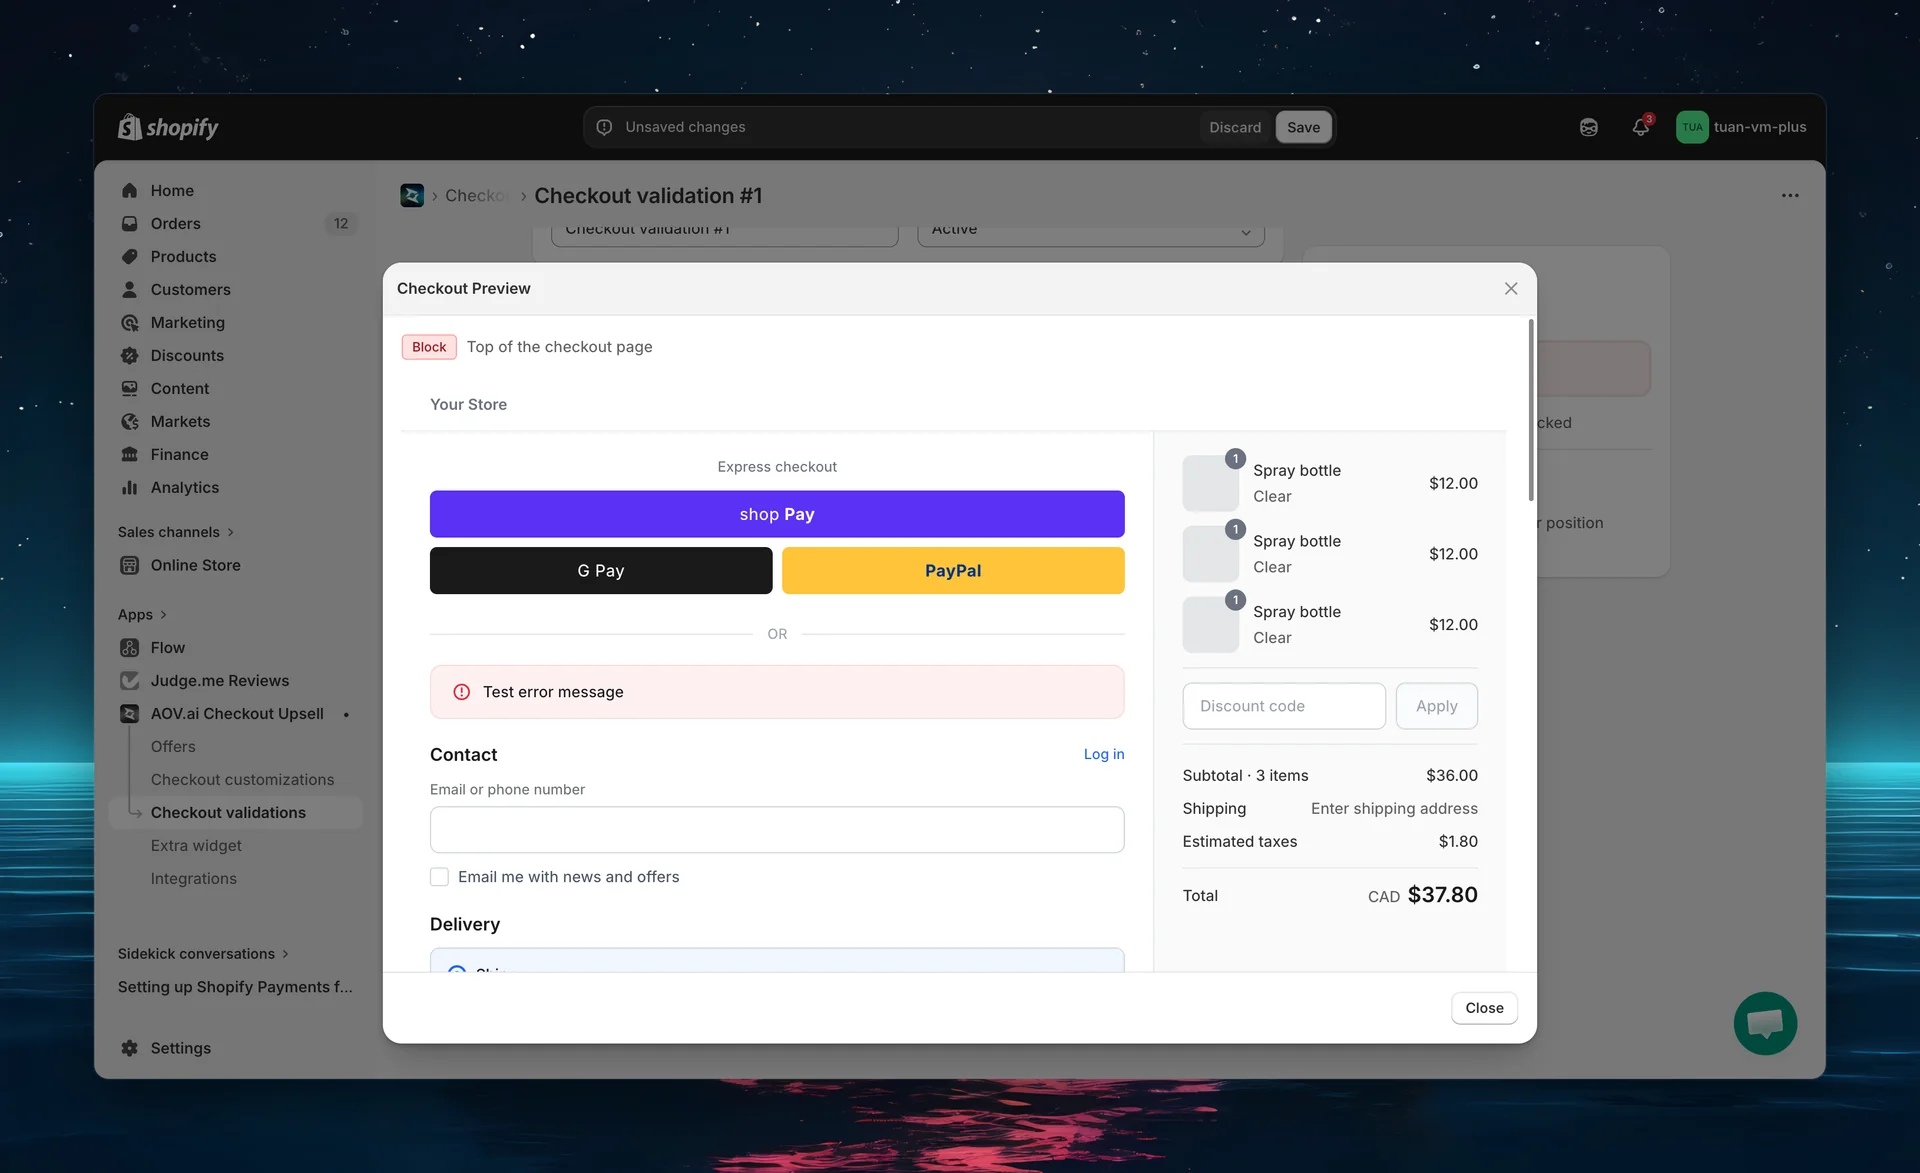
Full checkout preview
Click "Preview" (below the sidebar preview) to open a full-screen Checkout Preview modal showing the complete checkout layout with your error message rendered at the correct position.
When everything looks good:
- Set the Status to your preferred option
- Click Save in the top bar
The rule takes effect at checkout immediately.
Test your rule with Test Mode
Before activating a rule for all customers, test it first:
- Set the rule Status to Test mode and save
- Go to your store and add products to the cart
- Proceed to checkout
- Enter [email protected] as the checkout email
- Make sure all trigger conditions (if any) are met
- Verify the error message appears at the correct position
- Once verified, change the status to Active
Test mode only works with the email [email protected]. All trigger conditions must also be satisfied for the rule to take effect.
Manage existing rules
Toggle status
Use the Pause / Start action on any rule to quickly toggle its status without opening the editor.
Edit a rule
Click the edit icon (pencil) in the Actions column, or click the rule name to open the editor.
Delete rules
- Single rule: Click the delete icon (trash) in the Actions column
- Bulk delete: Select multiple rules with checkboxes → click Delete rules
Other bulk actions: Activate rules, Deactivate rules.
Deletion is permanent. The rule cannot be recovered.
Tips
- Start with Test mode — verify the rule works correctly before activating for all customers
- Use "Top of the checkout page" for most rules — it's the most visible and avoids field-level confusion
- Keep messages actionable — tell buyers what to do, not just what went wrong (e.g., "Add at least 2 items" instead of "Not enough items")
- Combine conditions wisely — all conditions use AND logic, so the rule only triggers when every condition matches
- Keep rule names descriptive — "Min order $50 for wholesale" is better than "Rule #1"
- Need more rules? — the free plan includes 1 validation rule (shared across all checkout-validation types). Use the Contact us link in the app to have more rules unlocked
FAQs
General
Q: Do I need Shopify Plus for Custom Rules? A: No. Custom Rules uses Shopify Functions, which are available on all Shopify plans.
Q: How many rules can I have? A: The free plan includes 1 validation rule, counted across all checkout-validation types (Custom Rules, Geo Restriction, Address Validation, Regex, VAT, and Order Limits combined — active, paused, and test-mode rules all count). To create more, use the Contact us link in the app to have additional rules unlocked.
Q: Do rules take effect immediately after saving? A: Yes. Once a rule is set to Active and saved, it applies to all new checkouts immediately.
Trigger conditions
Q: What happens if I set no conditions? A: The rule applies to every order at checkout. The error message will always show.
Q: Can I combine multiple conditions? A: Yes. Add multiple conditions with AND logic — all must be true for the rule to trigger.
Q: Can product conditions target specific variants? A: Yes. The Included/Excluded product condition lets you pick either a whole product or specific variants when you browse and select.
Q: What's the difference between "Greater than" and "Greater than or equal"? A: "Greater than 10" means 11 or more. "Greater than or equal to 10" means 10 or more.
Error message
Q: Can I use different languages in the error message? A: Yes. Enter the message in any language you prefer — it will display exactly as typed.
Q: What happens if multiple rules trigger at the same time? A: All matching rules display their error messages. Buyers must resolve all errors before completing checkout.
Q: Does the error block checkout or just show a warning? A: The error blocks checkout — buyers cannot complete their purchase until the condition is no longer met.