Testimonials
Show product reviews at checkout to boost buyer confidence. Testimonials automatically matches reviews to products in the cart — buyers see relevant social proof right when they're making their purchase decision.
Requires Shopify Plus. Testimonials uses Checkout UI Extensions, which are available on Shopify Plus plans.
What it does
Testimonials displays product reviews at checkout, pulled from your connected review app:
- Auto-match — shows reviews for products currently in the buyer's cart
- Judge.me integration — syncs reviews from your Judge.me account
- Customizable appearance — choose layout, star style, colors, and how many reviews to show
- Smart filtering — auto-publish only high-quality reviews (5-star, 4-star+, or all)
If no matching reviews are found for the products in the cart, the widget hides automatically — no empty state shown to buyers.
Step 1: Go to Extra Widgets
In the app sidebar, click Extra Widgets. Find the Testimonials card and click Manage.
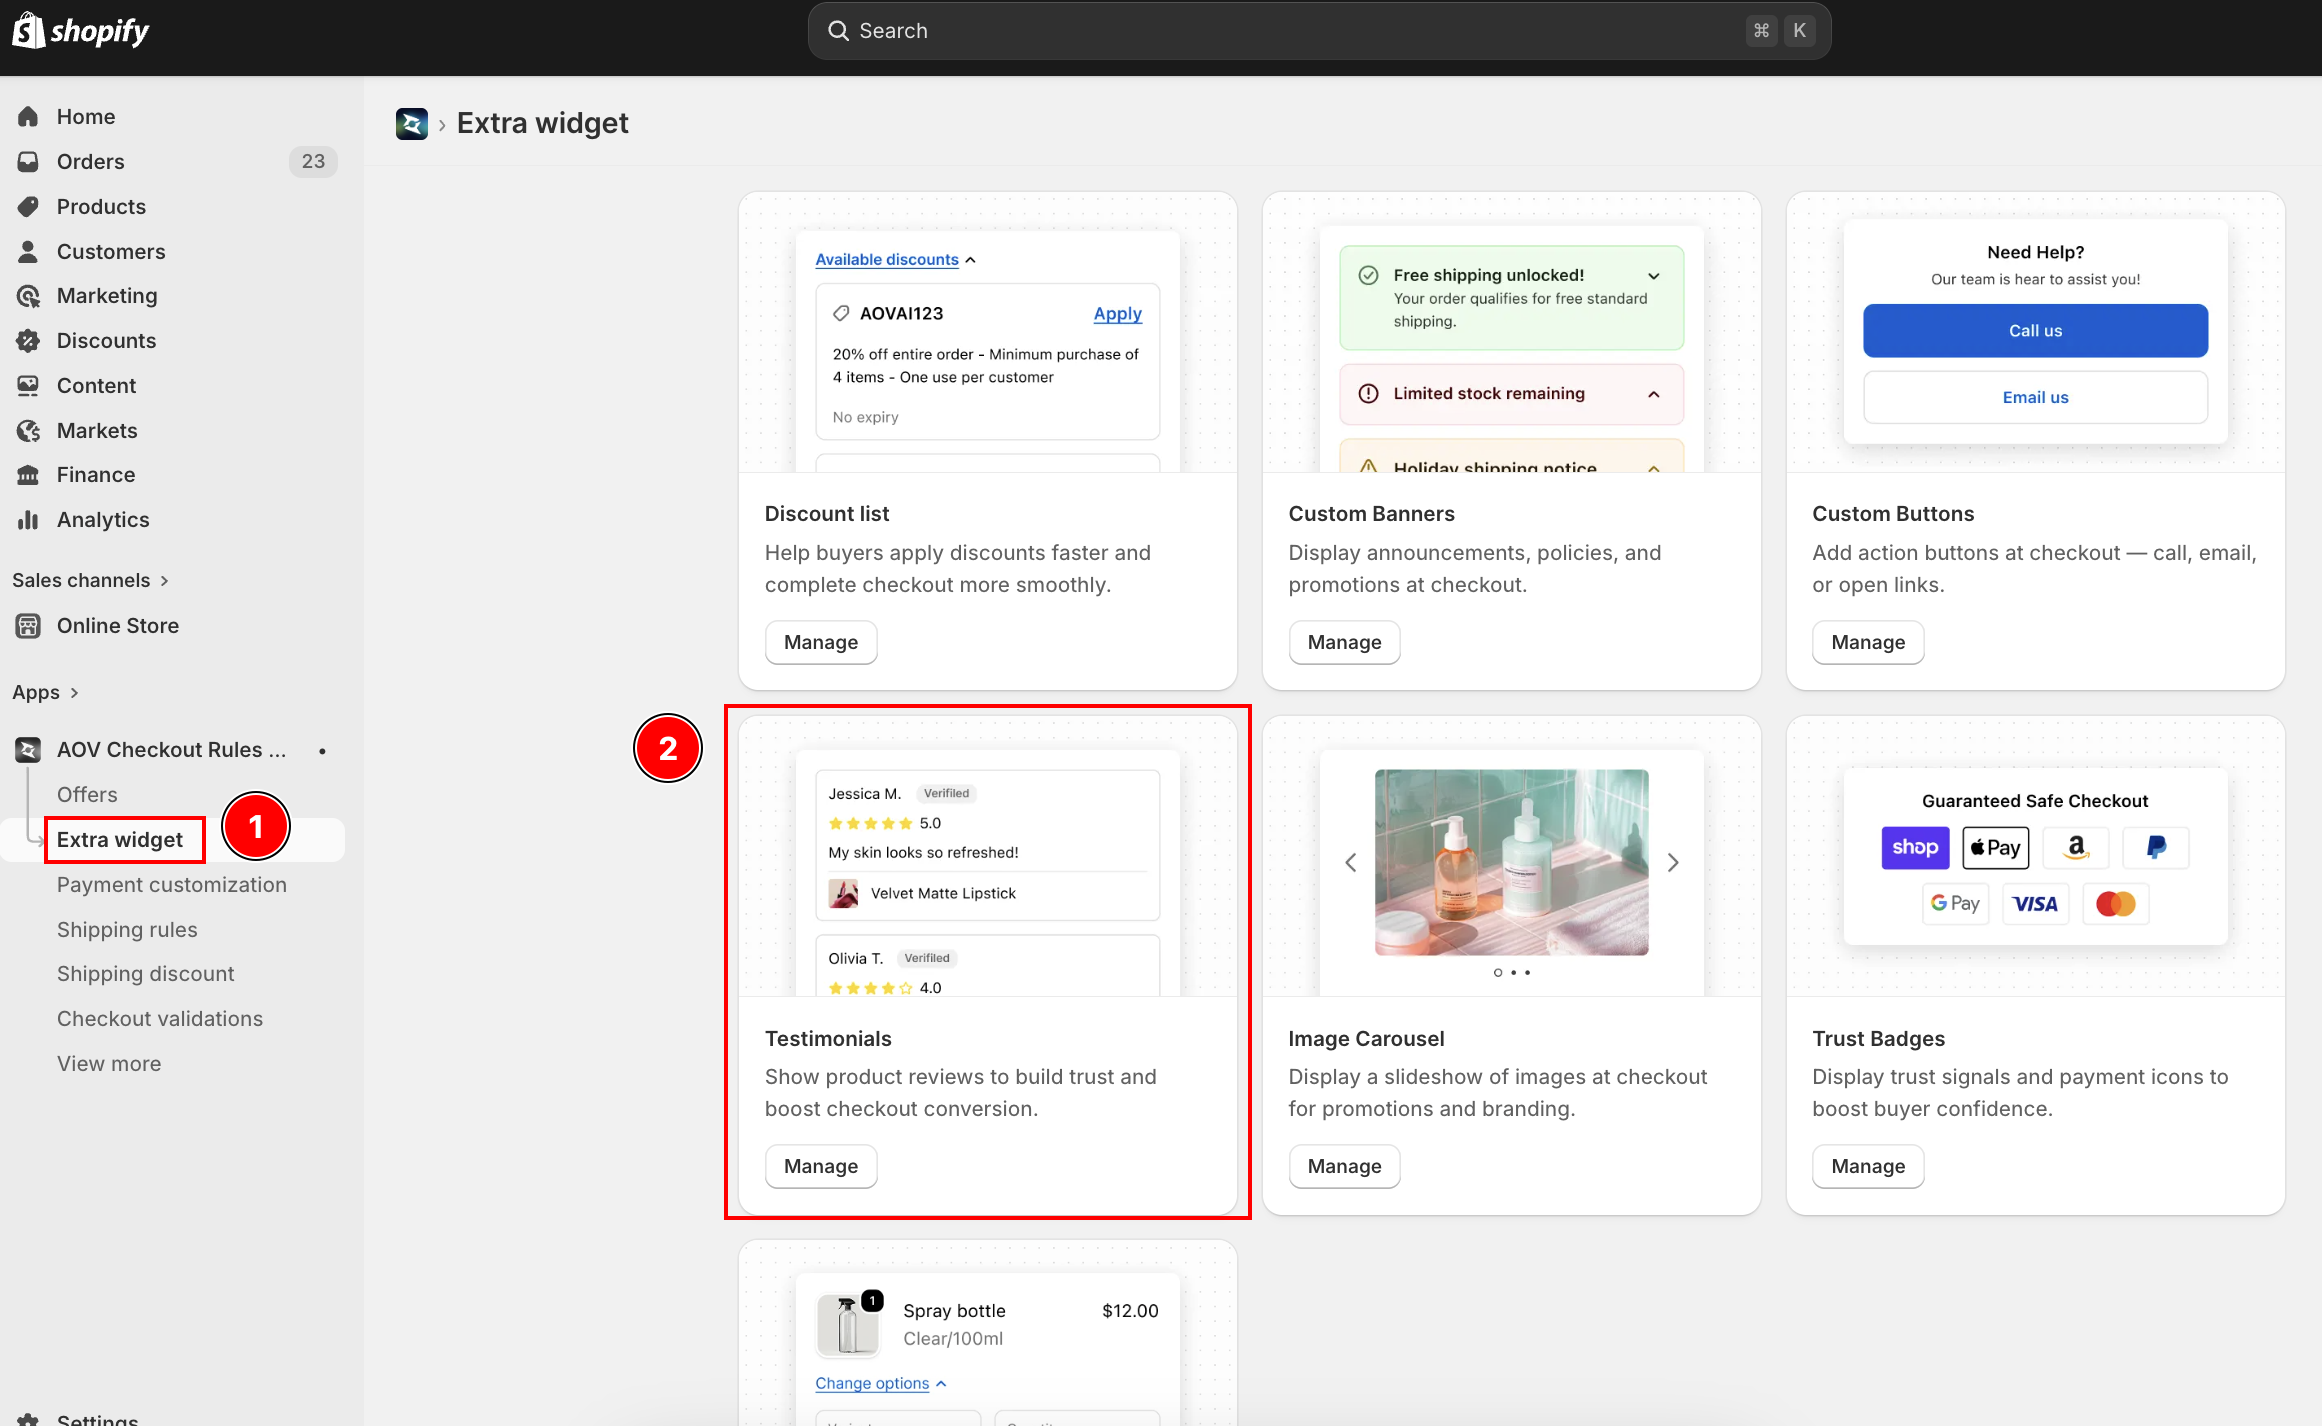
List page overview
| Feature | Description |
|---|---|
| Widget ID | Auto-generated unique ID (e.g., testimonial_a1b2) — used in Theme Editor |
| Name | Config name for your reference |
| Status | Active (live at checkout) or Inactive |
| Actions | Activate/Deactivate, Edit, Delete |
| Bulk actions | Select multiple configs to activate, deactivate, or delete |
Step 2: Create a new testimonial config
Click Create testimonial (top right). The editor opens with settings on the left and a live preview on the right.
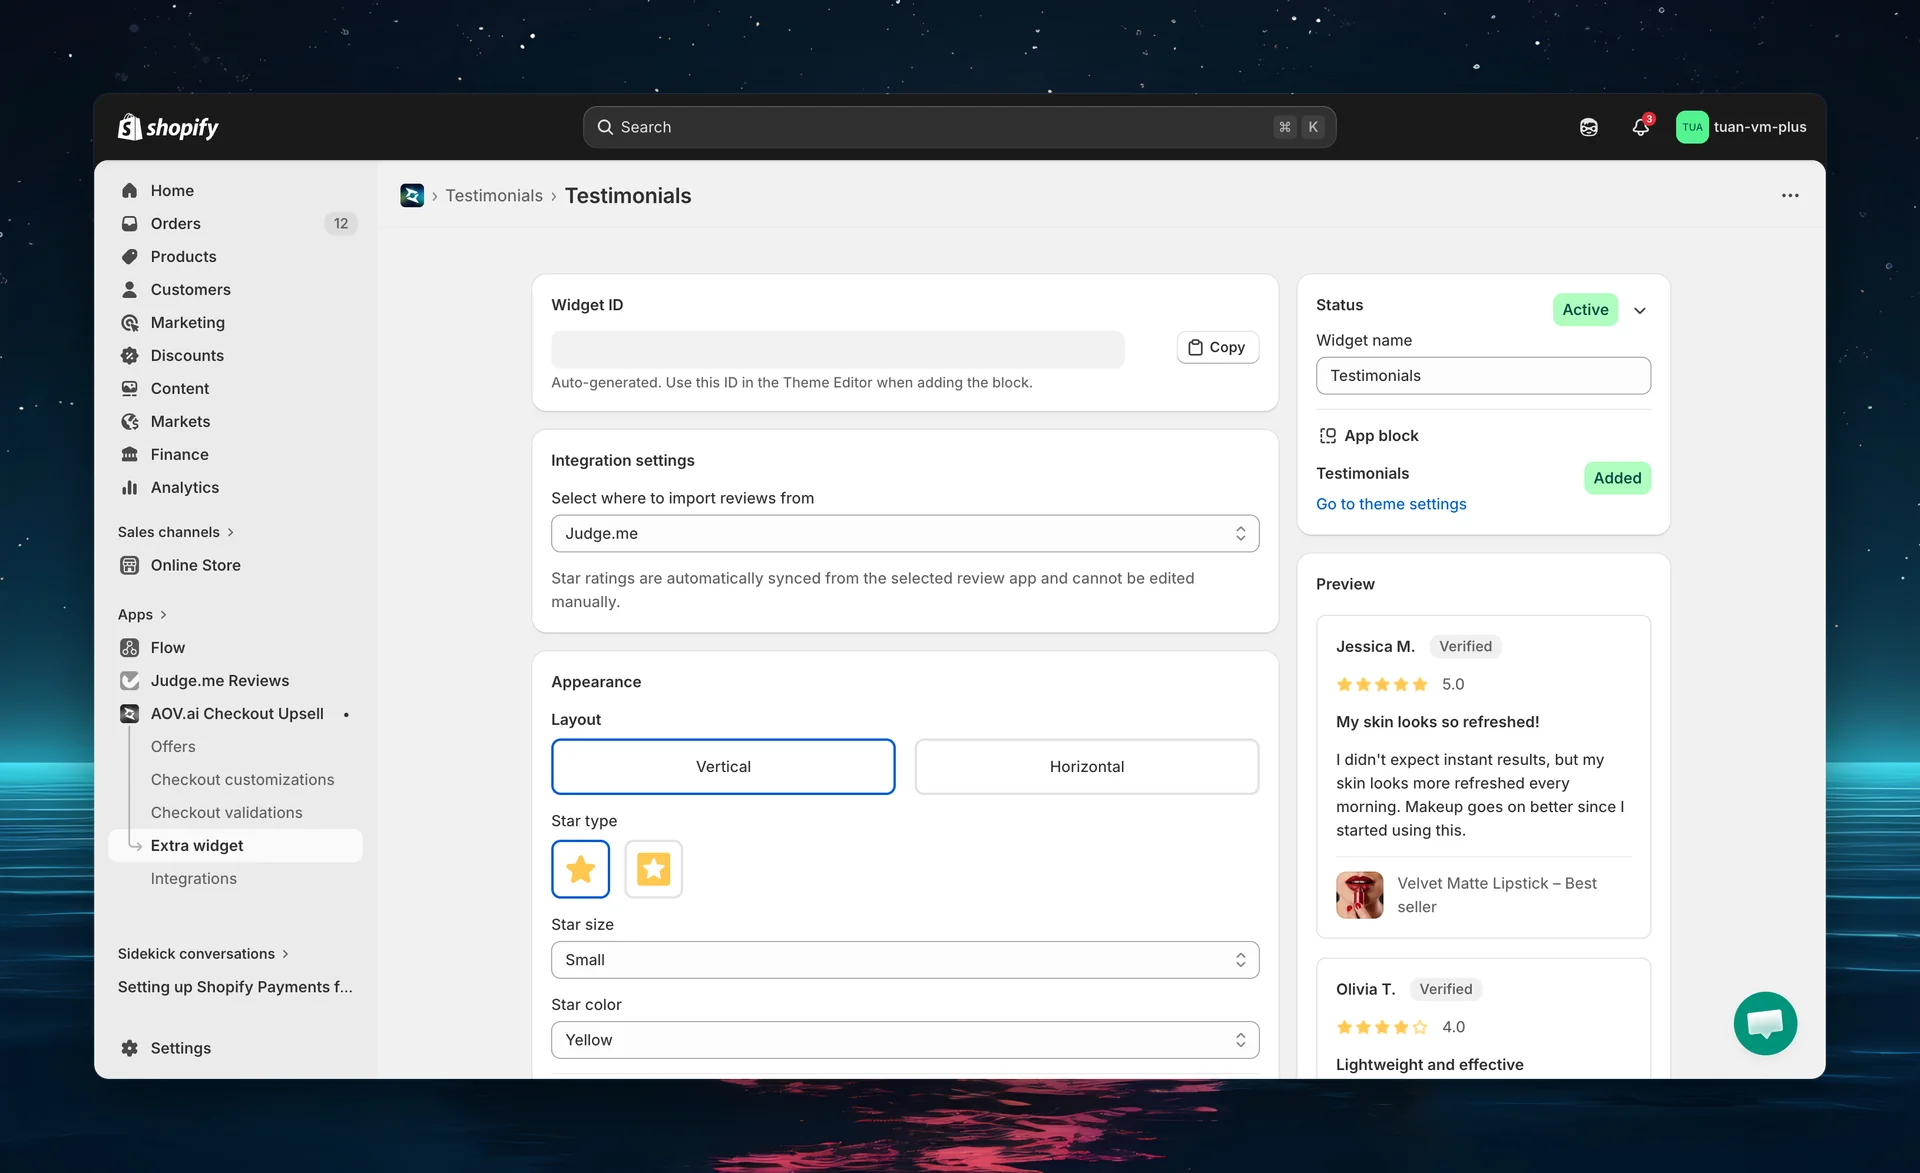
Widget ID
After saving for the first time, a Widget ID is generated (e.g., testimonial_a1b2). You'll need this ID when adding the block in the Theme Editor. Click the copy button to copy it.
Step 3: Configure review source
Review source
Select your review app from the dropdown. Currently supported:
| Source | Status |
|---|---|
| Judge.me | Supported |
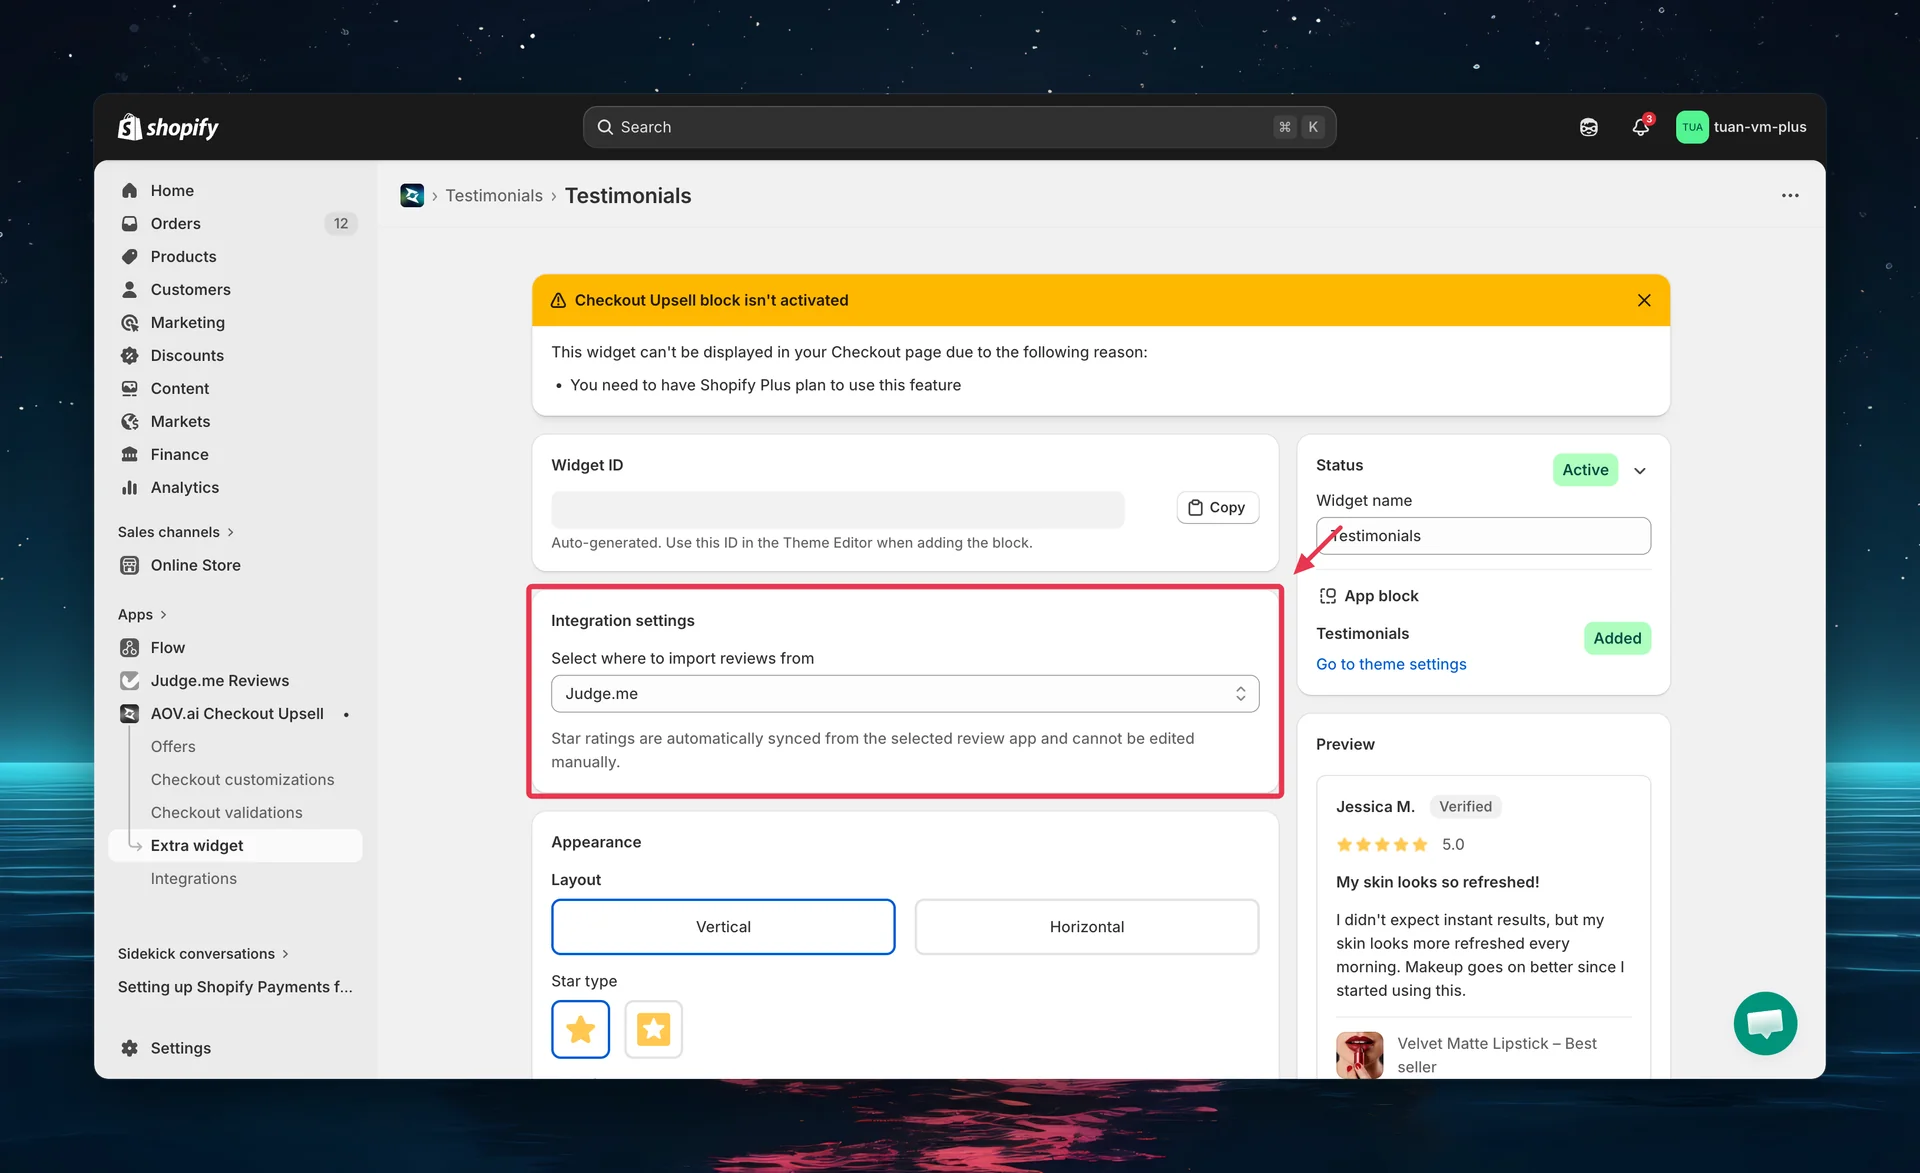
Connection status
| Status | What it means |
|---|---|
| Connected | Reviews are synced from Judge.me. Star ratings update automatically. |
| Not connected | Sample reviews are shown in the preview. Click "Go to Integration settings" to connect your Judge.me account. |
You must connect your Judge.me account in the app's Integration settings before real reviews will appear at checkout. Until connected, the preview shows sample data only.
Step 4: Configure appearance
Title
Add an optional heading above the review list, on the Appearance tab.
| Setting | Description |
|---|---|
| Title | Heading shown above the reviews (placeholder: "More than 1000+ happy customers"). Leave empty to hide it. |
The Title supports multiple languages. Translate it under Translation.
Layout
Choose how reviews are displayed:
| Layout | Description |
|---|---|
| Vertical | Reviews stacked on top of each other. Best for sidebar placement. |
| Horizontal | Reviews side by side in a row. Best for main content area with space. |
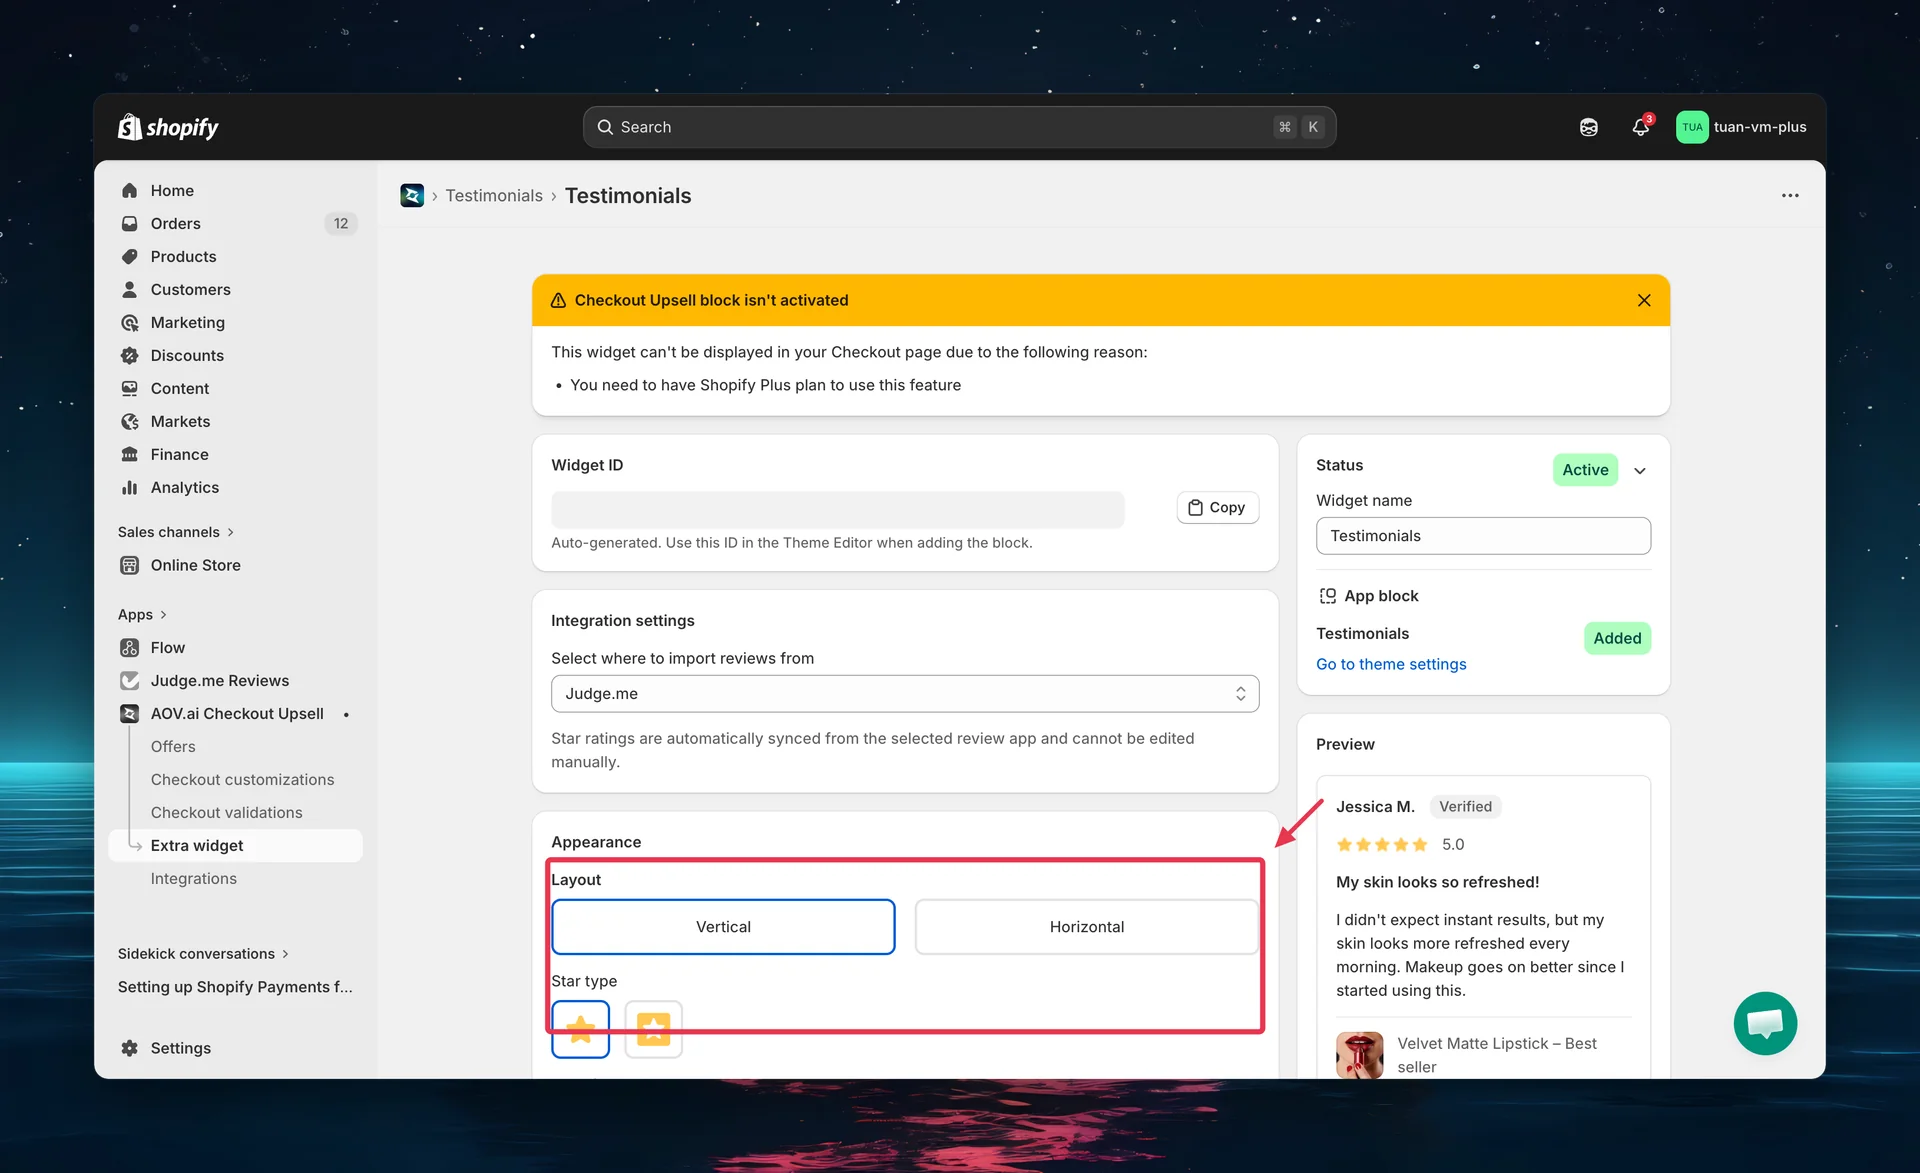
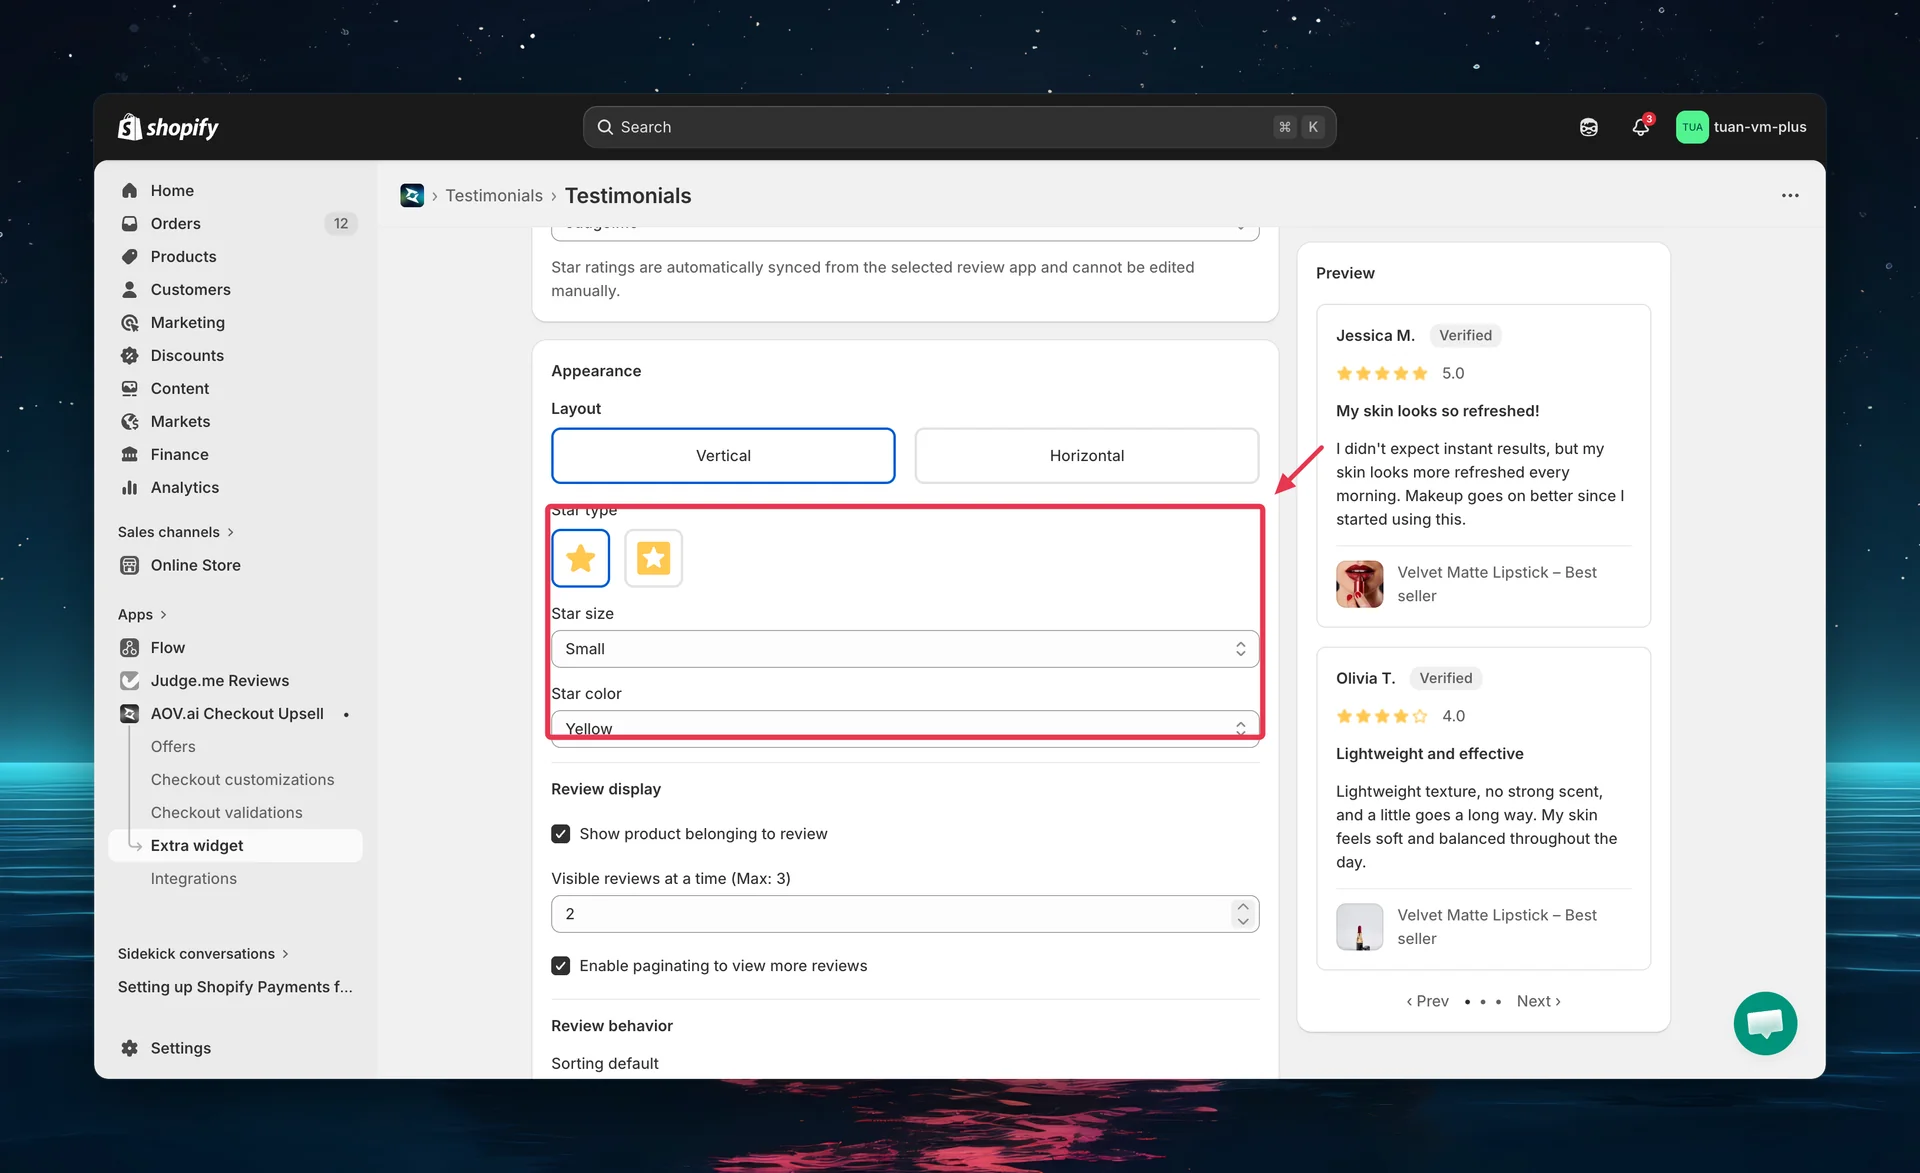
Star settings
| Setting | Options | Default |
|---|---|---|
| Star type | Plain (no background) / With background (colored fill) | Plain |
| Star size | Small (14px) / Medium (18px) | Small |
| Star color | Yellow / Orange / Red / Green / Blue / Purple | Yellow |
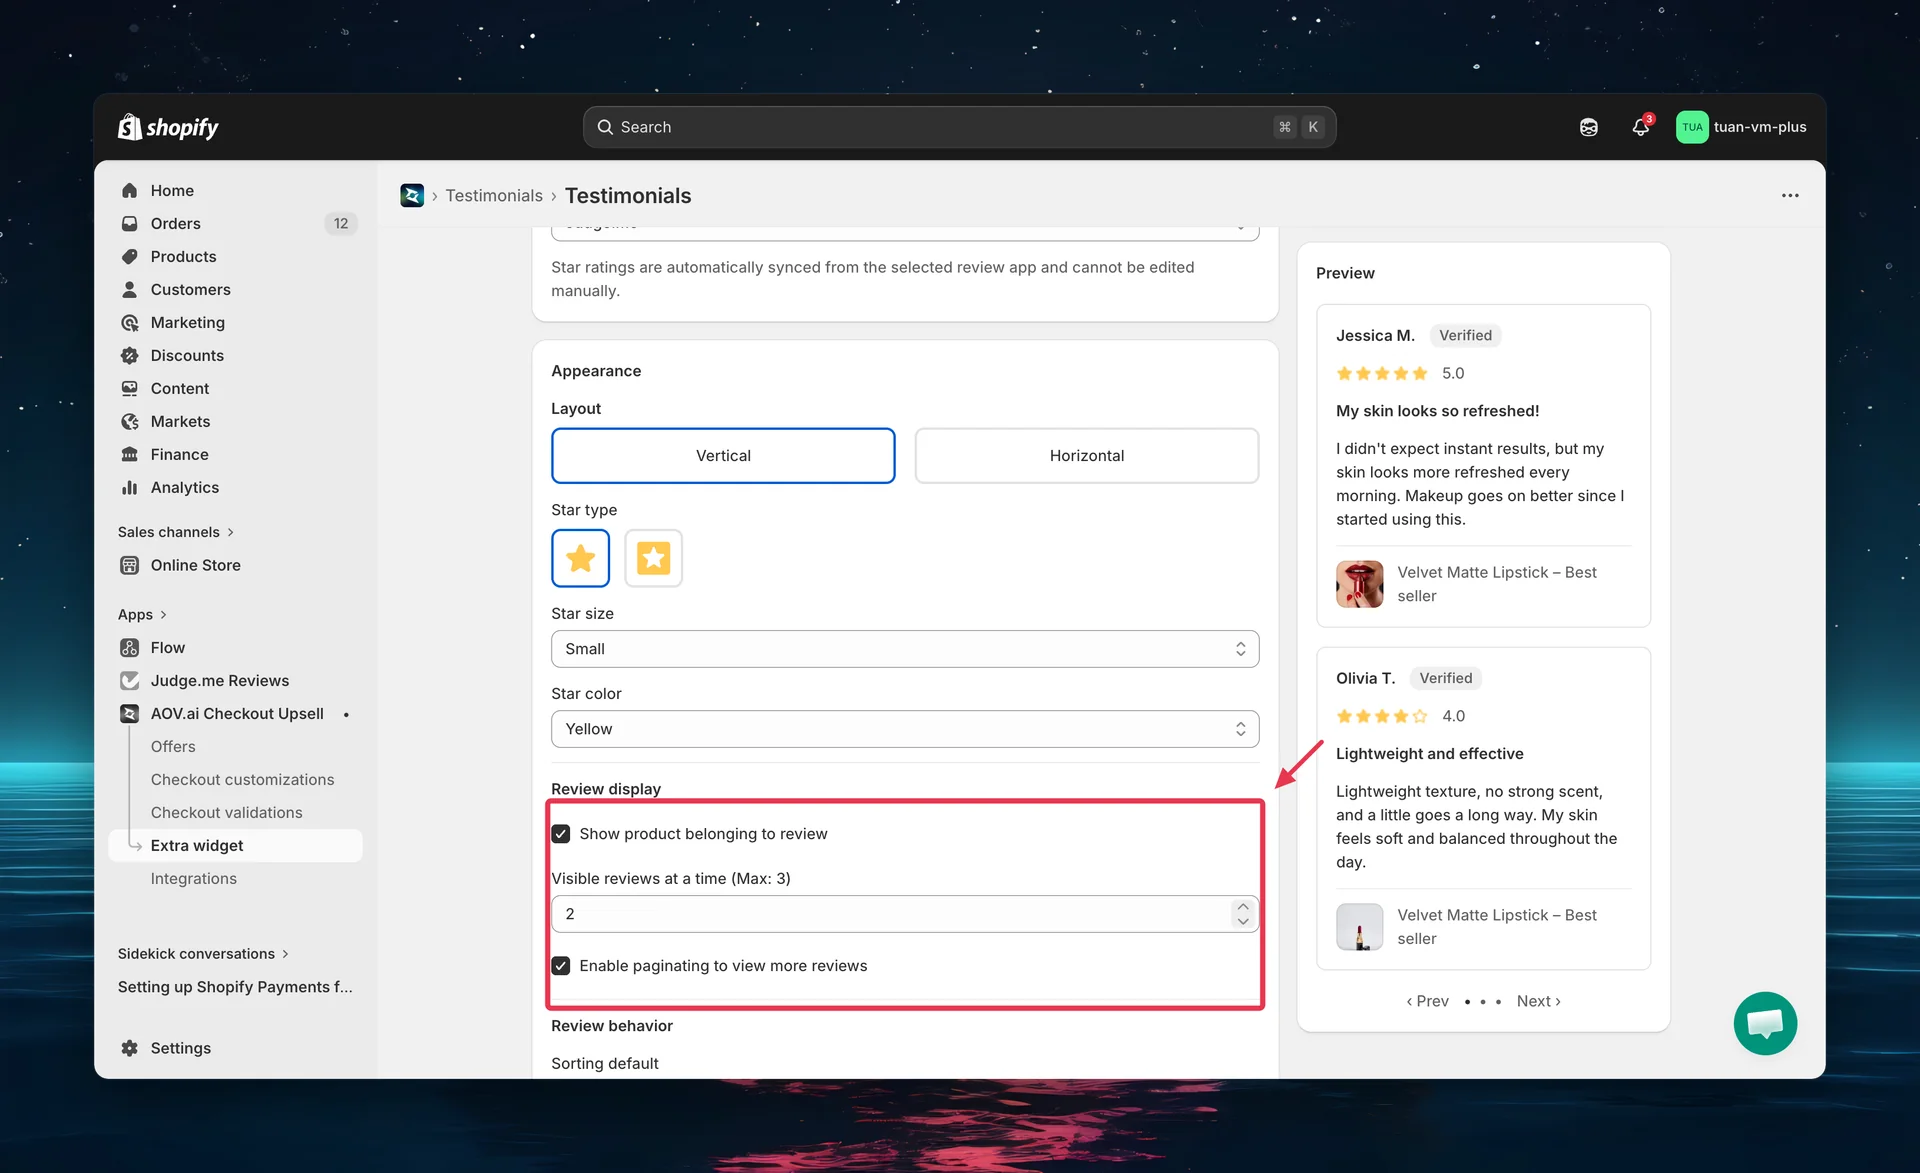
Review display
| Setting | Description | Default |
|---|---|---|
| Show product belonging to review | Display product thumbnail and name alongside the review | On |
| Visible reviews at a time | Number of reviews shown at once (1, 2, or 3) | 2 |
| Enable paginating | Show Prev/Next arrows plus clickable dots, so buyers can jump straight to any review page | On |
Step 5: Configure review behavior
Sorting
| Option | Description |
|---|---|
| Recent | Newest reviews first |
| Highest rating | 5-star reviews first |
| Lowest rating | Lowest-rated reviews first |
Auto-publish
Control which reviews are shown at checkout:
| Option | Description |
|---|---|
| 5 stars review | Only 5-star reviews are displayed |
| 4 stars and up | Reviews with 4 or 5 stars are displayed (recommended) |
| All reviews | All reviews regardless of rating |
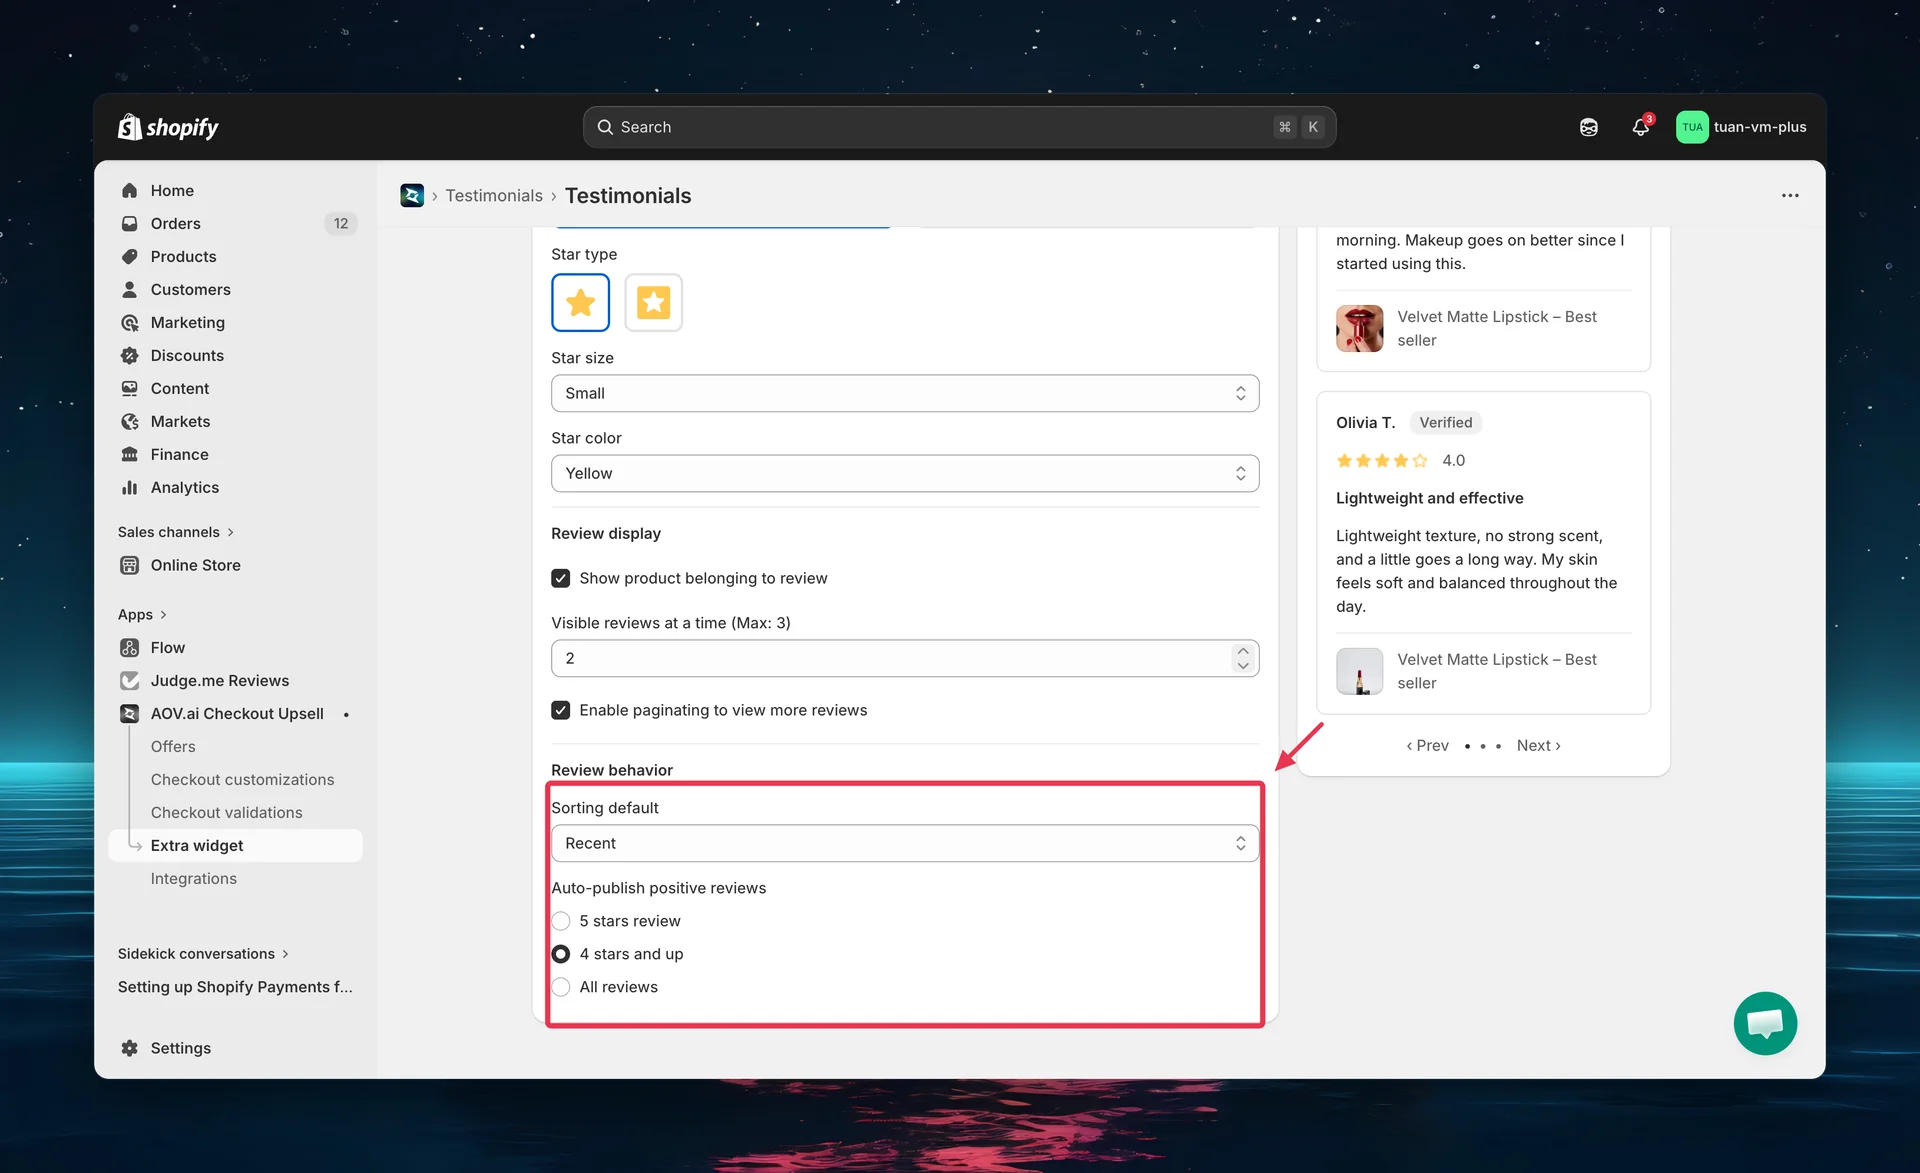
Recommended: Use "4 stars and up" to show positive reviews while still appearing authentic. Showing only 5-star reviews may seem less credible.
Step 6: Add the block in Theme Editor
After saving your testimonial config in the app, add it to your checkout page:
- Go to Shopify Admin → Online Store → Customize
- Navigate to the Checkout page in the theme editor
- Click Add block → select AOV.AI Testimonials
- In the block settings, enter the Widget ID you copied from the app
- Position the block where you want it (main content area or Order Summary sidebar)
- Click Save in the theme editor
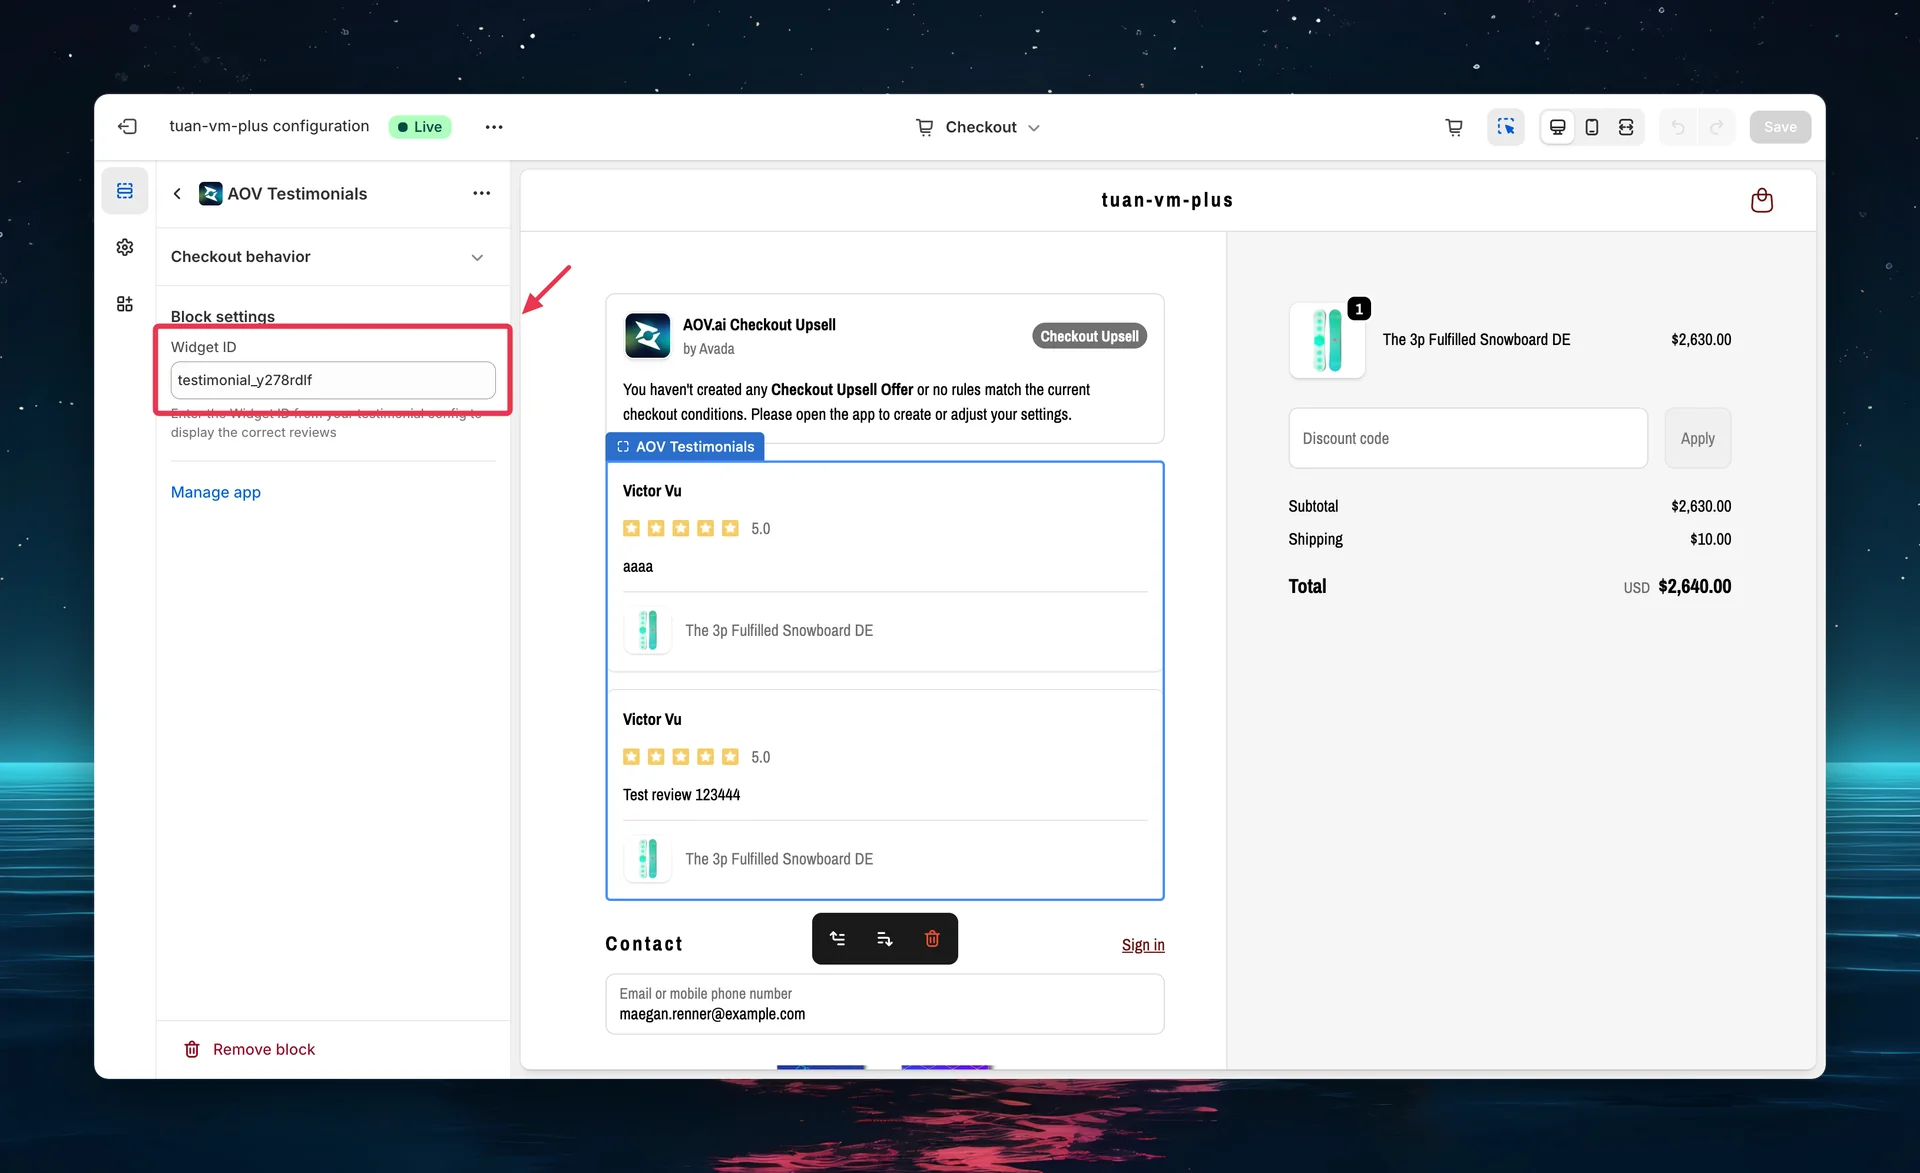
Sidebar tip: Use Vertical layout when placing the widget in the Order Summary sidebar — Horizontal layout may be too narrow in the sidebar column.
Tips
- Use "Vertical" layout for sidebar — horizontal reviews are too cramped in the narrow sidebar column
- Show 2 reviews at a time — enough social proof without overwhelming the checkout page
- Enable pagination — lets interested buyers browse more reviews without cluttering the page
- Show product info — buyers see which product the review is about, making it more relevant
- Use "4 stars and up" — feels authentic while keeping sentiment positive
- Connect Judge.me first — the widget shows sample data until your review app is connected
FAQs
General
Q: Do I need Shopify Plus for Testimonials? A: Yes. Testimonials uses Checkout UI Extensions, which require Shopify Plus.
Q: Which review apps are supported? A: Currently Judge.me is supported. More integrations may be added in the future.
Q: What happens if a product in the cart has no reviews? A: The widget hides automatically — buyers won't see an empty reviews section.
Q: Can I show reviews for all products, not just cart products? A: No. Testimonials automatically matches reviews to products in the buyer's cart for maximum relevance.
Integration
Q: How do I connect Judge.me? A: Go to the app's Integration settings (separate from the Testimonials editor). Follow the connection flow to link your Judge.me account.
Q: How often are reviews synced? A: Reviews sync automatically when the testimonial config is saved. New reviews from Judge.me are included in the next sync.
Q: What if I disconnect Judge.me? A: The widget will stop showing reviews at checkout. The preview in the editor will revert to sample data.
Display
Q: Can I choose which specific reviews to show? A: Not individually. Use the auto-publish setting to filter by star rating, and sorting to control the order.
Q: How does pagination work at checkout? A: Buyers see Prev/Next arrows below the reviews, plus a row of dots. Clicking an arrow moves one page; clicking a dot jumps straight to that review page.
Q: Do reviews show the reviewer's profile picture? A: Reviews show the reviewer's name and a verified badge (if applicable). Profile pictures depend on the review app data.