Image Carousel
Display promotional images, banners, and campaign visuals at checkout with an interactive slideshow. Buyers see your content while completing their purchase — with optional links to drive traffic to promotions.
Requires Shopify Plus. Image Carousel uses Checkout UI Extensions, which are available on Shopify Plus plans.
What it does
Image Carousel lets you create slideshows that display at checkout:
- Upload images — banners, product photos, campaign visuals (PNG, JPG, SVG, WebP, GIF)
- Add links — make images clickable to drive traffic to promotions or collections
- 3 layout styles — auto-play only, navigation buttons, or scrollable
- Auto-play — slides advance automatically at your chosen speed
- Frame sizing — control the exact width and height of the carousel
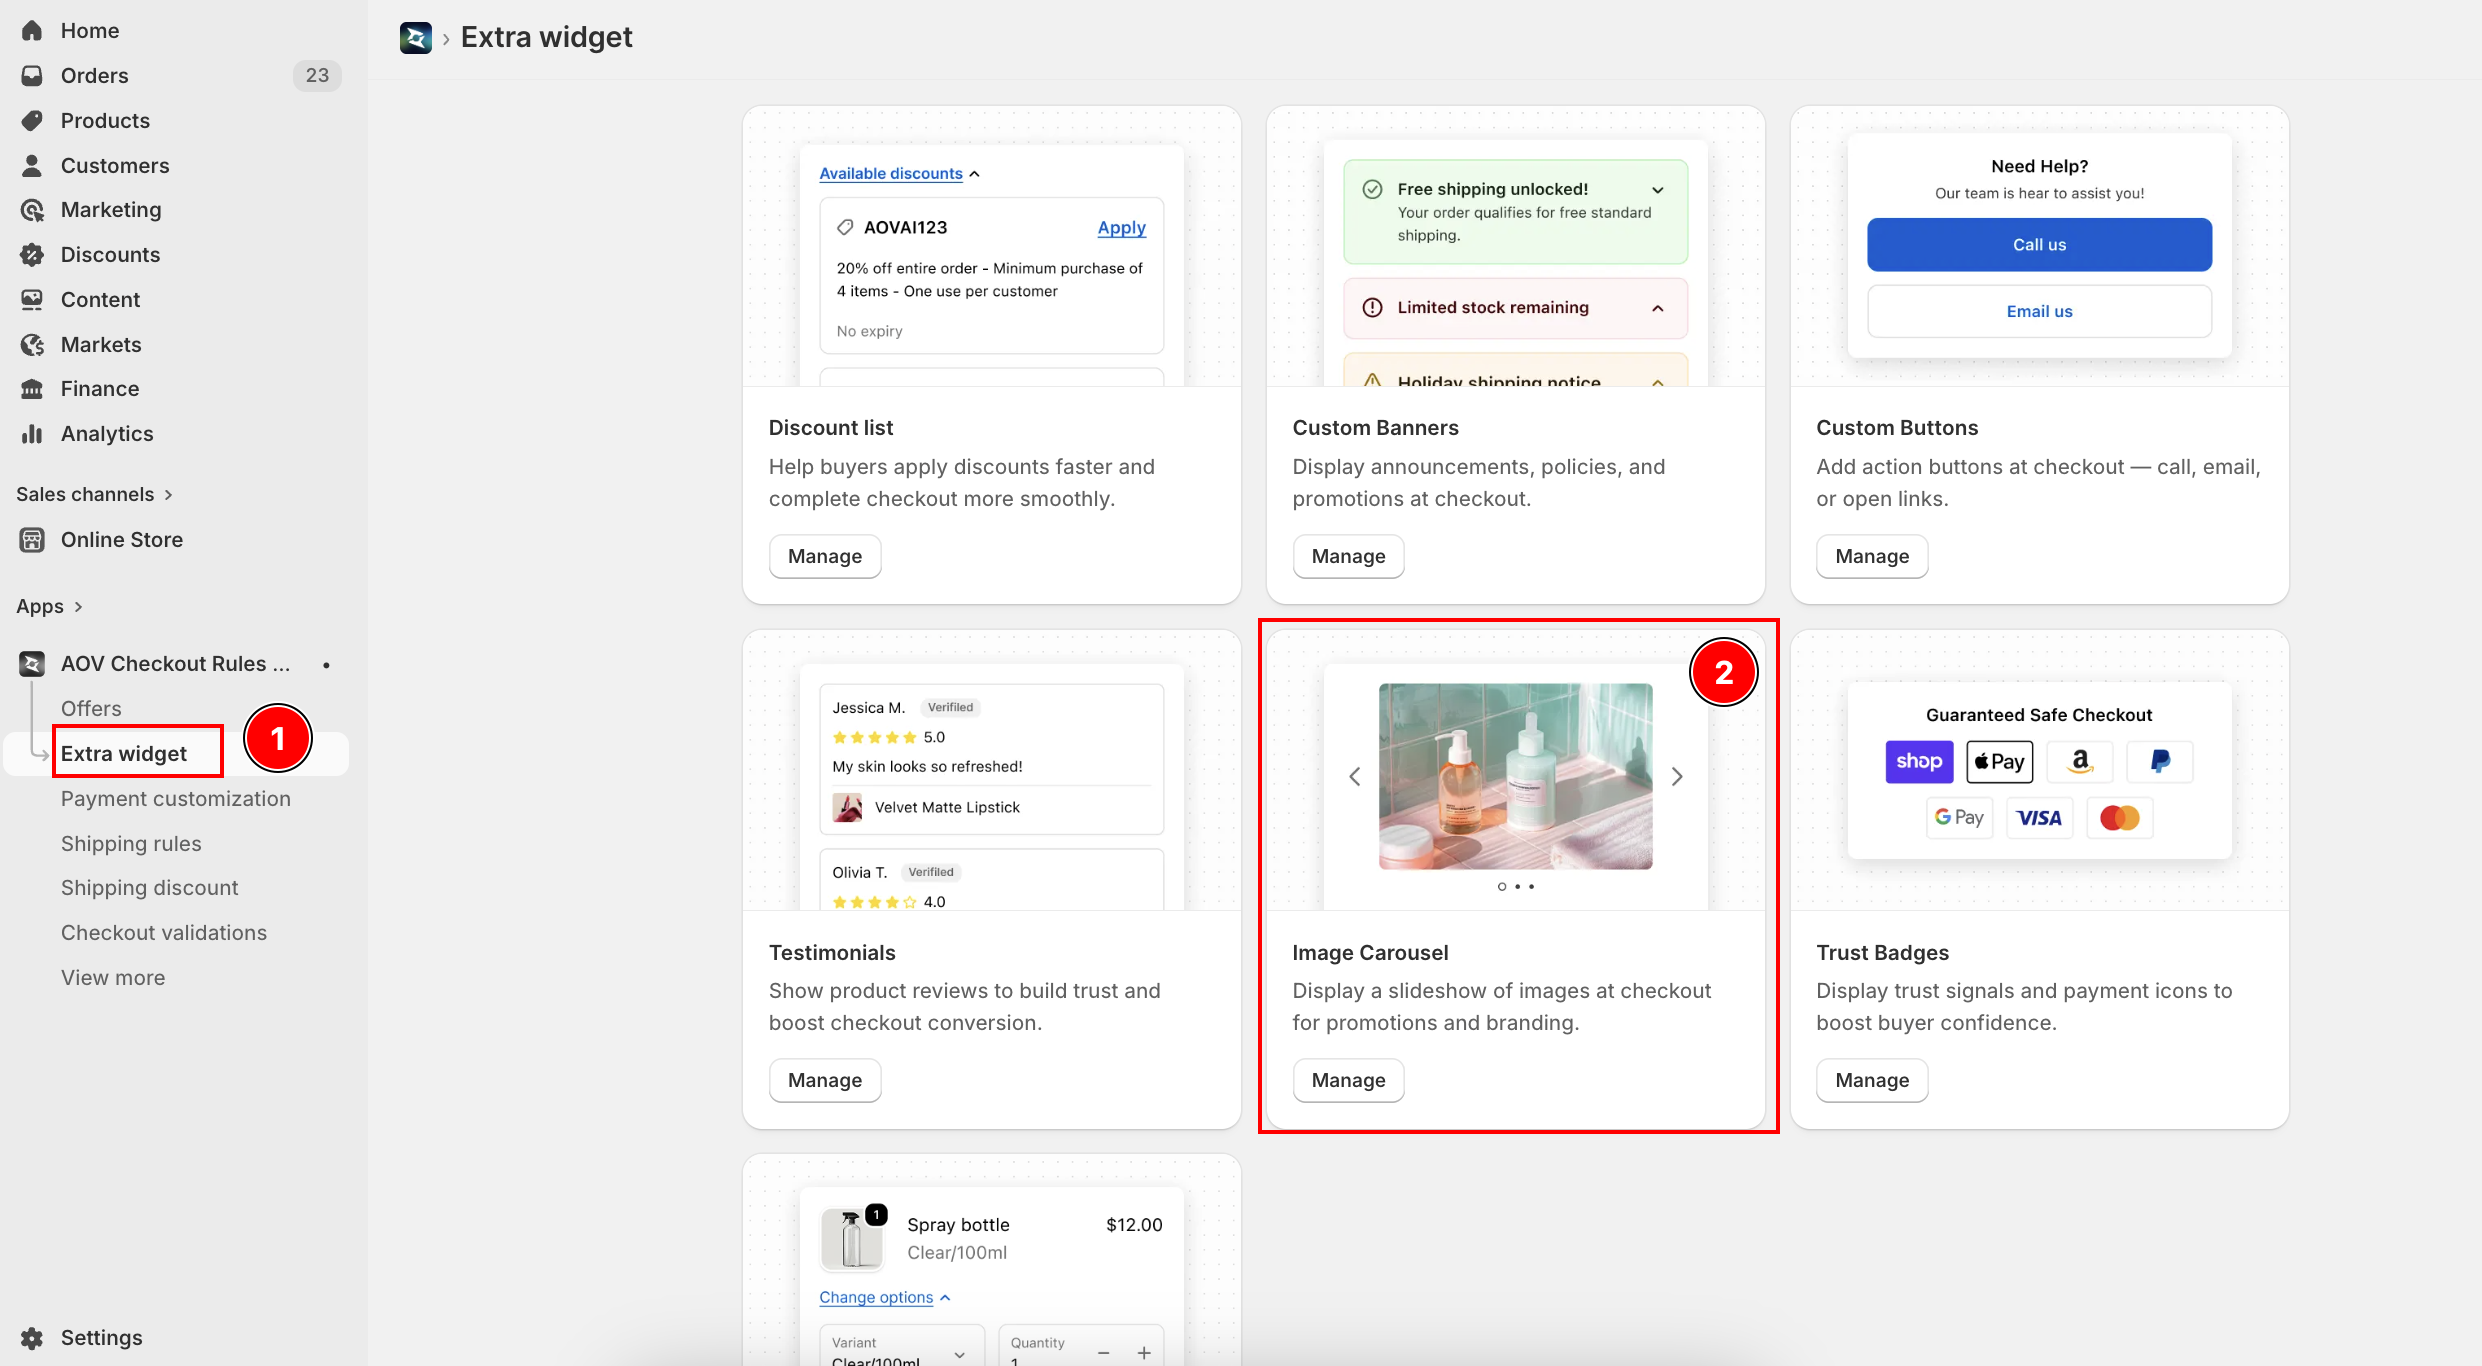
Step 1: Go to Extra Widgets
In the app sidebar, click Extra Widgets. Find the Image Carousel card and click Manage.
List page overview
| Feature | Description |
|---|---|
| Widget ID | Auto-generated unique ID (e.g., carousel_a1b2) — used in Theme Editor |
| Name | Carousel name for your reference |
| Status | Active (live at checkout) or Inactive |
| Layout | Display mode: None, Navigation, or Scrollable |
| Actions | Activate/Deactivate, Edit, Delete |
Each carousel has a unique Widget ID. You'll need this ID when adding the block in the Theme Editor.
Step 2: Create a new carousel
Click Create carousel (top right). The editor opens with settings on the left and a live preview on the right.
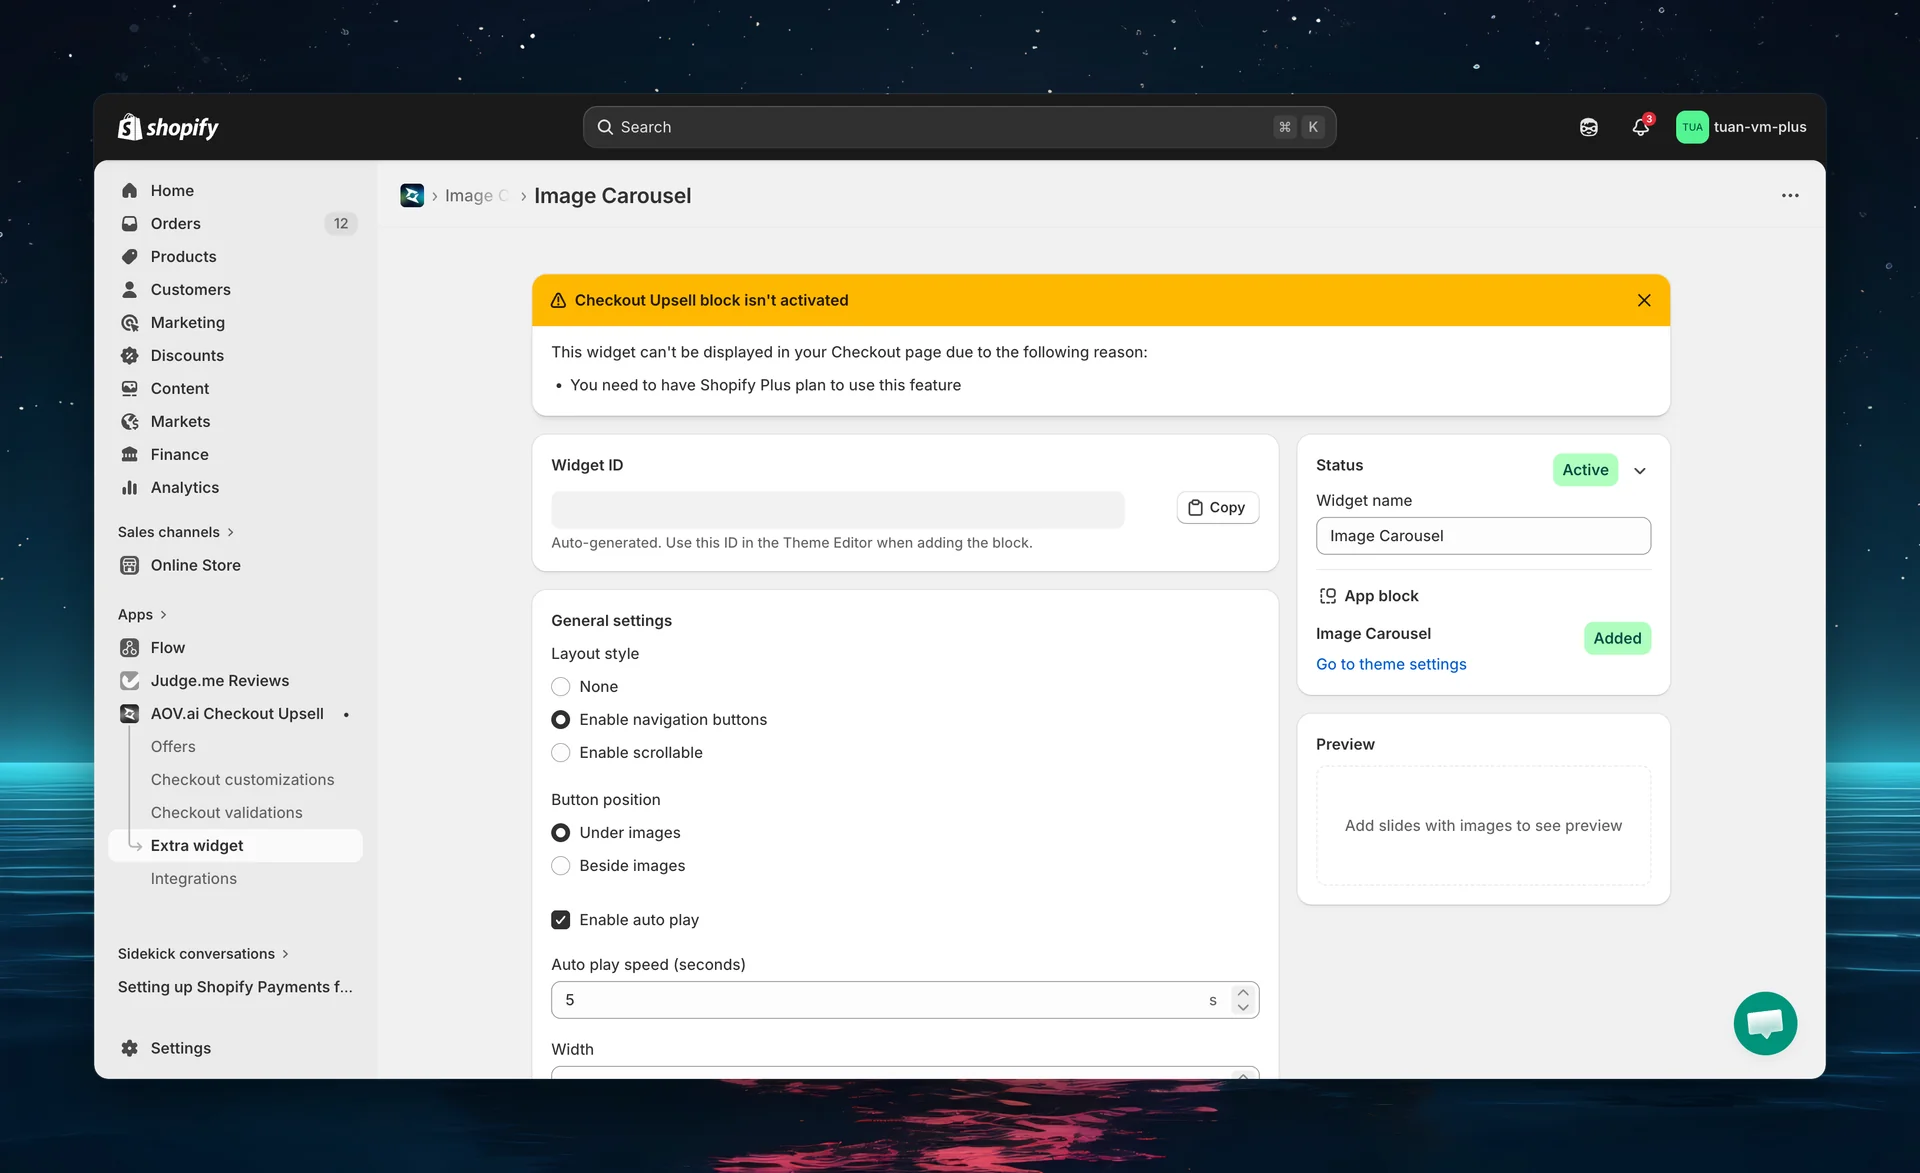
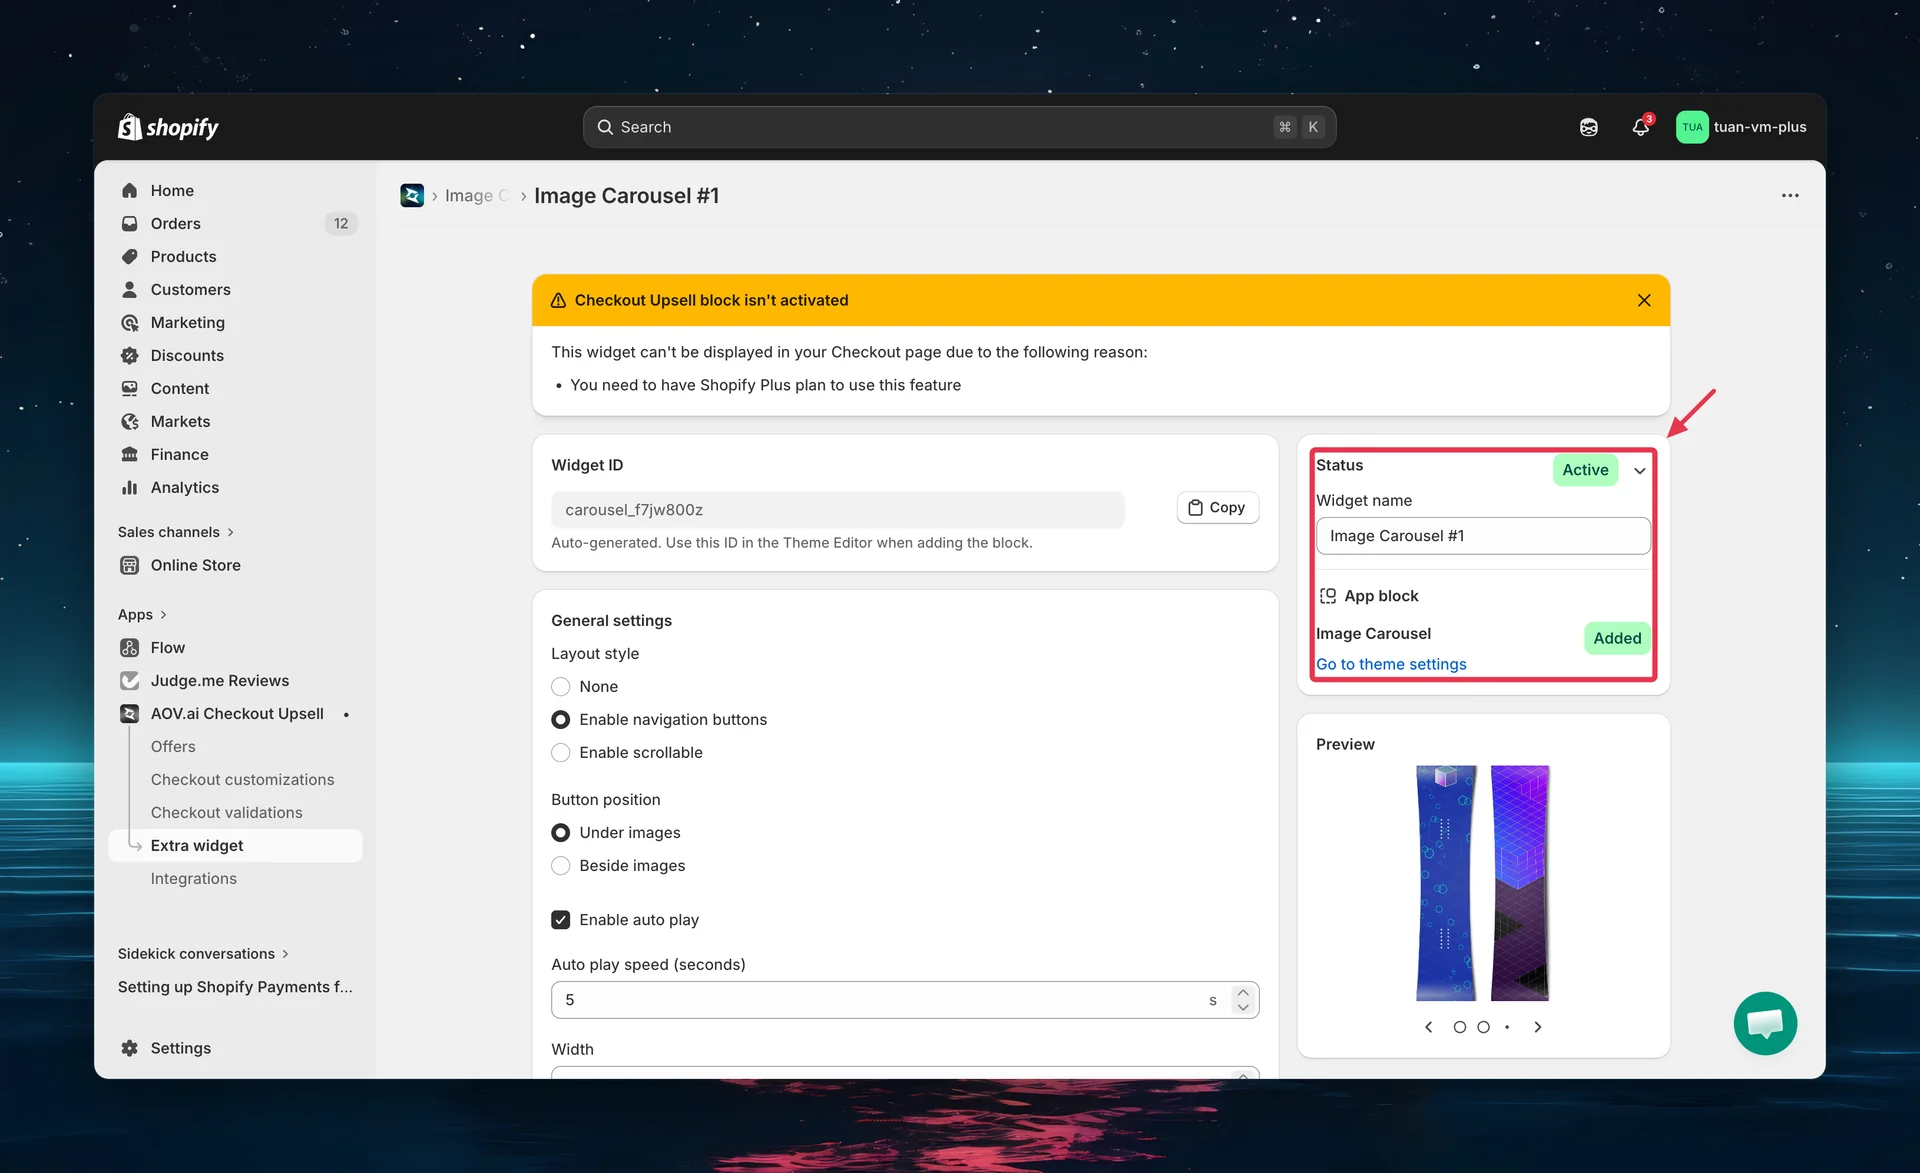
Step 3: Configure name and status
| Setting | Description |
|---|---|
| Carousel name | A name for your reference (e.g., "Summer Sale Banner"). Not shown to buyers. |
| Status | Active — carousel shows at checkout. Inactive — saved but not displayed. |
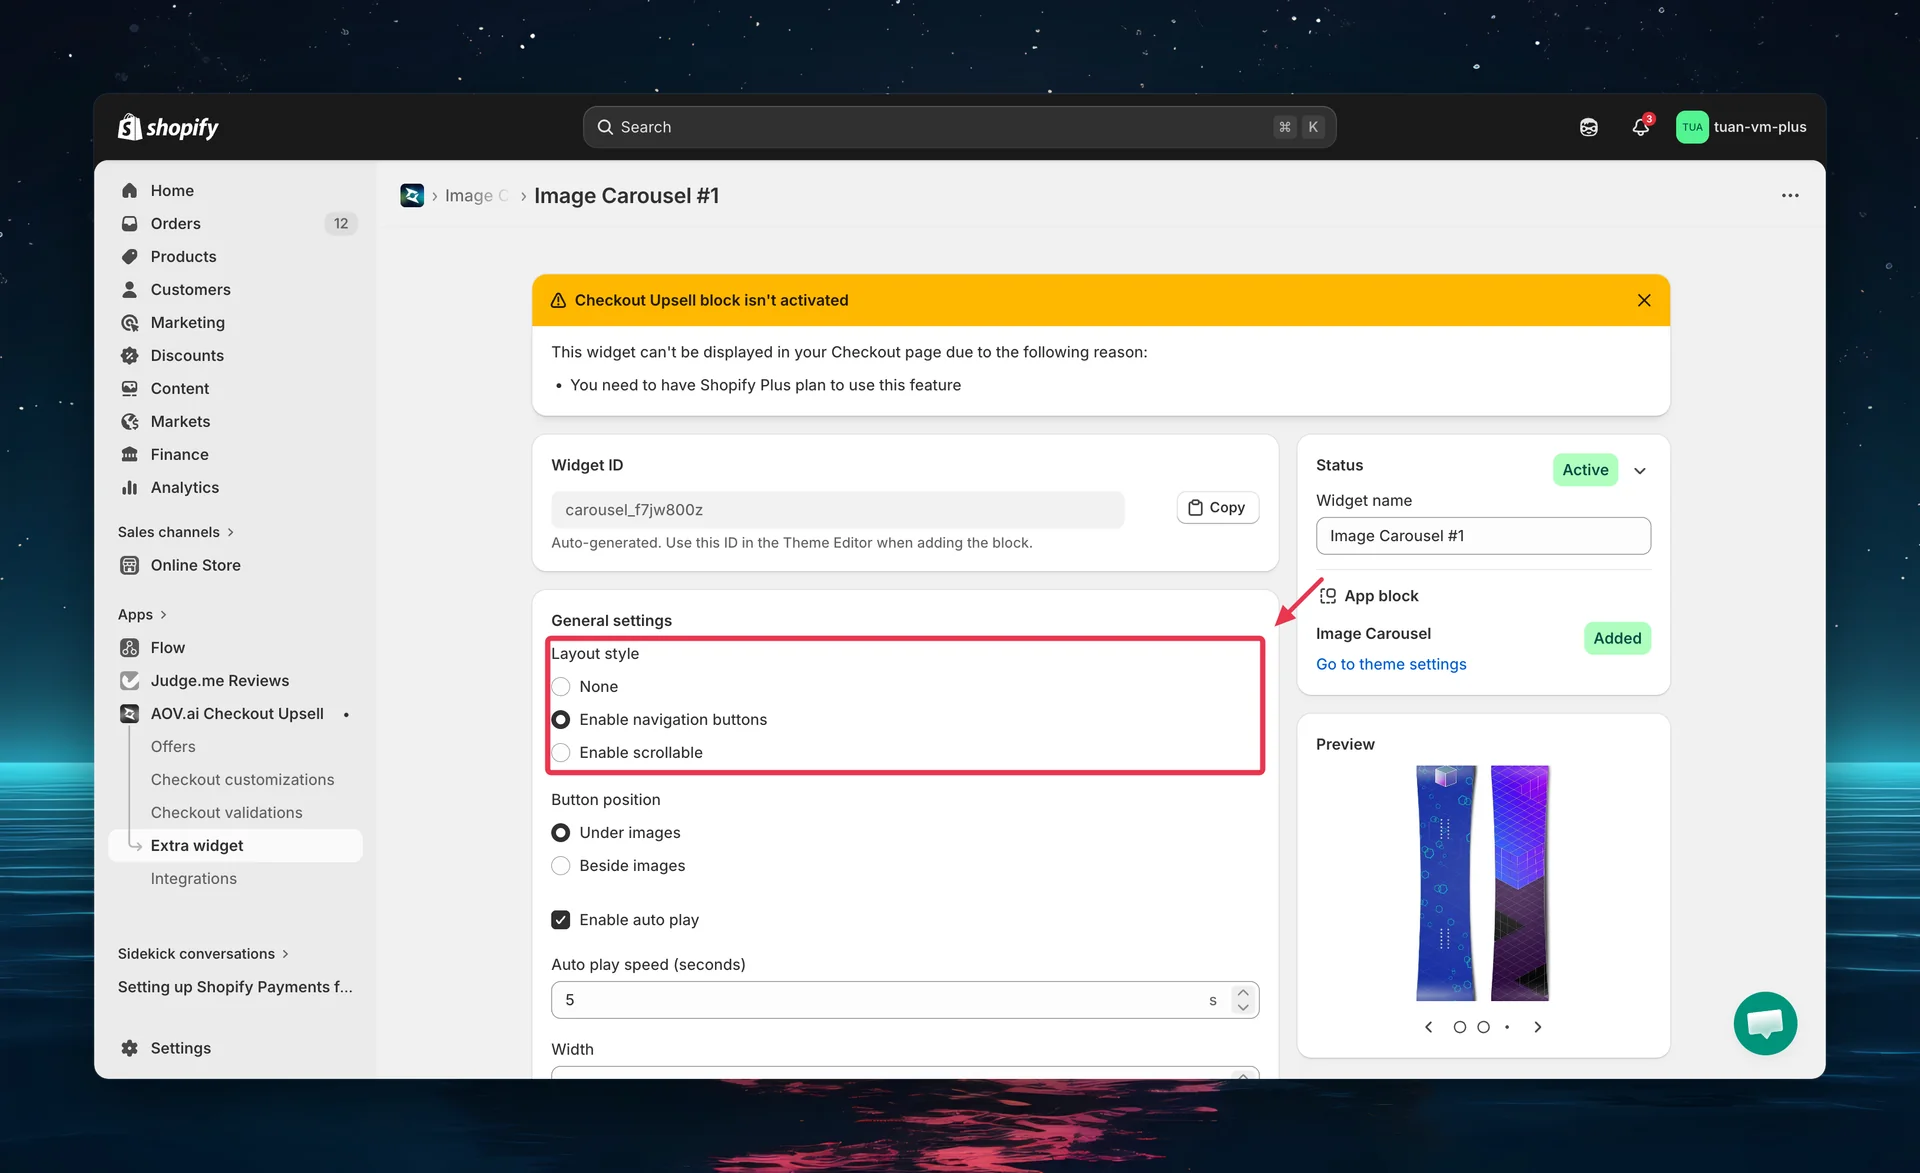
Step 4: Configure layout and display
Layout style
Choose how buyers interact with the carousel:
| Layout | Behavior | Auto-play |
|---|---|---|
| None | Shows one image at a time, no controls | Yes — slides advance automatically |
| Enable navigation buttons | Prev/Next buttons + dot pagination | Optional — can be turned on/off |
| Enable scrollable | All images in a horizontal row, buyer scrolls | No — buyer scrolls manually |
Button position (Navigation layout only)
| Position | Description |
|---|---|
| Under images | Prev/Next buttons and dots below the image |
| Beside images | Prev/Next buttons on left/right sides of the image |
Auto-play settings
| Setting | Description |
|---|---|
| Enable auto play | Toggle on/off. Available for "None" and "Navigation" layouts. |
| Auto play speed | Slider from 1 to 10 seconds. Controls how fast slides advance. Default: 5 seconds. |
Frame size
| Setting | Description |
|---|---|
| Width | Frame width in pixels. Default: 500px. |
| Height | Frame height in pixels. Default: 200px. |
The carousel automatically scales to fit the checkout container. Frame size sets the aspect ratio — the actual display width adapts to the available space.
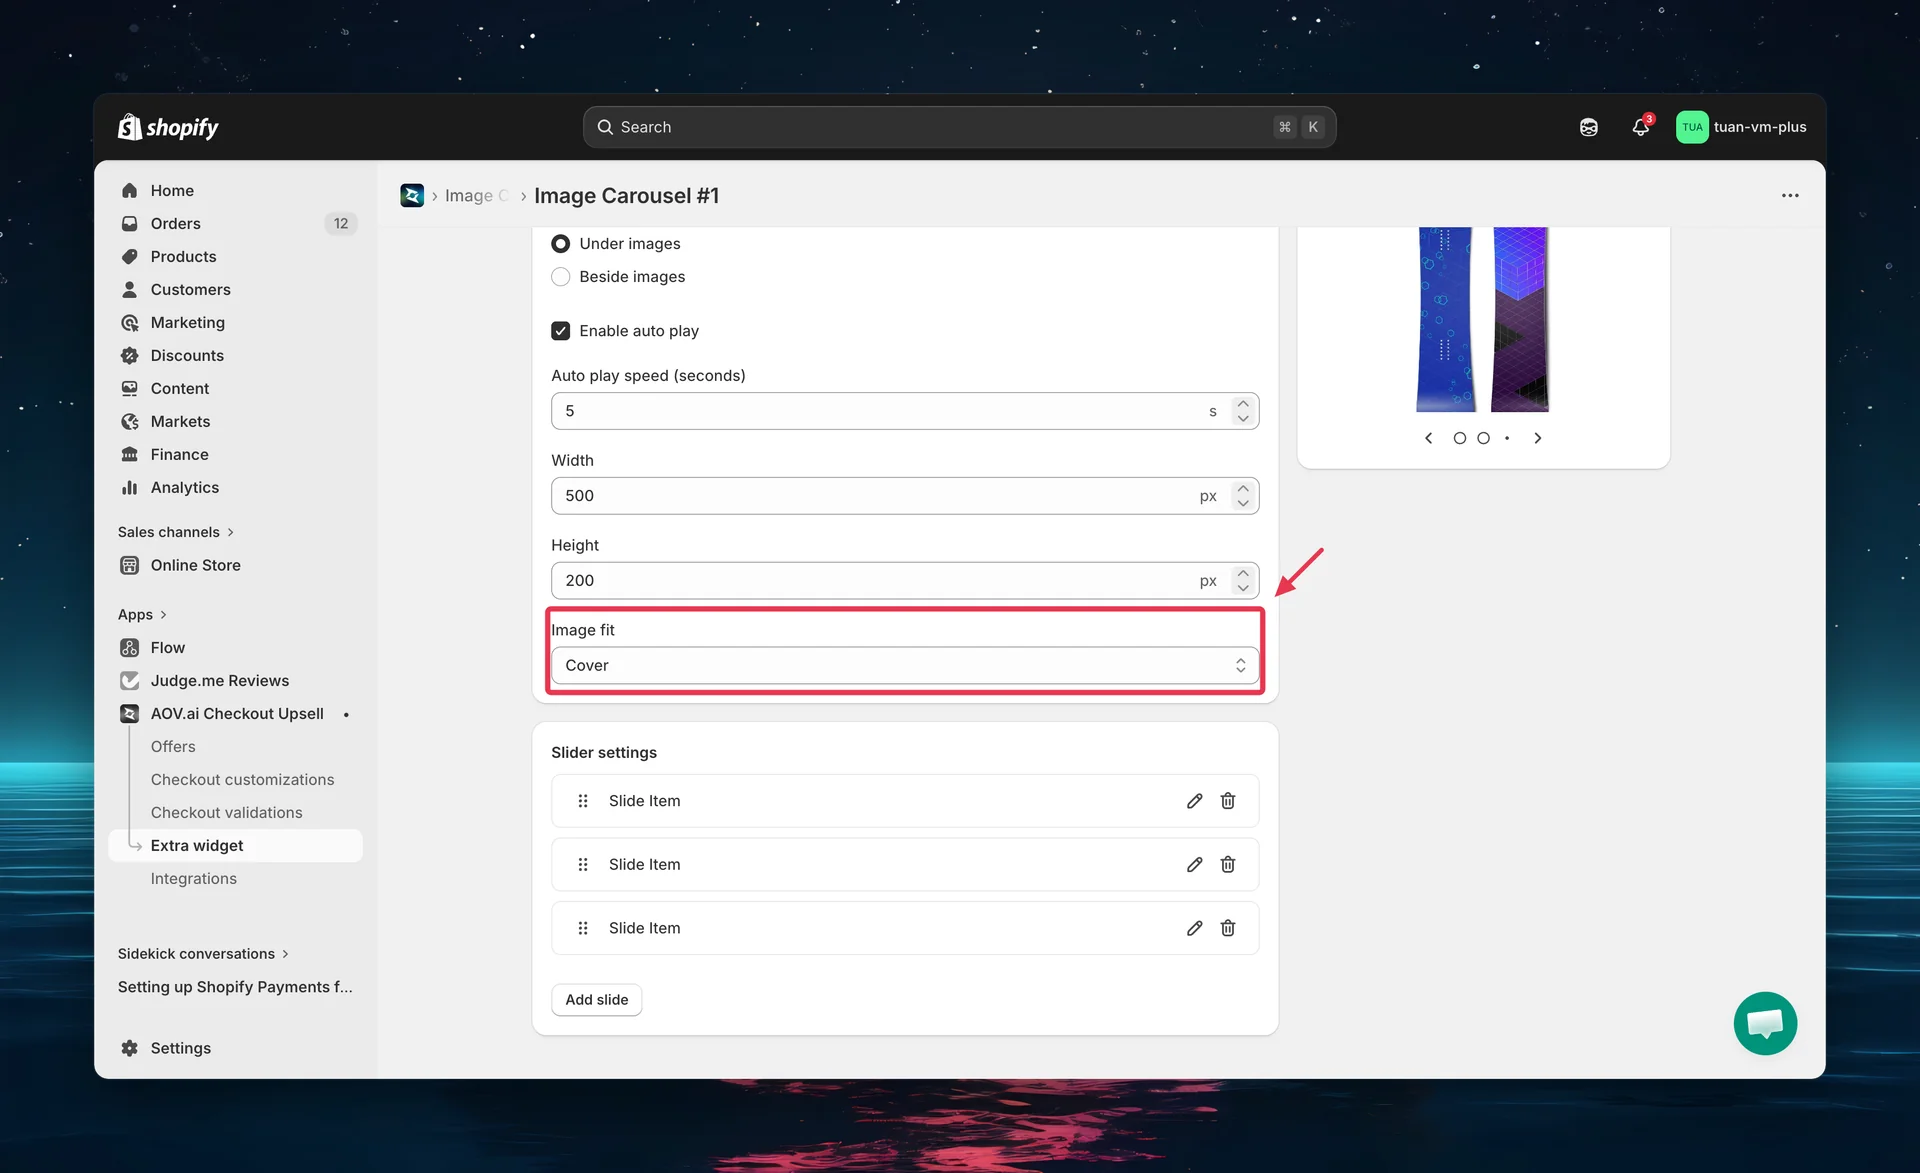
Image fit
| Option | Description |
|---|---|
| Cover | Image fills the entire frame. May crop edges if the aspect ratio doesn't match. |
| Contain | Image fits entirely within the frame. May show empty space if the aspect ratio doesn't match. |
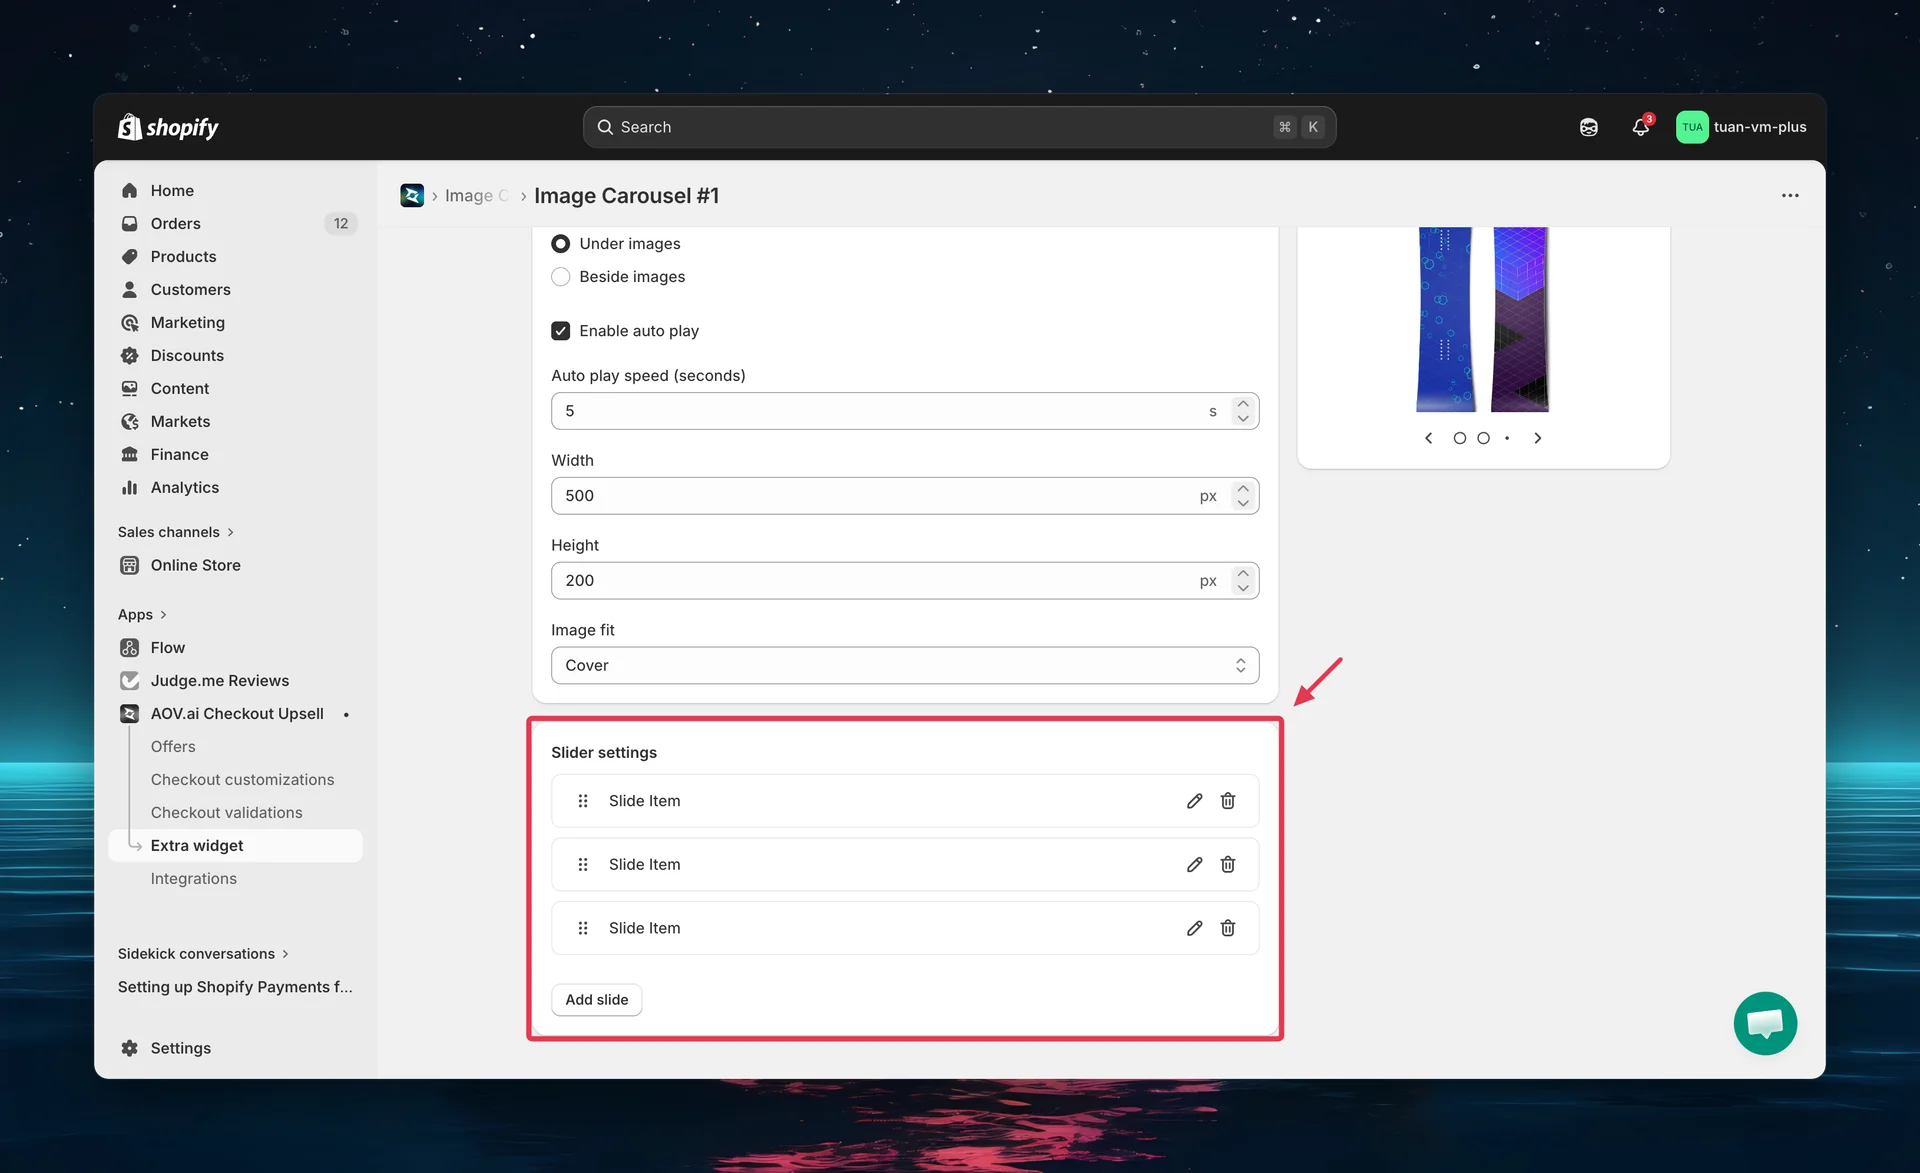
Step 5: Add slides
Click Add slide to add images to your carousel.
Per-slide settings
| Setting | Description |
|---|---|
| Image | Upload an image (PNG, JPG, SVG, WebP, or GIF). Max 2MB per image. |
| Image label | Text for screen readers (accessibility). Not visible to buyers. |
| Link to | Optional URL. When set, buyers can click the image to visit the linked page. |
Managing slides
- Add slides — click Add slide at the bottom
- Reorder — drag and drop slides using the handle
- Delete — click the trash icon on any slide
Use images with the same aspect ratio as your frame size to avoid cropping (Cover) or empty space (Contain). For example, if your frame is 500 x 200px, use images with a 5:2 ratio.
Step 6: Add the block in Theme Editor
After saving your carousel in the app, add it to your checkout page:
- Go to Shopify Admin → Online Store → Customize
- Navigate to the Checkout page in the theme editor
- Click Add block → select AOV.AI Image Carousel
- In the block settings, enter the Widget ID you copied from the app
- Position the block where you want it (main content area or Order Summary sidebar)
- Click Save in the theme editor
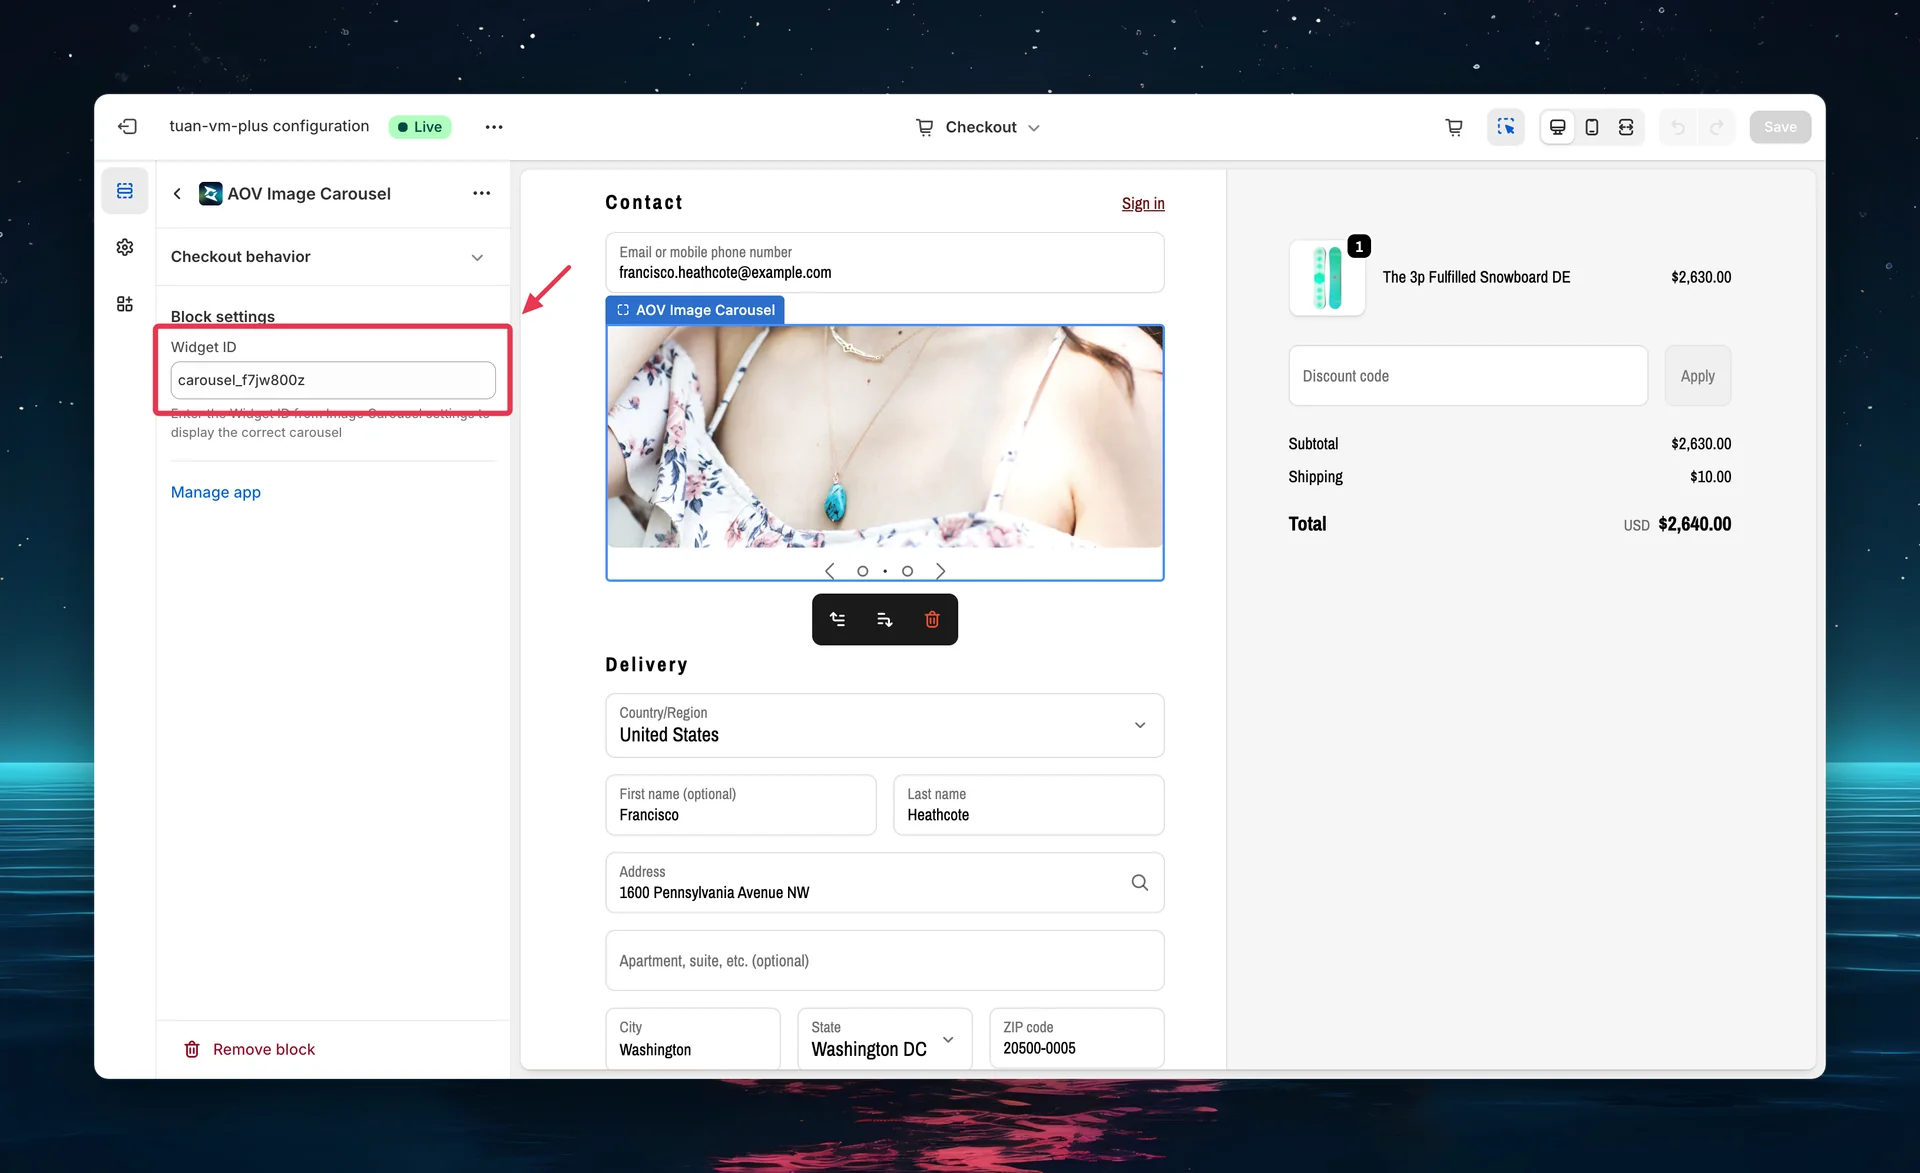
Where to find the Widget ID: Open the carousel in the app editor — the Widget ID is shown at the top. Click the copy button to copy it to your clipboard.
Layout comparison
| Feature | None | Navigation | Scrollable |
|---|---|---|---|
| Shows one image at a time | Yes | Yes | No (all visible) |
| Prev/Next buttons | No | Yes | No |
| Dot pagination | No | Yes | No |
| Auto-play | Yes (always) | Optional | No |
| Buyer scrolls | No | No | Yes |
| Best for | Simple banners | Multiple promotions | Product galleries |
Tips
- Use consistent image sizes — all slides should have the same dimensions to avoid jarring transitions
- Limit to 5-6 slides — too many slides means buyers won't see them all before completing checkout
- Use "Navigation" layout for multiple promotions — buyers can browse at their own pace
- Use "None" layout for simple rotating banners — clean look with no controls
- Add links strategically — link to promotions, collections, or product pages for cross-sell opportunities
- Test in sidebar vs main column — carousel looks different in each position. "Under images" button position works best in the sidebar.
FAQs
Q: Do I need Shopify Plus for Image Carousel? A: Yes. Image Carousel uses Checkout UI Extensions, which require Shopify Plus.
Q: What image formats are supported? A: PNG, JPG, SVG, WebP, and GIF. Maximum 2MB per image.
Q: Can buyers click on images? A: Yes, if you add a URL in the Link to field. The link opens in a new tab.
Q: What happens if the carousel is set to Active but no images are uploaded? A: The carousel won't display at checkout if there are no slides.
Q: Can I use different Widget IDs for different checkout pages? A: Each carousel has one Widget ID. You can create multiple carousels with different IDs and add them as separate blocks in the Theme Editor.
Q: Does auto-play work on mobile? A: Yes. Auto-play works on all devices. Navigation buttons and scrollable layouts also work on mobile with touch gestures.
Q: How do I change the carousel position at checkout? A: Reposition the block in the Theme Editor — drag it to a different location in the main content area or Order Summary sidebar.
Q: What's the recommended frame size? A: For the main content area, try 600 x 250px. For the Order Summary sidebar, try 380 x 200px. Adjust based on your images.
Q: Can I use GIFs for animated slides? A: Yes. GIF files are supported and will animate in the carousel.