Cart Editor
Let buyers change product variants and quantities directly at checkout — without leaving the checkout flow. Cart Editor reduces friction and cart abandonment by enabling quick edits right in the Order Summary sidebar.
Requires Shopify Plus. Cart Editor uses Checkout UI Extensions, which are available on Shopify Plus plans.
What it does
Cart Editor adds editing controls to each product in the Order Summary sidebar at checkout:
- Variant change — buyers can switch product options (size, color, material) via dropdown selectors directly at checkout.
- Quantity change — buyers can adjust item quantity with a stepper control (plus/minus buttons).
- Remove item — optionally let buyers remove products from their cart at checkout.
The widget appears as a collapsible link under each product. Buyers click to expand and make changes — cart updates instantly without page reload.
Step 1: Go to Extra Widgets
In the app sidebar, click Extra widget. Scroll down to find the Cart Editor card and click Select (first time) or Manage (if already created).
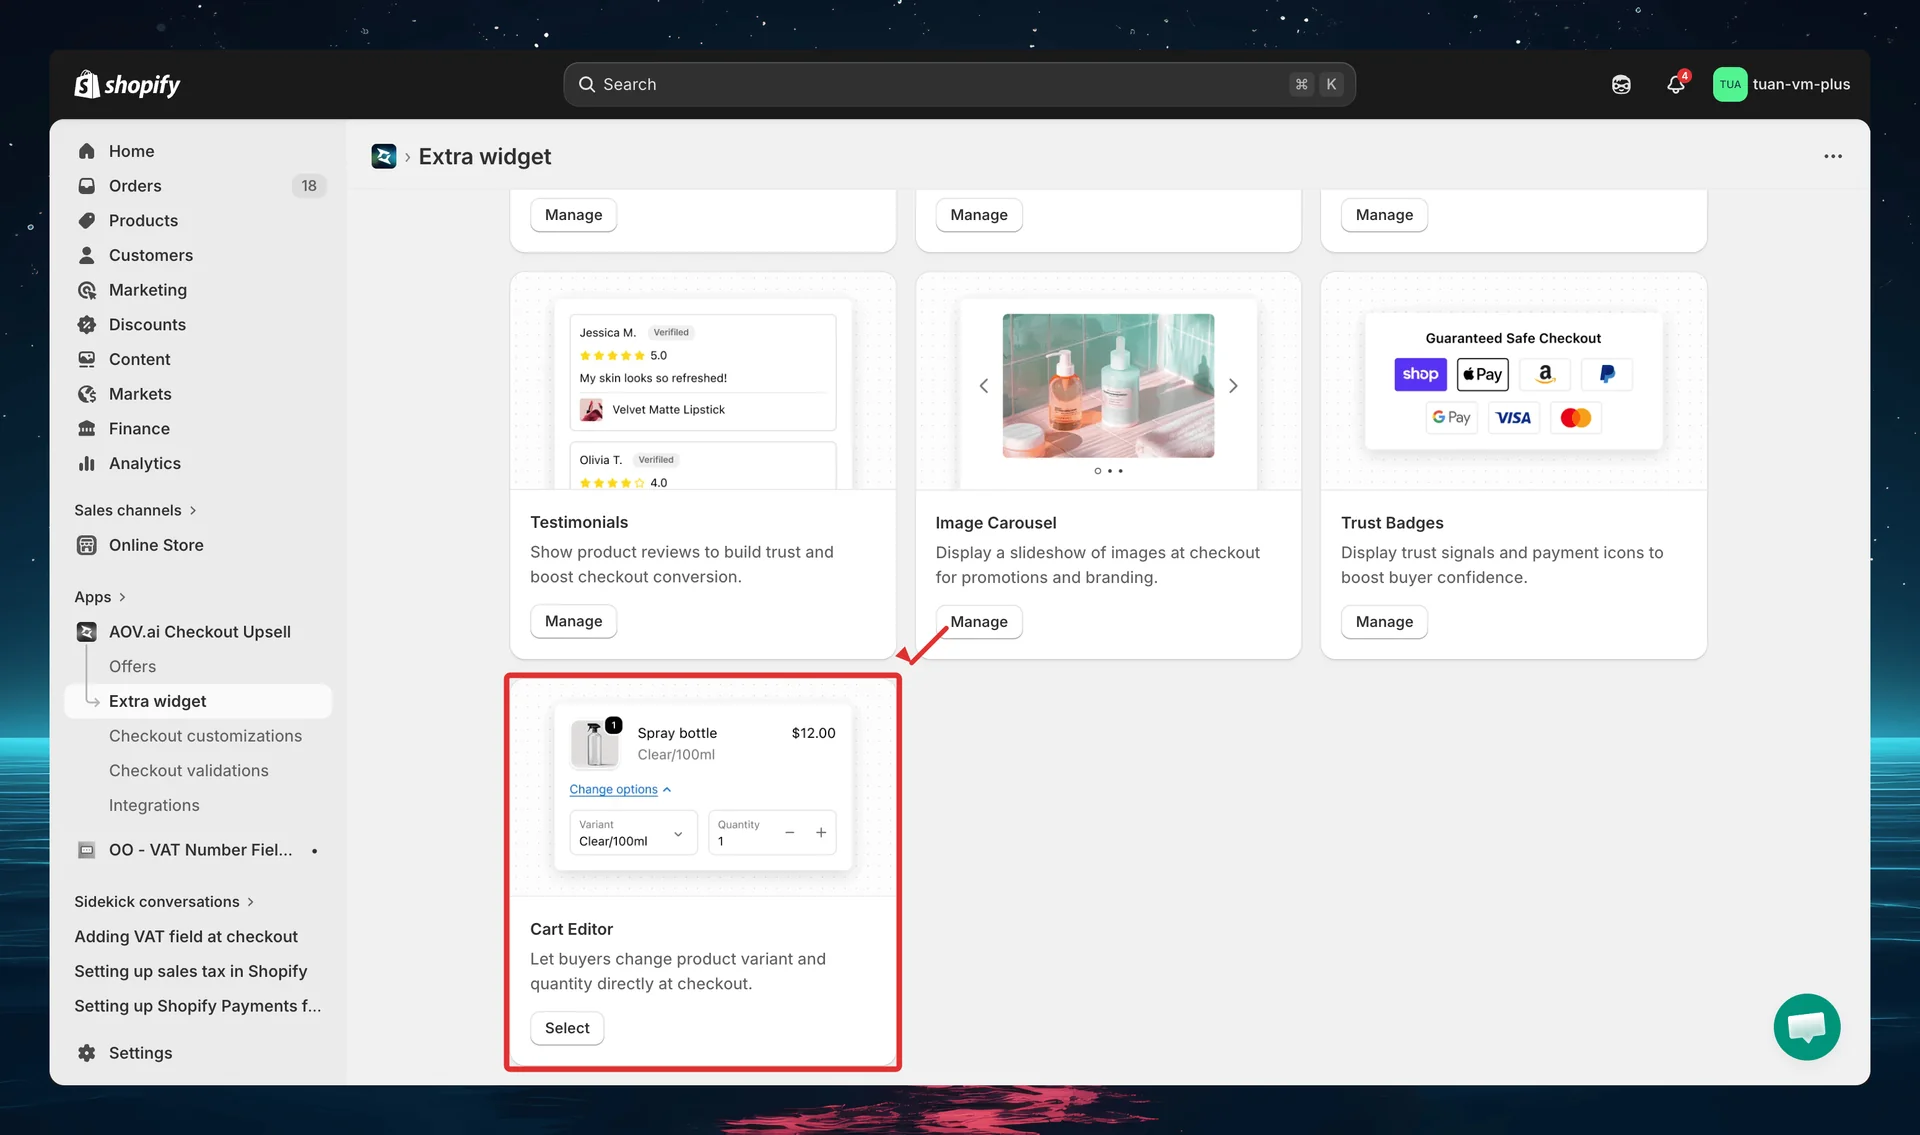
Cart Editor is a single-config widget — you have one cart editor config for your entire store (unlike Trust Badges or Custom Banners which support multiple configs).
Step 2: Configure editing options
The editor opens with a two-column layout: settings on the left and sidebar with live preview on the right.
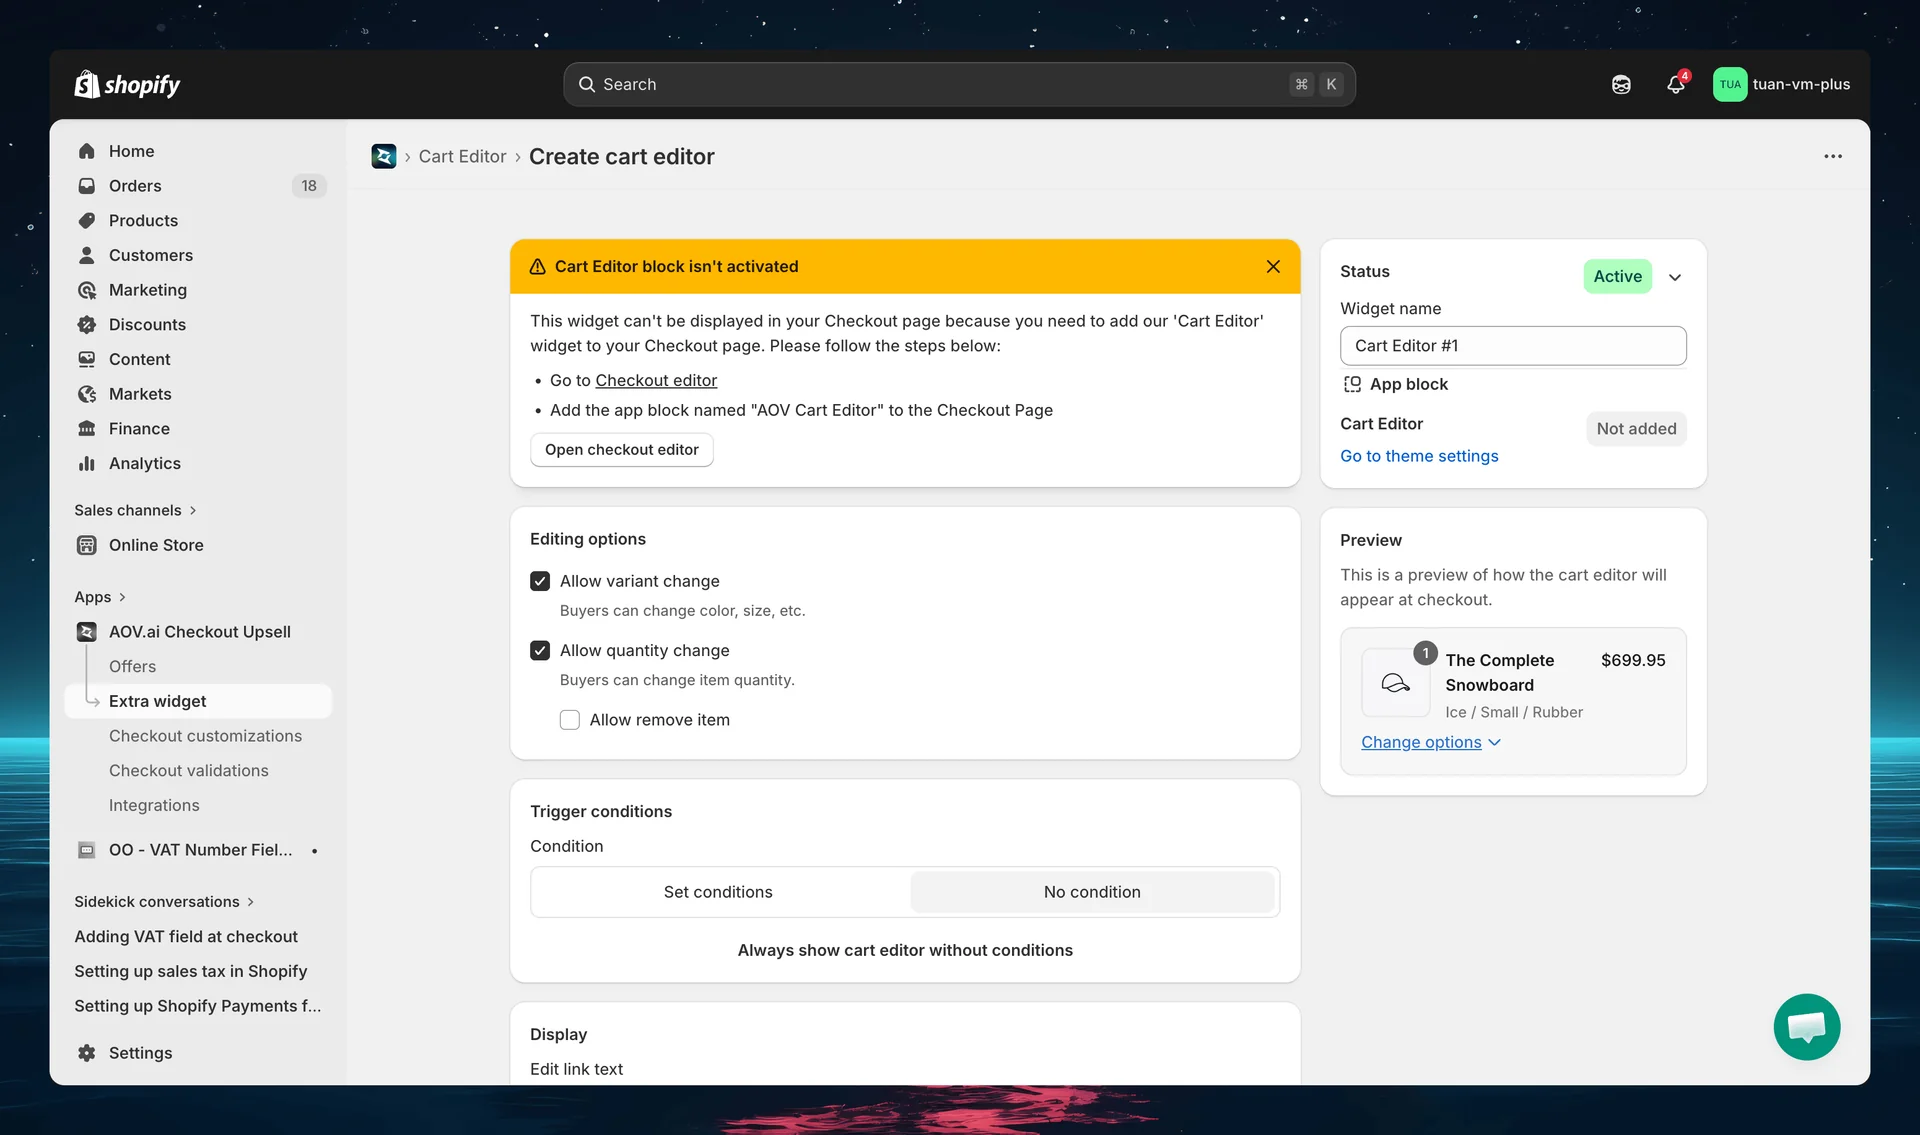
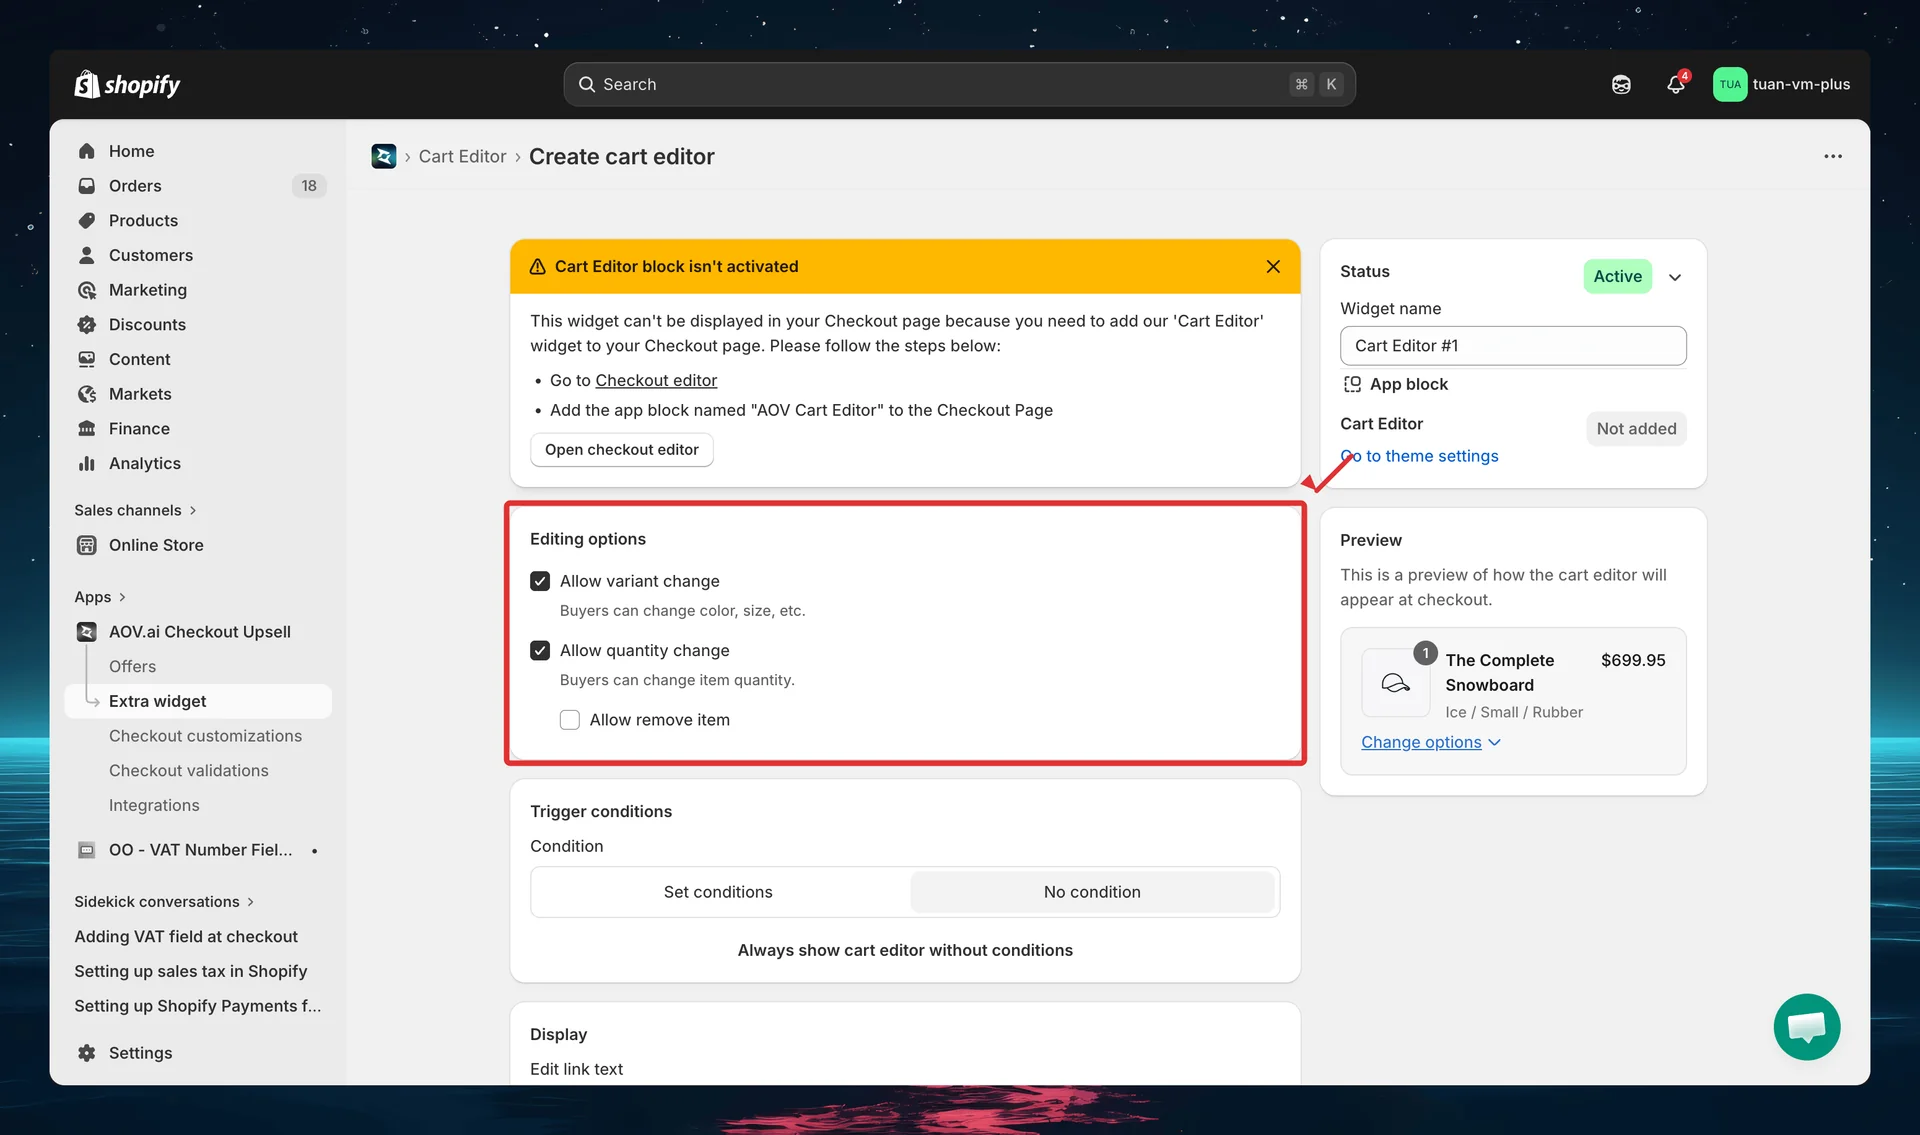
The Editing options section controls what buyers are allowed to change at checkout:
| Setting | Description | Default |
|---|---|---|
| Allow variant change | Buyers can change color, size, etc. | On |
| Allow quantity change | Buyers can adjust item quantity with a stepper | On |
| Allow remove item | Buyers can remove products from cart entirely (shown when quantity change is on) | Off |
At least one editing option (variant change or quantity change) must be enabled. If both are off, a warning banner appears.
Step 3: Set trigger conditions (optional)
Control when the cart editor appears using trigger conditions. By default, it shows for all products and buyers.
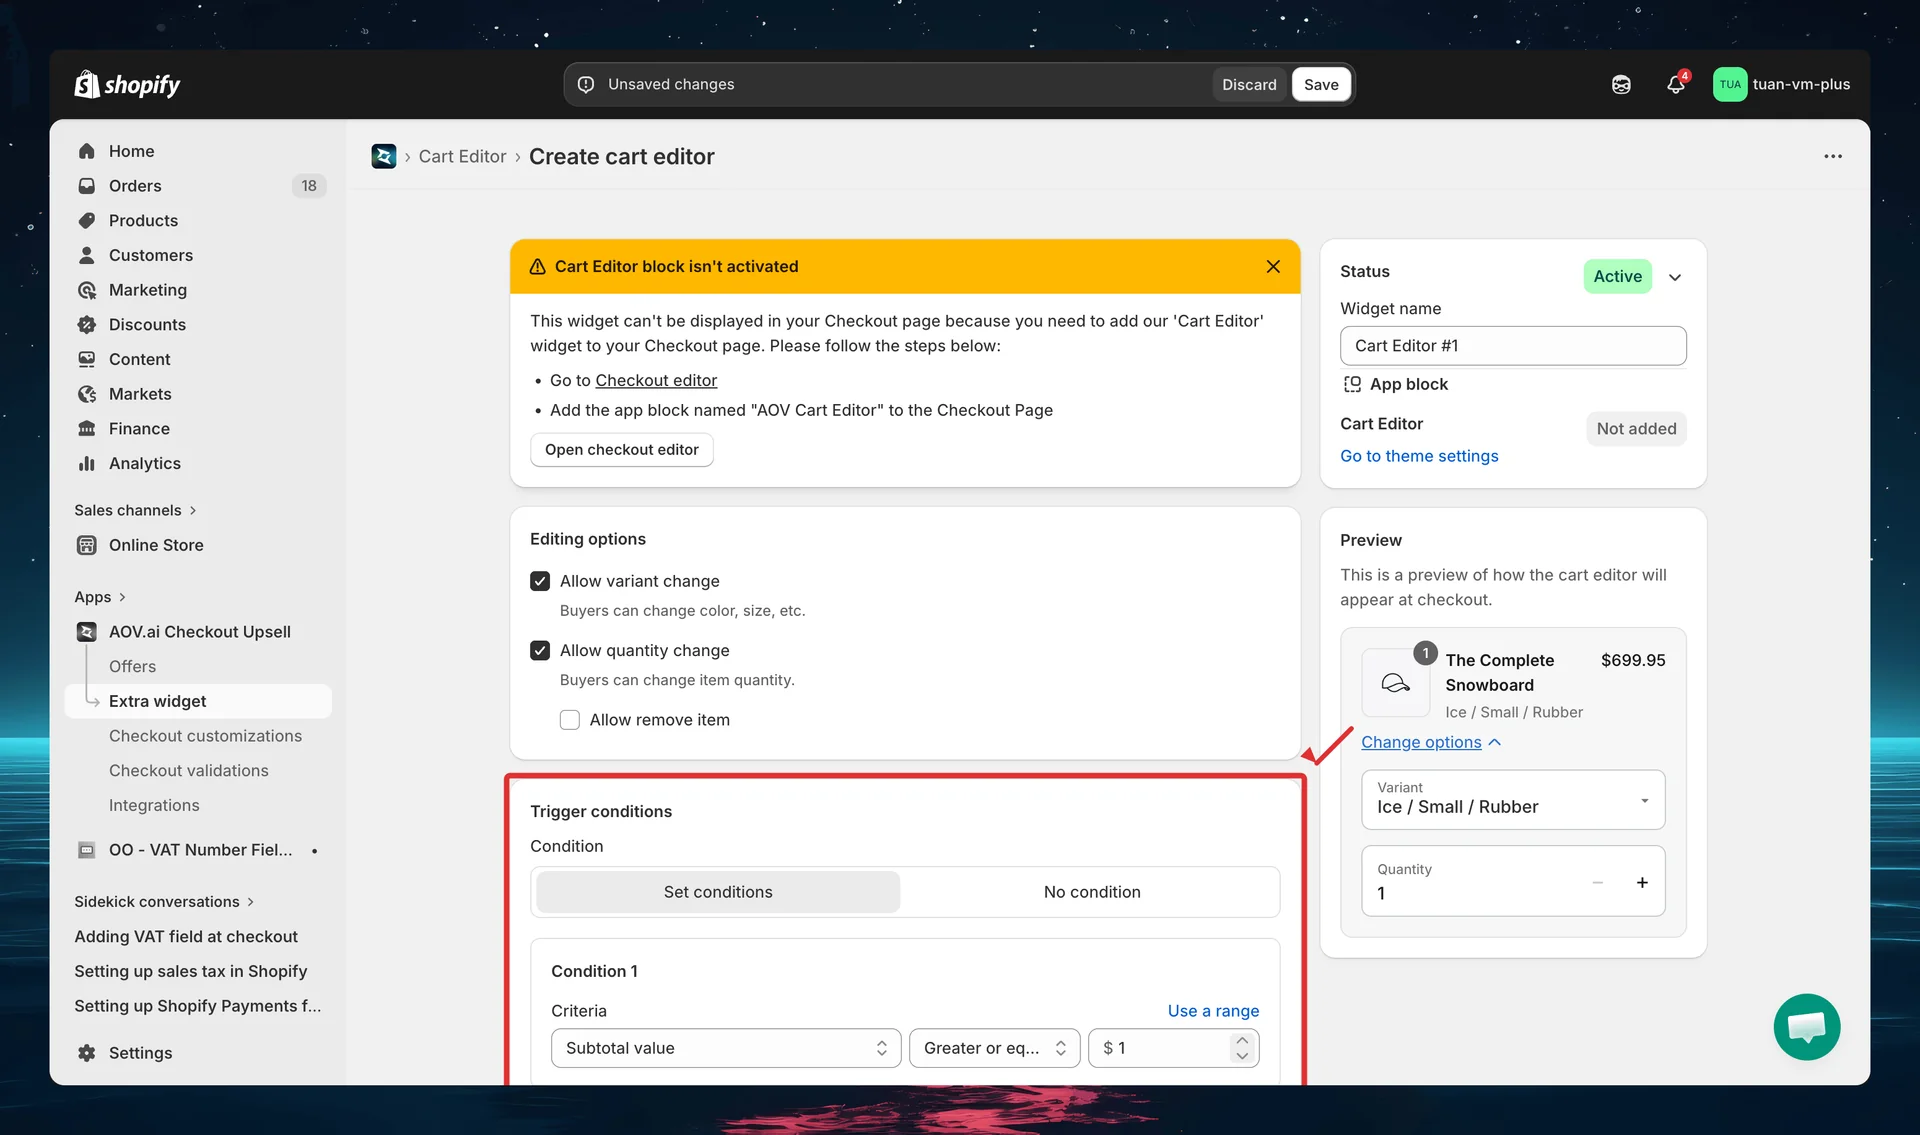
Toggle between two modes:
| Mode | Description |
|---|---|
| No condition | Cart editor always shows for all products and buyers |
| Set conditions | Cart editor only shows when ALL conditions are met (AND logic) |
Available conditions
| Condition | Description |
|---|---|
| Subtotal value | Cart subtotal meets a threshold (greater than, less than, equals, or range) |
| Product price | Product price meets a threshold |
| Included products | Cart must contain specific products |
| Excluded products | Cart must NOT contain specific products |
| Included collections | Cart must contain products from specific collections |
| Excluded collections | Cart must NOT contain products from specific collections |
| Customer tag | Buyer must have (or not have) specific customer tags |
You can add up to 4 conditions. All conditions use AND logic — every condition must be true for the widget to appear.
For guest checkout (no customer account), customer tag conditions are skipped — the cart editor still shows.
Step 4: Configure display settings
The Display section controls how the cart editor appears at checkout.
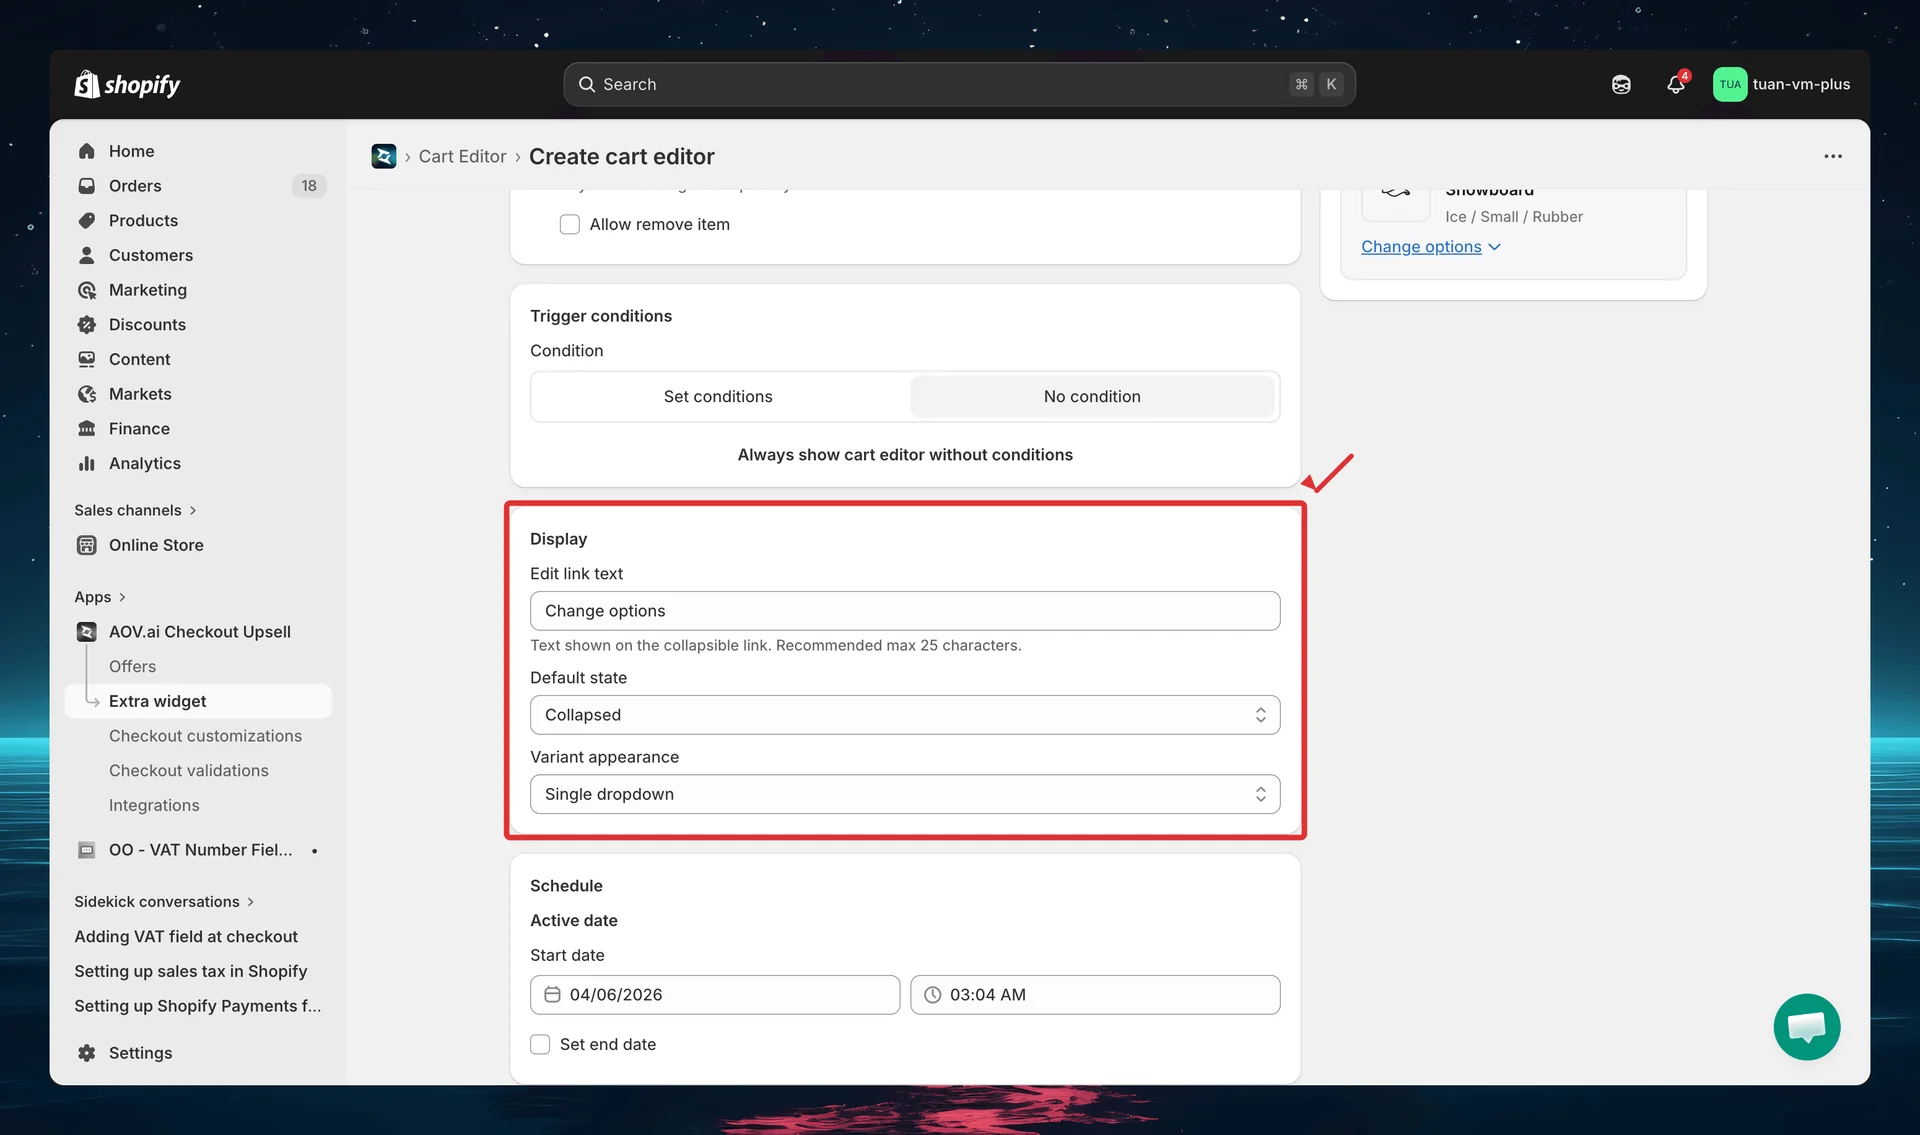
| Setting | Options | Default | Description |
|---|---|---|---|
| Edit link text | Free text | "Change options" | Text shown on the collapsible link. Recommended max 25 characters. Shown as placeholder when empty |
| Default state | Collapsed / Expanded | Collapsed | Whether the editor starts open or closed at checkout |
| Variant appearance | Single dropdown / Multiple dropdowns | Single dropdown | How variant selectors are displayed (shown only when variant change is on) |
Step 5: Set schedule (optional)
The Schedule section controls when the cart editor is active.
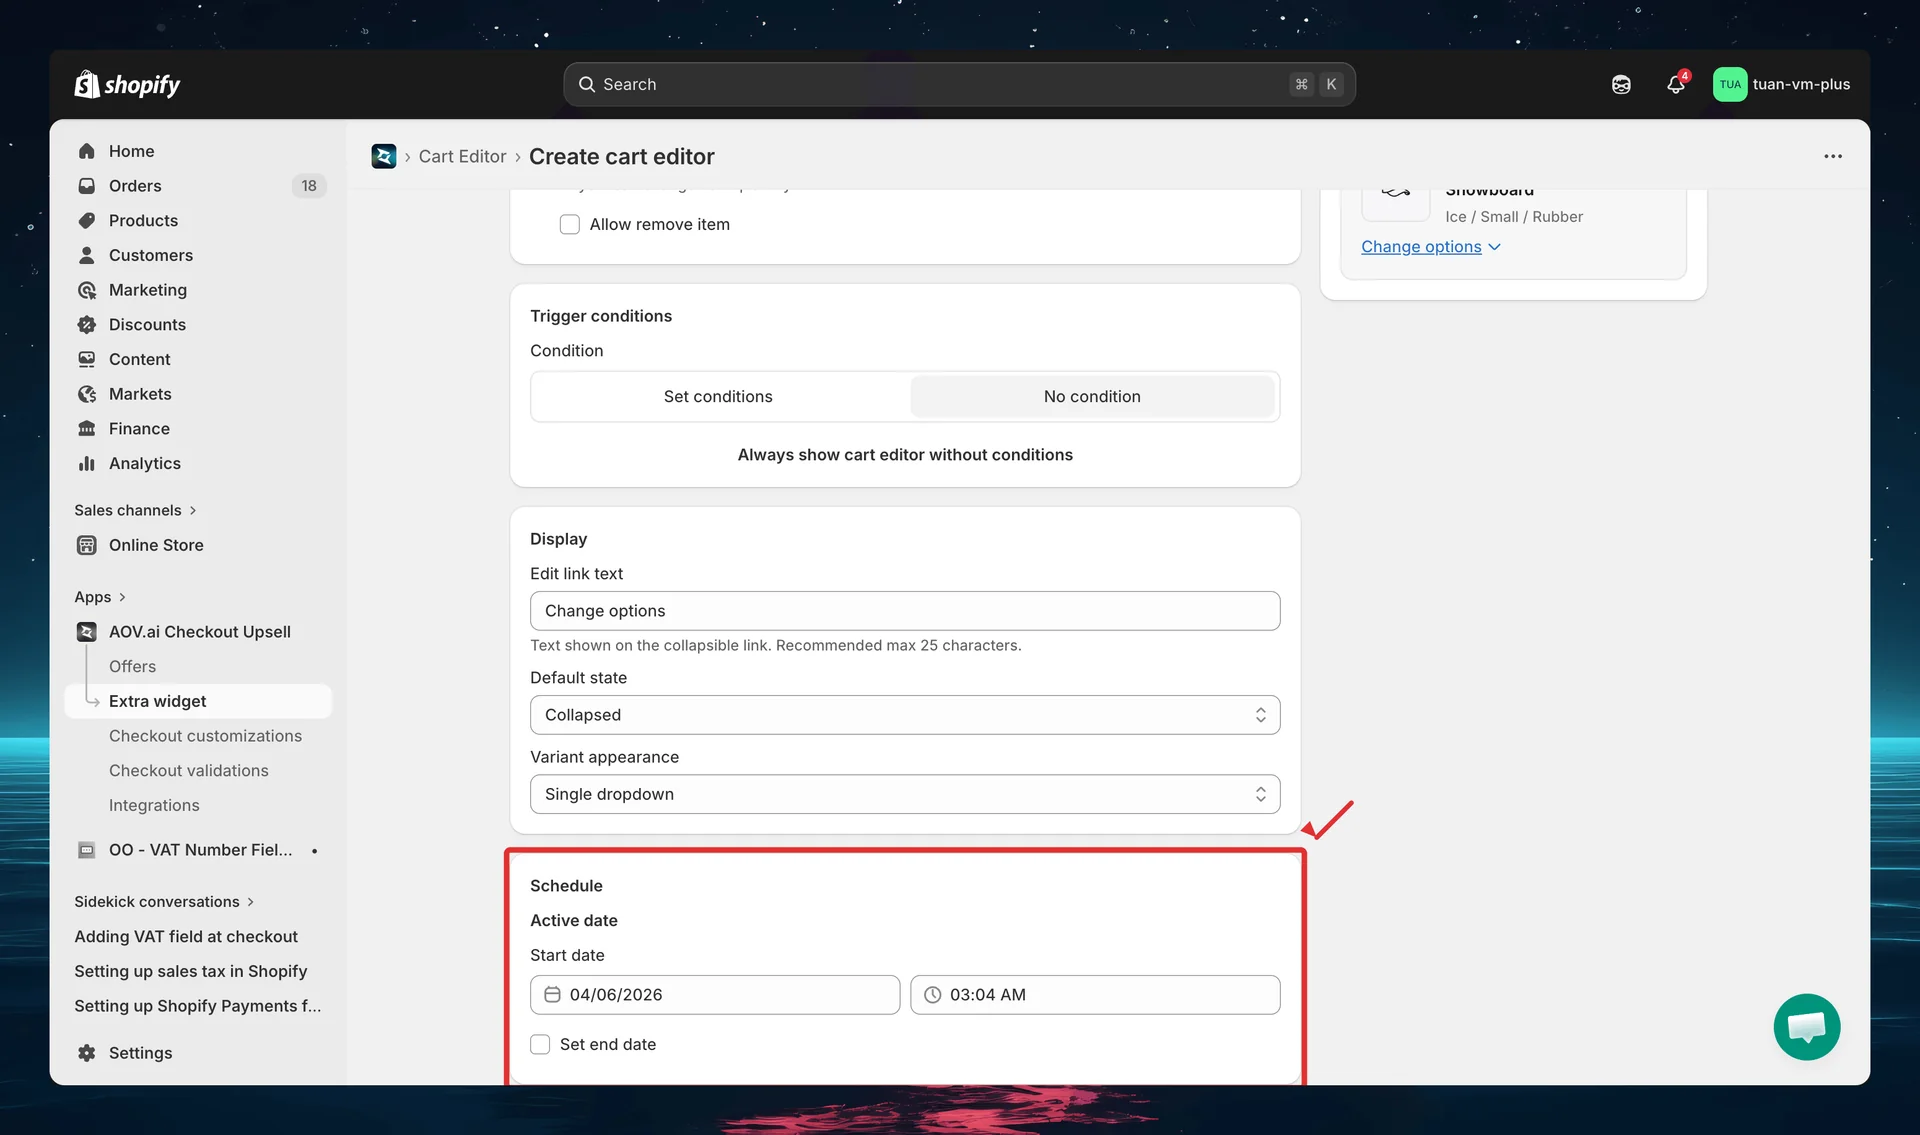
| Setting | Description |
|---|---|
| Active date / Start date | When the cart editor becomes active |
| Set end date | Check to set an end date — uncheck for no expiry |
Step 6: Sidebar settings
The right column shows status controls and a live preview.
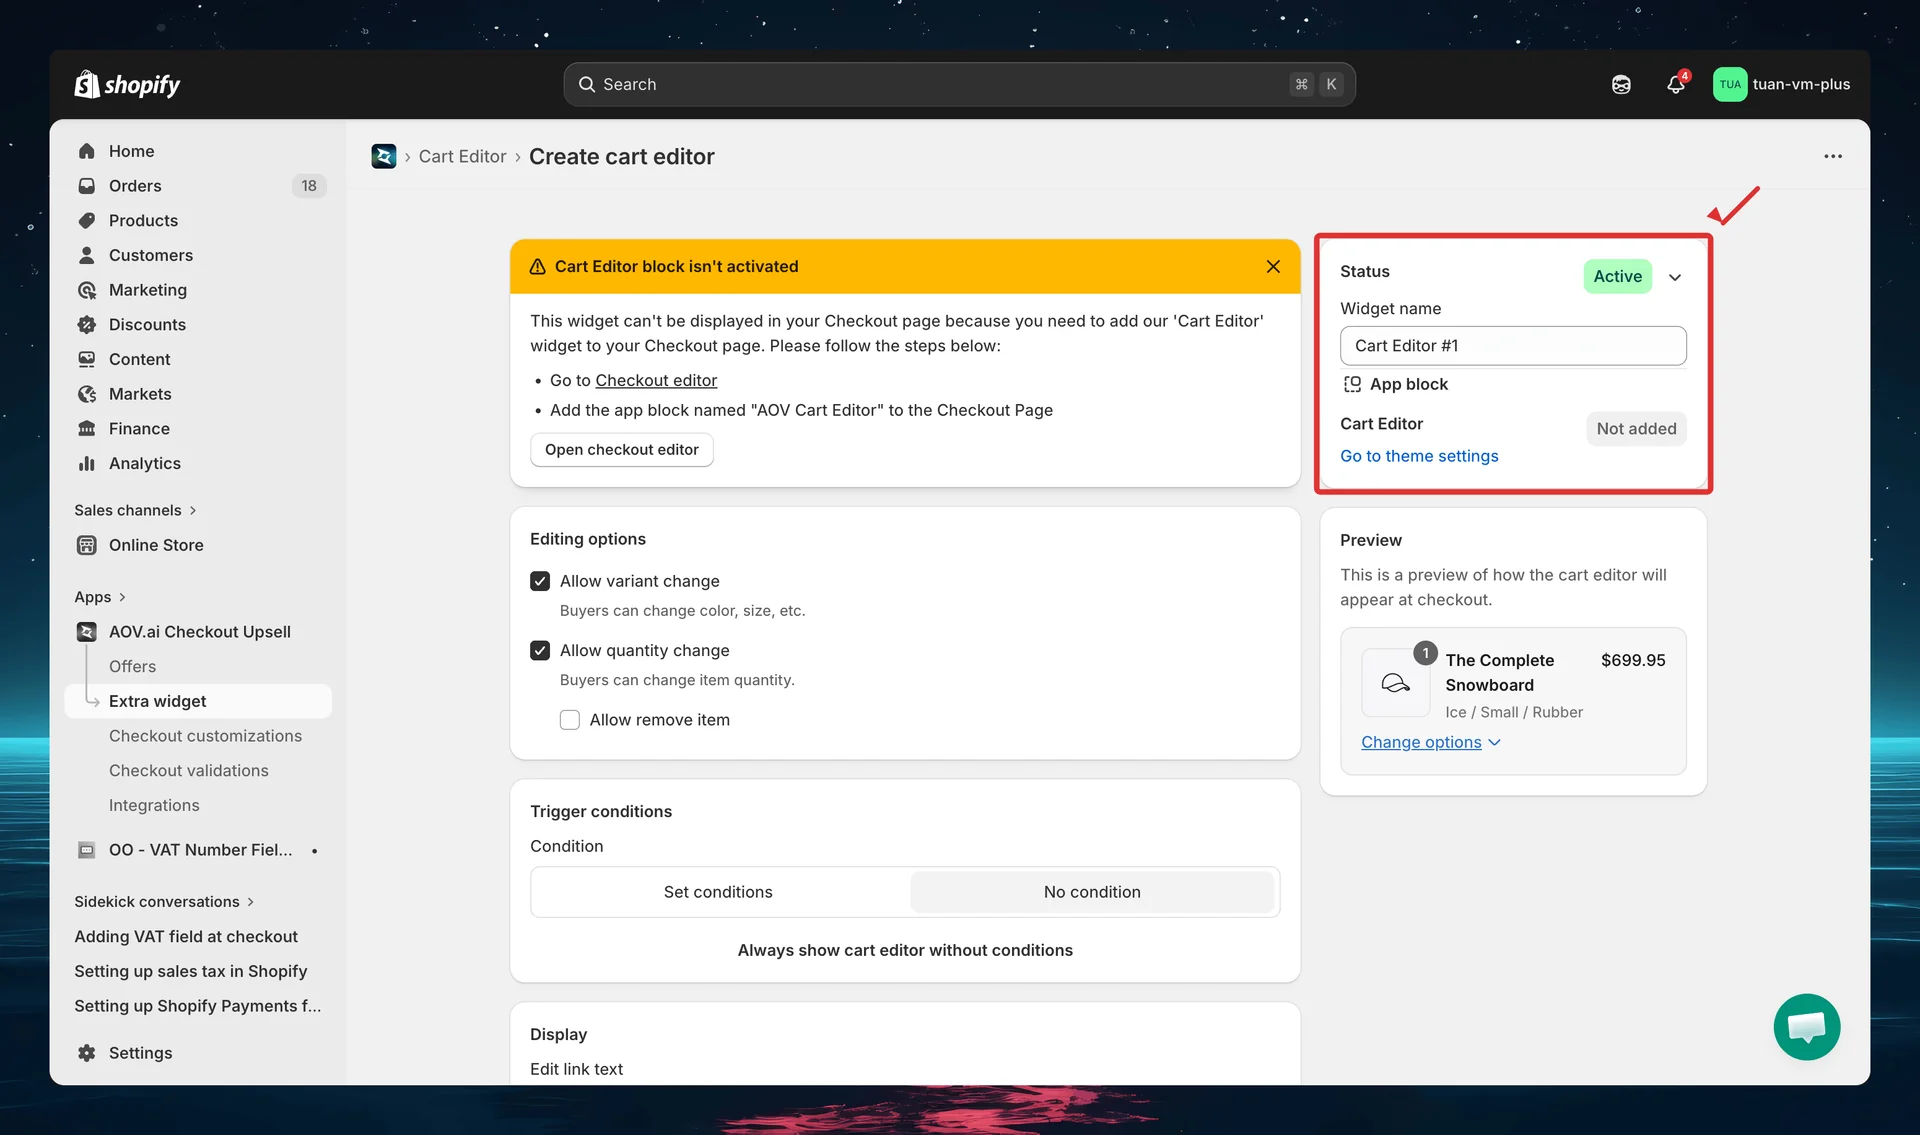
| Section | Description |
|---|---|
| Status | Toggle between Active (live at checkout) and Expired (hidden) |
| Widget name | Name for your reference — not shown to buyers (e.g., "Cart Editor #1") |
| App block | Shows whether the Cart Editor block has been added in the Theme Editor. Click "Go to theme settings" to open the Theme Editor |
| Preview | Live preview showing how the cart editor will look at checkout. Updates in real-time as you change settings |
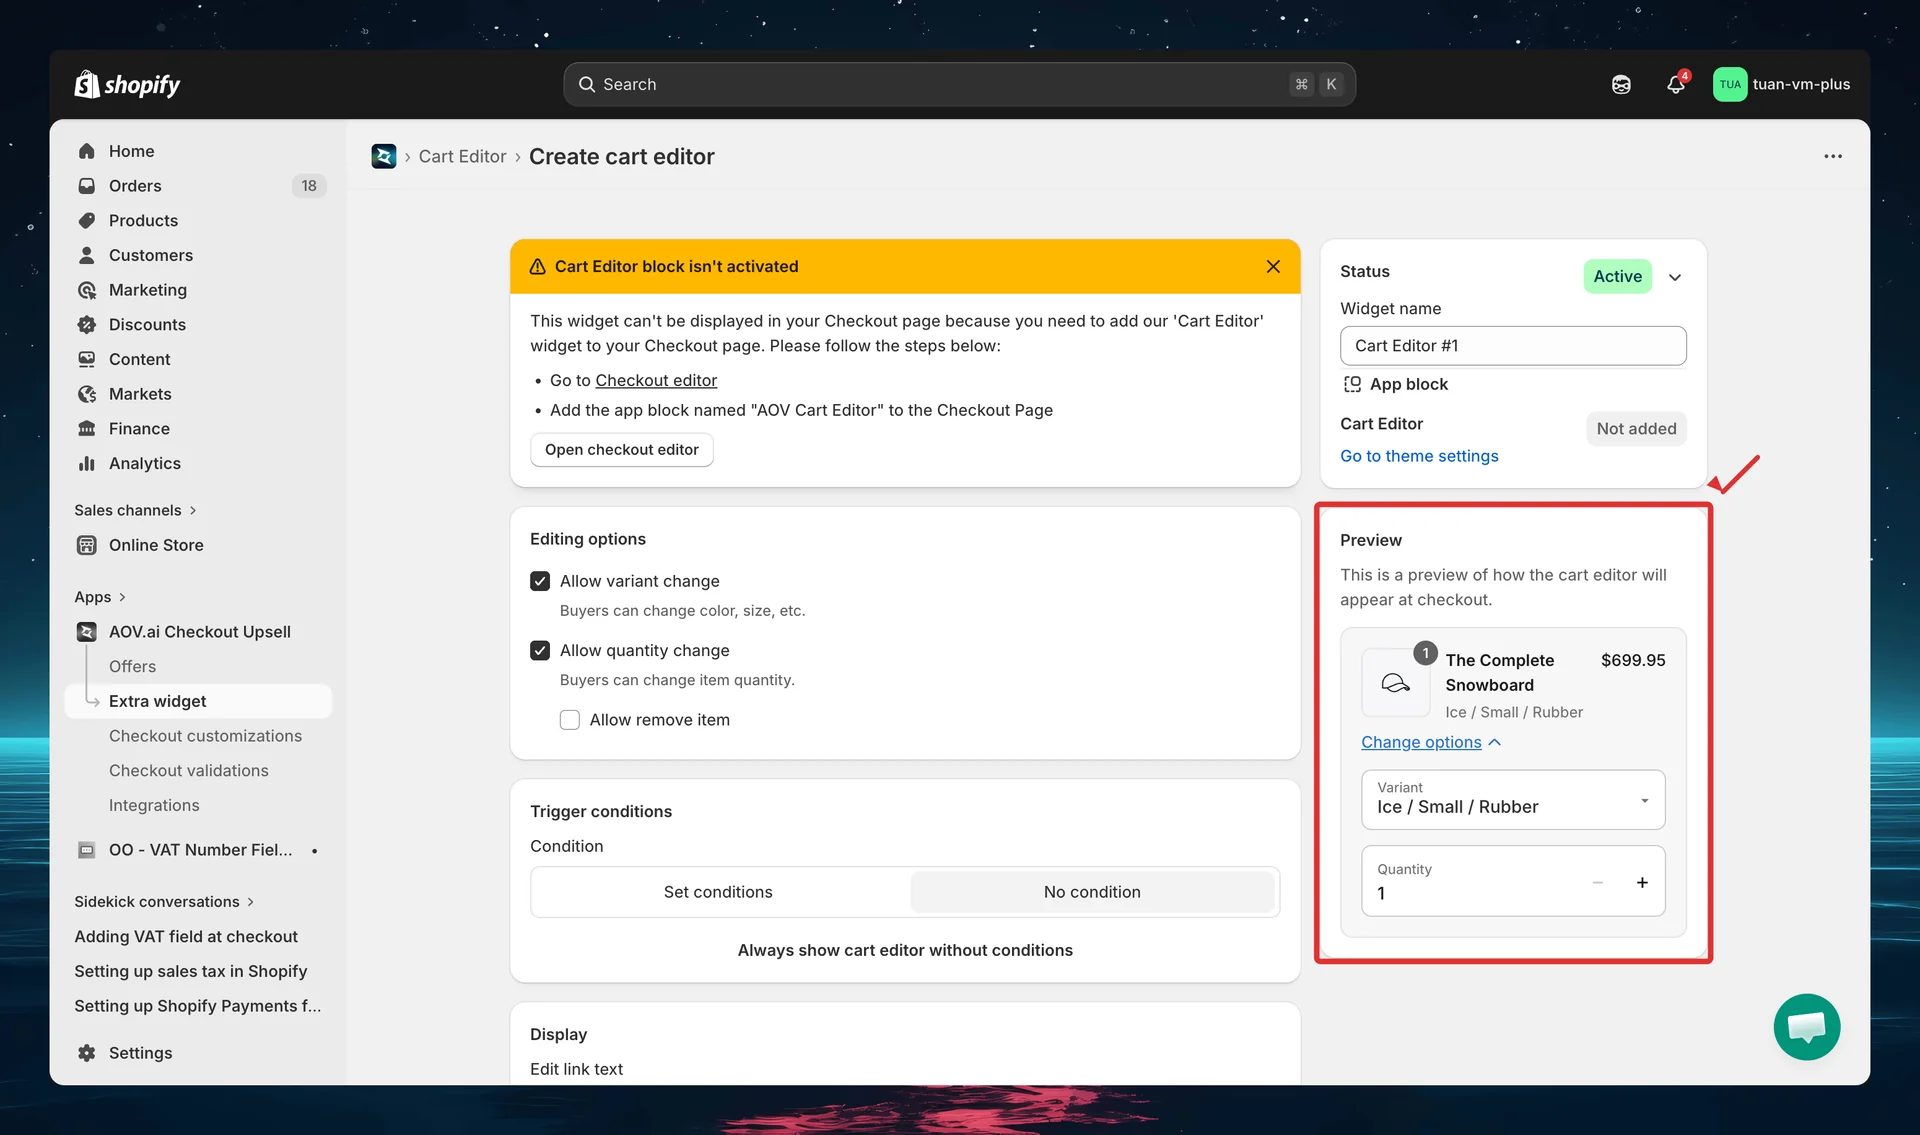
Preview — expanded state
Click "Change options" in the preview to see the expanded state with variant selectors and quantity stepper:
Step 7: Add the block in Theme Editor
After saving your cart editor config in the app, add it to your checkout page:
- Go to Shopify Admin → Online Store → Customize
- Navigate to the Checkout page in the theme editor
- Click Add block → select AOV Cart Editor
- Position the block in the Order Summary section
- Click Save in the theme editor
If the Cart Editor block is not added in the Theme Editor, a yellow warning banner appears at the top of the editor page with instructions.
How it works at checkout
Collapsed state (default)
Below each eligible product in the Order Summary, buyers see a clickable link:
Change options ▼
Clicking the link expands the editing controls.
Expanded state
When expanded, buyers see:
- Variant selectors — one dropdown per product option (Size, Color, etc.). Out-of-stock options show "(Out of stock)" and are disabled. With Multiple dropdowns appearance, each option gets its own dropdown; with Single dropdown, the combined variant is shown in one selector.
- Quantity stepper — plus/minus buttons to adjust quantity.
- Remove item — if enabled, buyers can remove the product from the cart. A confirmation prompt ("Remove this item from cart?") appears before removal.
All changes apply instantly — cart total updates without page reload.
Edge cases
| Scenario | Behavior |
|---|---|
| Single-variant product | Variant selectors are hidden, only quantity shown |
| Invalid variant combination | Error: "This combination is not available" |
| All variants out of stock | Dropdowns grayed out |
| Last item removed from cart | Shopify redirects buyer to cart page |
| Extension error | Graceful degradation — checkout works normally, widget hidden |
Tips
- Keep the edit link text short — under 25 characters to avoid wrapping on mobile
- Use "Collapsed" as default state — keeps checkout clean; buyers expand only when needed
- Choose the right variant appearance — "Multiple dropdowns" is clearer for products with several options (size + color + material); "Single dropdown" keeps things compact
- Enable "Remove item" carefully — consider whether you want buyers to empty their cart at checkout
- Use trigger conditions for specific products — if you sell both physical and digital products, you might only want cart editing for physical items
- Test on mobile — the Order Summary sidebar collapses on mobile; verify the cart editor looks good
FAQs
General
Q: Do I need Shopify Plus for Cart Editor? A: Yes. Cart Editor uses Checkout UI Extensions, which require Shopify Plus.
Q: Can I create multiple cart editor configs? A: No. Cart Editor is a single-config widget — one config applies to your entire store.
Q: What happens if I deactivate the cart editor? A: It stops appearing at checkout immediately. Your config is preserved — reactivate it anytime.
Q: Does Cart Editor work with Volume Savings? A: Yes. When both are active for the same product, Cart Editor shows variant editing while Volume Savings handles quantity tiers — no duplicate controls.
Checkout behavior
Q: Where does the cart editor appear on the checkout page? A: In the Order Summary sidebar (right column), directly under each product item. It does not appear in the main checkout flow area.
Q: Do changes update the cart immediately? A: Yes. Variant and quantity changes apply instantly with automatic price updates — no page reload needed.
Q: What happens if a buyer selects an out-of-stock variant? A: Out-of-stock options are marked "(Out of stock)" and disabled in the dropdown. Buyers cannot select them.
Q: What if the buyer removes all items from their cart? A: Shopify automatically redirects the buyer to the cart page when the cart is empty.
Theme Editor
Q: I see a yellow warning banner about the Cart Editor block — what do I do? A: Follow the instructions in the banner: go to the Theme Editor, add the "AOV Cart Editor" block to the Checkout page, and save.
Q: Where should I place the Cart Editor block? A: Add it to the Order Summary section of the checkout page. The extension targets purchase.checkout.cart-line-item.render-after, so it automatically renders below each product line item.