Payment Settings
Step 2 of the campaign wizard: configure payment type, deposit amount, inventory deduction, fulfillment status, and order tags.
How to set up
From the campaign wizard, navigate to Step 2: Payment. Choose how customers pay for their pre-order.
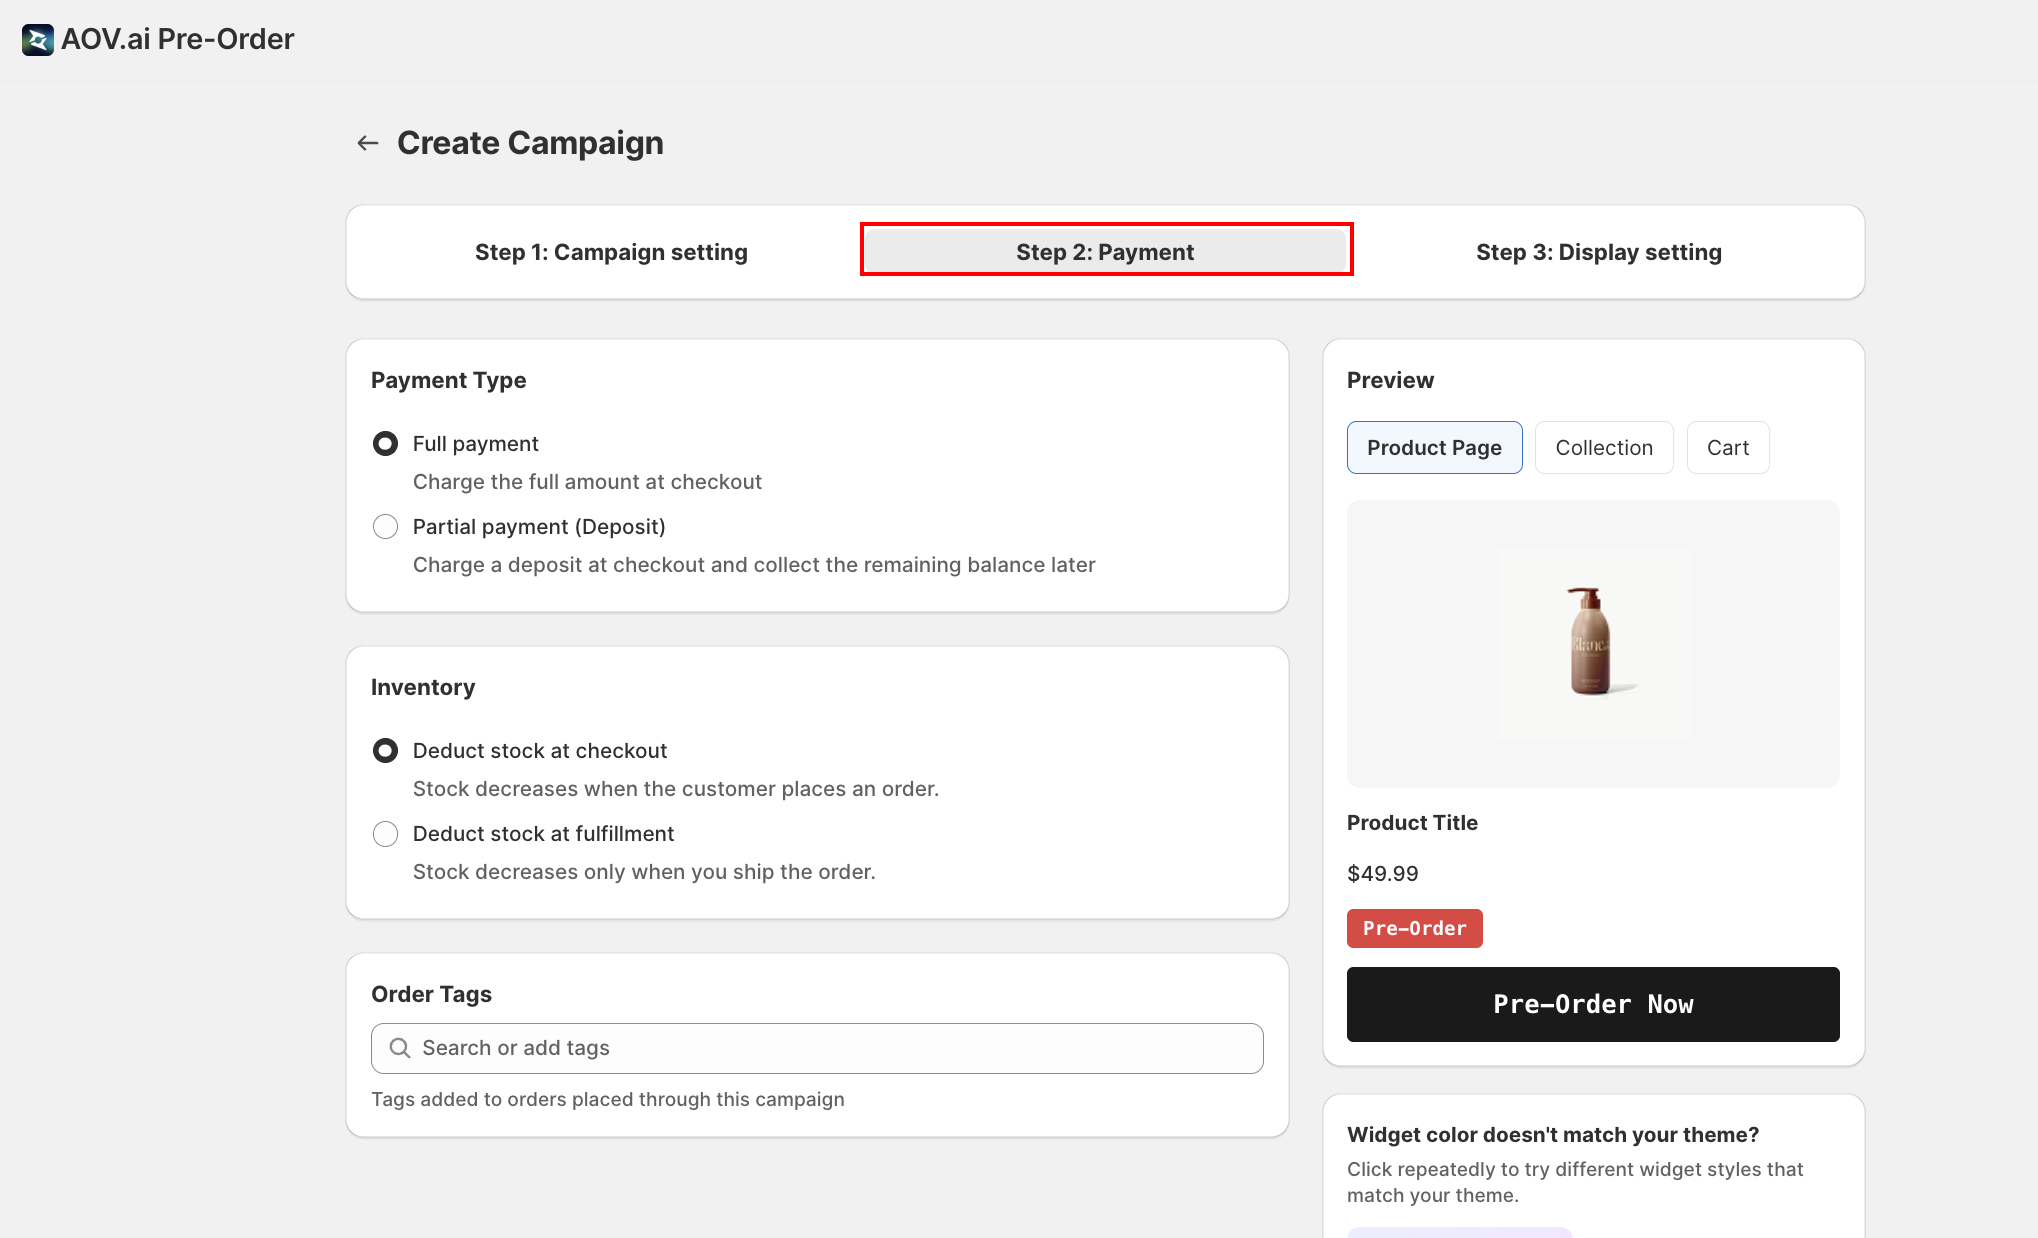
Choose payment type
In the Payment Type card, select one option:
- Full payment
- Charge the full amount at checkout.
- The simplest option, no additional configuration needed.
- Partial payment (Deposit)
- Charge a deposit at checkout and collect the remaining balance later.
- When selected, the Deposit Amount and Remaining Balance sections appear (see next steps).
Choose deposit type (Partial payment only)
When Partial payment is selected, the Deposit Amount card appears with a segmented button group:
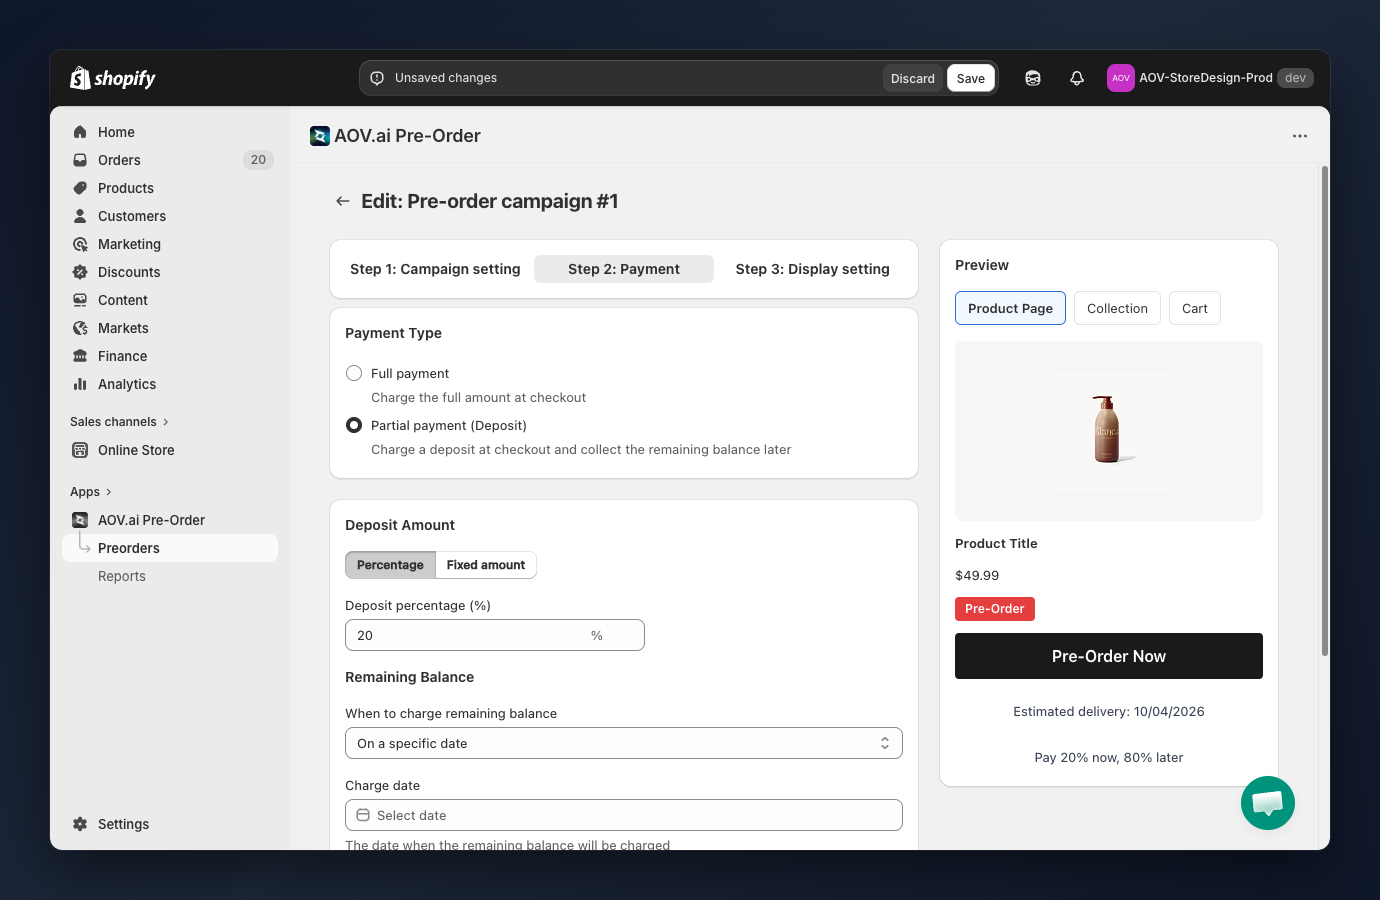
- Percentage (default): charge a percent of the product price as the deposit.
- Fixed amount: charge a flat amount as the deposit.
Set deposit value (Partial payment only)
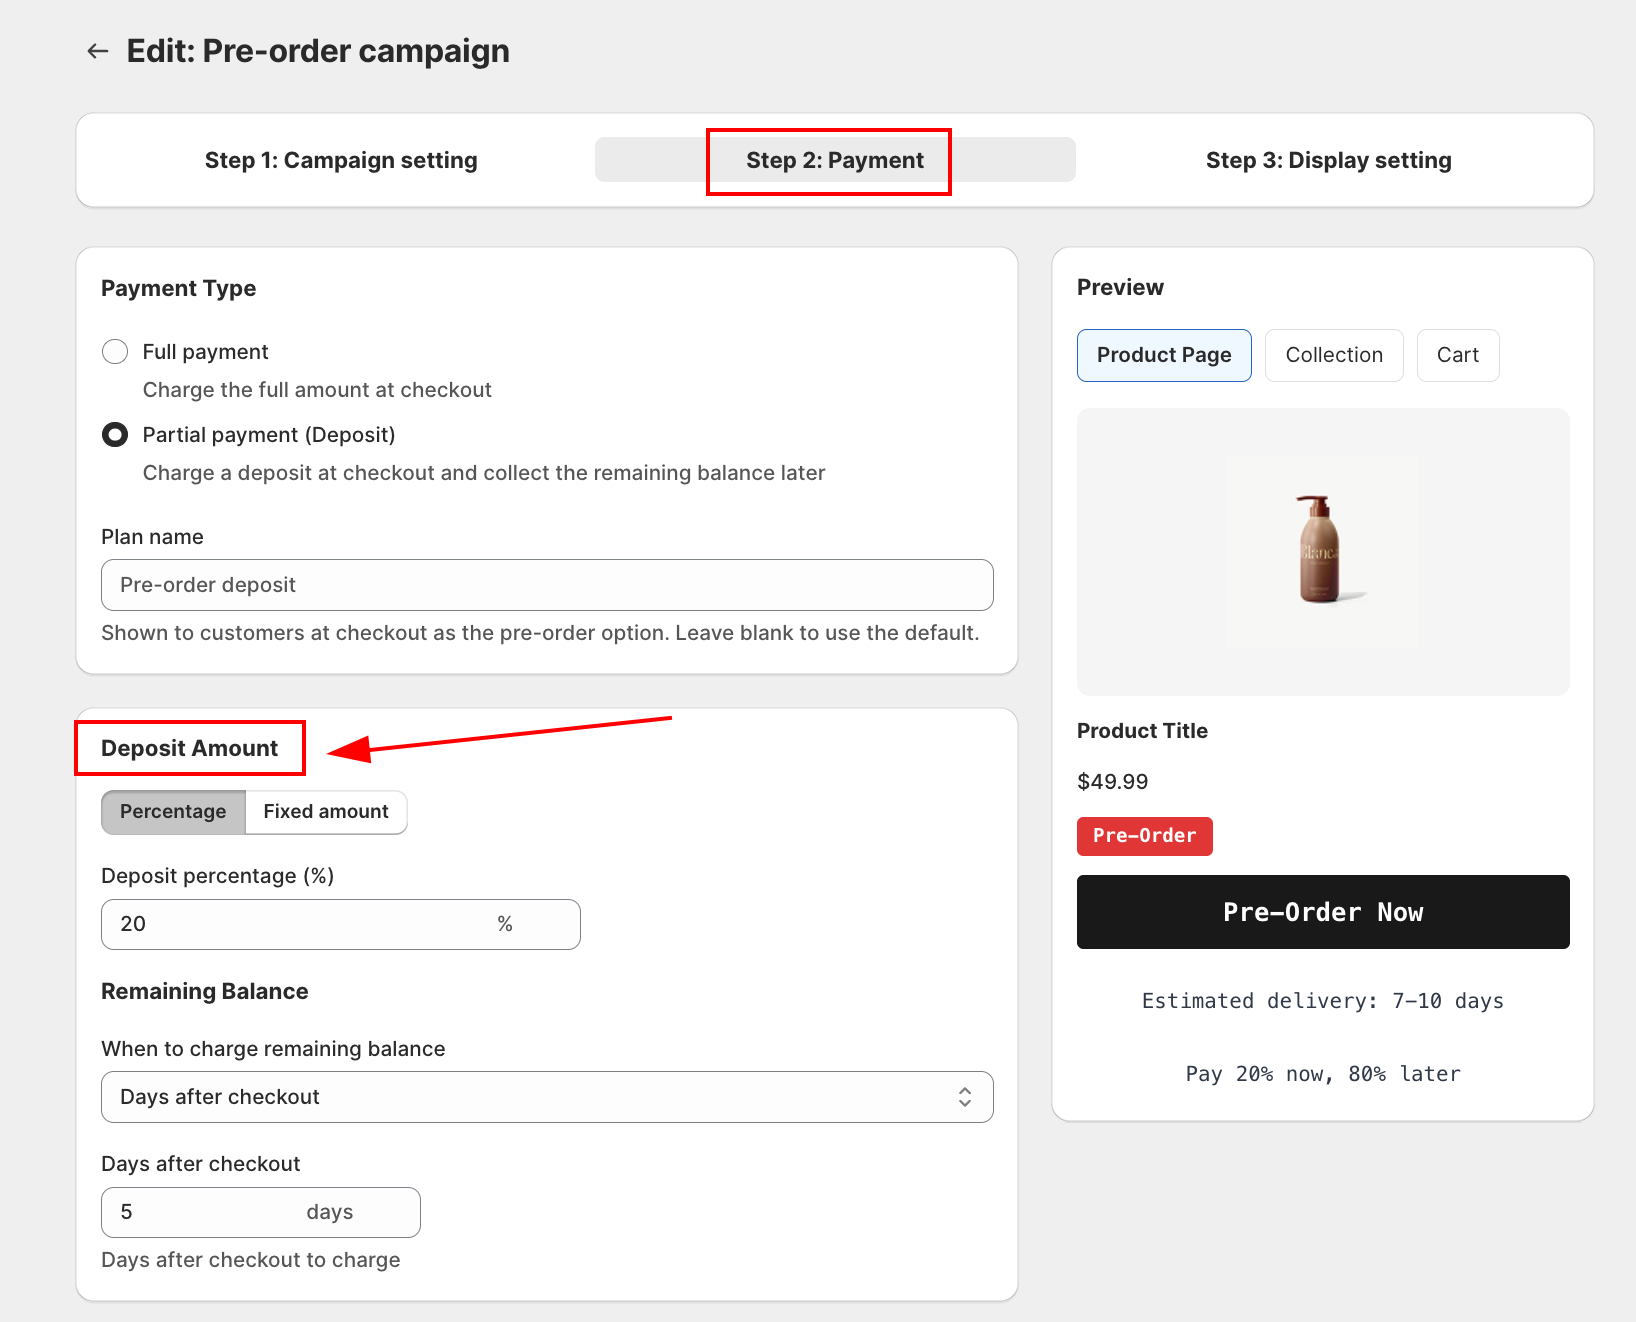
A single field appears below the toggle. Its label changes based on the deposit type:
- Deposit percentage (%): enter a value from 1 to 100 (e.g.
20means the customer pays 20% now). - Deposit amount (
<currency symbol>): enter a fixed amount in your store currency (e.g.25means $25 regardless of product price).
Tip: A 20-30% deposit is a common practice. It secures the customer's commitment while keeping the entry barrier low.
Set the remaining balance schedule (Partial payment only)
In the Remaining Balance section, choose When to charge remaining balance:
- On a specific date
- A Charge date picker appears; the remaining balance is charged automatically on that date.
- Past dates are disabled.
- Days after checkout
- Enter the number of days after the order is placed (suffix shows "days").
- The remaining balance is charged automatically that many days later.
The preview panel updates to show the payment message (e.g. "Pay 20% now, 80% later") when partial payment is configured.
Choose inventory deduction
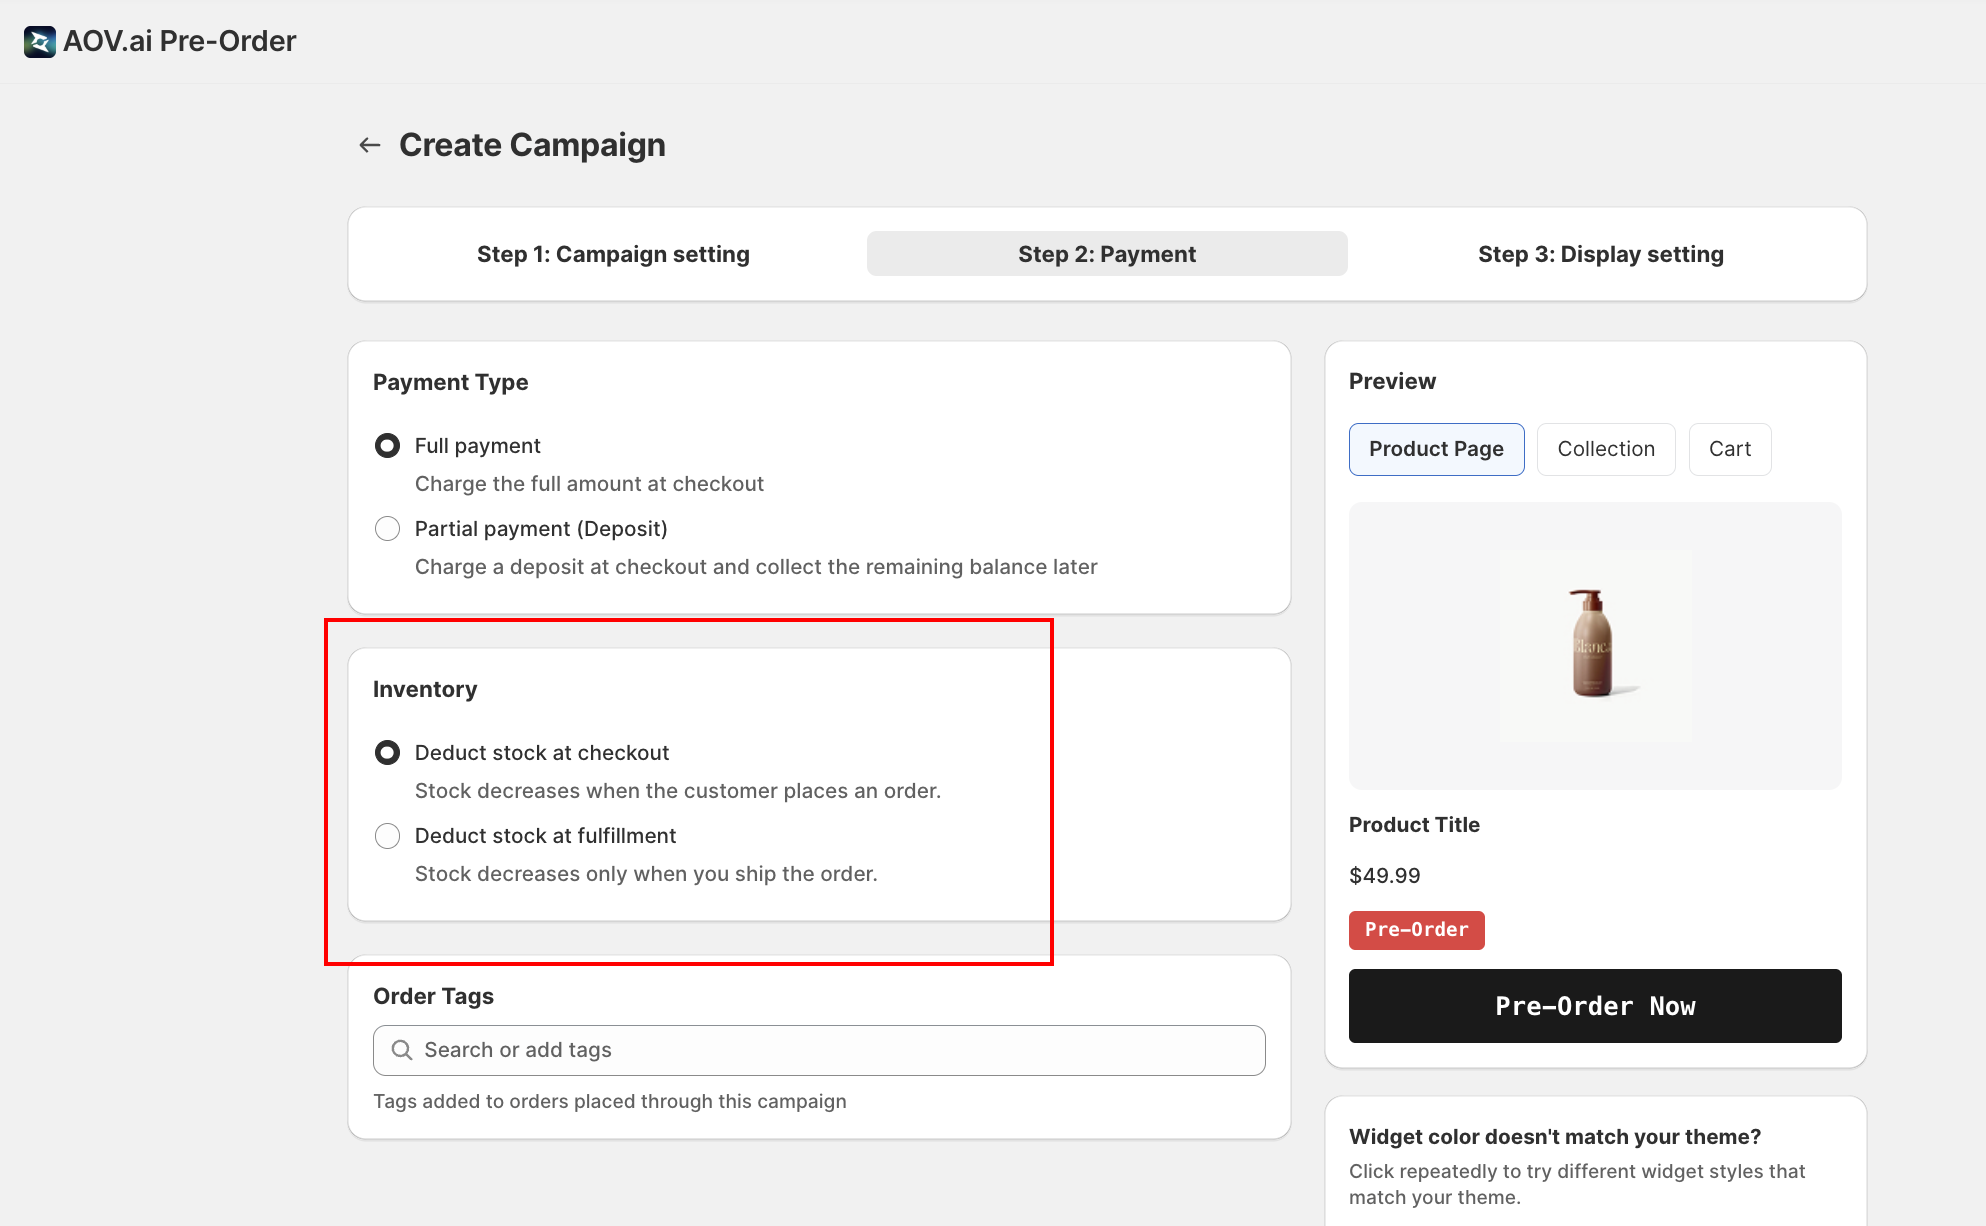
The Inventory card controls when stock is decremented for pre-orders:
- Deduct stock at checkout (default): stock decreases when the customer places the order.
- Deduct stock at fulfillment: stock decreases only when you ship the order.
- Useful if your "inventory on hand" reflects available-to-ship rather than reserved units.
Add order tags (optional)
In the Order Tags card, type a tag name into the Search or add tags field. A "Add "your-tag"" row appears in the dropdown; click it (or press Enter) to add the tag.
- Added tags appear as small chips below the field. Click the × on a chip to remove it.
- Example tags:
pre-order,summer-2026,deposit-paid - Tags are automatically attached to every Shopify order placed through this campaign.
Tip: Use tags to filter and manage pre-orders in Shopify Admin. For example, create a smart collection or order view filtered by the pre-order tag.
Choose fulfillment status
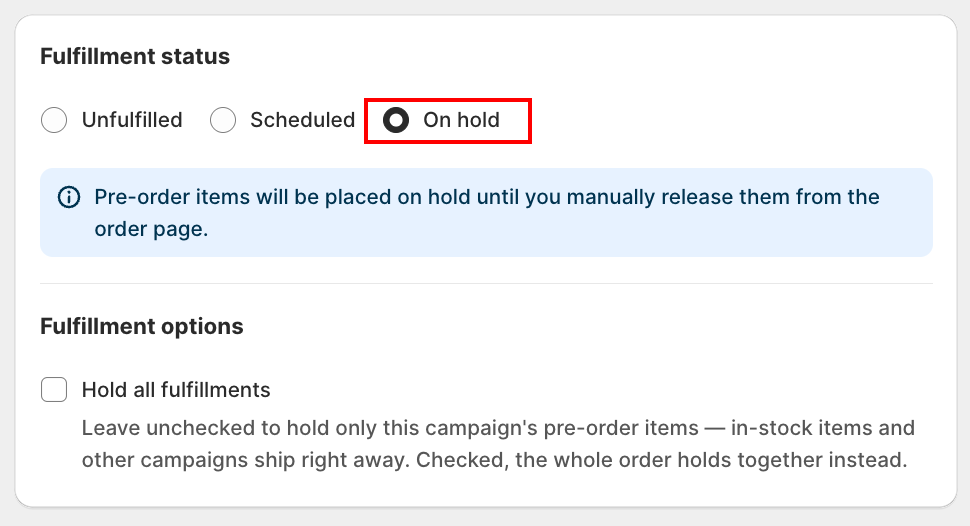
The Fulfillment status card sets how the app hands pre-order line items to Shopify's fulfillment queue the moment an order is placed. Pick the option that matches this campaign:
- Unfulfilled (default)
- Pre-order items are ready to fulfill right away, no release needed.
- Use this when you already have stock and are only taking orders early, for example to collect a deposit or build buzz ahead of a public launch.
- Scheduled
- Pre-order items stay on a temporary hold and switch to Unfulfilled automatically, on a date or after a number of days you set. No manual release needed.
- Use this when you know the exact restock or launch date.
- On hold
- Pre-order items stay on hold until you release them manually from the order in Shopify Admin.
- Use this when you don't yet know when stock will arrive. This was the app's only behavior before this setting existed.
The info banner above the radio buttons changes to describe the status you've selected:
- Unfulfilled: "Orders will appear in your fulfillment queue as Unfulfilled, making them immediately available for fulfillment."
- Scheduled: "Orders will stay in Scheduled status and move to Unfulfilled based on your selection below."
- On hold: "Pre-order items will be placed on hold until you manually release them from the order page."
Set the auto-release schedule (Scheduled only)
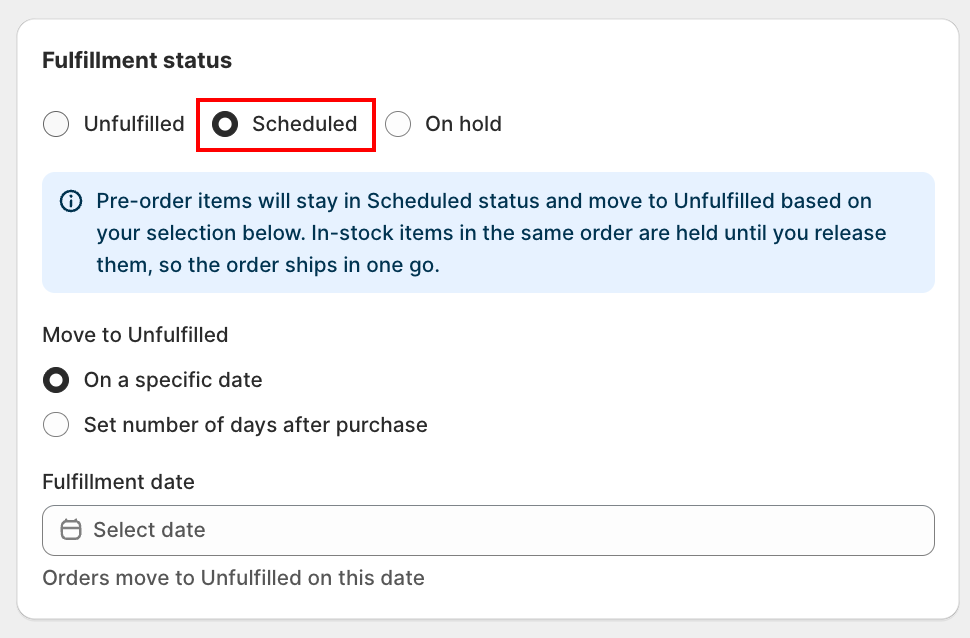
Selecting Scheduled reveals a Move to Unfulfilled section with two ways to set the release timing:
- On a specific date (default)
- Pick a Fulfillment date. Every order placed under this campaign switches from Scheduled to Unfulfilled on that exact date, no matter when each order was placed.
- Past dates can't be selected.
- Set number of days after purchase
- Enter a whole number in Days after purchase (minimum 1). Each order gets its own release date: its purchase date plus that many days.
- Example: with 7 days, an order placed October 1 becomes Unfulfilled on October 8.
Choosing Scheduled also hides the Fulfillment options section described next. There's no split-or-hold choice to make, since pre-order items are never combined into a hold with in-stock items under this status.
Choose fulfillment options (Unfulfilled and On hold only)
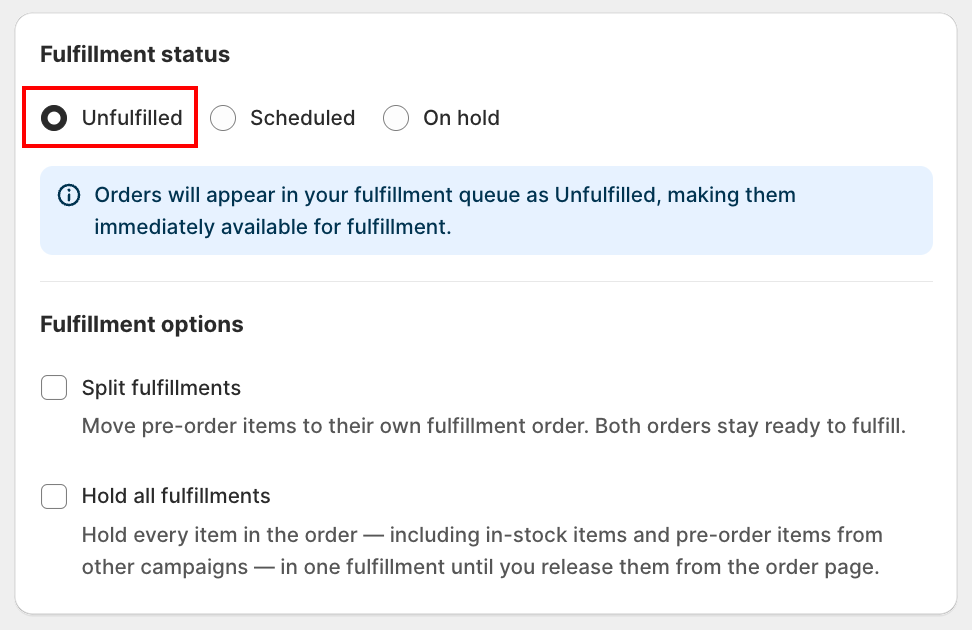
When fulfillment status is Unfulfilled or On hold, a Fulfillment options section appears below it. This is where the app's original split/hold setting now lives.
It controls what happens when an order mixes a pre-order item with a regular in-stock item. The same two choices are relabeled depending on which status you picked, since the outcome is different in each case:
Under Unfulfilled:
- Don't hold any items (default)
- Nothing is held.
- Both the in-stock and pre-order items are ready to fulfill right away.
- Hold all items
- Both the in-stock and pre-order items are held together until you manually release them.
- Useful when you'd rather ship the whole order in one shipment.
Under On hold:
- Hold pre-order items only (default)
- The in-stock item ships right away.
- Only the pre-order item is held.
- Hold all items
- Both items are held, as separate fulfillment orders you can release independently, or together once everything is ready to ship as one shipment.
Example: a customer orders one in-stock shirt and one pre-order shirt in the same order.
- Unfulfilled + Don't hold any items: both shirts ship the same day.
- Unfulfilled + Hold all items: both shirts wait until you release the order.
- On hold + Hold pre-order items only: the in-stock shirt ships right away, the pre-order shirt waits for you to release it.
- On hold + Hold all items: both shirts wait, as separate fulfillment orders you can release on your own schedule.
Campaigns created before this setting existed keep working exactly as before, no order already placed is affected. They default to Unfulfilled + Don't hold any items the next time you open and save the campaign.
When an order spans more than one campaign
If a single order contains products from two campaigns with different fulfillment settings, the app applies whichever setting is safest:
- Fulfillment status priority: On hold > Scheduled > Unfulfilled.
- Fulfillment options priority: Hold all items > Don't hold any items / Hold pre-order items only.
For example, if product A belongs to a campaign set to Unfulfilled and product B (in the same order) belongs to a campaign set to On hold, the whole order is held On hold.
Click Continue to proceed to Step 3: Display Settings (opens in a new tab), or click Back to return to Step 1: Campaign Settings (opens in a new tab).