Payment Settings
Step 2 of the campaign wizard: configure payment type, deposit amount, inventory deduction, and order tags.
How to set up
From the campaign wizard, navigate to Step 2: Payment. Choose how customers pay for their pre-order.
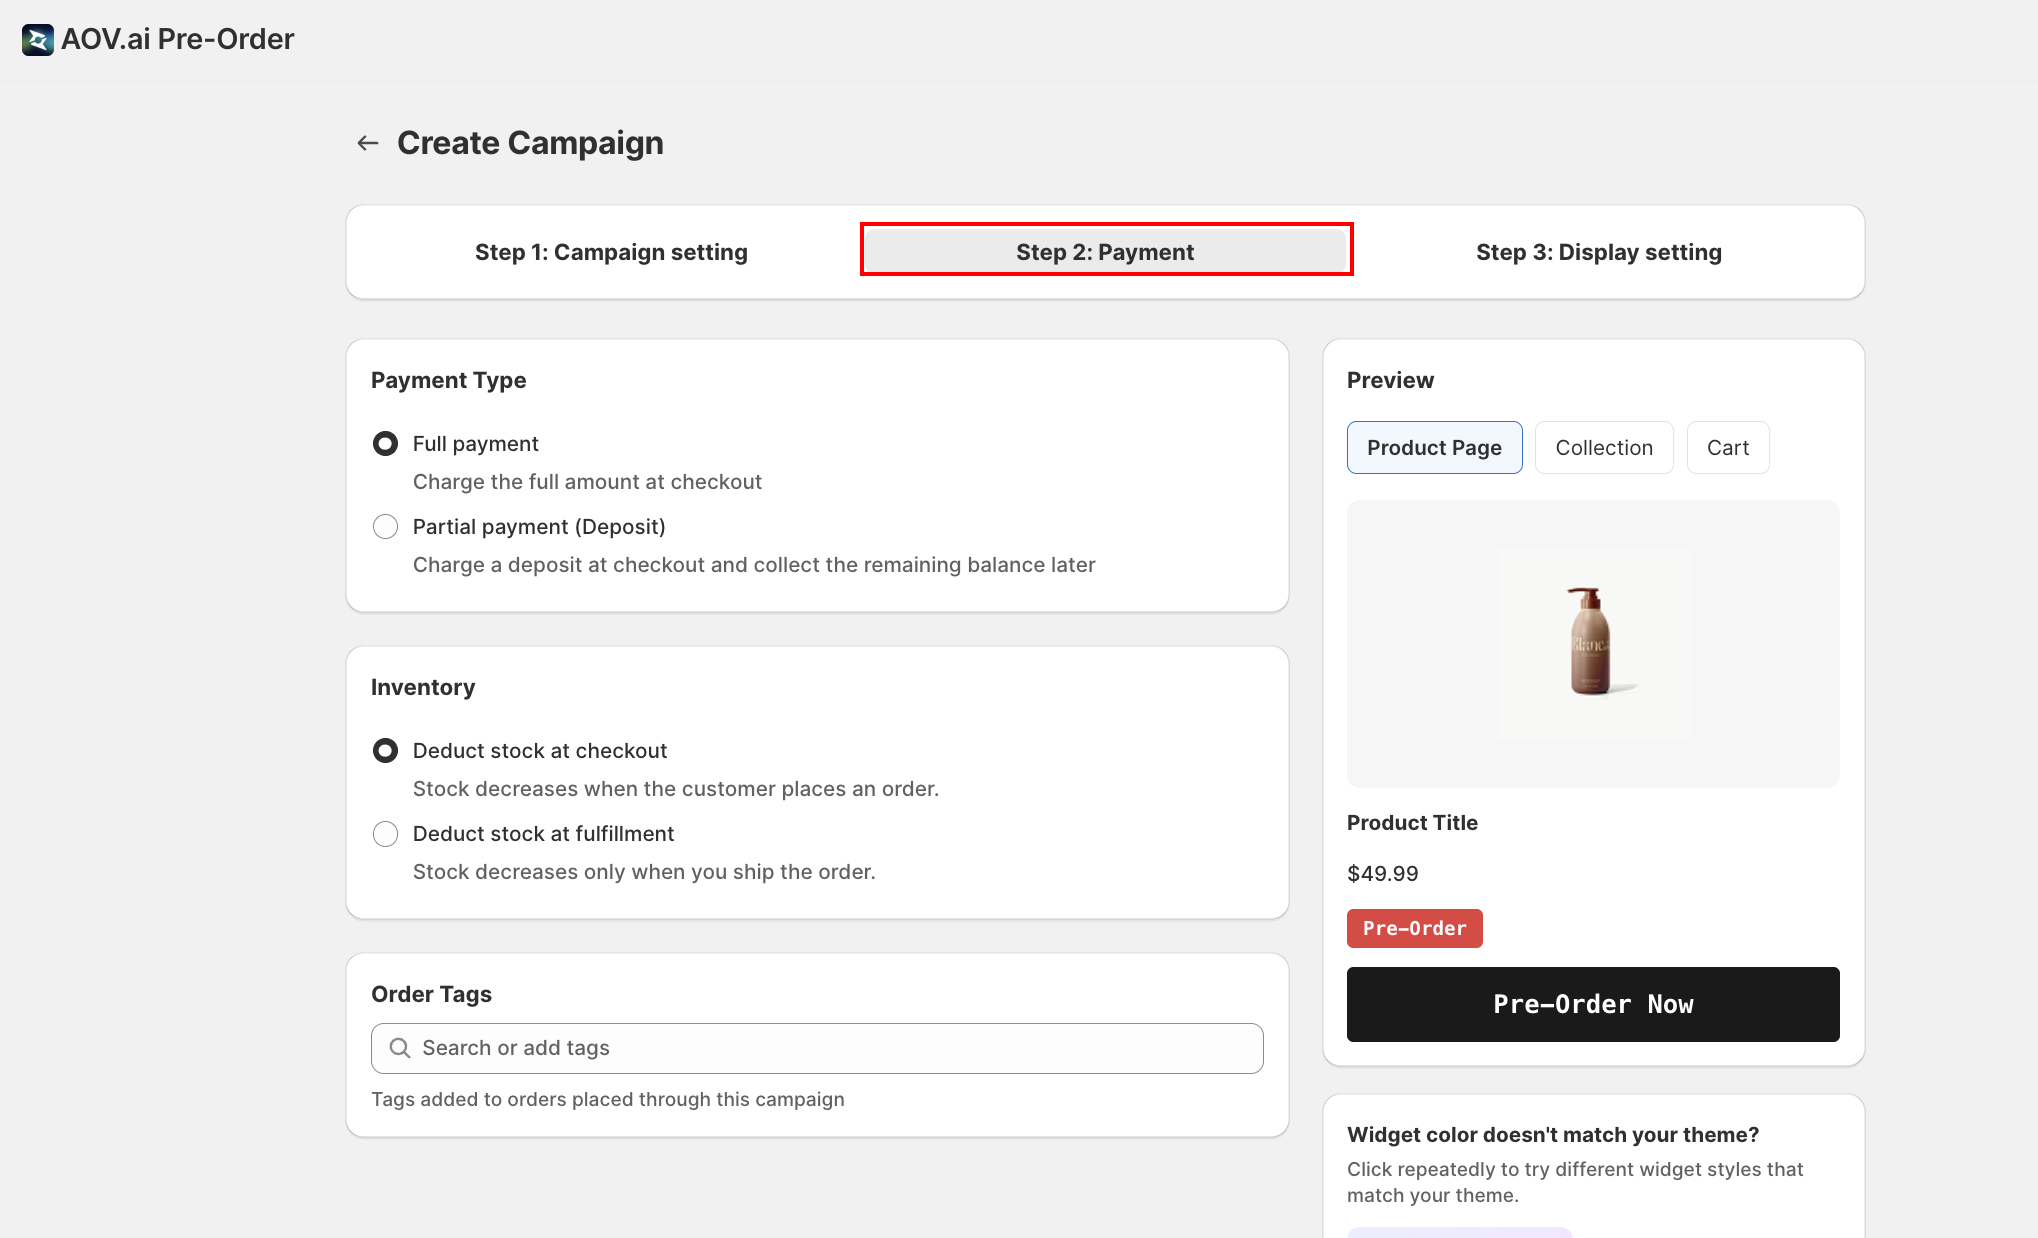
Choose payment type
In the Payment Type card, select one option:
- Full payment: charge the full amount at checkout. This is the simplest option, no additional configuration needed.
- Partial payment (Deposit): charge a deposit at checkout and collect the remaining balance later. When selected, the Deposit Amount and Remaining Balance sections appear (see next steps).
Choose deposit type (Partial payment only)
When Partial payment is selected, the Deposit Amount card appears with a segmented button group:
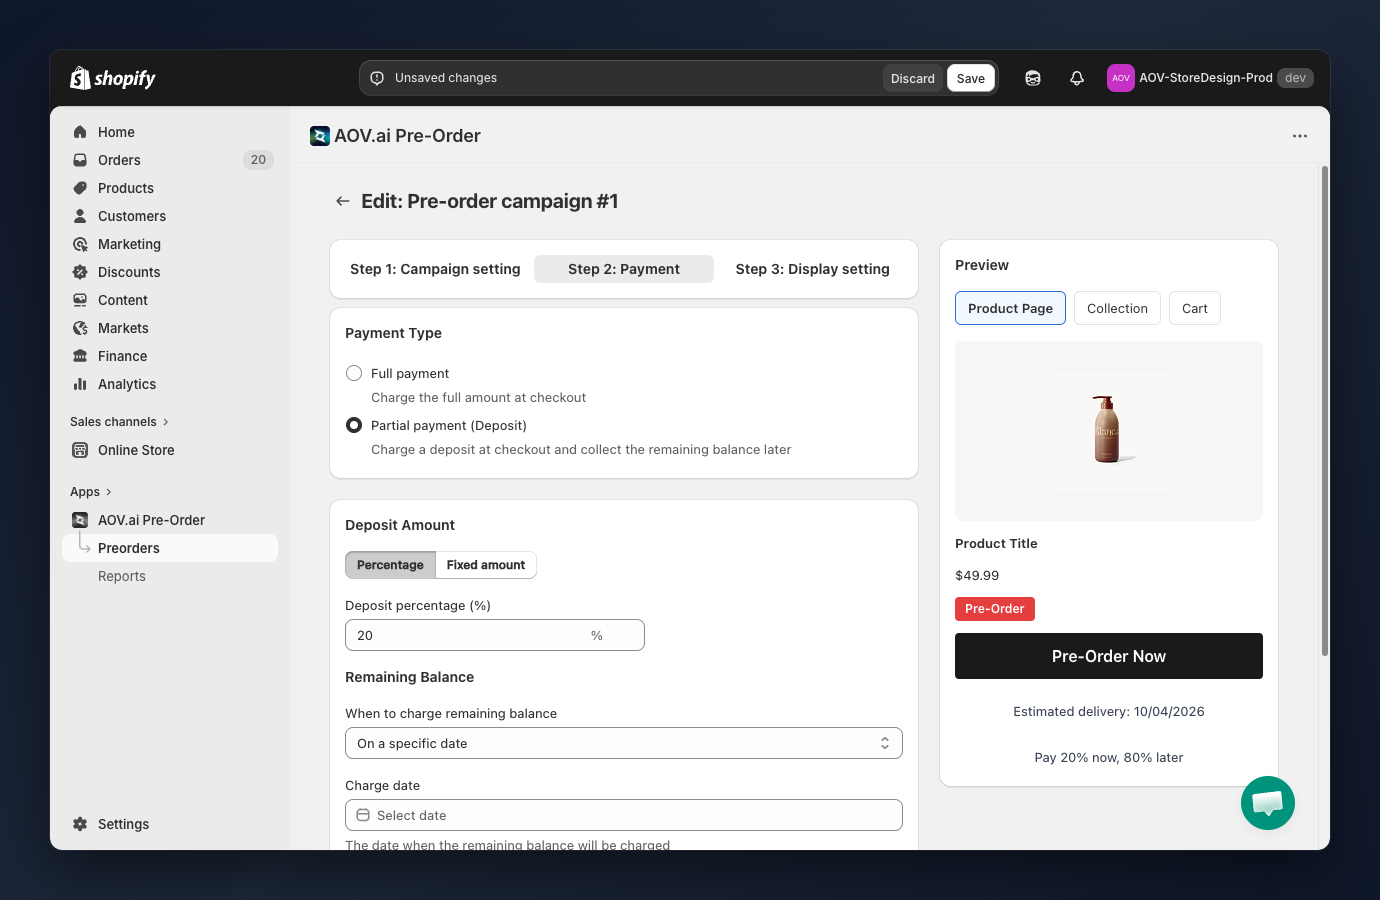
- Percentage (default): charge a percent of the product price as the deposit.
- Fixed amount: charge a flat amount as the deposit.
Set deposit value (Partial payment only)
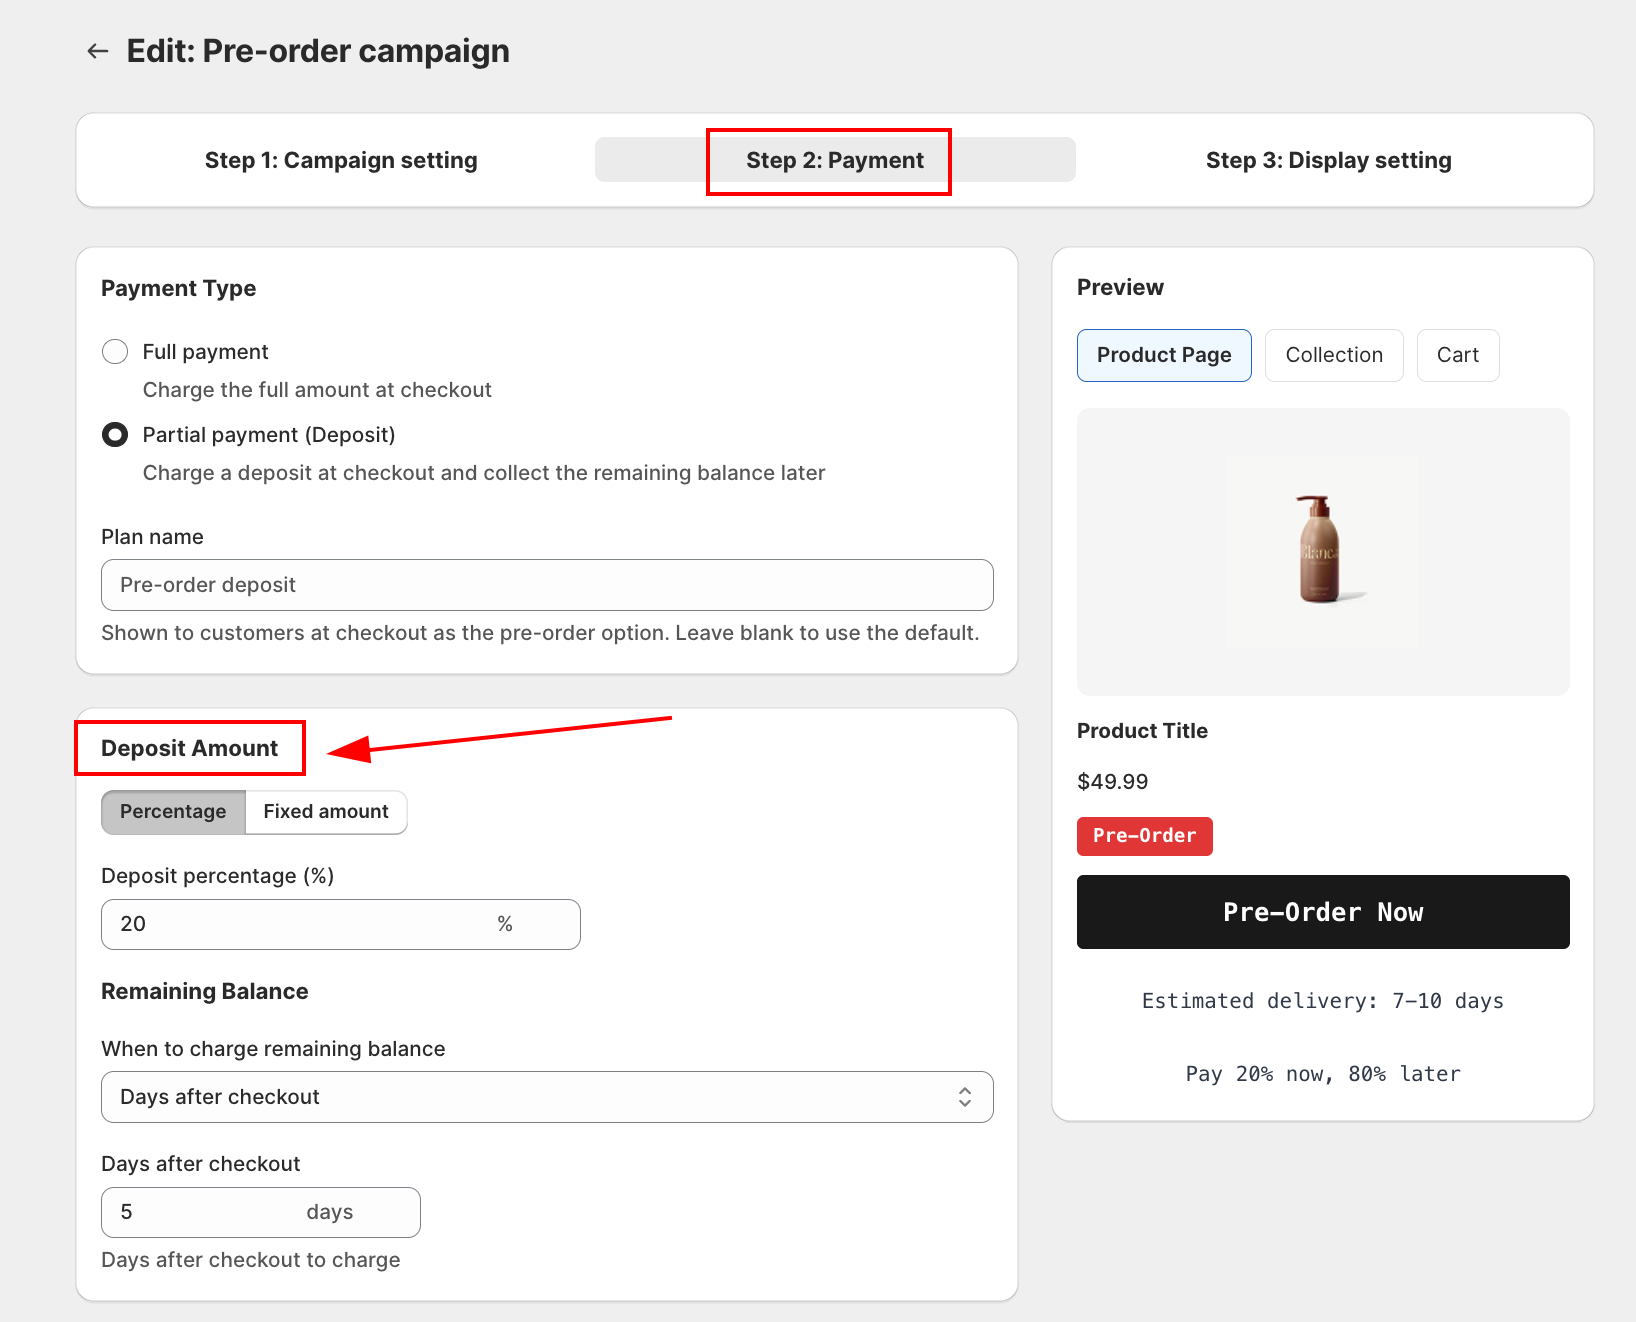
A single field appears below the toggle. Its label changes based on the deposit type:
- Deposit percentage (%): enter a value from 1 to 100 (e.g.
20means the customer pays 20% now). - Deposit amount (
<currency symbol>): enter a fixed amount in your store currency (e.g.25means $25 regardless of product price).
Tip: A 20-30% deposit is a common practice. It secures the customer's commitment while keeping the entry barrier low.
Set the remaining balance schedule (Partial payment only)
In the Remaining Balance section, choose When to charge remaining balance:
- On a specific date: a Charge date picker appears. The remaining balance is charged automatically on that date. Past dates are disabled.
- Days after checkout: enter the number of days after the order is placed (suffix shows "days"). The remaining balance is charged automatically that many days later.
The preview panel updates to show the payment message (e.g. "Pay 20% now, 80% later") when partial payment is configured.
Choose inventory deduction
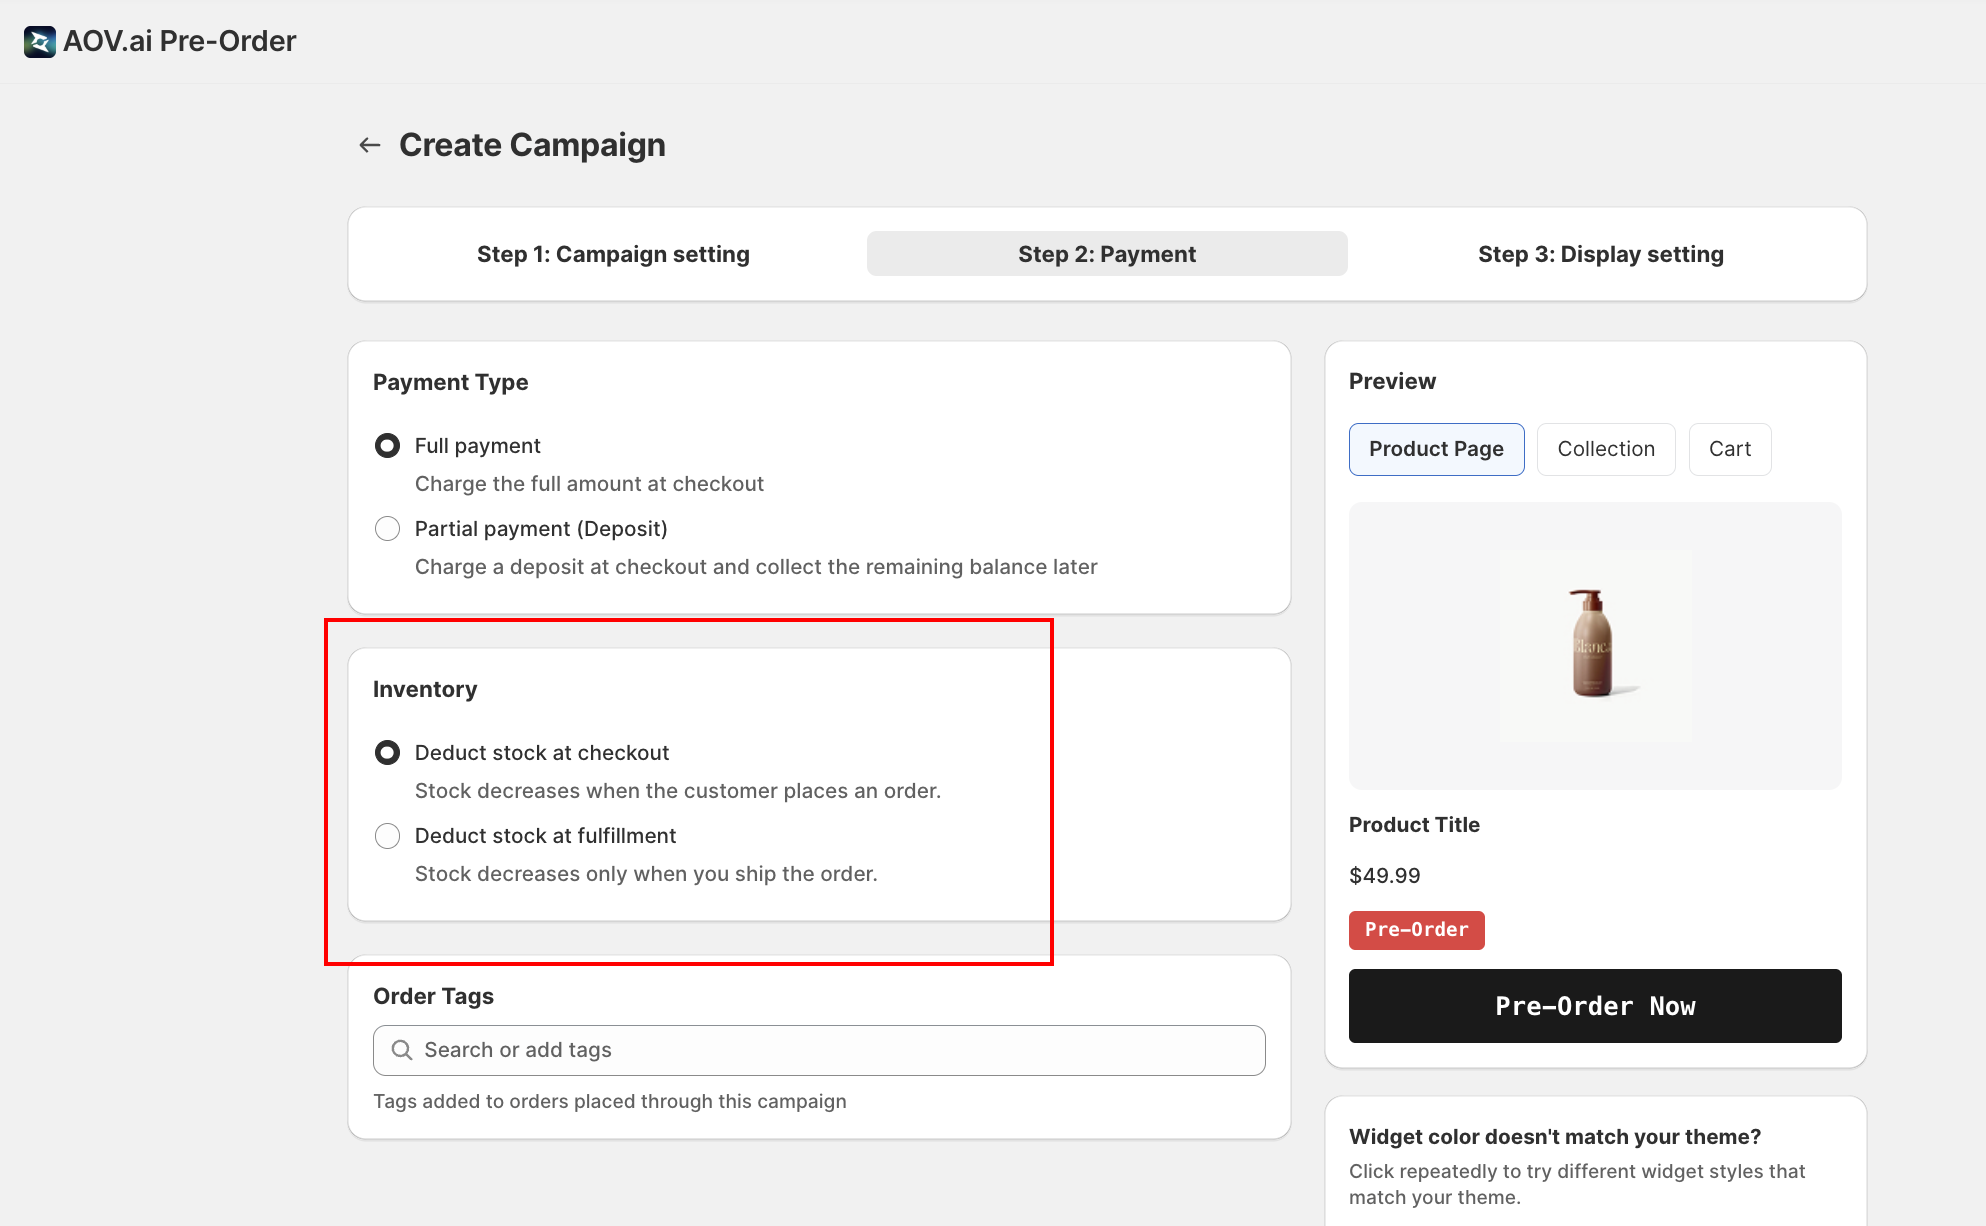
The Inventory card controls when stock is decremented for pre-orders:
- Deduct stock at checkout (default): stock decreases when the customer places the order.
- Deduct stock at fulfillment: stock decreases only when you ship the order. Useful if your "inventory on hand" reflects available-to-ship rather than reserved units.
Add order tags (optional)
In the Order Tags card, type a tag name into the Search or add tags field. A "Add "your-tag"" row appears in the dropdown; click it (or press Enter) to add the tag.
- Added tags appear as small chips below the field. Click the × on a chip to remove it.
- Example tags:
pre-order,summer-2026,deposit-paid - Tags are automatically attached to every Shopify order placed through this campaign.
Tip: Use tags to filter and manage pre-orders in Shopify Admin. For example, create a smart collection or order view filtered by the pre-order tag.
Choose fulfillment options
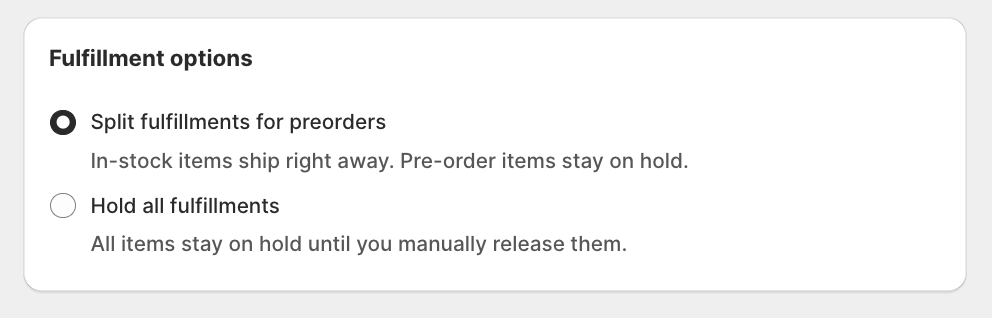
In the Fulfillment options card, select how the app handles orders that contain a mix of pre-order and in-stock items.
| Option | Behavior |
|---|---|
| Split fulfillments (default) | In-stock items are fulfilled and shipped immediately. The pre-order item is placed On hold until stock arrives. |
| Hold all fulfillments | The entire order is held On hold until you manually release it — useful when you want to pack and ship everything together in one shipment. |
Example: a customer orders one in-stock shirt and one pre-order shirt.
- With Split fulfillments: the in-stock shirt ships the same day. The pre-order shirt stays On hold and ships when stock is available.
- With Hold all fulfillments: both shirts wait until you release the order manually.
Split fulfillments is the recommended default for most stores. It ships in-stock items immediately and reduces the chance of customers cancelling while waiting for a pre-order item.
Click Continue to proceed to Step 3: Display Settings (opens in a new tab), or click Back to return to Step 1: Campaign Settings (opens in a new tab).