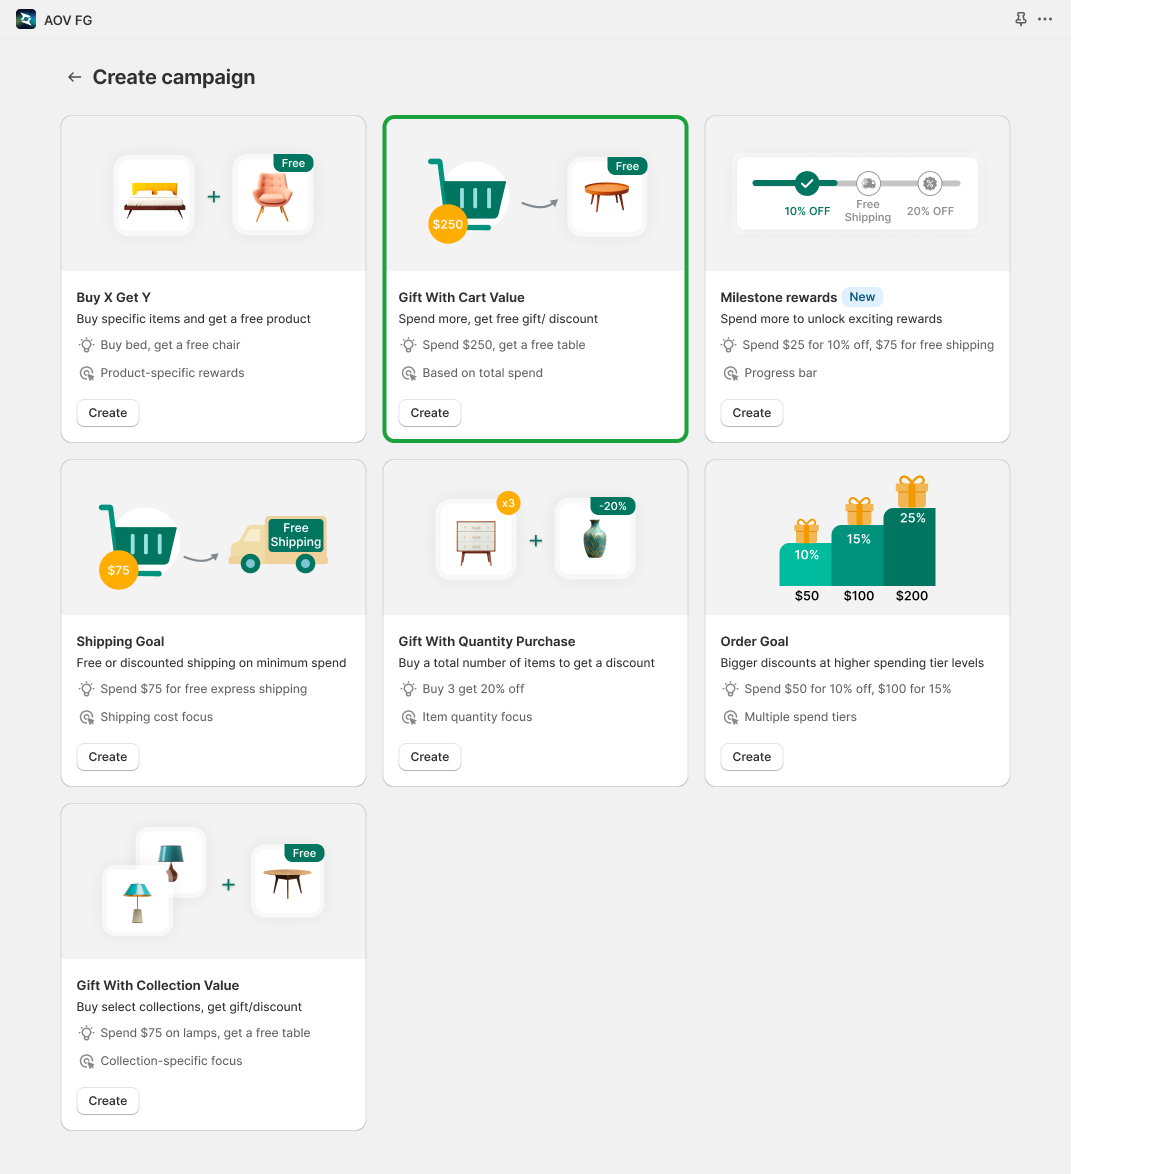
# Gift with Cart Value
Gift with Cart Value campaign is designed to encourage customers to spend more by offering them a free gift once their cart reaches a specific value. This strategy helps increase the store’s average order value while also motivating upselling and improving conversion rates. Additionally, by rewarding customers with free gifts, it enhances their shopping experience and builds stronger customer satisfaction and loyalty.
## **How to set up Gift with Cart Value campaign?**
### **Step 1: Access gift with cart value**
From your app, go to **Campaigns > Gift with Cart Value** to access the campaign, in which you will find a default Campaign name that we created. You are able to change the name to your liking, it is used for you to identify this campaign with others.
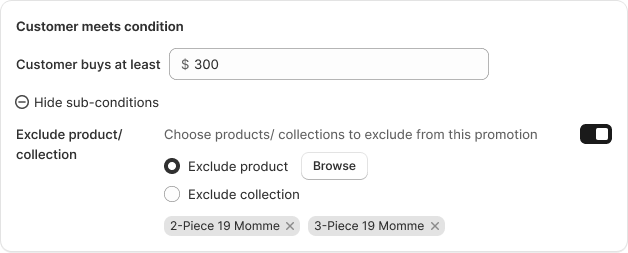
### **Step 2: Set up campaign conditions**
#### **General Setting**
* **Minimum Cart Value:** Choose the amount of money your customers need to spend to unlock the offer.
* **Exclude products/collections**: You can also choose to exclude specific product(s) or collections from this promotion by clicking **Browse** and choosing the expected product(s). In short, customers won’t receive the offer if they buy products from this section.
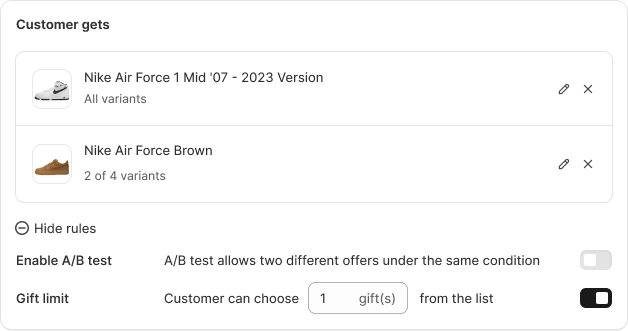
### **Step 4: Set up campaign gift**
#### General Settings
* Select the gift(s) you want to grant your customers. For instance, you might offer a complimentary gift like a microfibre cloth if customers buy a pair of glasses.
* You can change the quantity of the gift that customers will receive. Merchants utilize this feature to not only boost customers' spending, but also to clear out remaining old items.
* If the gift has multiple variants, you can choose which one you want to offer or leave the decision to customers.
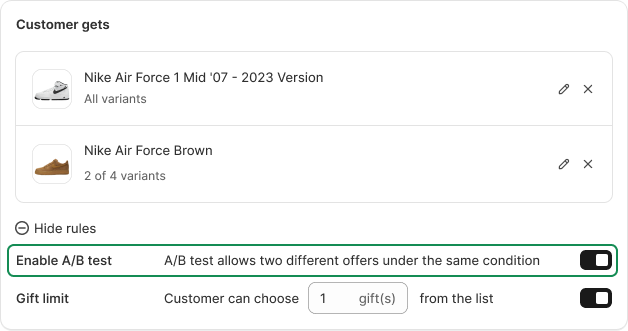
#### A/B Testing (optional)
Enable A/B Testing to randomly offer 2 types of gifts to customers. Doing so will help you understand what customers want and create the best offer to boost revenue.
### **Step 5: Configure discount**
**Discount type:** Decide on which type of discount you want to apply for the gift. There are three options that you can take into consideration: Free/ Percentage/ Fixed amount
The system auto-apply a discount code to your free gift. Therefore, you can edit this code as you like
{% hint style="info" %}
When the A/B test is enabled, you are able to set different discount types for each option.
{% endhint %}
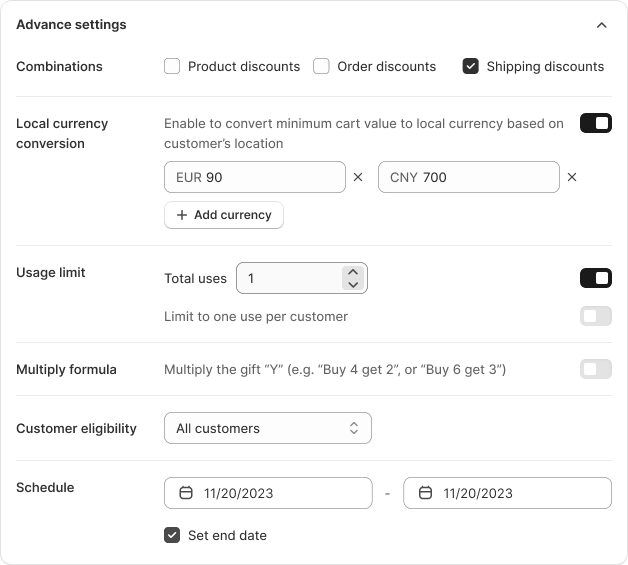
### **Step 6: Advanced settings**
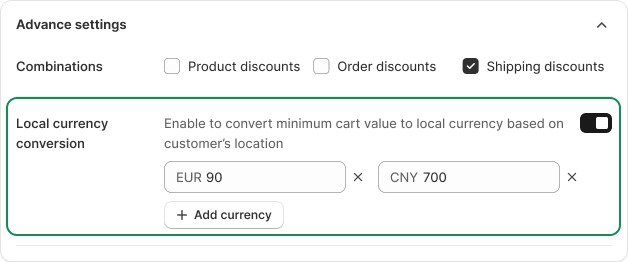
**5.1 Discount combination:** You can let your customers combine this discount with other different types (from Shopify or other Campaigns) to let them have the best deal based on their cart. Other discounts you can choose to combine are: Product discount, Order discount, Shipping discount
**5.2 Usage limit (optional)**
* Total uses
To create urgency and push customers to act, consider enabling a **“Total uses”** to limit how many times the gift is available overall.
* Limit to one use per customer:
To avoid customers receiving too many gifts from a single discount—which can lead to a poor shopping experience and unnecessary losses—you can enable **“Limit to one use per customer”.**
{% hint style="info" %}
Note: The app will detect and enforce the one-time use **per customer** if the customer is logged into their **member account**. If the customer checks out as a guest, this restriction may not apply.
{% endhint %}
**5.3 Multiplying formula (optional):** Enable this option to let customers multiply their gift reward based on how much they buy. \*\*
* For example: You create a campaign with 2 trigger products (X) and 1 gift product (Y), then you turn Multiplying Formula on, when customers purchase 4, 6, 8, or … trigger products (X), they will get 2, 3, 4, or … gift product (Y).
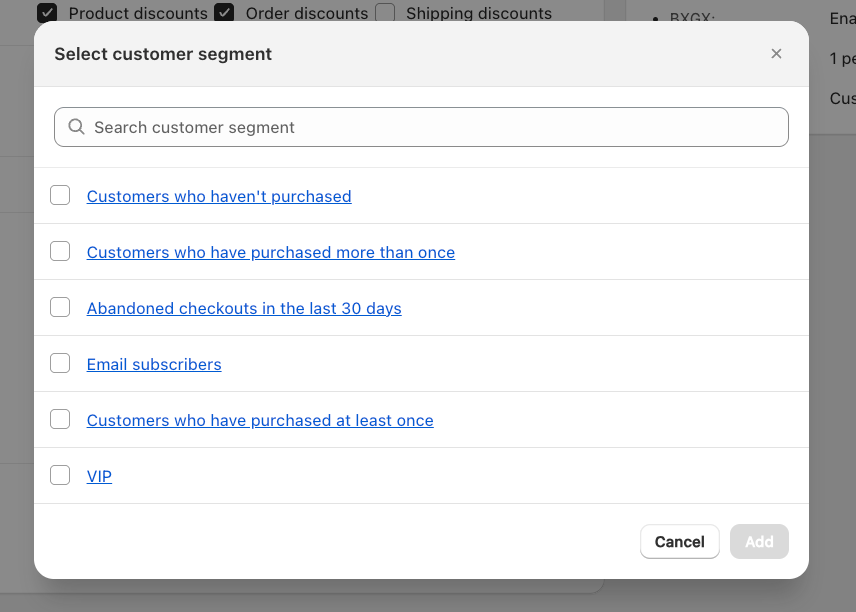
**5.4 Customer egilibility**
This section lets you control who can see and redeem your BXGY campaign. You can choose to make the promotion available to everyone or limit it to specific groups.
* **All customers:** The campaign will apply to **anyone** who meets the conditions—no restrictions.
* **Specific link:** Only customers who click on a **unique campaign link** will see or access the promotion.
* **Customer location:** Limit the campaign to customers from specific **countries or regions**.
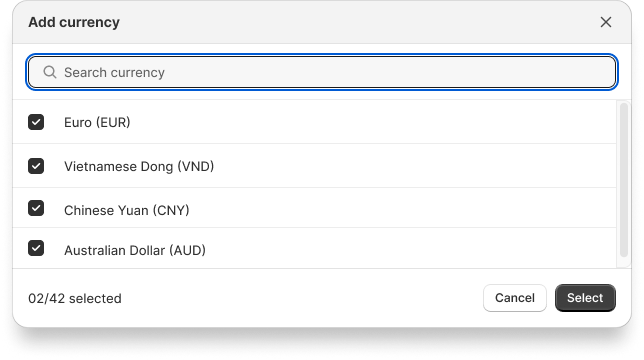
* **Specific customer segment:** Choose specific customer segments to exclude from this promotion. We offer 5 segment options as in this image:\\
Note: The app uses existing segments from your **Shopify admin.** If you need to filter a custom segment, please create one in **Customers > Segments** in your Shopify admin. You're welcome to share the conditions you’d like to filter by, and we’ll do our best to help you set it up in Shopify.
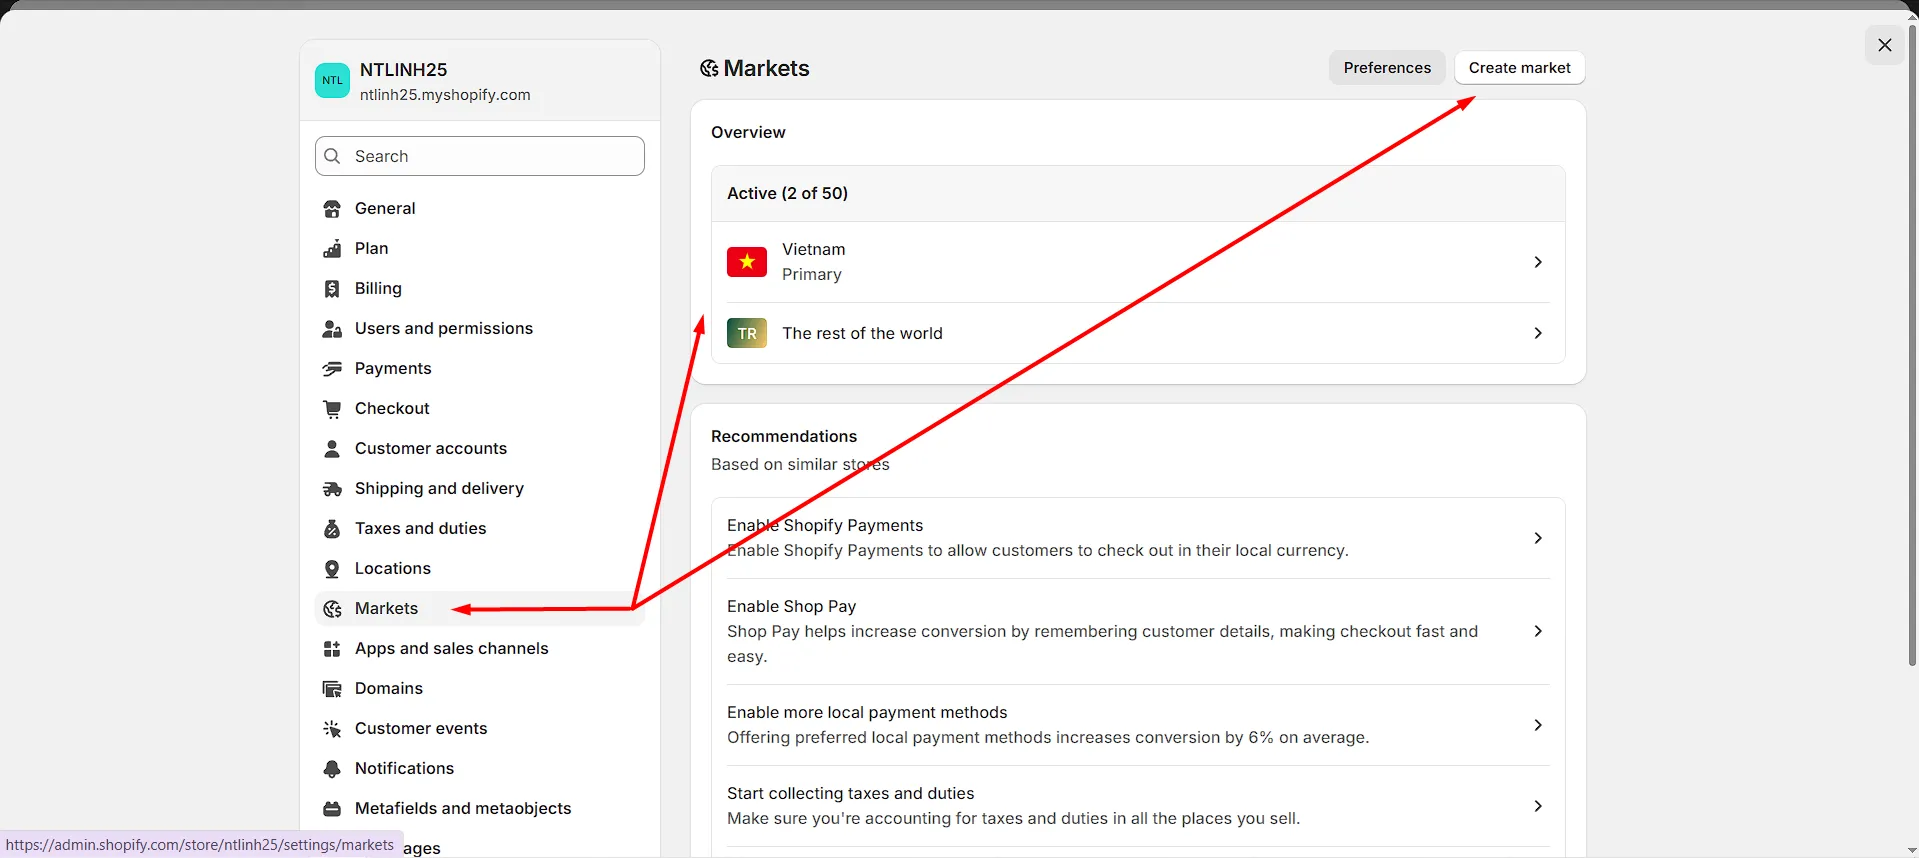
**5.5 Local currency conversion**
**Local Currency Conversion** automatically converts the prices on an online store into the customers’ local currency, based on their geographic location via IP address.
Before adding the currency you want to convert, you must first set up **markets** in your Shopify Admin settings. Please navigate to **Settings** > **Markets** > **Create market**/**change existing market**.
Shopify settings
After finishing the market's setup, you can continue choosing the currency you want to convert for the customers
### **Step 7: Set up appearance**
**Gift selection method :** Choose the gift selection method that your customers might experience. We offer 3 types of methods:
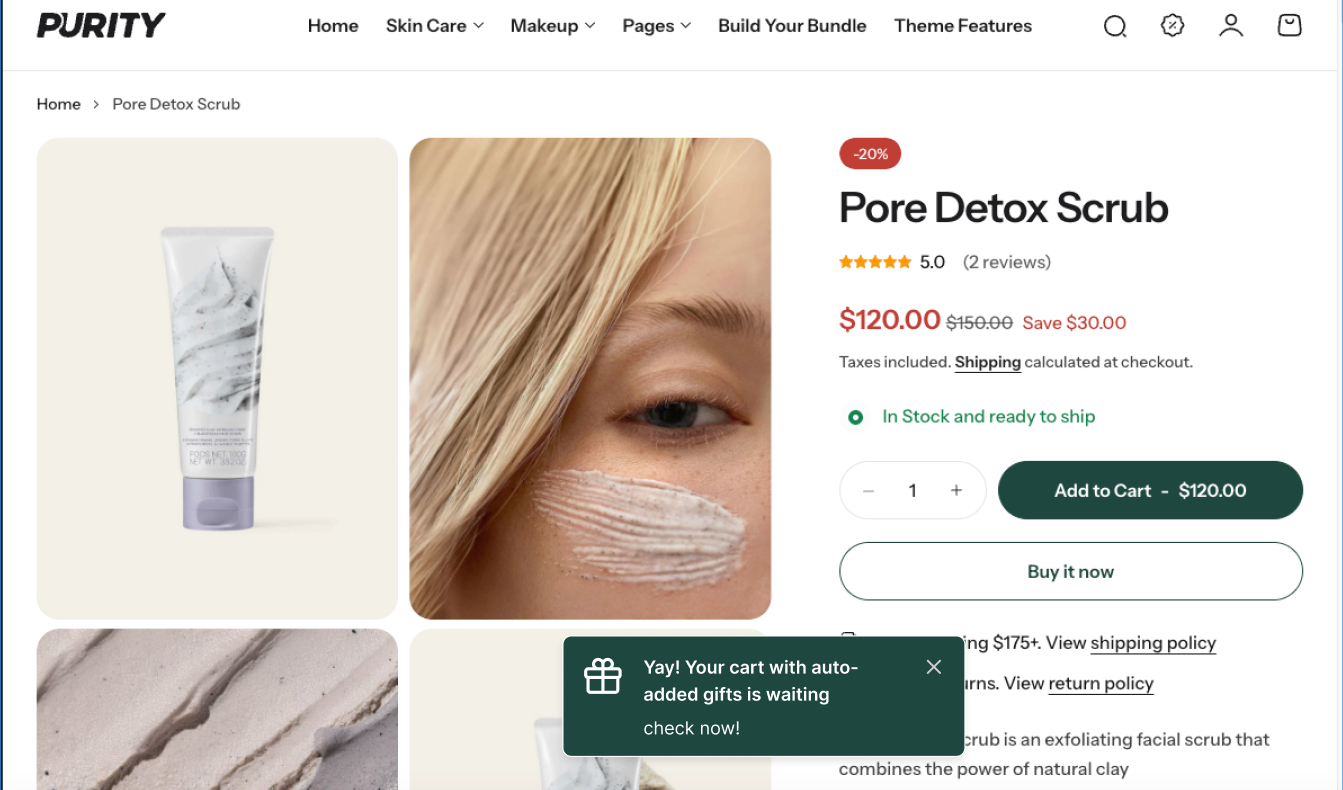
* **Announcement bar:** Automatically add products to the cart :
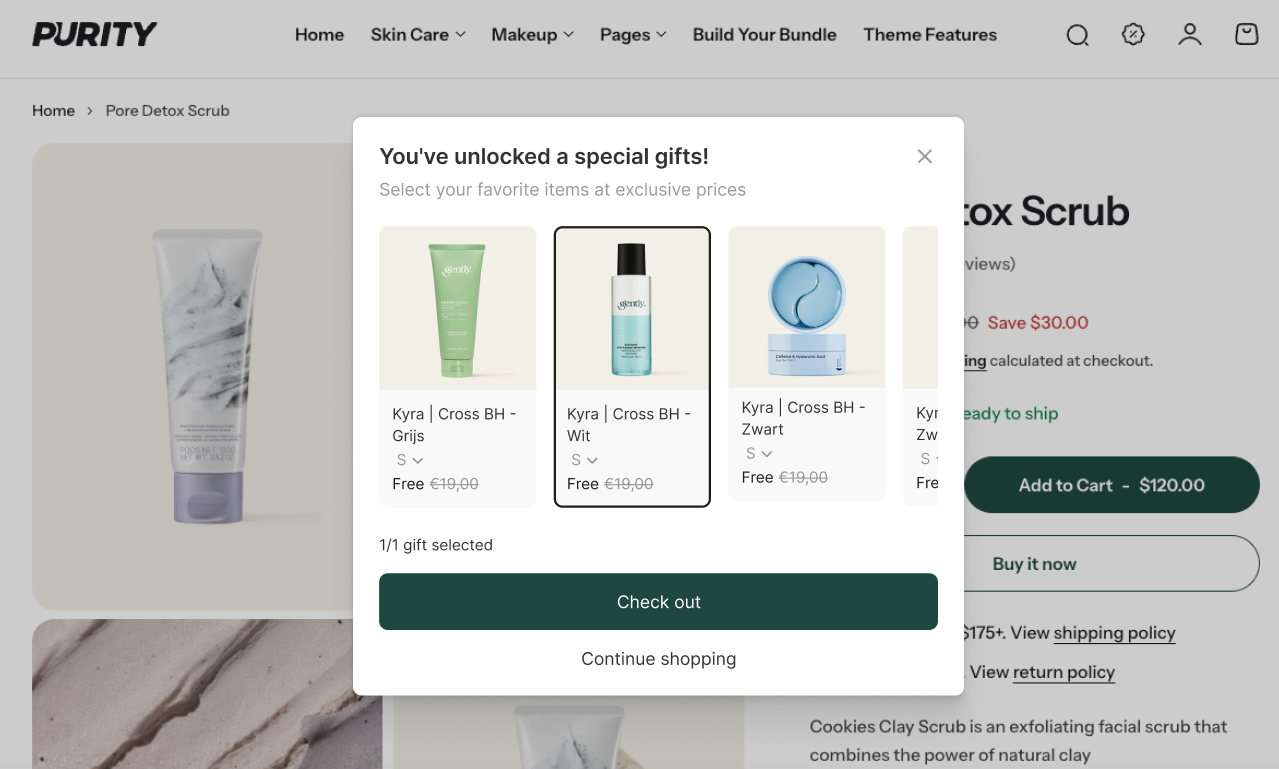
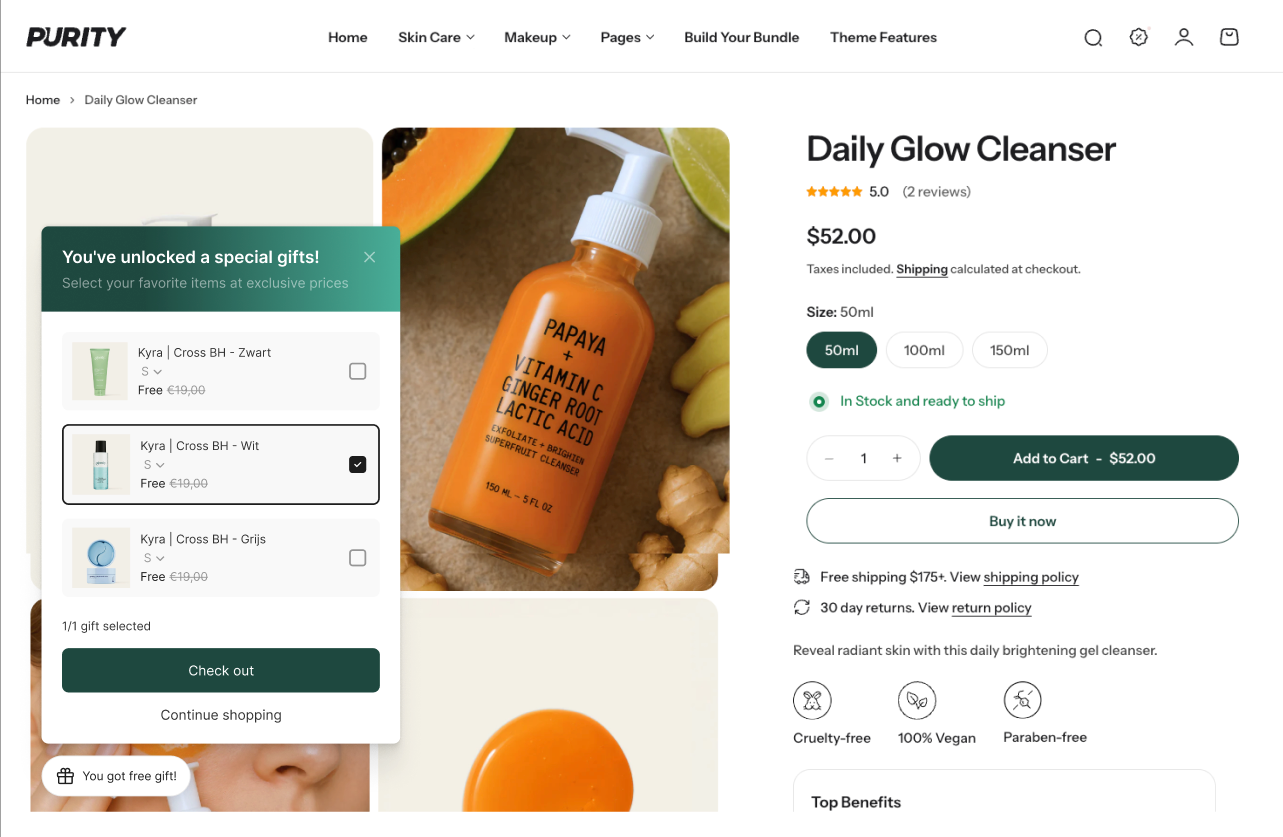
* **Foating button:** Customer choose from gift list
* **Pop-up:** Customer choose from gift list
*
**Final step**
Once you've completed all the setup steps, take a moment to review your campaign settings to make sure everything looks correct.
Then, click **Save** to finalize your campaign.
To make it visible on your storefront, go to **Online Store > Theme > Customize > App Embeds** and enable the **AOV Free Gifts** app.
{% embed url="" %}
### Need help!!
* **Live chat support:** Get real-time help directly inside the app. Click the chat icon in the bottom-right corner of your dashboard. Our support is on standby 24/7, feel free to reach out to us whenever you want.
Live chat support in app
* **Email us:** For in-depth questions or technical issues, email us at: Response time: within 24 hours on business days.
* **Watch the Setup Demo**: Prefer a walkthrough? Watch our step-by-step video here:
---
# Agent Instructions: Querying This Documentation
If you need additional information that is not directly available in this page, you can query the documentation dynamically by asking a question.
Perform an HTTP GET request on the current page URL with the `ask` query parameter:
```
GET https://help.aov.ai/promotion-campaign/gift-with-cart-value.md?ask=
```
The question should be specific, self-contained, and written in natural language.
The response will contain a direct answer to the question and relevant excerpts and sources from the documentation.
Use this mechanism when the answer is not explicitly present in the current page, you need clarification or additional context, or you want to retrieve related documentation sections.