# Deal of the Day
{% hint style="success" %}
This feature is available for all types of campaign.
{% endhint %}
### What is Deal of the Day?
Deal of the Day is a visually engaging pop-up widget enabling you to highlight exclusive daily deals. Customers can easily see what's available and claim enticing offers such as free gifts or discounts.
### Why to use Deal of the Day?
Drive more attention
This feature is designed to grab attention from customers, as it is placed in an easy to see area(s), making purchases more effective and time-saving.
Enhance customer engagement
With an attractive and interactive display, customers are more likely to explore the deals. As it showcases multiple deals in a single, easy-to-access widget, it can reduce confusion and improve customer experience,
Streamline targeted promotions
This feature allows you to manually choose campaigns appearing on the widget or set the pre-defined rules to match your store's strategies.
### How to set up Deal of the Day?
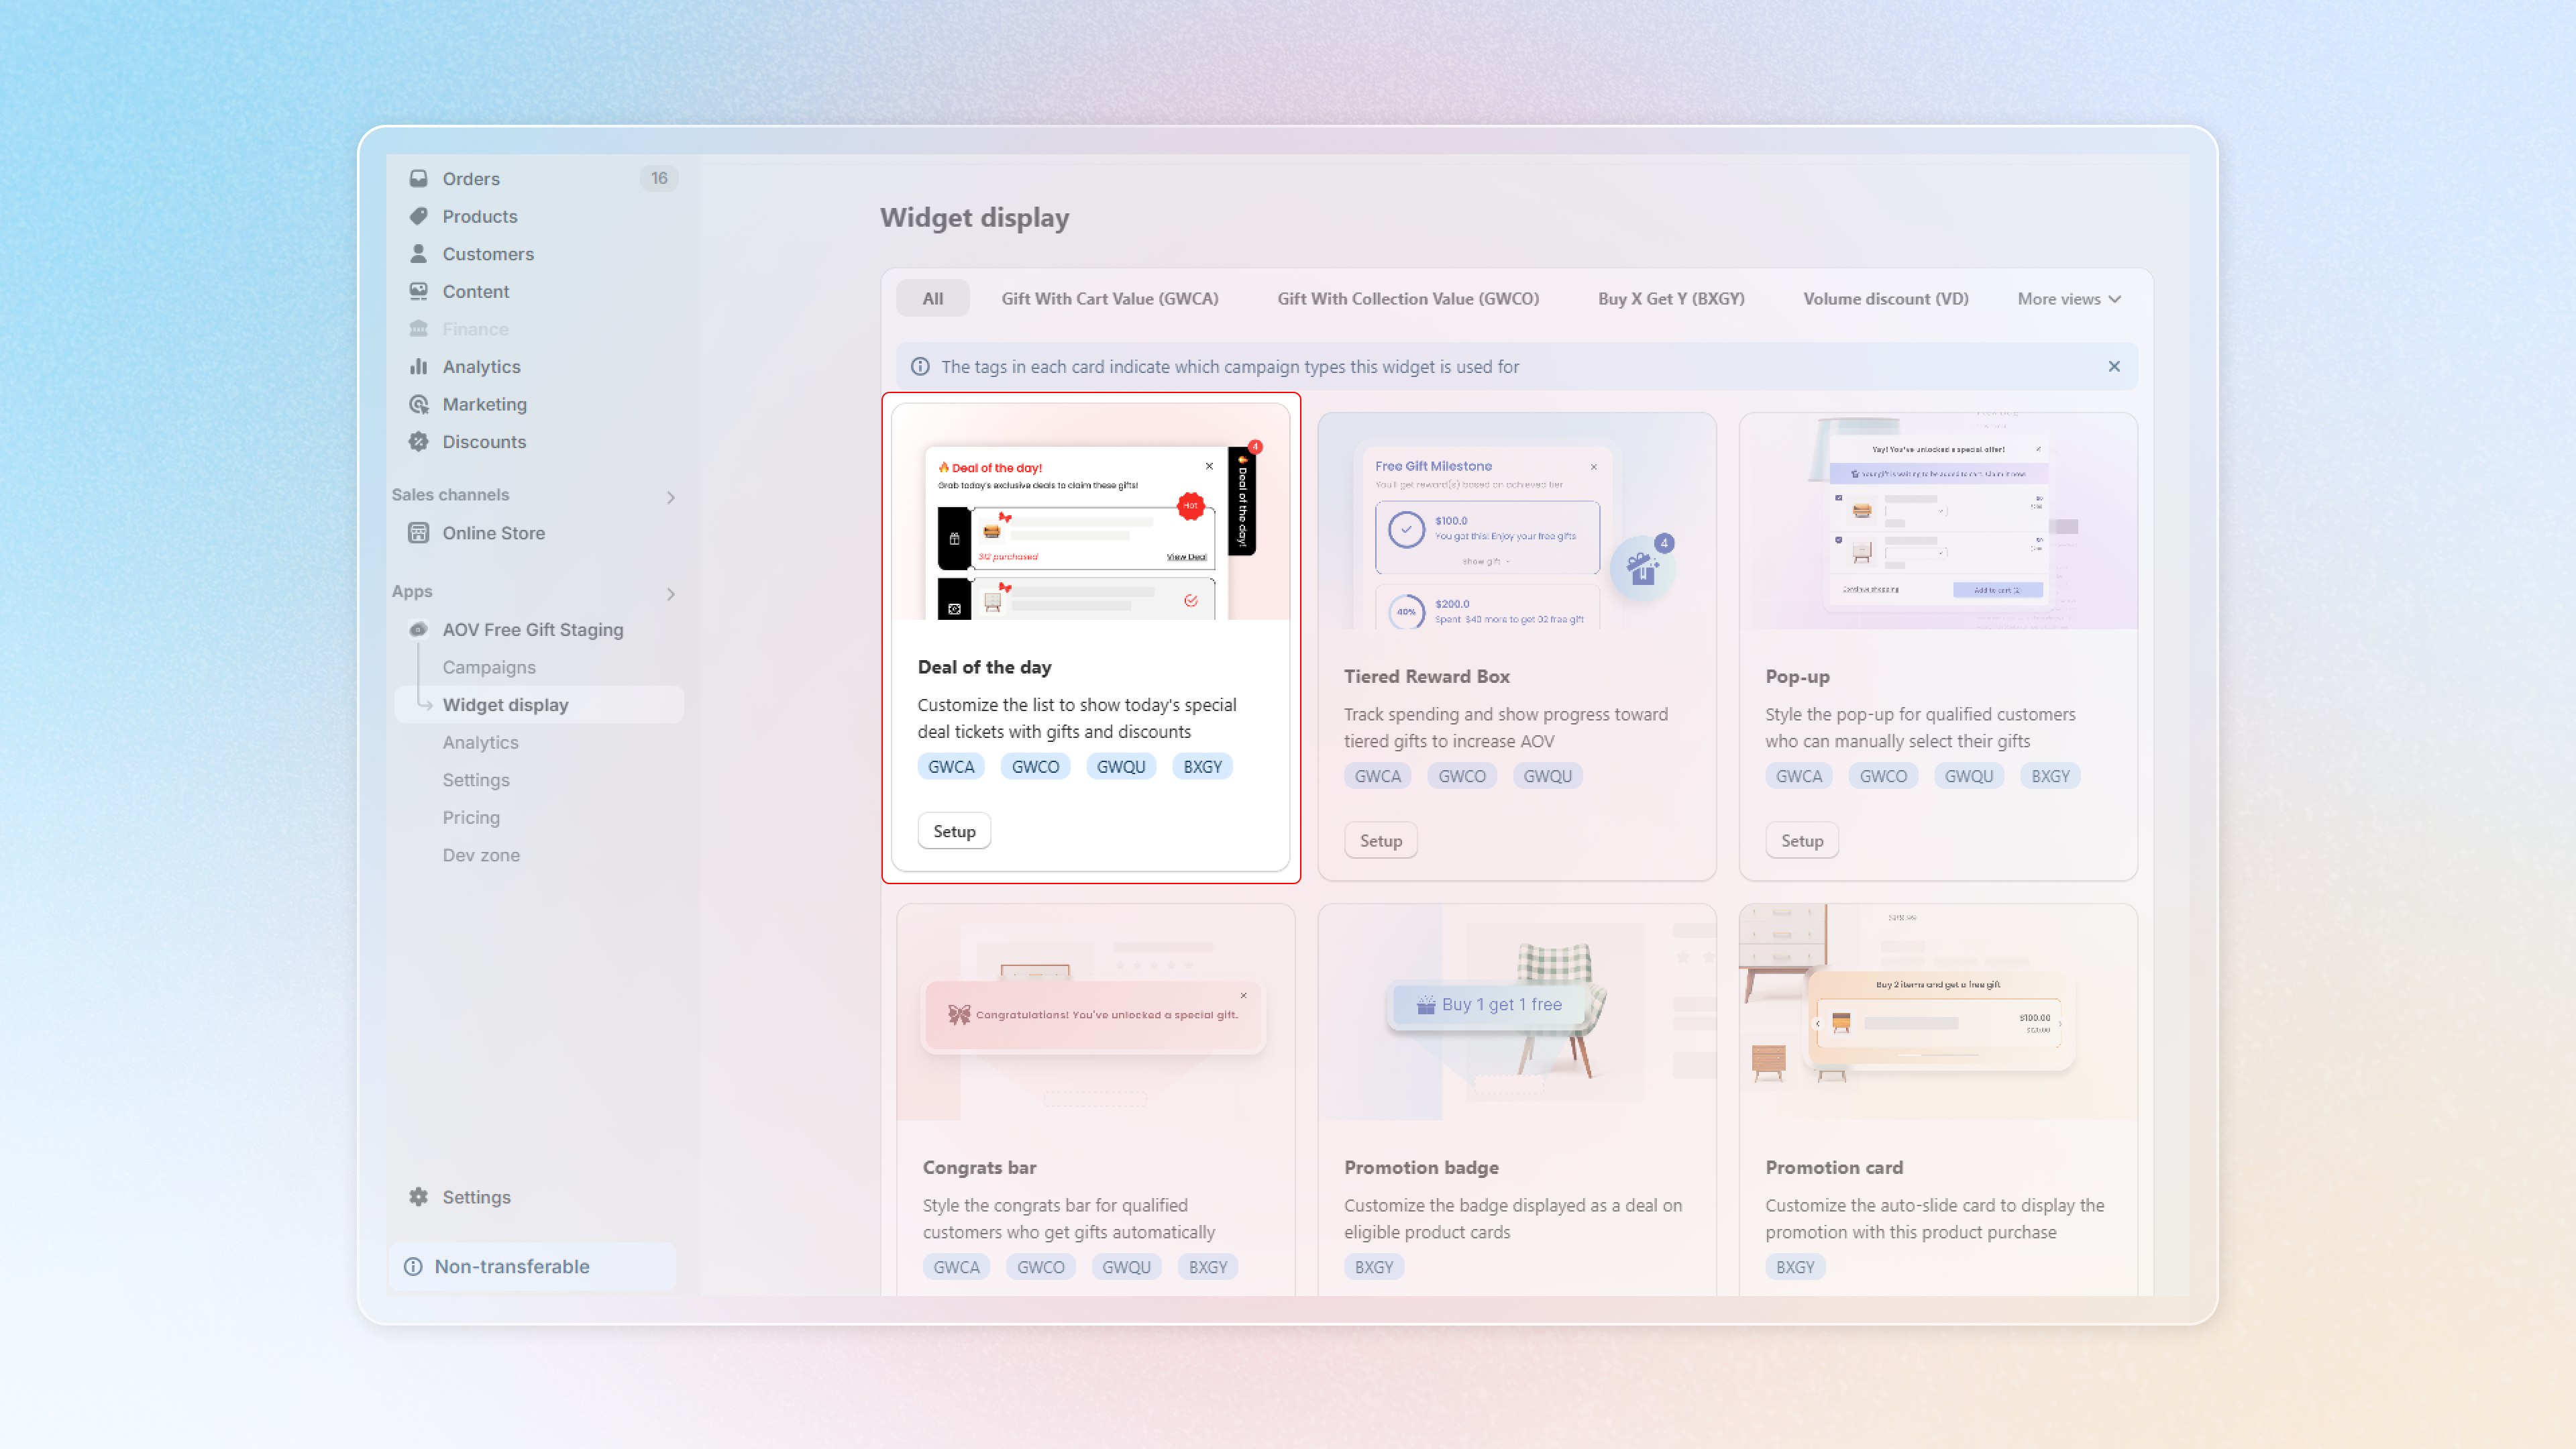
#### Step 1: Navigate Deal of the Day
Go to **Widget display** in the menu > find **Deal of the Day** widget > Click on **Setup**.
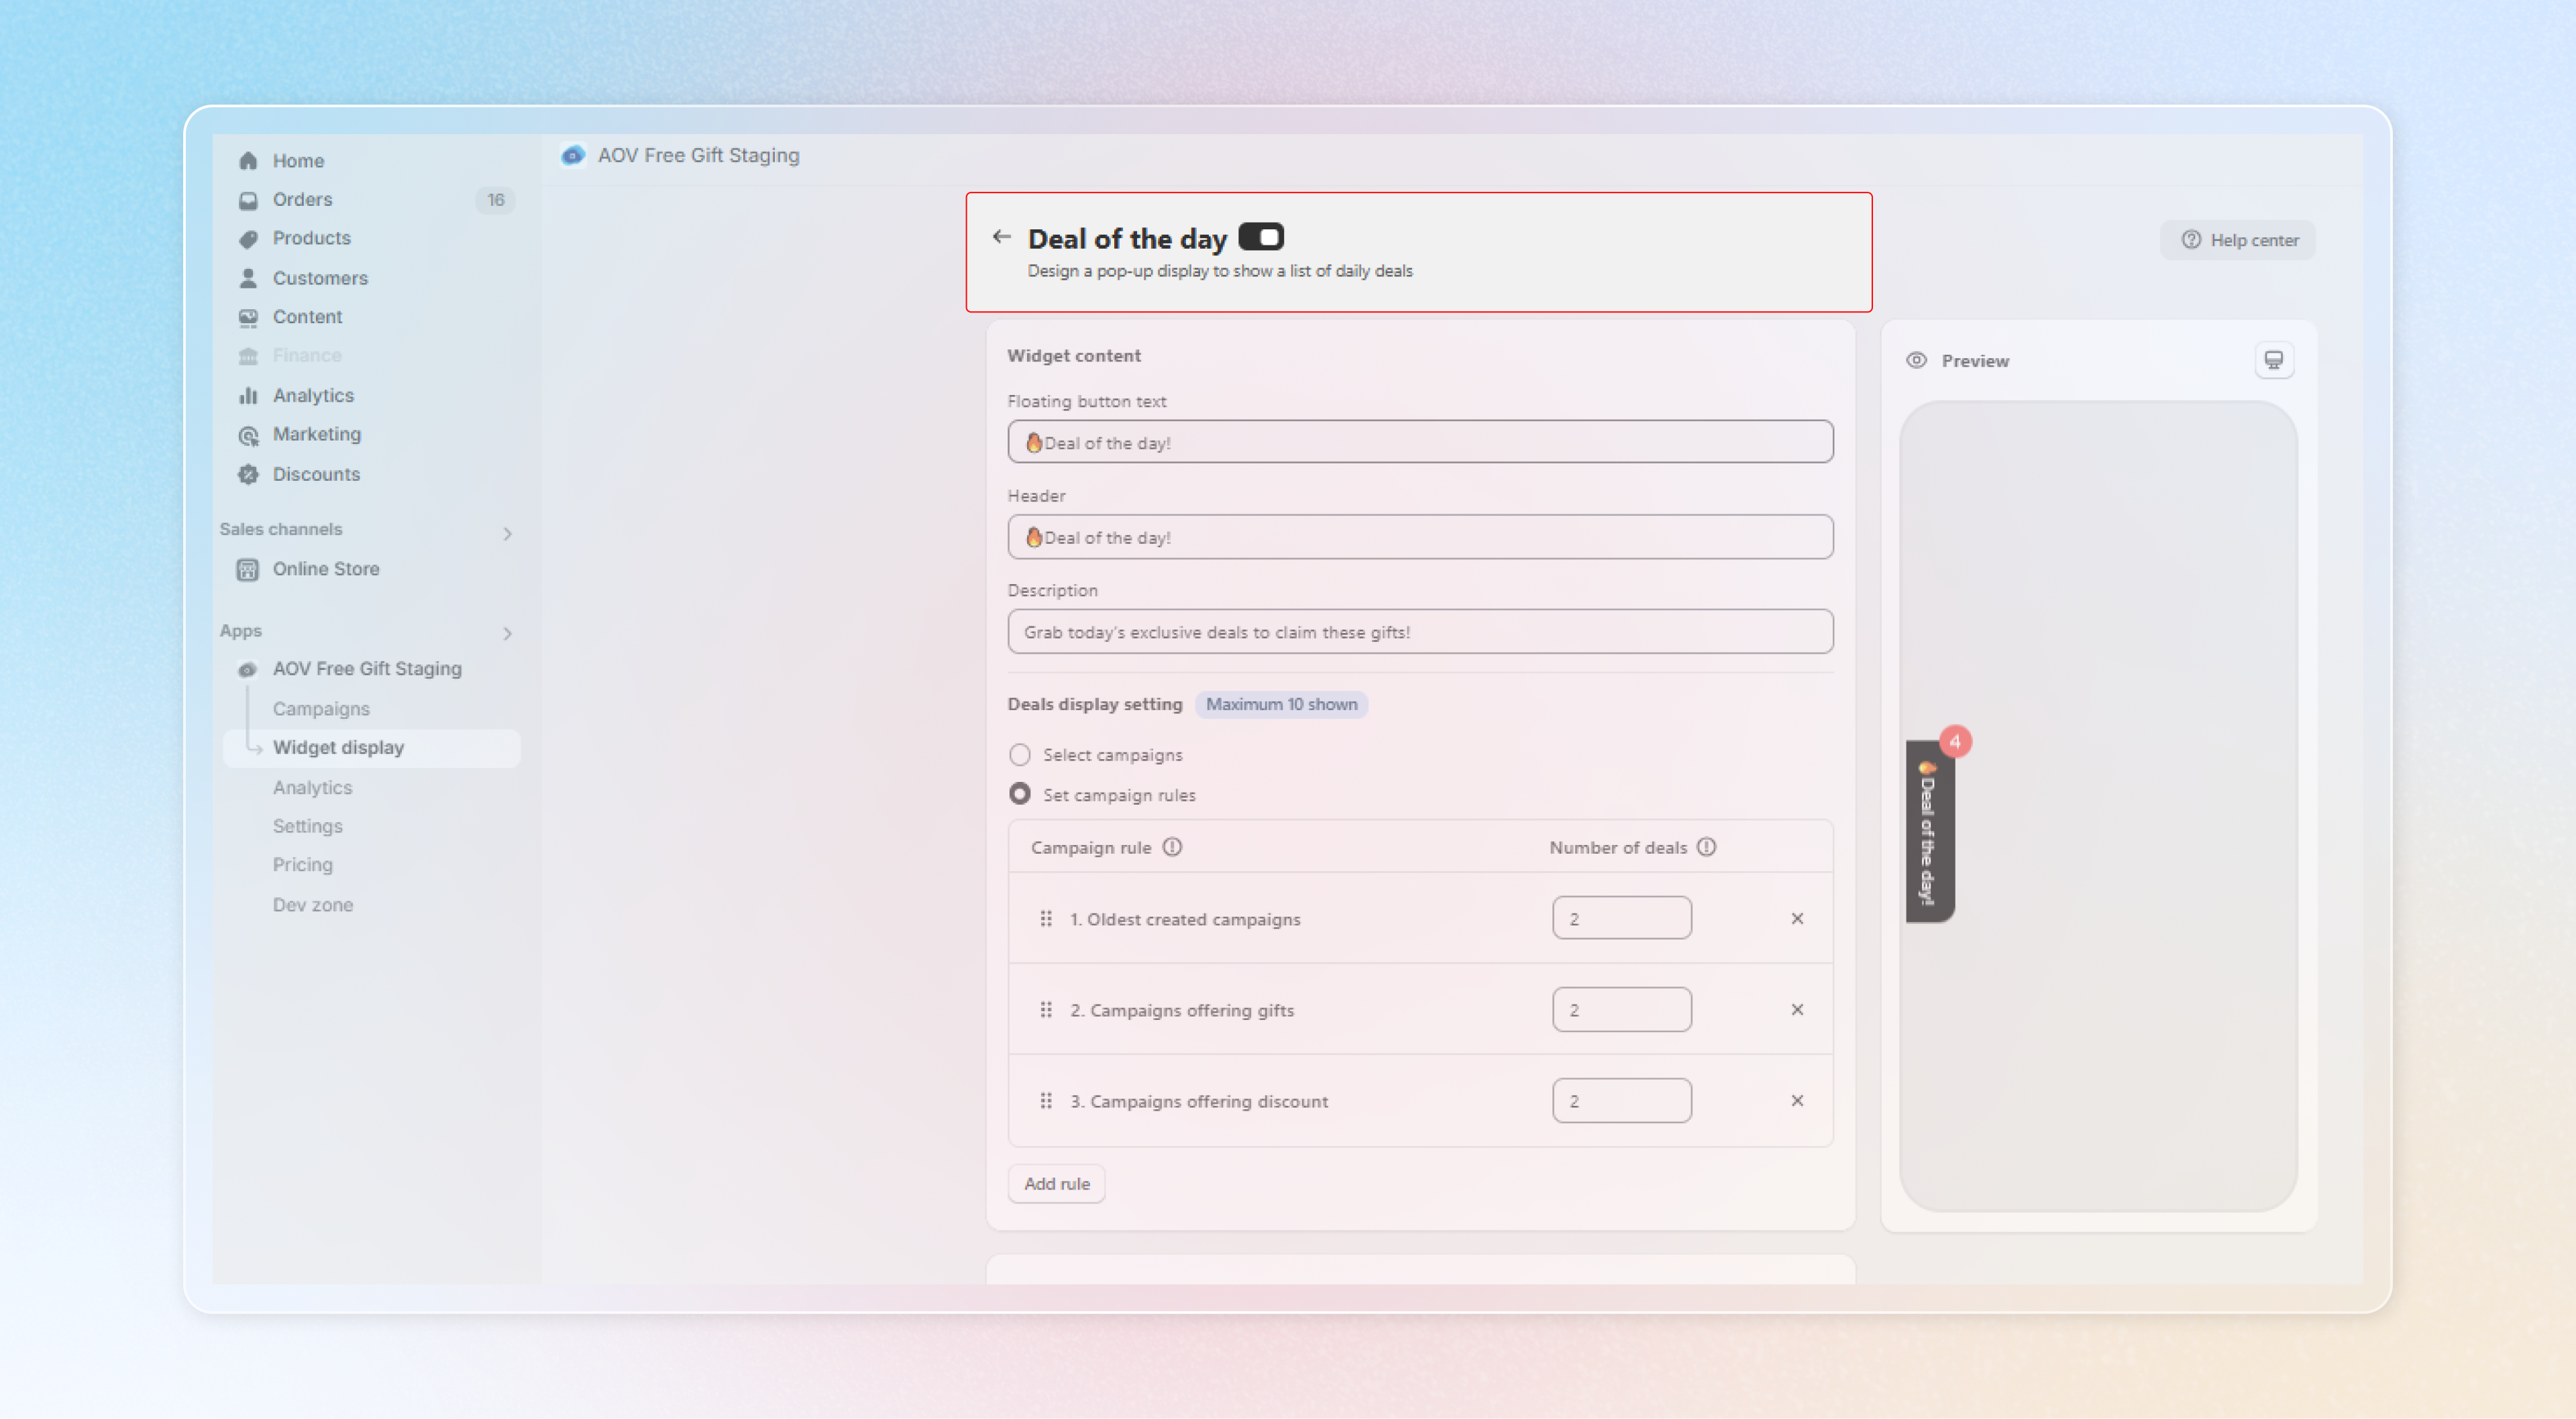
Toggle the **button** to enable this feature.
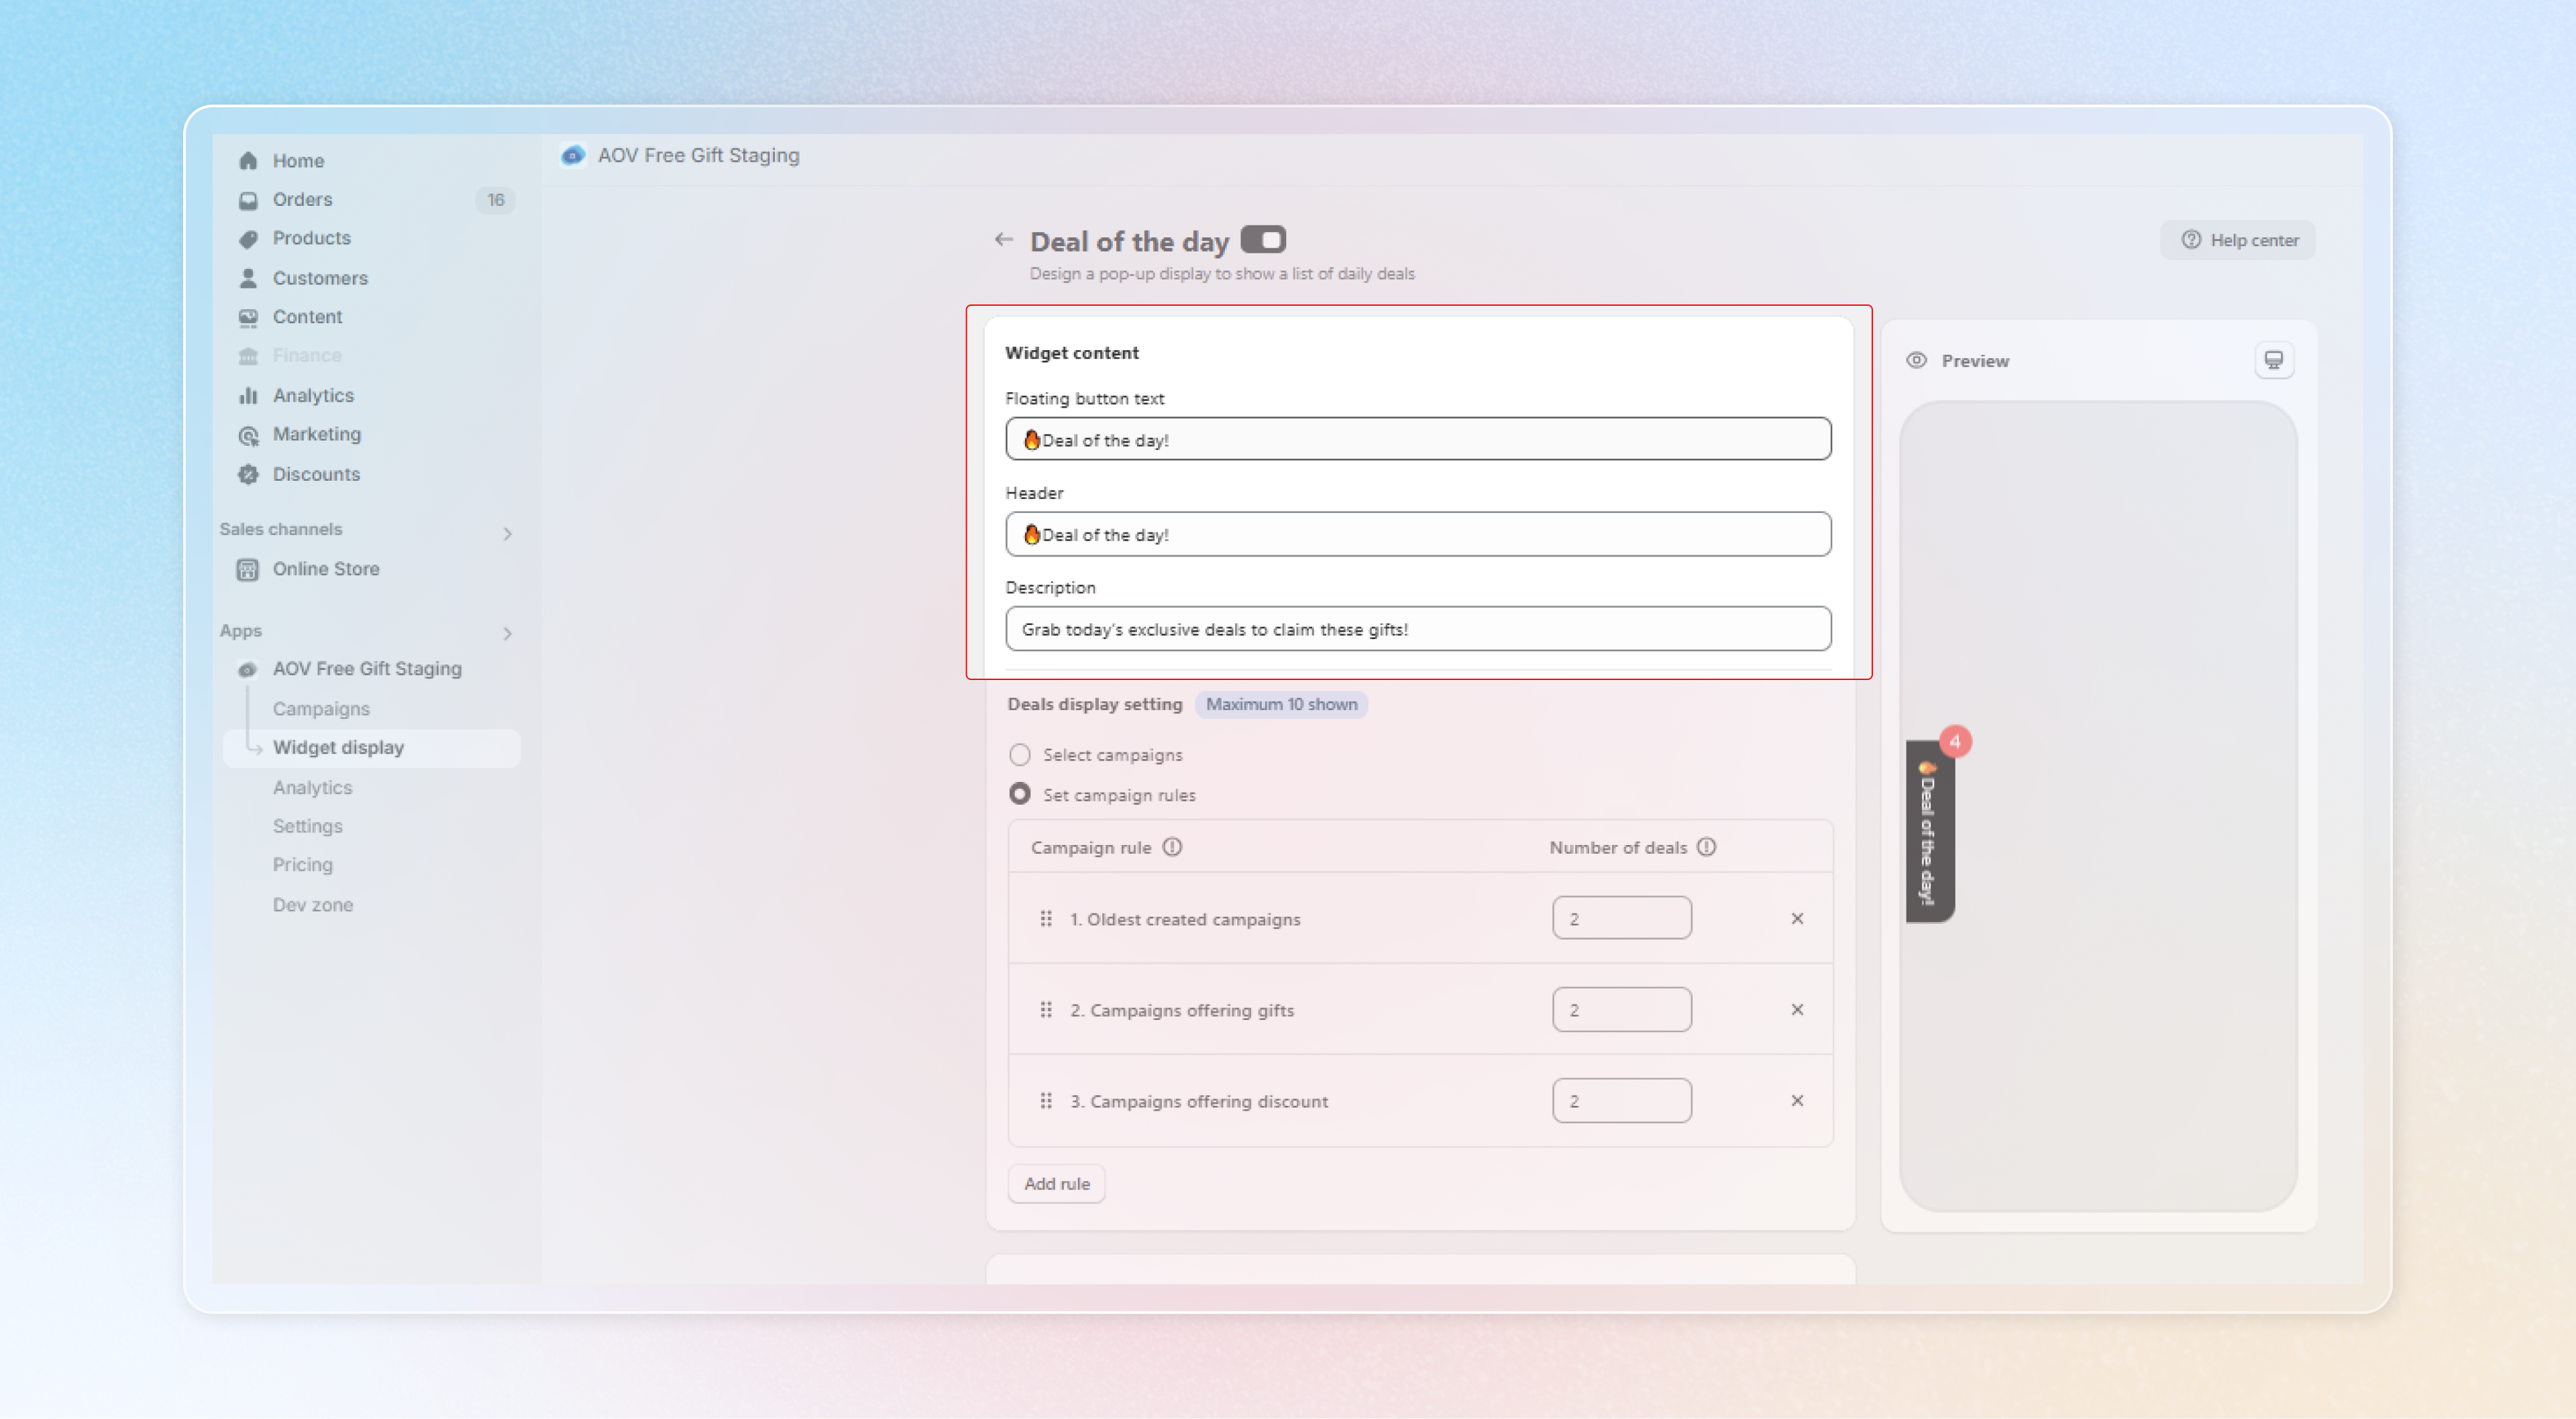
#### Step 2: Customize Widget content
**Floating button text**
Enter a short, engaging phrase like “🔥 Deal of the Day!” to attract attention.
**Header**
Add a compelling header such as “🔥 Deal of the Day!” for consistency with the Floating button text.
**Description**
Write a brief description of the widget so that customers can understand more about its functions. For example: “Grab today’s exclusive deals to claim these gifts!”
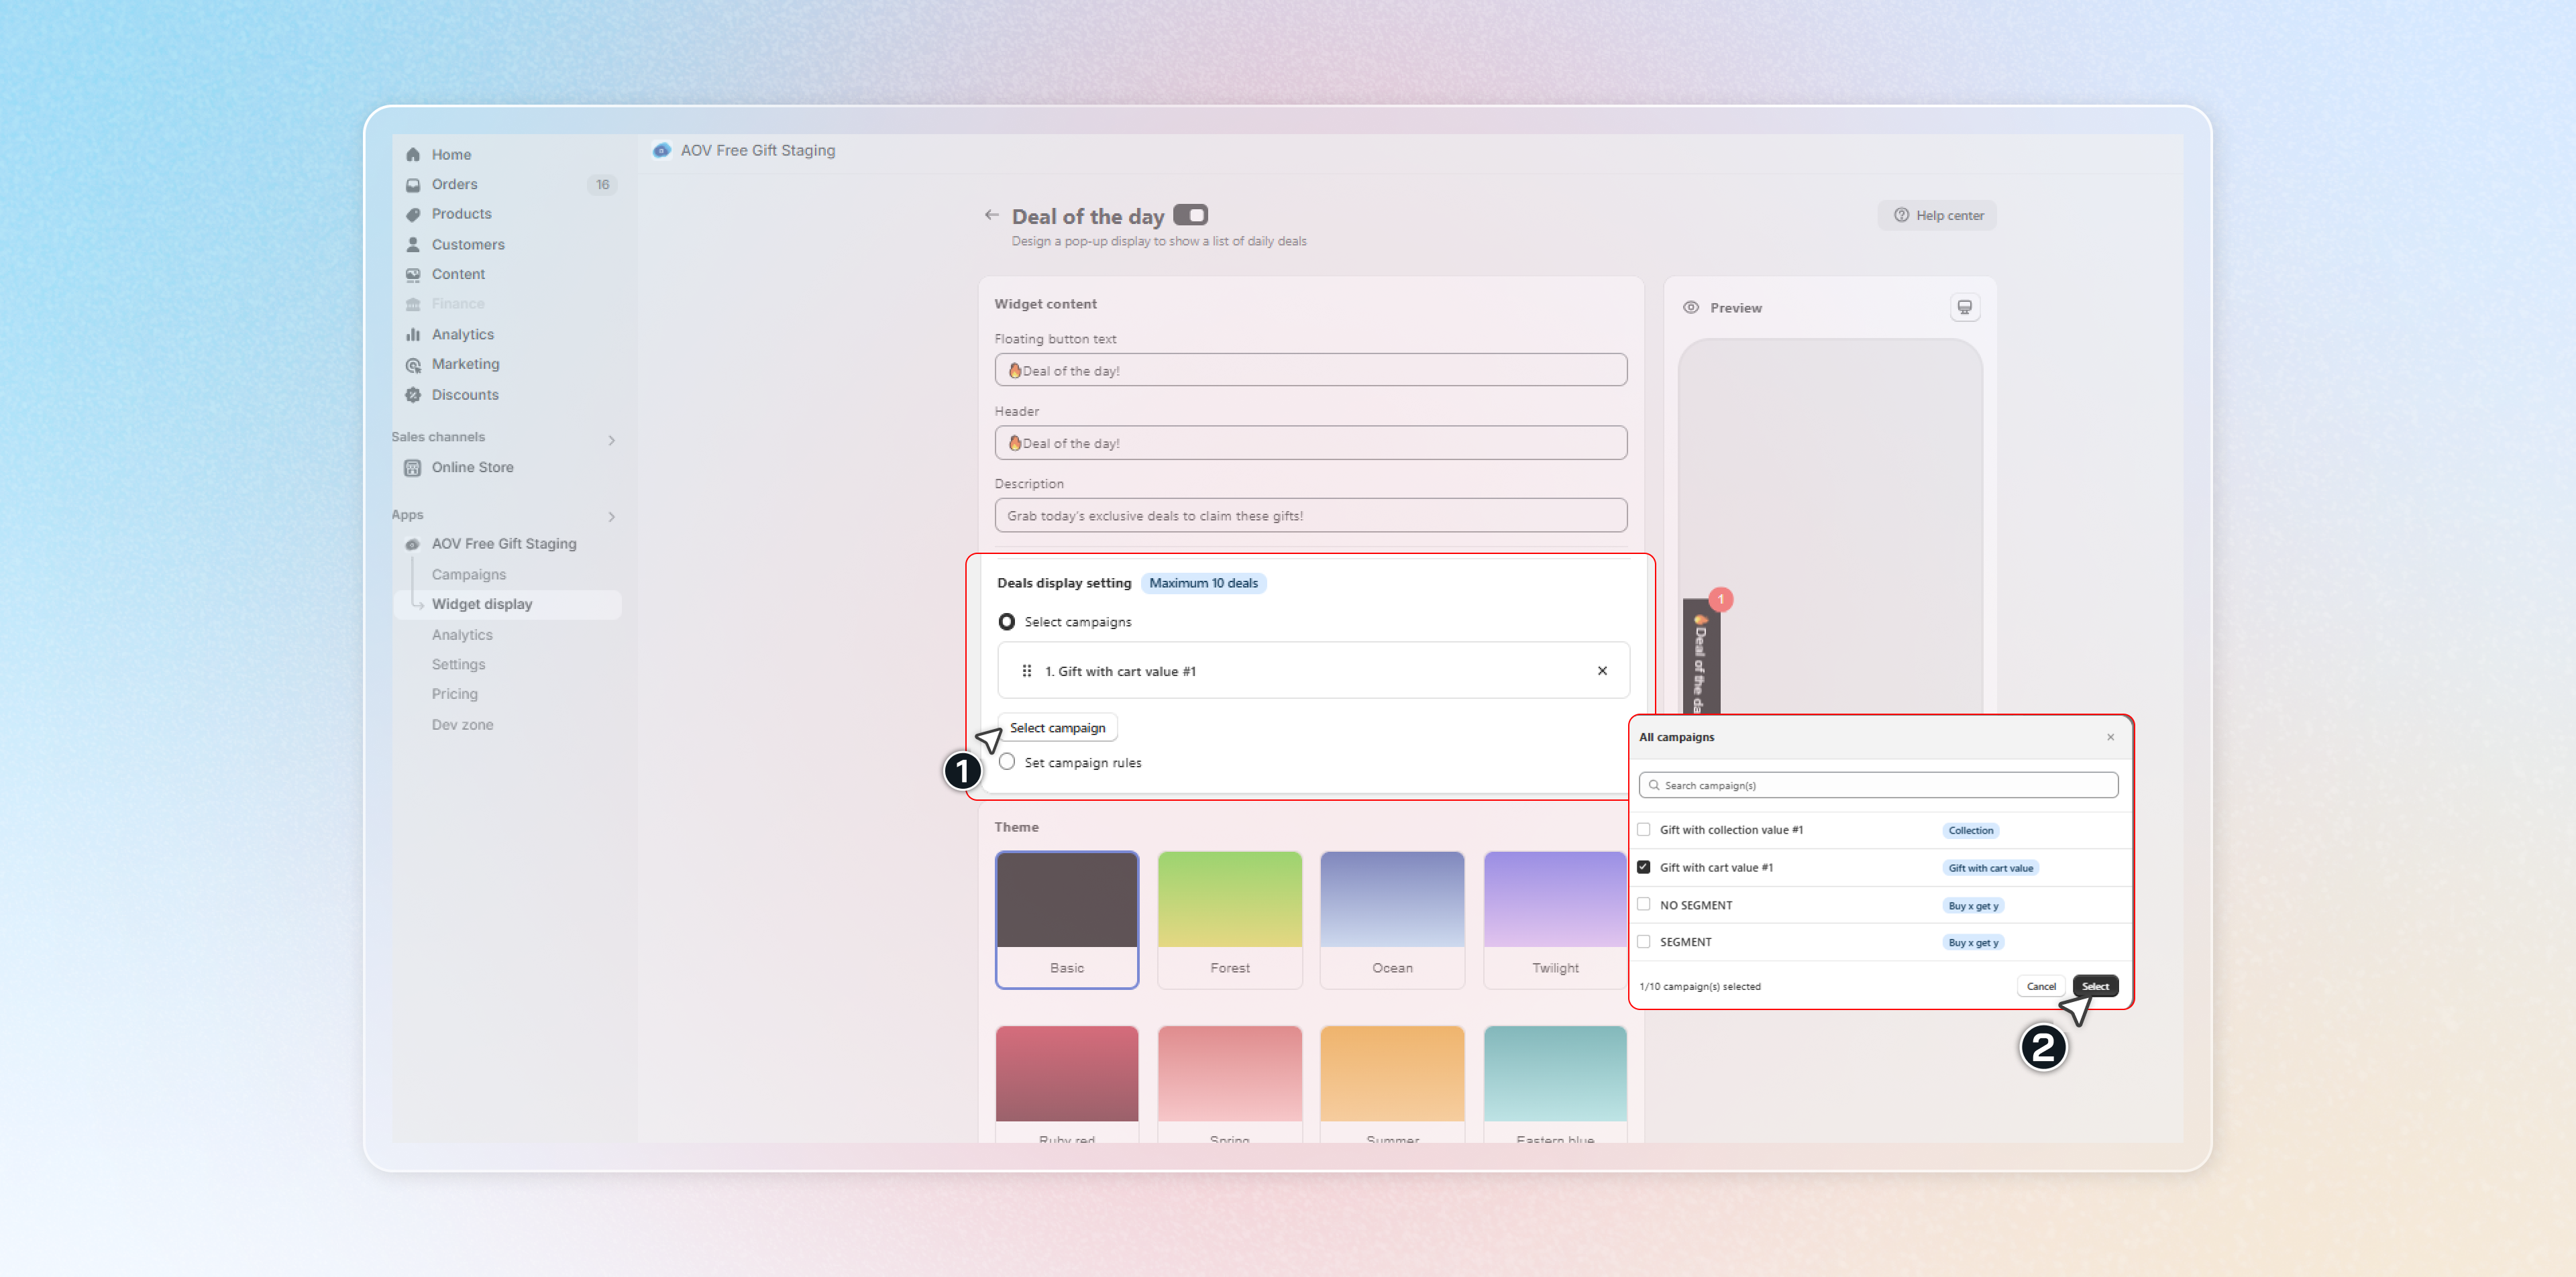
#### Step 3: Choose Deals display setting
You can decide to select campaigns manually or set campaign rules so that it will automatically display campaigns matching the requirement.
**Select campaigns**
Click **Select campaigns** button and choose one(s) you want to show on the widget.
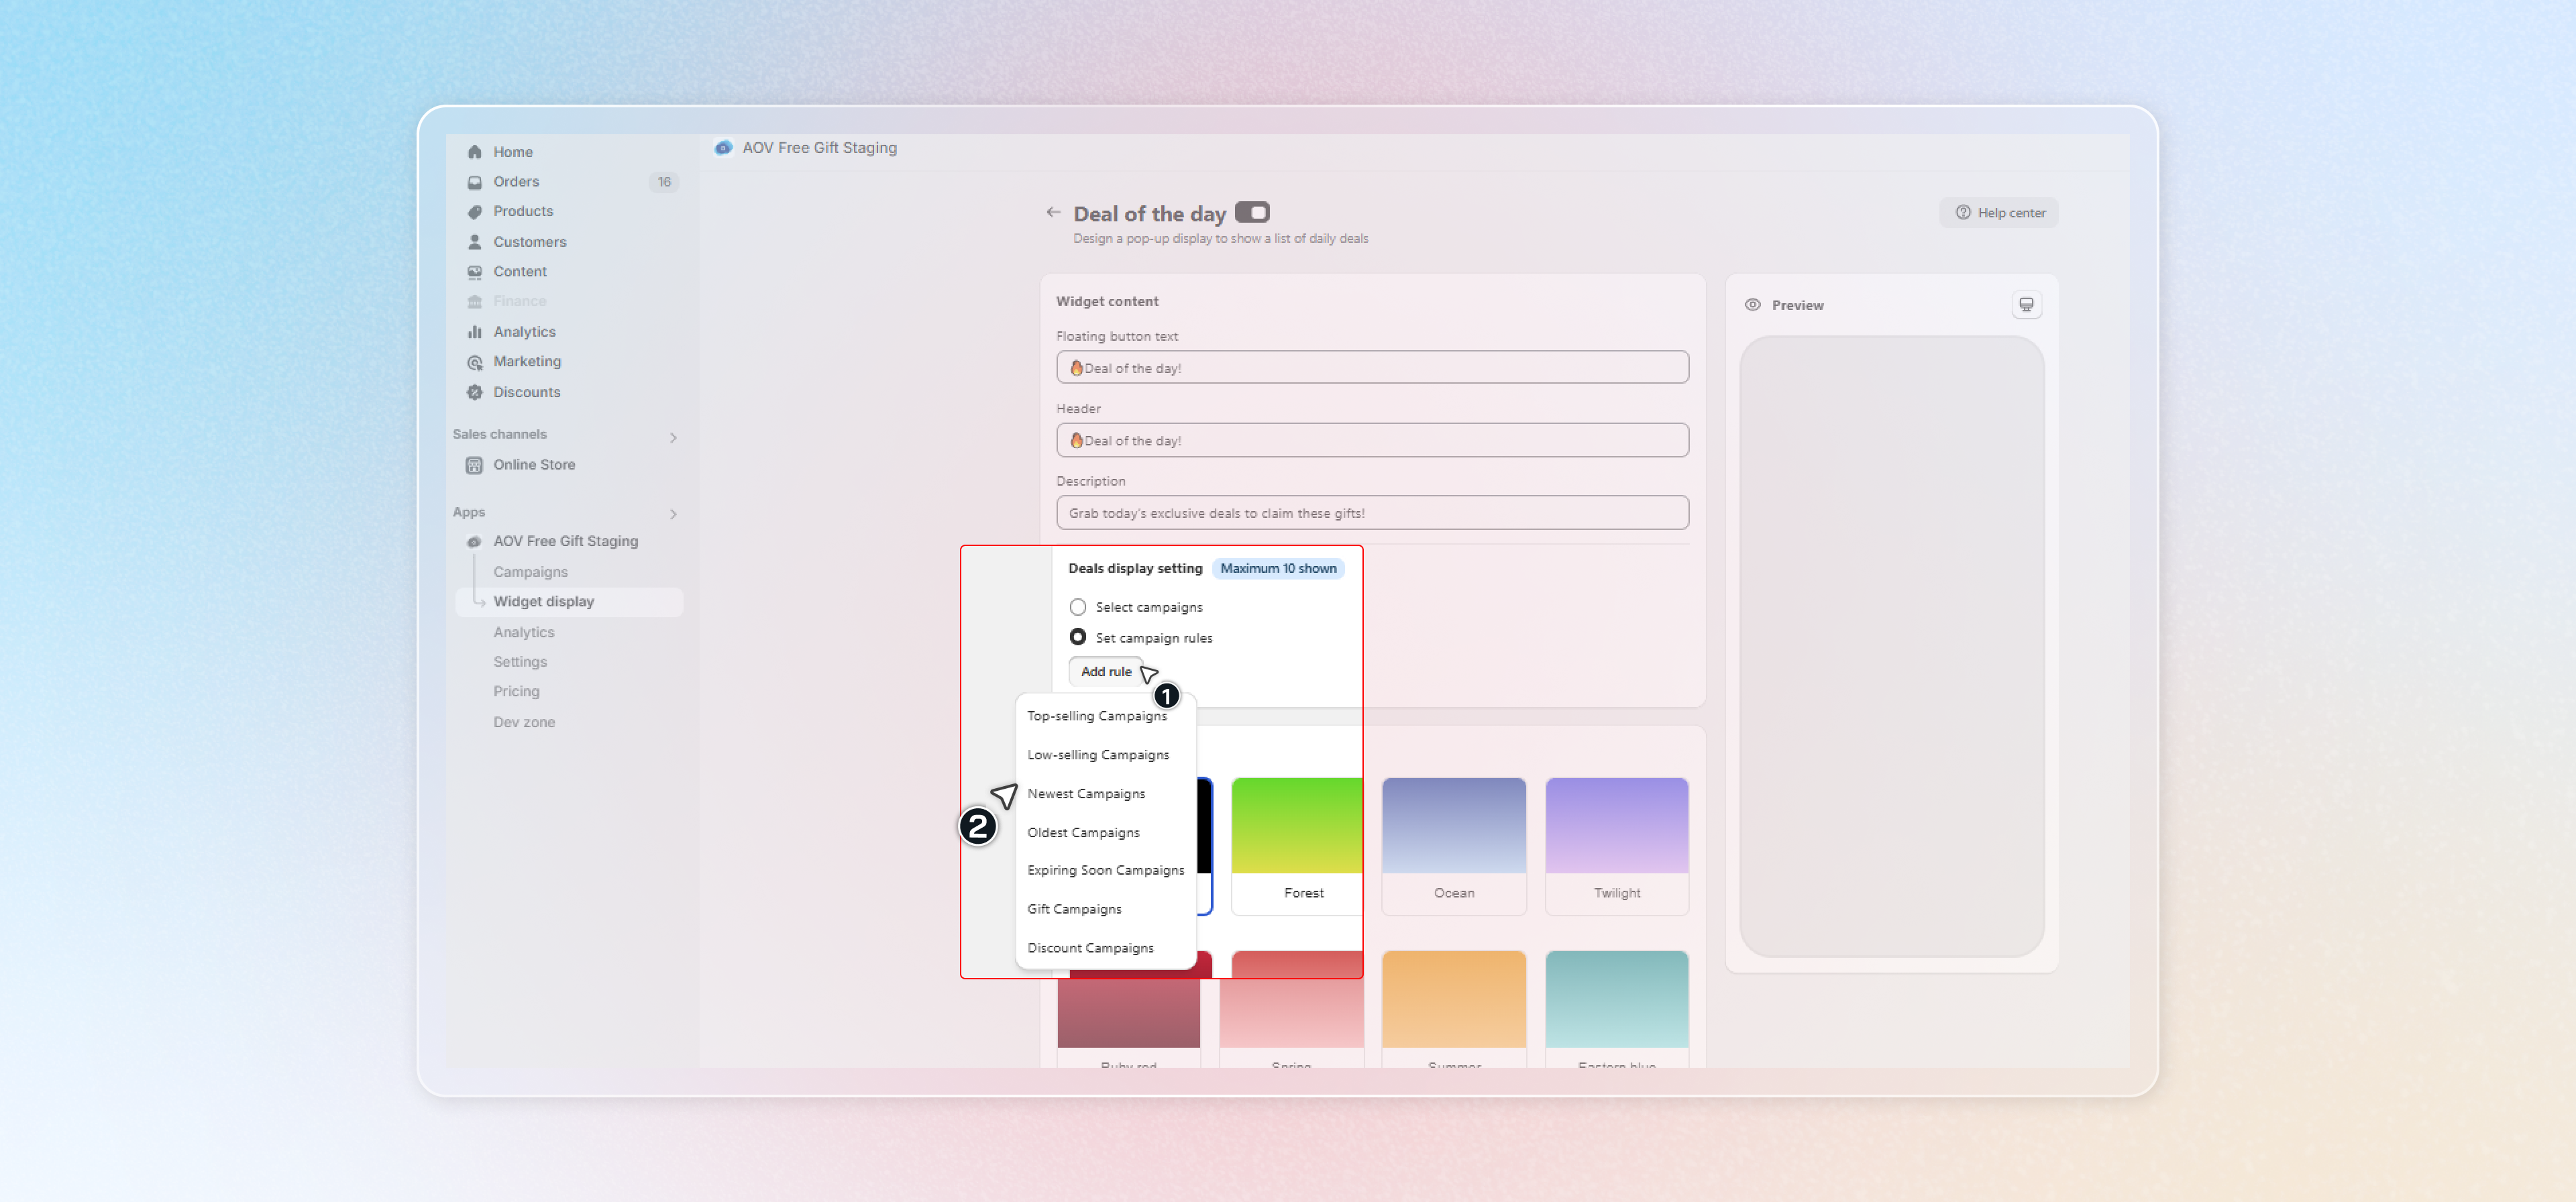
**Set campaign rules**
Click **Add rule** button and choose 01 among 07 campaign options.
{% hint style="success" %}
The rule will determine which deals are display and ensure the widget aligns with your strategy.
{% endhint %}
Select the **Number of deals** that will be displayed, ensuring a clean and manageable widget.
{% hint style="info" %}
You can only set a maximum of 10 deals to show on the widget.
{% endhint %}
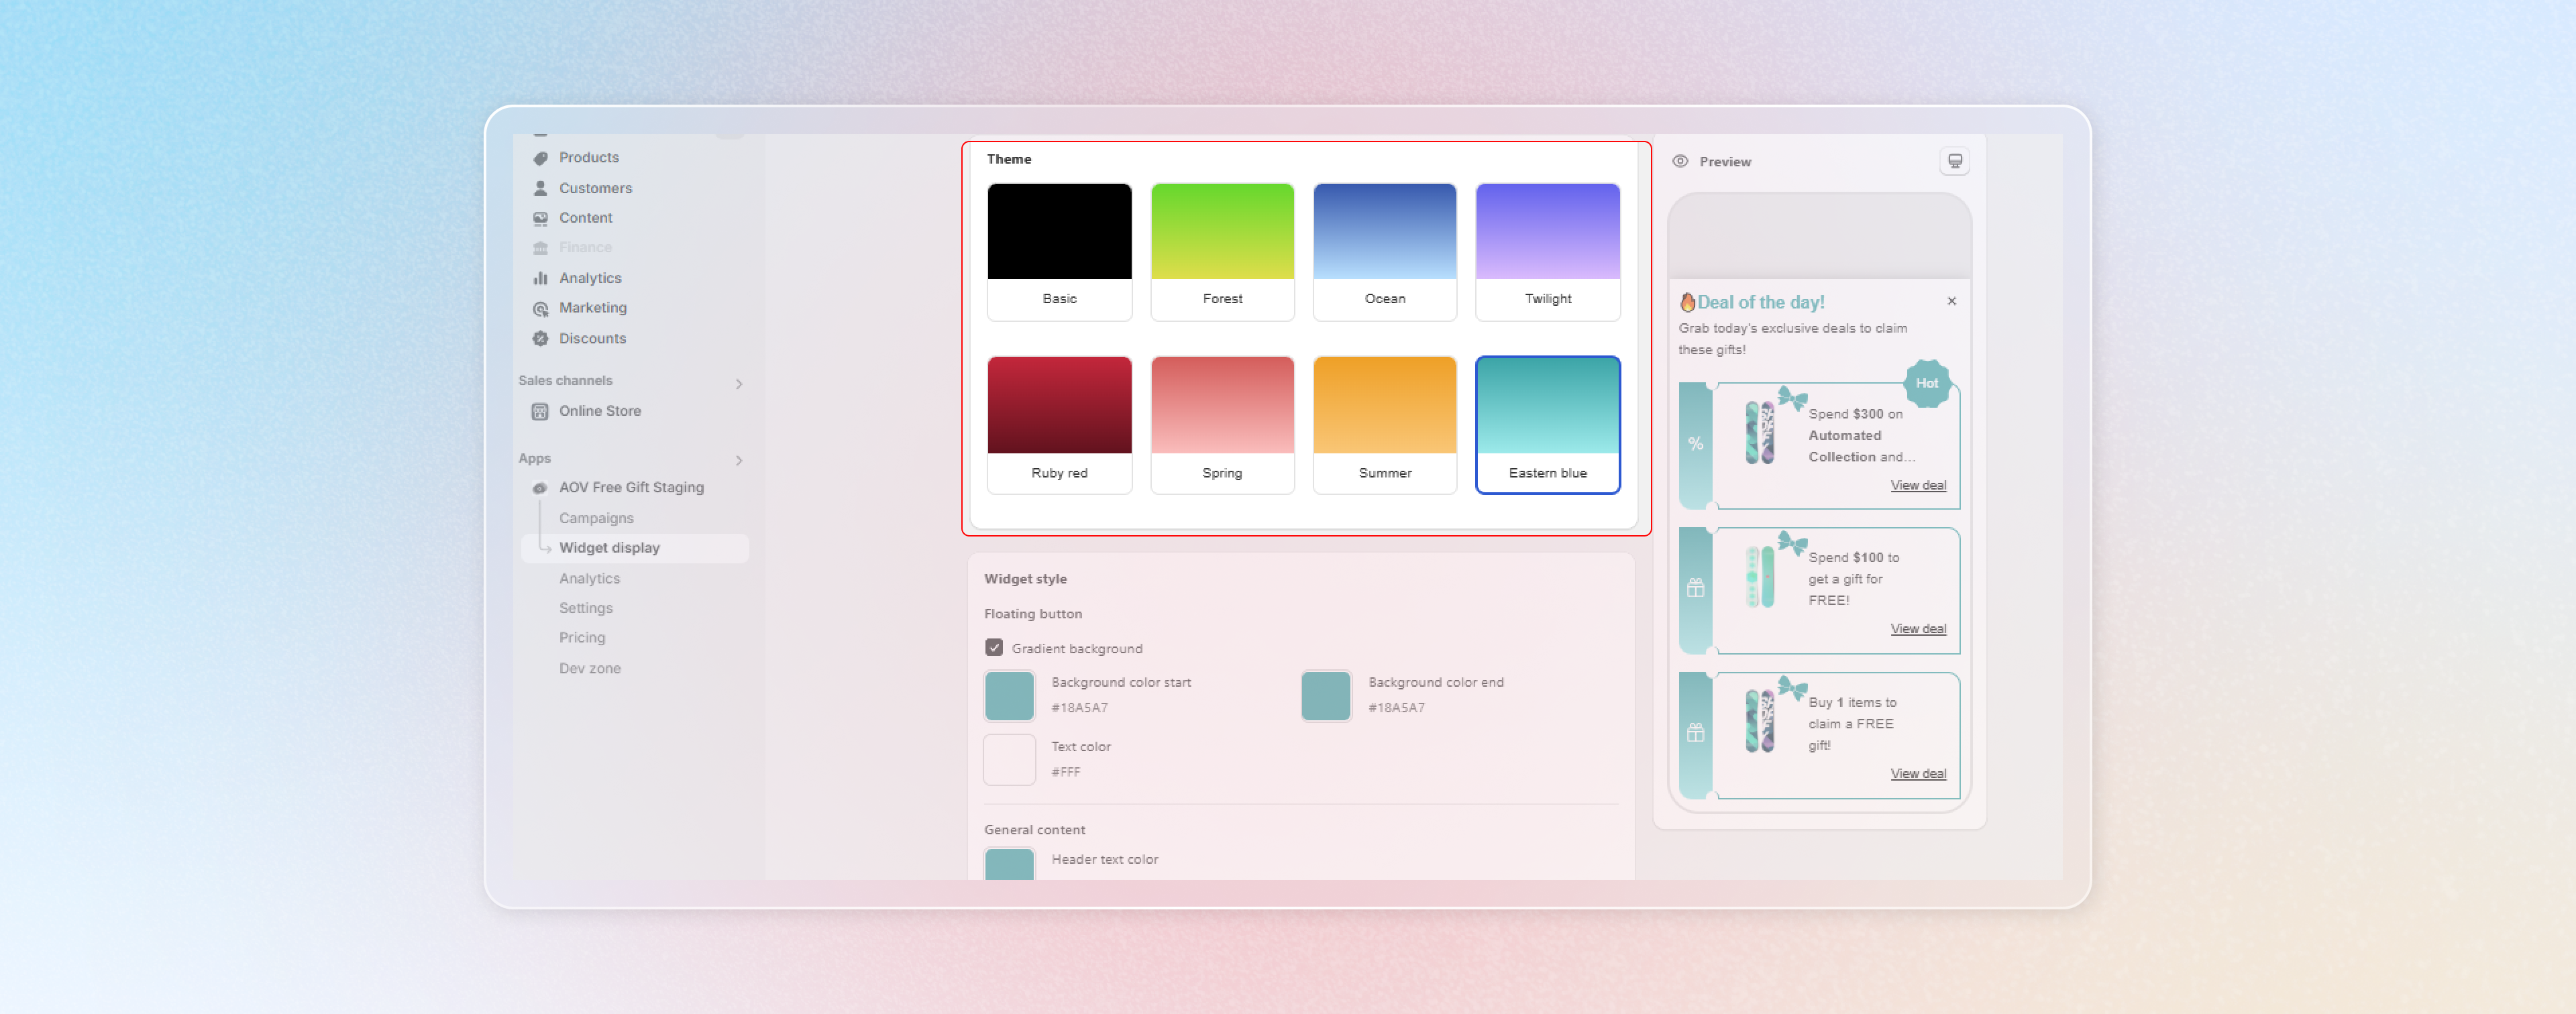
#### Step 4: Customize the Theme
Match the widget's look to your store's branding by customizing the theme.
Pick a predefined theme like "Basic" or "Ruby Red," or customize the colors manually in the next step.
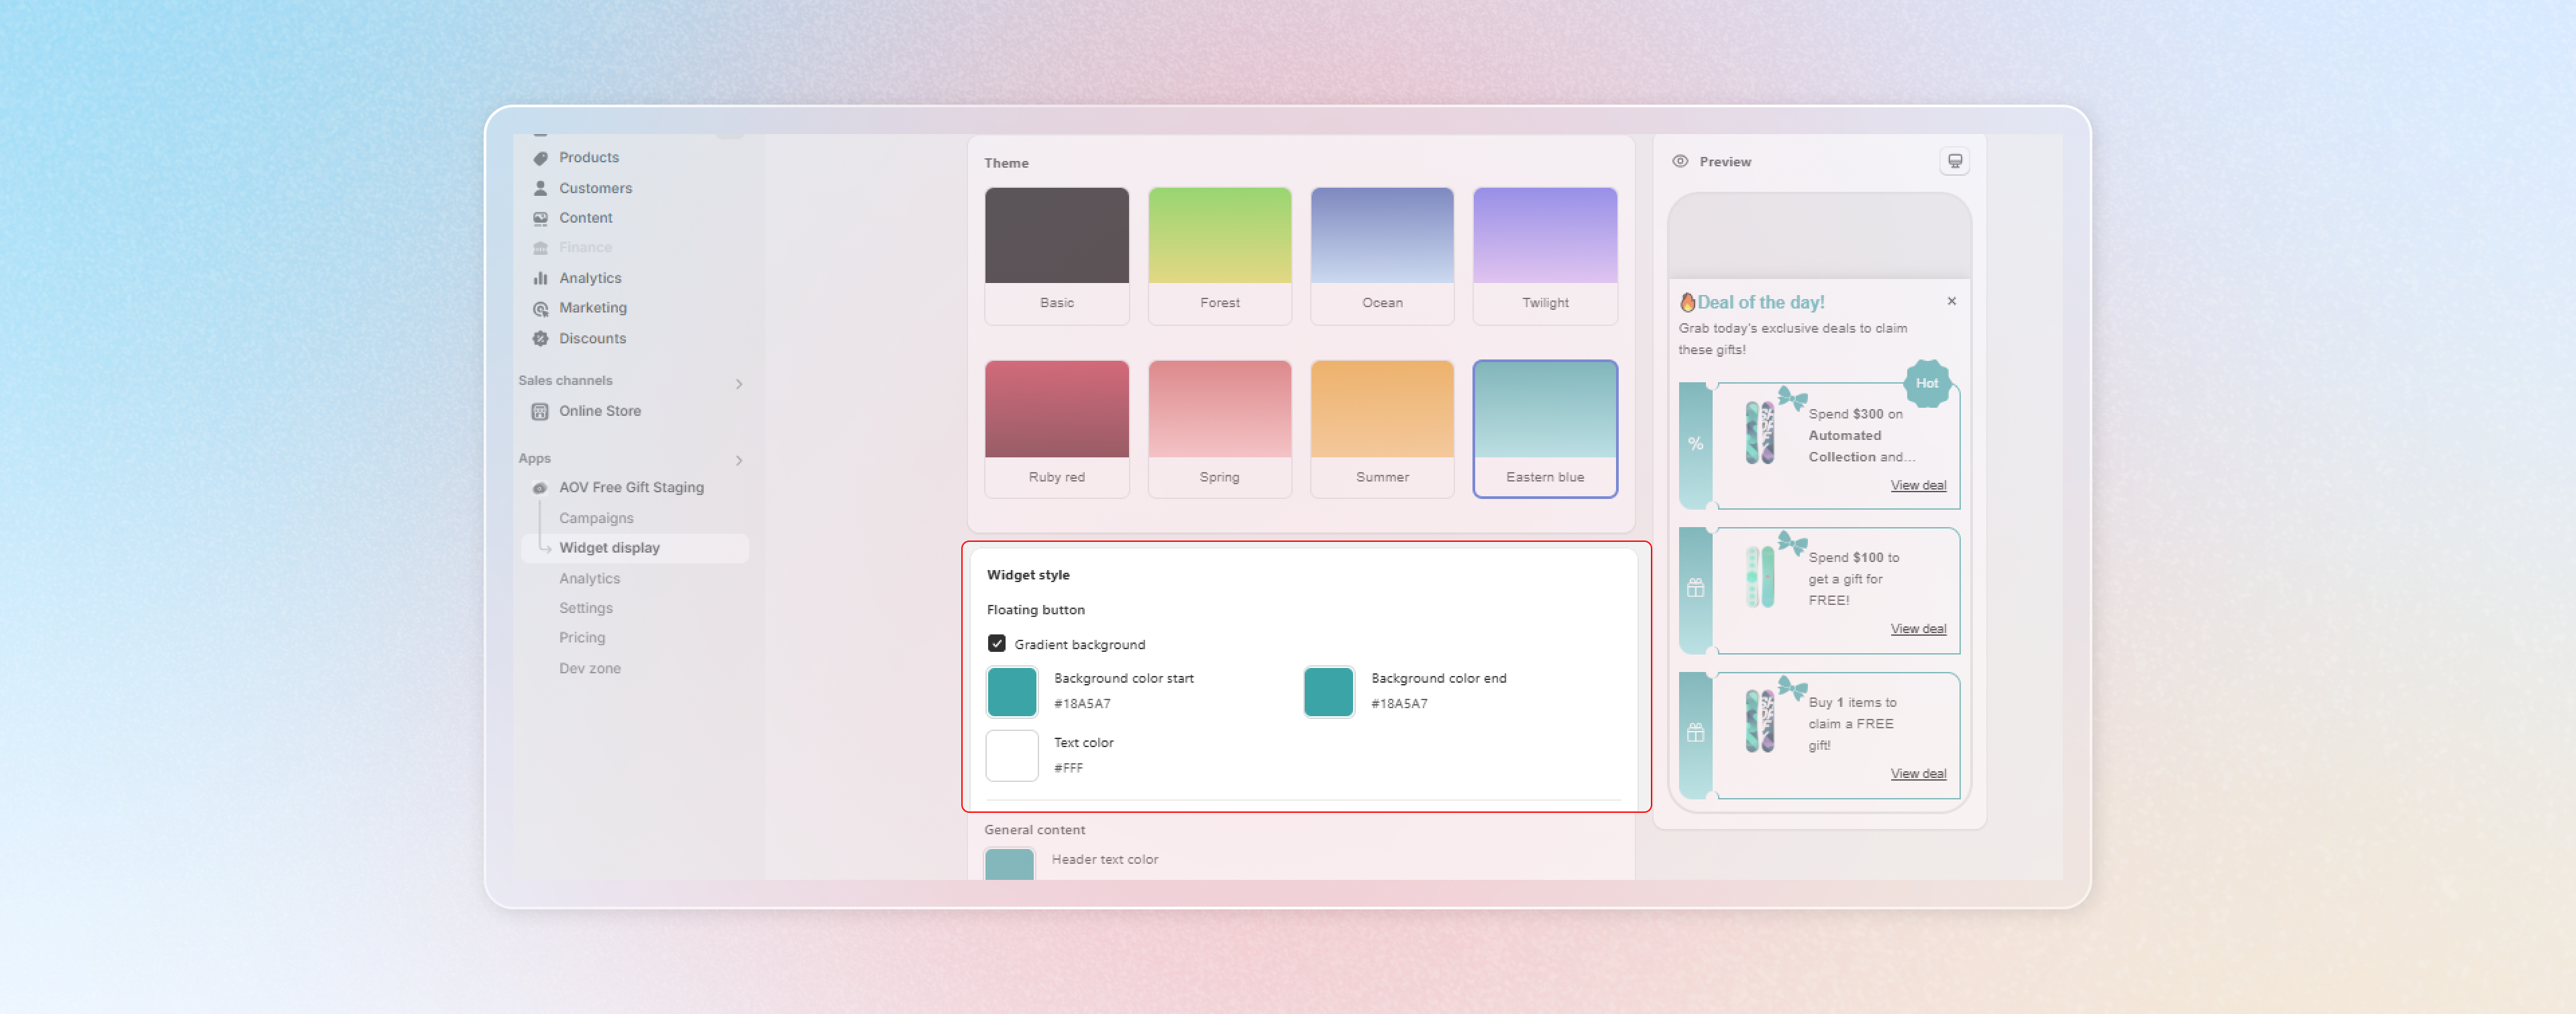
**Step 5: Adjust Widget Style**
**Floating button**
Choose if you want to create a gradient background by ticking on the box.
Modify the background and text colors of the floating button to ensure visual appeal and readability.
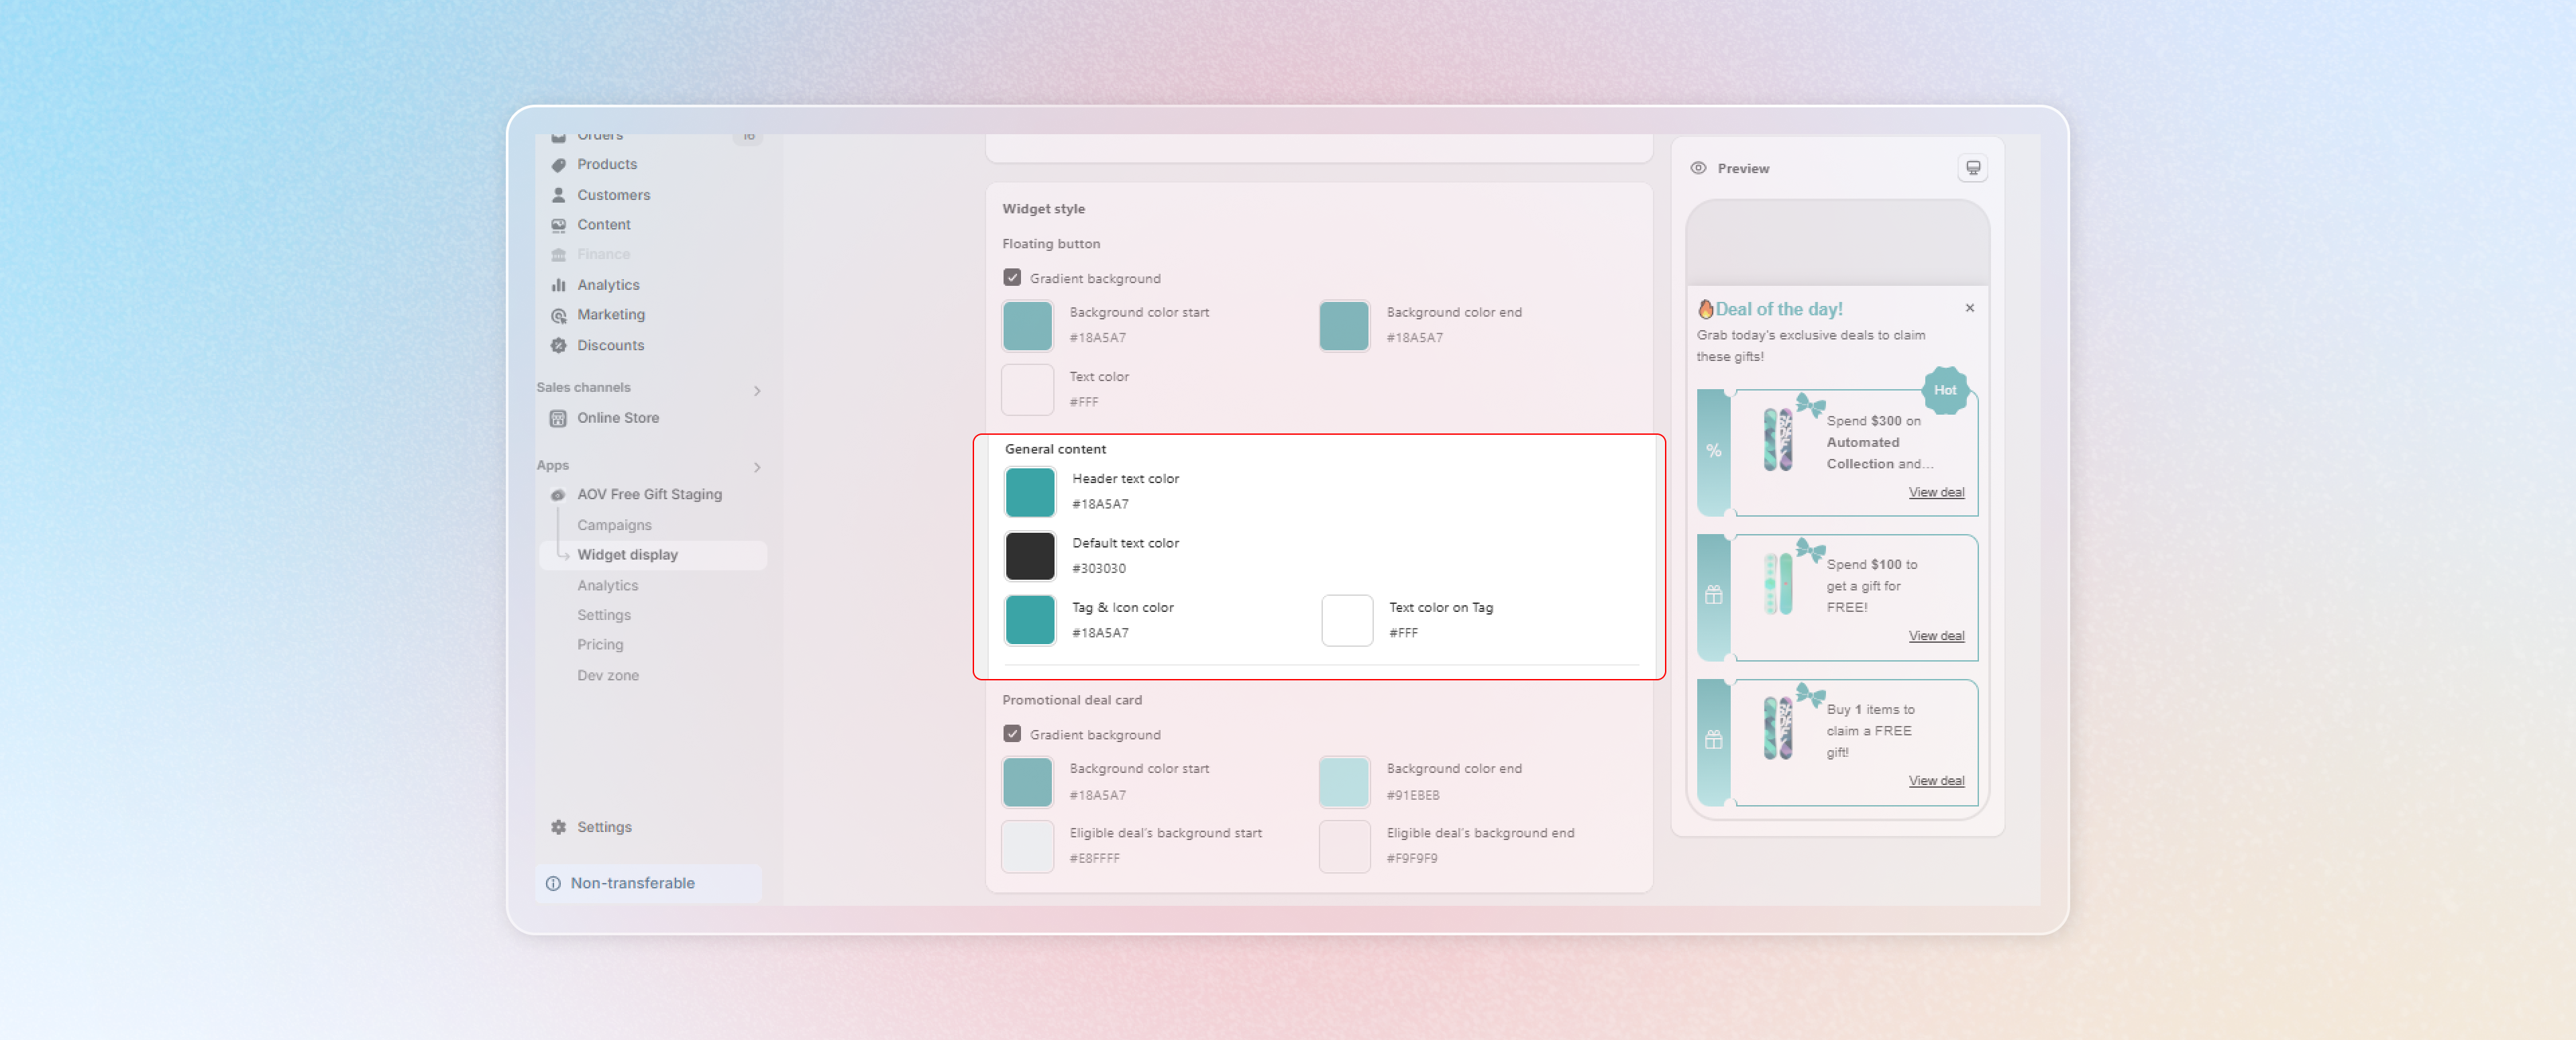
**General**
Customize elements' color inside the widget, including Header text color, Default text color, Tag & Icon color and Text color on Tag to match your store's identity and ensure readability.
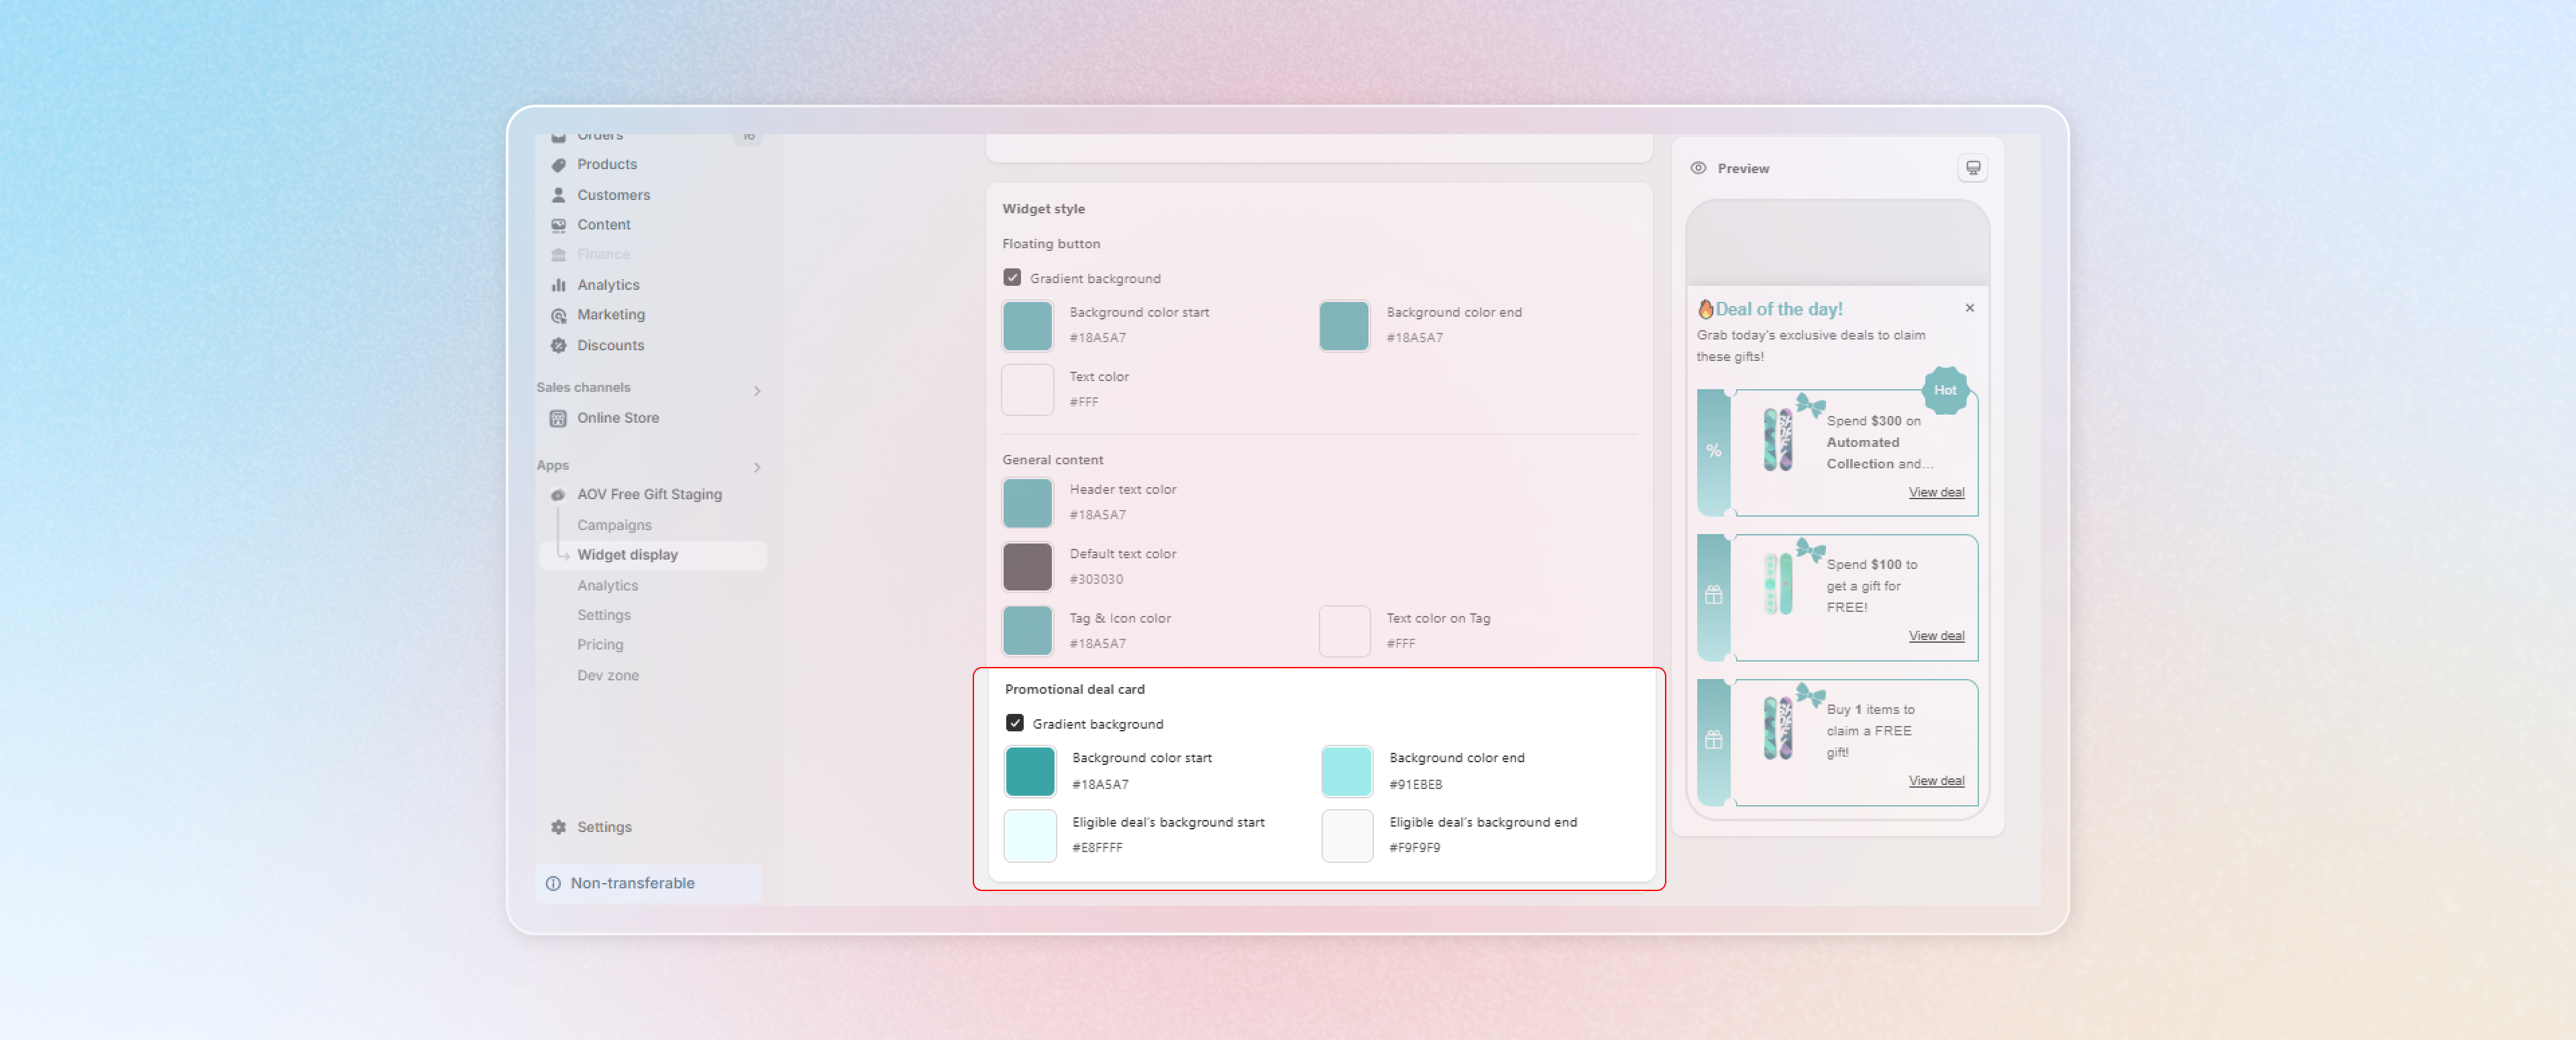
**Promotional deal card**
Choose the background color for the ticket stubs as well as the color in claimed state, which will be shown after customers successfully claim a deal.
**Final step: Preview and Activate the Widget**
Confirm the widget’s appearance before making it live. Use the **Preview** panel to see how the widget will look on desktop and mobile.
Click **Save** to confirm all the change.
That's it! Everything is all set now. Let's watch your sales soar!